Thankfully, the April 15 tax deadline day is behind us… that means many readers will be traveling in the weeks ahead, to enjoy a late spring or early summer getaway. If you will be transporting any firearms when traveling by air this spring and summer you need to know the rules.
If you will be flying with firearms this year, you should read this article. You need to familiarize yourself with current Federal Regulations on gun transport before you get anywhere near an airport. Thankfully, the Transportation Security Administration (TSA) has a web page that states the important requirements for airline passengers traveling with firearms and/or ammunition.
You’ll want to visit the TSA Firearms and Ammunition webpage, and read it start to finish. In addition, before your trip, you should check the regulations of the airline(s) with which you will fly. Some airlines have special requirements, such as weight restrictions.
Here are the TSA’s key guidelines for travel with firearms:
TSA FIREARM Guidelines
1. When traveling, comply with the laws concerning possession of firearms as they vary by local, state and international governments.
2. If you are traveling internationally with a firearm in checked baggage, please check the U.S. Customs and Border Protection website for information and requirements prior to travel.
3. Declare each firearm each time you present it for transport as checked baggage. Ask your airline about limitations or fees that may apply.
4. Firearms must be unloaded and locked in a hard-sided container and transported as checked baggage only. As defined by 49 CFR 1540.5, a loaded firearm has a live round of ammunition, or any component thereof, in the chamber or cylinder or in a magazine inserted in the firearm. Only the passenger should retain the key or combination to the lock unless TSA personnel request the key to open the firearm container to ensure compliance with TSA regulations. You may use any brand or type of lock to secure your firearm case, including TSA-recognized locks.
5. Bringing an unloaded firearm with accessible ammunition to the security checkpoint carries the same civil penalty/fine as bringing a loaded firearm to the checkpoint. You may find information on civil penalties at the Civil Enforcement page.
6. Firearm parts, including magazines, clips, bolts and firing pins, are prohibited in carry-on baggage, but may be transported in checked baggage.
7. Replica firearms, including firearm replicas that are toys, may be transported in checked baggage only.
8. Rifle scopes are permitted in carry-on and checked baggage.
TSA Ammunition Guidelines
1. Ammunition is prohibited in carry-on baggage, but may be transported in checked baggage.
2. Firearm magazines and ammunition clips, whether loaded or empty, must be securely boxed or included within a hard-sided case containing an unloaded firearm. Read the requirements governing the transport of ammunition in checked baggage as defined by 49 CFR 175.10 (a)(8).
3. Small arms ammunition (up to .75 caliber and shotgun shells of any gauge) must be packaged in a fiber (such as cardboard), wood, plastic, or metal box specifically designed to carry ammunition and declared to your airline.
4. Ammunition may be transported in the same hard-sided, locked case as a firearm if it has been packed as described above. You cannot use firearm magazines or clips for packing ammunition unless they completely enclose the ammunition. Firearm magazines and ammunition clips, whether loaded or empty, must be boxed or included within a hard-sided, locked case.
5. Please check with your airline for quantity limits for ammunition.
More Airline Travel Tips from Tom McHale
A while back, Tom McHale wrote an excellent article for the Beretta Blog, entitled Ten Things You Need to Know about Flying with Guns. Here are two of Tom McHale’s Travel Tips from that article:
Weigh your gun case and ammunition
Most airlines will allow up to 11 pounds of ammunition. And, like any luggage, you will be charged more for any baggage weighing more than 50 pounds. This sounds like a lot, but when traveling to the Crimson Trace Midnight 3 Gun competition last year, my case with shotgun, rifle, pistol and ammunition tipped the scale past the 50 pound mark.
Pack ammo in the same locking case
This is another area that’s misunderstood and full of internet myth. Your ammo just needs to be stored in some type of safe container and not loose. Technically, you can keep ammunition in magazines, but I wouldn’t recommend it. It meets the letter of the law storage requirement, but too many airline and TSA agents will give you grief. Use a plastic ammo box or original cardboard packaging and you’ll be fine carrying that in the same lockable case as your gun.
*Please see, United States Code, Title 18, Part 1, Chapter 44 for information about firearm definitions.
Want to improve your understanding of Ballistics, Bullet Design, Bullet Pointing, and other shooting-related tech topics? Well here’s a treasure trove of gun expertise. Applied Ballistics offers dozens of FREE tech articles on its website. Curious about Coriolis? — You’ll find answers. Want to understand the difference between G1 and G7 BC? — There’s an article about that.
“Doc” Beech, technical support specialist at Applied Ballistics says these articles can help shooters working with ballistics programs: “One of the biggest issues I have seen is the misunderstanding… about a bullet’s ballistic coefficient (BC) and what it really means. Several papers on ballistic coefficient are available for shooters to review on the website.”
Credit Shooting Sports USA Editor John Parker for finding this great resource. John writes: “Our friends at Applied Ballistics have a real gold mine of articles on the science of accurate shooting on their website. This is a fantastic source for precision shooting information[.] Topics presented are wide-ranging — from ballistic coefficients to bullet analysis.”
Here are six (6) of our favorite Applied Ballistics articles, available for FREE to read online. There are dozens more, all available on the Applied Ballistics Education Webpage. After Clicking link, select Plus (+) Symbol for “White Papers”, then find the article(s) you want in the list. For each selection, then click “Download” in the right column. This will send a PDF version to your device.
Tumblers and walnut/corncob media are old school. These days many shooters prefer processing brass rapidly with an ultrasonic cleaning machine. When used with the proper solution, a good ultrasonic cleaning machine can quickly remove remove dust, carbon, oil, and powder residue from your cartridge brass. The ultrasonic process will clean the inside of the cases, and even the primer pockets. Tumbling works well too, but for really dirty brass, ultrasonic cleaning may be a wise choice.
Our friend Gavin Gear has evaluated an RCBS Ultrasonic cleaning machine using RCBS Ultrasonic Case Cleaning Solution (RCBS #87058). To provide a real challenge, Gavin used some very dull and greasy milsurp brass: “I bought a huge lot of military once-fired 7.52x51mm brass (fired in a machine gun) that I’ve been slowly prepping for my DPMS LR-308B AR-10 style rifle. Some of this brass was fully prepped (sized/de-primed, trimmed, case mouths chamfered, primer pockets reamed) but it was gunked up with lube and looking dingy.”
UltimateReloader.com Case Cleaning Video (7.5 minutes):
Gavin describes the cleaning exercise step-by-step on UltimateReloader.com. Read Gavin’s Cartridge Cleaning Article to learn how he mixed the solution, activated the heater, and cycled the machine for 30 minutes. As you can see in the video above, the results were impressive. If you have never cleaned brass with ultrasound before, you should definitely watch Gavin’s 7.5-minute video — it provides many useful tips and shows the cleaning operation in progress from start to finish.
Ultra Dry Necks After Ultrasonic Cleaning — Some Suggestions
The Ultrasonic cleaning process gets cartridge brass so “squeaky clean” that increased force may be required to seat your bullets, or they may “grab” as they go in the necks. To reduce bullet-seating effort, you may benefit from adding a little dry case lube inside the case-neck before loading (use a nylon brush). Another trick is adding a teaspoon of Ballistol lube to the cleaning solution. That provides a trace lubricant inside the necks, but does not interfere with powder ignition in any way.
The latest Gen2 RCBS ultrasonic cleaning machine has a large 6.3-quart capacity. That’s nearly 100% larger than the first generation machine in Gavin’s video. The Gen2 machine, $434.52 on Amazon, features a second ceramic heater and transducer to better clean brass cases and firearm parts. The LED is easily programmable, and the timer can be set for up to 30 minutes of cleaning. The original 3.2 quart-capacity RCBS ultrasonic machine, as shown in Gavin’s video, is still available for $213.99 at Midsouth Shooters.
Introduction — What You Need in a Security Gun Safe
If you own firearms, you need a gun safe. In some states, such as California, if you don’t own a safe, you face potential liability if your firearms are stolen. Purchasing a safe is no easy decision however. There are dozens of safe manufacturers and countless design options. Sorting out the facts from the marketing claims can be difficult.
Today’s seven Saturday Showcase videos explain the most important qualities you should look for in a safe, and help you with the tough decisions, such as “Should I get a digital lock or a dial lock?”, “What kind of fire-proofing is most effective?”, “How big a safe do I really need?”, and “What interior works best with long-barreled scoped rifles?” You’ll find reviews of full-size safes, modular safes, and smaller handgun safes. Plus you’ll find expert advice on how to install your safe in your home and how to keep the contents free from rust.
Budget $1200-1500 for a safe from a major maker, with external hinges, and an interior at least 58″ high. That gives you room for 30″-barreled rifles with a top shelf for handguns and other valuables. A rotary rack and slide-out drawers are great additions.
Keypad or Dial? We favor rotary dial locks. With minimal maintenance they will function flawlessly for decades. But the digital locks offer quick-access and convenience. If you go digital, get a commercial-grade unit.
Fire-lining is worth getting, but a thin layer of sheet-rock doesn’t make a safe truly “fire-proof”.
Interior at least 58″ High and 30″ wide Overall Weight 750+ Pounds 8 Gauge or Heavier Wall Thickness Double-Wall, Composite Door with Relockers Minimum UL RSC Rated. TL-15 or TL-30 Rating is Desirable External Hinges
Mechanical UL Group II (or better) Lock with Standard Dial Or UL Type 1 Commercial-Grade Electronic Lock
Custom Interior Suitable for Scoped Guns with Long Barrels On-Door Storage System for Non-scoped Long Guns OR Rotary Gun Rack for Scoped Rifles and ARs
Internal (sandwiched) Insulator, Reinforced if Sheet-rock Palusol? Heat-Activated Expanding Door Seals
Slide-out Drawers for Handguns Fire-lined Inner Safe for Paper and Media
Low Gloss, Rust-resistant External Finish Pre-Drilled holes for Lag Bolts and in Rear for Electric Cord Overhead Fluorescent Lamp and/or LED Mini-lights on Strings
Advice for Gun Safe Buyers — Seven Key Things to Consider
This video covers key gun safe features — Seven Things to Consider Before Buying a Gun Safe. Not all gun safes are created equal. There are many variables — fire ratings, burglar ratings, colors, lock choices, internal capacity, door storage, and more. And with the recent controversy involving Liberty Safes, you should check the safe-maker’s policies regarding digital passcodes — you don’t want your passcode revealed without a warrant and/or without your consent.
DOs and DON’Ts of Safe Buying
DO purchase a safe that is bigger than you think you need.
Your gun collection is bound to grow over time. A good safe is more than just a gun locker–it becomes a secure storage device for your family’s other valuables as well. You’ll find you quickly fill up even a large safe. Spend the money for the size, protection, and features you want. Your gun collection may be worth many tens of thousands of dollars. Some people who visit this site wouldn’t hesitate to spend $1300 for a custom action or $1800+ for a competition scope, yet they don’t want to spend more than a few hundred dollars on a safe. That’s not common sense. If you’re on a tight budget, consider a used safe. Unlike many other products, safes don’t really wear out over time. When businesses change locations, you can get a very high quality commercial safe for little more than the cost of removing it.
DO spend more for a safe that offers fire-resistance.
But you have to do your homework–you can spend a lot of money for “fire-proofing” that actually is not very effective. Make sure if sheet-rock is used that it is properly installed. If you have valuable documents and media files, it’s not a bad idea to purchase a smaller, commercial-grade fire safe to put inside the gun safe. This gives you double protection.
DO look at many different brands of safes before you buy.
There ARE significant differences among brands. For example, Browning offers a unique (patent-pending) door-mounted rifle rack. Zanotti offers slide-out drawers and a modular design that is much easier for an owner to move. Ft. Knox uses an advanced method to secure and stabilize its fire-proofing layers within the safe. Brown offers custom exotic wood interior shelving and safes with commercial-grade burglary protection (much thicker steel with heavy composite doors and walls). Amsec offers a proprietary “DryLight” poured concrete-type fire insulation with greater structural strength than typical sheet-rock panels.
DO investigate the safe’s specifications.
Just because a safe is big and heavy doesn’t mean it’s particularly secure. Heavy-gauge steel is much more resistant to cutting and drilling than light 12- or 14-gauge steel. Some safes on the market have walls so thin they can be penetrated with a fire ax. We recommend 10-gauge steel at a minimum, and 8 gauge is much better. The safe should carry a UL RSC (Underwriters Laboratories “Residential Security Container”) or better rating.
DO ask about the safe’s safeguards against tampering.
A quality safe will feature extra armor or devices to defeat drilling. Low-grade safes can be opened in a few minutes with simple, battery-powered hand tools. All safes should have relockers to help ensure the safe remains locked in the case of a burglary. Relockers are hardened pins that are triggered during an attack, and cannot be retracted without hours of drilling. The number of relockers on a safe ranges from 2-10+ depending on the safe’s size and burglary grade.
DON’T store powder in your safe. A tightly-sealed metal box with a large quantity of powder inside is a bomb. Store powder in a separate, lightly-constructed cabinet or plastic box. The main thing for powder is to keep it dry and away from moisture and light.
Don’t Make the Mistake of Buying an Undersized Safe
The most common mistake people make when buying a gun safe is getting a safe that’s too small. This video explains why you should probably invest in a bigger safe. First, the rated gun capacity is exaggerated — rifles with mounted optics, long barrels, wide forearms and/or pistol grips take up considerably more space than a small rimfire rifle or a lever gun with iron sights. Second, your gun collection will likely grow in years to come. Third, you may want to store other valuables in the safe — such as vital documents, jewelry, watches, and pricey electronics. In this video the host notes: “Get a much larger safe than you think you’ll need at first. This will guarantee that you will have enough room for future purchases and all the guns and equipment you currently have.”
What Happens in a Fire and Deluxe Features
This video shows what can happen INSIDE a gun safe during a fire. This Winchester safe did not fare well during a major hourse. That’s why you want to buy a safe with a good fire rating.
This video shows the features of a large Superior Safe Co. gunsafe with internal organizers and door storage for handguns and accessories.
Modular Safes — Smart Option for Easier Moving
This article features a great video showing how to assemble a modular safe in under 30 minutes. This article also explains the benefits of modular gunsafes — primarily easier transport and installation. “Modular safes have been around for a few years now and are becoming more popular. Here’s why: The safe comes delivered to you in panels, so you can bring them into your home one at a time and put it together anywhere you like. This makes it easy to carry up and down stairs, onto elevators or anywhere! Security — Is it as secure as one that comes pre-assembled? The answer is, absolutely.” READ FULL ARTICLE on NRAWomen.com.
Five Good Gun Safes Under $500
We know some readers have a tight budget. This video looks at some recommended lower-cost safes under $500.00 list price. Note, however, that this video was produced in 2022. Now in 2023, with Bidenflation, the actual gun safe prices may be higher. For a full-size safe, we do recommend you spend quite a bit more — the investment in a higher quality safe, with better fire rating, is worth it.
Locking Device–Mechanical Dial vs. Digital Locks Recommendation: UL Group II mechanical dial lock or commercial-grade electronic.
For gun safes, we prefer rotary-combination dial locks, although commercial-grade electronic locks are now very good. While less convenient, and slower to open than electronic locks, combination locks are still more durable and trouble-free than the digital locks found on many low- to medium-cost gun safes. Among the combination locks, the Sargent & Greenleaf model 6730 (UL Group II) remains an industry standard. The director of Sturdy Safes noted: “An S&G 6730 will be working fine when your grandchildren have grandchildren.” For home use, we also recommend the standard, high-visibility “front-read” white on black dial.
Avoid the cheap, imported electronic locks. These are known for failing relatively quickly–the keypad internals just wear out. With some of these designs, if the lock fails while the door is closed, you’ll have to employ a professional gunsmith to drill your safe and replace the locking assembly and keypad. With any electronic lock, re-program your combination now and then so that keypad wear patterns don’t reveal the numbers you push to open the safe. But when you change the combination, be sure to record the new setting.
With a dial lock, choose a design that meets UL Group II (or better) certification. If you choose a digital lock, we strongly recommend that you select a UL Type I, Commercial Grade lock from LaGard, Sargent & Greenleaf, or Kaba Mas. Commercial-grade locks, such as the S&G Comptronic” 6120 or LaGard “SafeGard” are much more robust and are designed to be used 20 times a day or more in retail and banking environments. A good commercial digital keypad lock should give 10 years or more of continuous use before replacement is required. With any digital lock, however, you should replace the battery at least once a year. Normally this can be done without professional assistance.
A rapid-access bedside safe is a great way to keep your pistol secure, but also readily available, close at hand. Not all rapid-access pistol safes are created equal, however. In this video, John of Pew Pew Tactical explains what to look for in a small pistol safe, and points out the pros and cons of the four safes tested:
Fort Knox FTK-PB Simplex Pistol Box
Strong case, reliable no-battery locking system. Very good safe, but expensive ($299.00 on Amazon).
Vaultek Electronic Pistol Safes Vaultek offers multiple styles and sizes, many with advanced biometric capabilities. Vaultek rapid access safes are offered in sizes to hold a single handgun or multiple pistols along with other valuables.
The Cartridge Comparison Guide is a remarkably comprehensive 340-page, spiral-bound book. Covering over 250 cartridges, the Second Edition of the Cartridge Comparison Guide is the product of many years of labor by Andrew Chamberlain, a Utah-based hunter. Andrew says his Guide “compares every factory available cartridge from the 17 calibers up to the 50 caliber cartridges”. (Sorry, most wildcat cartridges are not covered.) Chamberlain’s Guide also compiles cartridge data from major ammunition manufacturers such as Barnes, Federal, Hornady, Norma, Nosler, Remington, Sierra, Swift, Weatherby, and Winchester. It shows the optimal velocity achieved for each bullet weight and calculates bullet energy, recoil, and powder efficiency. Large color photos illustrate handgun and rifle cartridges.
The Cartridge Comparison Guide provides data for thousands of cartridge/bullet/velocity combos. Quick reference sheets and ballistics charts cover Trajectory, Velocity, and Energy out to 500 yards. The Cartridge Comparison Guide also offers a firearms lexicon, plus Appendices covering Cartridge Selection for Game Animals, Bullet Selection/Design, Bullet Expansion, and Wound Channel Characteristics.
New Content in Second Edition of Cartridge Comparison Guide
The Cartridge Comparison Guide (Second Edition) costs $39.99 plus shipping and tax. CLICK HERE to visit the Online Store where you can order the 340-page book. Here’s what’s new in the Second Edition:
Addition of Shotgun Ammunition (Both Slug and Shot loads).
Momentum Calculation for all Rifle, Shotgun and Handgun loads.
Integration of Shotgun Slug Ammunition with Center Fire Rifle Data Tables.
Factory Load Summary Added (Shows manufacturers and loads produced).
One factory load and one hand load for every bullet weight available in each cartridge.
Over 90 pages of additional ballistics content (roughly 35% more than in First Edition).
Great Resource for Hunters
One of Chamberlain’s main goals in creating the Cartridge Comparison Guide was to help hunters select the right cartridge for the job: “This started as a personal project to gather information on the more popular cartridges commonly used for hunting. I wanted to find the best all-around performing cartridge and rifle that a guy on a budget could shoot. I began comparing cartridge performance, versatility, bullet selection, powder efficiency, recoil generation vs. energy produced, standing ballistic data for different environments….”
Giant Cartridge Poster for Computer Wallpaper (1665×1080 pixels)
Here’s a great illustration of hundreds of cartridges and shotshell types. For dedicated reloaders, this would work great as desktop “wallpaper” for your computer. CLICK HERE for full-size image.
Most competitive shooters are pretty good about bore cleaning (some may even clean their bores too aggressively). However, we’ve found that many shooters neglect the chamber area and the bolt lug recesses. It’s too easy to clean the bore, slip out the guide rod and say “I’m done.” Sinclair Int’l explains why it’s important to clean the action interior: “Shooters use a lot of grease and oil on their bolts to reduce friction and to prevent wear[.] Unfortunately, both of these compounds attract grit, powder and primer residues. Cleaning your receiver is especially critical [with] custom actions where the fit between the action and bolt is held to very tight tolerances. Routine cleaning of the action will prevent unnecessary wear on the bolt body, locking lugs, and the action raceways/guide rails. Frequent action cleaning is also essential to keeping the trigger area free of debris which can cause trigger hang-ups and failures.”
Your rifle deserves a clean action and lug recesses. For action cleaning, our friend Danny Reever favors the PMA Action Cleaning Tool. This handy tool speeds up the cleaning process, letting you do a better job in less time. Danny reports: “I’ve been using the PMA Action Cleaning Tool Kit ($79.95) for quite some time. Previously, I used one of the old style (round knob) action-cleaning tools with cylindrical cotton rolls. I think the PMA Action Cleaning Tool Kit is easier to use, and possibly achieves better results. CLICK HERE to Read Full Tool Review.
Cleaning the Chamber
Combustion by-products, lubricants, and solvent residues can collect in your chamber. Severe build-up of grease and carbon can interfere with chambering. Also some solvents will promote corrosion. You need to keep your chambers clean.
1) Install a clean cotton mop of the correct size on the end of a chamber rod and insert the mop into the chamber. Rotate the mop several times to remove any brush bristles left behind and any excess solvent that was between the rod guide snout and the end of the chamber. Make sure the chamber is dry. Prior to storing a rifle you can oil the chamber but make sure the oil is removed prior to firing the rifle.
2) Alternatively, install an old bore brush on a chamber rod, overlap a couple of patches on the brush bristles, and wrap them around the brush completely. Then insert the patch-covered brush into the chamber while rotating it to remove the excess solvent and debris. Push it firmly into the neck area of the chamber. A similar method is to pierce a large patch on the end of the brush loop and insert it into the action, again rotating the brush as you push the patch up against the breech.
Cleaning the Lug Recess Area
The action lug recess area is one of the dirtiest places on a bolt-action rifle. To properly clean this area, always use a tool designed for the task, such as the $24.99 Sinclair Action Cleaning Tool (Brownells #749003115) which is part of the full Sinclair Action Cleaning Tool Kit ($48.99 at Brownells, #749004651).
1) Insert a cotton roll or cleaning felt into your lug recess cleaning tool and wet both ends and the face of the cotton roll/felt with solvent.
2) Insert the tool into the action and push it forward until it is positioned fully in the lug recess area and rotate the tool head several times. Then reverse the rotation for another few turns. While rotating the tool move it slightly in and out to cover the entire recess area and to also clean the breech face.
3) Remove the tool from the action and inspect the surface of the felt or cotton roll. If there is quite a bit of residue on both sides of the felt/roll, then repeat with another wet felt/roll.
4) When you feel the recess area is completely clean, insert a dry cotton roll into the tool and rotate the tool head to remove any remaining solvent and debris. If necessary, use a second dry cotton roll.
5) You can follow this step up with another pass of a mop or patches into the chamber to get any debris or solvent that pushed forward out of the lug recess area.
Want to shoot better scores at your next match? Here’s a smart, inexpensive do-it-yourself project from the good folks at Criterion Barrels. For less than a dollar or two in materials, in just a few minutes you can create a handy, effective mirage shield, custom-fitted to your favorite rifle.
All precision shooters should be familiar with mirage, a form of optical distortion caused primarily by variations in air temperature. Savvy shooters will use mirage as a valuable tool when gauging wind speed and direction. Natural mirage is unavoidable, but there are many techniques designed to limit its influence in long-range marksmanship.
A form of mirage can be produced by the barrel itself. Heat rising from the barrel may distort sight picture through your optics, leading to erratic results. Mirage caused by barrel heat can be reduced dramatically by a simple, light-weight mirage shield.
How to Make a Mirage Shield
A mirage shield is an extremely cost-effective way to eliminate a commonly-encountered problem. Making your own mirage shield is easy. Using old venetian blind strips and common household materials and tools, you can construct your own mirage shield for under one dollar.
Materials Required:
1. Vertical PVC Venetian blind panel
2. Three 1”x1” pieces adhesive-backed Velcro
3. Ruler or tape measure
4. Scissors or box cutter
5. Pencil or marker
1. Measure the distance from the end of the receiver or rail to the crown of the barrel.
2. Using a pencil and ruler, measure the same distance and mark an even line across the blind.
3. Cut across the line using scissors or a box cutter, shortening the blind to the required length. (Remember, measure twice, cut once!)
4. Expose the adhesive backing on the loop side of the Velcro. Center and apply the Velcro strips on the barrel at regular intervals.
5. Expose the adhesive backing of the fuzzy side of the Velcro.
6. Place the blind on the upper side of the barrel. Apply downward pressure. Once the Velcro has secured itself to the barrel, separate the two sides. Proceed to mold both sides of the Velcro to fit the contour of their respective surfaces.
7. Reaffix the blind. Barrel related mirage is now a thing of the past!
NOTE: You can attach the Velcro on the opposite side of the blind if you want the blind to curve upwards. Some folks thinks that aids barrel cooling — it’s worth a try.
How to Remove and Re-Attach the Mirage Shield
Removal of your mirage shield is accomplished by simply removing the blind. You can un-install the Velcro by pulling off the strips and then gently removing any adhesive residue left behind using an appropriate solvent. (Simple cooking oil may do the job.) Caution: With fine, high-polish blued barrels, test any solvent on a non-visible section of the barrel. Before storing the gun, re-oil the barrel to remove active solvents and residual fingerprints.
SUMMARY: Powder can have a very long shelf life. You need to watch for changes in smell and color. A reddish tinge, almost like rust on the powder, is a bad sign, as is a foul odor, not to be confused with a normal chemical smell. Either of these signs indicate it is time to dispose of your powder by means other than shooting.
Ever wondered about the stability of the propellants in your reloading room? There are some important things you should know about powder storage, to ensure consistent powder performance and safety. Western Powders (which has been acquired by Hodgdon) published an informative Q & A series entitled Dear Labby: Questions for our Ballistics Lab . Here are some excerpts that pertain to powder storage and shelf life. Worried that your powder may be too old? Western’s experts explain how to check your propellants for warning signs.
Proper Powder Storage
Q: I live in southern Arizona where it is very hot. I am told powders will become unstable if stored in an area not air-conditioned. My wife says no powder or primers in the house. Can powder be stored in a refrigerator? What about using a fireproof safe? I would appreciate your ideas. — M.C.
Lab Answer: SAAMI guidelines are pretty clear on issues of storage. They recommend storing smokeless powder in containers that will not allow pressure to build if the powder is ignited — ruling out gun safes and refrigerators.
In their original containers, the lifespan of smokeless powders is quite long, even in hot, arid climates. In fact the lifespan is typically longer than the average handloader would need to store them. Stored safely in a garage or outbuilding, your powder should last years. If you see the powder developing a reddish tint, or giving off a foul odor, it is time to discard it.
Clumps in Powder Container
Q: I ordered some of your Accurate 1680 powder back about in December. I just now opened it … and it is full of clumps. My knowledge tells me that means moisture. Am I wrong? I just now broke the seal and it has been stored in a ammo can with desiccant packs around it and a dehumidifier running 14-16 hours a day. I can’t imagine this being my fault, if this does indicate moisture. I don’t know if the pink part on the label is suppose to be red or not, but it is definitely pink, so if it was red I am wondering if I was shipped an old container? I hope that this isn’t bad and I am stuck with it…
Lab Answer: All powder contains a certain amount of moisture. When the powder is stored or during shipping, it can go through temperature cycles. During the cycling, the moisture can be pulled to the surface and cause clumping. Clumping can also be caused by static electricity if too dry or the powder has limited graphite content. You can break up the clumps before metering and they shouldn’t be a problem. This will not affect the powder performance, so your product is fine. Accurate 1680 labels are designed in Pink. As a side note, specification for testing powder is at 70° F and 60% humidity.
Shelf Life and Packaging Dates
Q: Does powder ever get to old to use and what identifying marks does your company put on the canister for when it is made, You have helped me out a while ago when I asked about keeping my cowboy shooting under 950 fps and it works great less stress on the hand and the recoil is very minimum. — R.B.
Lab Answer: On one pound bottles, the number is on the corner in a silver box. If the powder was poured today, it would read 012815 followed by a lot number. The whole number would look something like 012815749. Eight pound bottles have a sticker on the bottom with an obvious date code. The lot number appears above the date.
The shooting season is now in full swing. When you head to the range you’ll want to be prepared. That means collecting all the gear you’ll need at the range. It’s easy to forget small, critical items, so we’ve provided a checklist of the small “extras” you should pack before you head out to the range. In addition to rifle, rests, ammo, targets, and cleaning gear, here are a dozen essentials you should include in your range bag.
• Shell-Holder — If you don’t have calipers, you can use a shell-holder to check for excessive case expansion from hot loads. If a fired case doesn’t slip into the shell-holder easily, your load is definitely TOO HOT.
• Extra Earplugs — Always use ear protection when shooting. We bring a 35mm film canister with extra sets of foam earplugs.
• Hex Wrench or Screwdriver for action screws — Action screws can work loose with time. Always bring the appropriate hex wrench or screwdriver whenever you go to the range.
• Small Wrench for Scope Rings — Check the tension of your scope base and ring fasteners before you go. Bring along a small Torx wrench for the ring screws (or other tool that fits your fasteners).
• Normal and Under-sized Jags — It is often wise to use one-caliber undersize jags when applying solvent with cotton patches. You should have a couple sizes in your range kit.
• Extra Batteries — Bring extra batteries for all your electronic gear — which can include chronograph, windmeter, digital camera, GPS etc.
• Small Notebook and Pen or Pencil — Use the notebook to record chron data, log group sizes, and make notes about wind and weather conditions.
• Adhesive dots — Bring a few sheets of adhesive dots (sold at office supply stores). Use small white or black dots as target pasters. Use larger red or orange dots as aiming points (target centers).
• Folding Chair or Camp Stool — This comes in handy if you’re spotting for another shooter, or if you reload away from the firing line.
• Water Bottle — You can’t shoot well if you’re dehydrated. Bring at least two quarts of water with you and keep a bottle at the bench.
• Surveyors’ Tape and Wood Stakes — You can make inexpensive wind indicators using surveyors’ tape attached to the top of wood stakes.
• Small Plastic Ruler — Use this to measure your group sizes. A transparent (see-through) ruler works best. Rulers are also useful for drawing lines on targets.
This list is not intended to be exclusive. There are many other items you may wish to include. Obviously bring safety glasses, and Sharpie-type pens are always handy to mark targets. We invite our readers to add other “essentials” to the list. The important thing is to plan ahead, packing your key items before you drive to the range.
Many novice hand-loaders believe that neck bushing Inside Diameter (ID) size is the only important factor in neck tension. In fact, many different things will influence the grip on your bullet and its ability to release from the case neck. To learn more about neck tension and “case grip”, take the time to read this article carefully. We bet you’ll gain knowledge that will let you load more accurate ammo, with better ES/SD.
Editor: Guys, this is a VERY important article. You really should read it over carefully, twice. Variations in the force required to release a bullet can significantly affect accuracy and ES/SD. You really need to know how the grip on bullet can be altered by many different factors.
Neck Tension (i.e. Grip on Bullets) Is a Complex Phenomenon
While we certainly have considerable control over neck tension by using tighter or looser bushings (with smaller or bigger Inside Diameters), bushing size is only one factor at work. It’s important to understand the multiple factors that can increase or decrease the resistance to bullet release. Think in terms of overall brass-on-bullet “grip” instead of just bushing size (or the internal neck diameter in non-bushing full-length sizing dies).
Bullet grip is affected by many things, such as:
1. Neck-wall thickness.
2. Amount of bullet bearing surface (shank) in the neck.
3. Surface condition inside of neck (residual carbon can act as a lubricant; ultrasonic cleaning makes necks “grabby”).
4. Length of neck (e.g. 6mmBR neck vs. 6mm Dasher).
5. Whether or not the bullets have an anti-friction coating.
6. The springiness of the brass (which is related to degree of work-hardening; number of firings etc.)
7. The bullet jacket material.
8. The outside diameter of the bullet and whether it has a pressure ridge.
9. Time duration between bullet seating and firing (necks can stiffen with time).
10. How often the brass is annealed.
11. Amount (length) of neck sized (e.g. you can size only half the neck).
12. Interior diameter of bushing, or neck section of non-bushing die. – and there are others…
One needs to understand that bushing size isn’t the beginning and end of neck tension questions, because, even if bushing size is held constant, the amount of bullet “grip” can change dramatically as the condition of your brass changes. Bullet “grip” can also change if you alter your seating depth, and it can even change if you ultrasonically clean your cases.
6-time U.S. National Long-Range Champion John Whidden adds: “Our tests show us that the condition of the necks in regards to lubed or not, carbon inside or not, squeaky clean or not, etc., matter even more than the size of the bushing used. An ultrasonically cleaned or brand new dry case neck make for some quite high seating force.”
In our Shooters’ Forum a reader asked: “How much neck tension should I use?” This prompted a lengthy Forum discussion in which other Forum members recommended a specific number based on their experience, such as .001″, .002″, or .003″. These numbers, as commonly used, correspond to the difference between case-neck OD after sizing and the neck OD of a loaded round, with bullet in place. In other words, the numbers refer to the nominal amount of interference fit (after sizing).
While these commonly-used “tension numbers” (of .001″, .002″ etc.) can be useful as starting points, neck tension is actually a fairly complex subject. The actual amount of “grip” on the bullet is a function of many factors, of which neck-OD reduction during sizing is just one. Understanding these many factors will help you maintain consistent neck tension as your brass “evolves” over the course of multiple reloadings.
Seating Depth Changes Can Increase or Decrease Grip on Bullet
You can do this simple experiment. Seat a boat-tail bullet in your sized neck with .150″ of bearing surface (shank) in the neck. Now remove the bullet with an impact hammer. Next, take another identical bullet and seat it with .300″ of bearing surface in another sized case (same bushing size/same nominal tension). You’ll find the deeper-seated bullet is gripped much harder.
Neck-Wall Thickness is Important Too
I have also found that thinner necks, particularly the very thin necks used by many 6mm PPC benchrest shooters, require more sizing to give equivalent “grip”. Again, do your own experiment. Seat a bullet in a case turned to .008″ neckwall thickness and sized down .003″. Now compare that to a case with .014″ neckwall thickness and sized down .0015″. You may find that the bullet in the thin necks actually pulls out easier, though it supposedly has more “neck tension”, if one were to consider bushing size alone.
In practical terms, because thick necks are less elastic than very thin necks, when you turn necks you may need to run tighter bushings to maintain the same amount of actual grip on the bullets (as compared to no-turn brass). Consequently, I suspect the guys using .0015″ “tension” on no-turn brass may be a lot closer to the guys using .003″ “tension” on turned necks than either group may realize.
Toward a Better Definition of Neck Tension
As a convenient short-cut, we tend to describe neck tension by bushing size alone. When a guy says, “I run .002 neck tension”, that normally means he is using a die/bushing that sizes the necks .002″ smaller than a loaded round. Well we know something about his post-sizing neck OD, but do we really have a reliable idea about how much force is required to release his bullets? Maybe not… This use of the term “neck tension” when we are really only describing the amount of neck diameter reduction with a die/bushing is really kind of incomplete.
My point here is that it is overly simplistic to ask, “should I load with .001 tension or .003?” In reality, an .001″ reduction (after springback) on a thick neck might provide MORE “grip” on a deep-seated bullet than an .003″ reduction on a very thin-walled neck holding a bullet with minimal bearing surface in the neck. Bushing ID is something we can easily measure and verify. We use bushing size as a descriptor of neck tension because it is convenient and because the other important factors are hard to quantify. But those factors shouldn’t be ignored if you want to maintain consistent neck tension for optimal accuracy.
Consistency and accuracy — that’s really what this all about isn’t it? We want to find the best neck tension for accuracy, and then maintain that amount of grip-on-bullet over time. To do that you need to look not only at your bushing size, but also at how your brass has changed (work-hardened) with time, and whether other variables (such as the amount of carbon in the neck) have changed. Ultimately, optimal neck tension must be ascertained experimentally. You have to go out and test empirically to see what works, in YOUR rifle, with YOUR bullets and YOUR brass. And you may have to change the nominal tension setting (i.e. bushing size) as your brass work-hardens or IF YOU CHANGE SEATING DEPTHS.
Remember that bushing size alone does not tell us all we need to know about the neck’s true “holding power” on a bullet, or the energy required for bullet release. True bullet grip is a more complicated phenomenon, one that is affected by numerous factors, some of which are very hard to quantify.


 For gun safes, we prefer rotary-combination dial locks, although commercial-grade electronic locks are now very good. While less convenient, and slower to open than electronic locks, combination locks are still more durable and trouble-free than the digital locks found on many low- to medium-cost gun safes. Among the combination locks, the Sargent & Greenleaf model 6730 (UL Group II) remains an industry standard. The director of Sturdy Safes noted: “An S&G 6730 will be working fine when your grandchildren have grandchildren.” For home use, we also recommend the standard, high-visibility “front-read” white on black dial.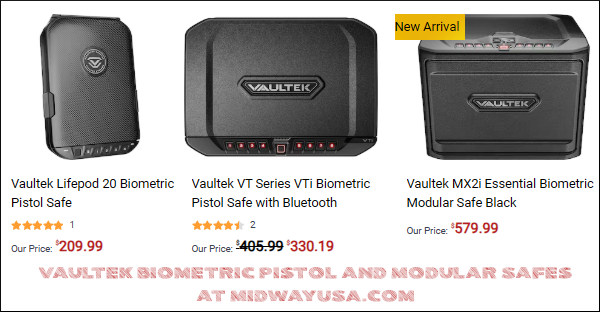

 The
The 




 The shooting season is now in full swing. When you head to the range you’ll want to be prepared. That means collecting all the gear you’ll need at the range. It’s easy to forget small, critical items, so we’ve provided a checklist of the small “extras” you should pack before you head out to the range. In addition to rifle, rests, ammo, targets, and cleaning gear, here are a dozen essentials you should include in your range bag.
 • Shell-Holder — If you don’t have calipers, you can use a shell-holder to check for excessive case expansion from hot loads. If a fired case doesn’t slip into the shell-holder easily, your load is definitely TOO HOT.
 • Hex Wrench or Screwdriver for action screws — Action screws can work loose with time. Always bring the appropriate hex wrench or screwdriver whenever you go to the range.
 • Extra Batteries — Bring extra batteries for all your electronic gear — which can include chronograph, windmeter, digital camera, GPS etc.
 • Folding Chair or Camp Stool — This comes in handy if you’re spotting for another shooter, or if you reload away from the firing line.
 • Small Plastic Ruler — Use this to measure your group sizes. A transparent (see-through) ruler works best. Rulers are also useful for drawing lines on targets.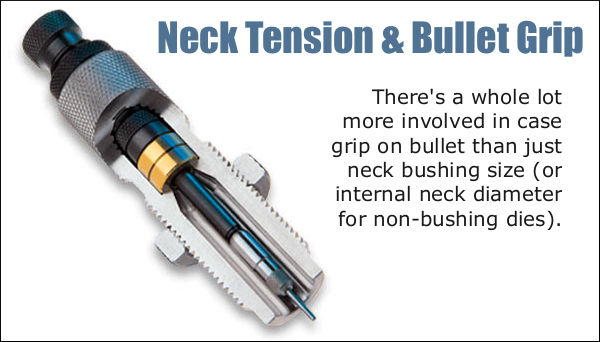
 In our
  Neck-Wall Thickness is Important Too


