Do primer types make a significant difference in accuracy or vertical dispersion at long range? The answer is “maybe”. Here’s one anecdotal study that tracked vertical variance among six different primer types. The tester is a good shooter with a very accurate rifle — four of the six 4-shot groups were under 2″ at 500 yards. This test doesn’t settle the question, but does suggest that it may be worth trying a few different primer types with your match ammo.
Here is a very interesting test for the 6 BRA (6mmBR Ackley) cartridge. Forum member James Phillips, a talented long-range benchrest shooter, tested SIX different primer types from three different manufacturers. To help determine vertical dispersion, James set his target out at 500 yards. He then proceeded to shoot 4-shot groups, in order, with each primer type. Velocities were recorded with a chrono. The photo above shows the results. James says: “I’ll retest the best two for accuracy and consistency with 10 shots each”. CLICK HERE for full-screen target photo.
As you can see, ALL the groups are pretty impressive. The smallest groups, 1.253″, was shot with CCI 400 primers. Next best (and very close) was CCI BR4, at 1.275″ for four shots. The “flat line” winner was the Remington 7.5, at upper left. There was almost no vertical. If you are intrigued by this interesting primer test, you can join the discussion in this Primer Test FORUM THREAD.
Primer Brand
Group Size
Velocity
Extreme Spread
Std Deviation
Remington 7.5
1.985″ 4 shot
2955 FPS
8 FPS
4.0 FPS
Federal 205M
2.200″ 4 shot
2951 FPS
11 FPS
4.8 FPS
Sellier Bellot SR
1.673″ 4 shot
2950 FPS
14 FPS
5.9 FPS
CCI 450M
2.341″ 4 shot
2947 FPS
14 FPS
6.6 FPS
CCI 400
1.253″ 4 shot
2950 FPS
3 FPS
1.3 FPS
CCI BR4
1.275″ 4 shot
2949 FPS
15 FPS
6.9 FPS
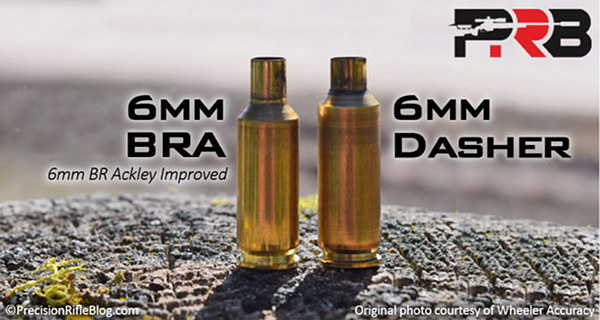
CARTRIDGE: 6mmBR Ackley, aka 6 BRA. Parent case is 6mmBR Norma. The 6 BRA is fire-formed to create a 40-degree shoulder and less body taper. Capacity is increased, but the neck is longer than a 6mm Dasher. The capacity is enough to get to the 2950+ FPS accuracy node. Some shooters say the 6 BRA is more forgiving than the 6mm Dasher. The 6 BRA is certainly easier to fire-form.
TEST REPORT — Conditions, Shooting Method, Loading Method
Tester James Phillips posted this report in ourShooters’ Forum:
Conditions: The testing was done in the morning over flags. The flags never moved or even twitched. I had as perfect conditions as I could have asked for. It was overcast so no mirage and no wind. There were no other shooters, just me.
Test Procedure: Each shot was precisely shot at my pace and centered the best possible using my Nightforce 15-55X scope. I did not use the round-robin method. Each four-shot group with the same was shot at one time. Then I moved onto the next primer. Everything felt right for each and every shot fired today. Of course I could repeat the test tomorrow and it could be exact opposite of today’s test. We can chase this forever. But [soon] I’m going to test the BR4 and 400 primer… for best accuracy and consistency for 10 shots each.
How Rounds Were Loaded: Each load was weighed to one (1) kernel of powder. So I know that’s as good as I can weigh them. Each bullet seating force was within 1# on my 21st Century hydraulic arbor press.
Previous Initial Load Testing: All groups were shot with 31.1 grains of H4895. During initial load testing I settled in on the Sellier & Bellot primer to finalize everything as it showed more promise over the CCI 450 Magnum I also tried. I was actually surprised to have seen the higher ES and SD from that primer today along with the vertical shown. [Editor: Look carefully — one shot from the CCI 450 is right in the center black diamond, stretching the vertical. By contrast the Rem 7.5 had almost no vertical.]
Groups Shot at 500 Yards with 6 BRA
Velocity and NODE Considerations: I was about 5-6 FPS above what appeared to been my optimum velocity of 2943-2945 FPS, so I’ll test 5 shots of 31.0 and 5 of 31.1 and see what happens from there. I can only assume my velocities where higher due to the higher humidity and of course temps were 5 degrees warmer this morning as well. It wasn’t far off but I noticed it.
Each Wednesday, the U.S. Army Marksmanship Unit publishes a reloading “how-to” article on the USAMU Facebook page. A while back, the USAMU’s reloading gurus looked at the subject of case lubrication. Tasked with producing thousands of rounds of ammo for team members, the USAMU’s reloading staff has developed very efficient procedures for lubricating large quantities of cases. This article reveals the USAMU’s clever “big-batch” lube methods. For other helpful hand-loading tips, visit the USAMU Facebook page on upcoming Wednesdays.
Rapid, High-Volume Case Lubrication
Today’s topic covers methods for quickly applying spray lube to cartridge cases prior to sizing. A typical order for this shop may be 25,000 rounds, so [speeding up] the lubrication process can be a real time-saver. While your ammunition lots probably aren’t this large, the efficient methods discussed here may help save a considerable amount of time over your handloading career. Our case lubrication rates range from 1500-1600 cases per hour, to 2400-2500 cases per hour, depending on caliber.
This shop uses virgin brass, whereas most home handloaders use fired brass, which necessitates some small changes at times. These will be discussed as they arise. Begin with fired brass that has been tumbled clean.
Ensure as much tumbling media as possible is removed from the brass, as when it gets into a size die, it can dent cases significantly. This is a good time to round out dents in the case mouths using a tapered tool to prevent damage from the decapping stem.
First, dump the clean cases into a large box or reloading bin. Shake the bin back and forth so that many cases are oriented with the mouths up. Next, pick up as many cases as is convenient with the mouths “up”, from natural clusters of correctly-oriented cases. With 7.62mm-size cases, this is usually 3-4, and with 5.56mm cases, this can be up to 8-10. Place the cases into the rack slots, mouth-up. Doing this in groups rather than singly saves considerable time. Once these clusters have been depleted, it will be time to re-shake the bin to orient more cases “up.”.
This photo shows a case lubrication rack made by a USAMU staffer.
Naturally, adjust the spacing to best fit the calibers you reload. We have found this size … convenient for handling through the various phases of case lubrication/transfer to progressive case feeders for processing. Note that the 1/2-inch angle does not cover much of the critical case area at the base, just forward of the extractor groove, where most re-sizing force will be exerted. As the USAMU uses virgin brass, less lubrication is required for our brass than would be needed for Full Length (FL) sizing of previously-fired brass.
NOTE: The amount applied using our rack is easily enough for our purpose. If using fired brass, be sure to adequately lube this base area to avoid having cases stick in the full-length sizing die.
Using a spray lube, coat the cases adequately, but not excessively, from all sides. Be sure to get some lube into the case mouths/necks, in order to reduce expander ball drag and case stretching/headspace changes. The spray lube this shop uses does not harm primers or powder, and does not require tumbling to remove after lubing.*
Take a close look at the photo above. The USAMU shop uses a common kitchen turntable, which allows the rack to be rotated easily. We place this in a custom-made box which prevents over-spray on to floors and walls.
Angled Box Method for Smaller Cases to be Neck-Sized
A refinement of the above method which especially speeds processing of 5.56x45mm cases is as follows. A small cardboard box which holds about 100 cases is fitted with an angled “floor” secured by tape. With the smaller 5.56mm cases, usually about 8-10 cases per handful can be picked up, already correctly-oriented, and placed into the box together. This prevents having to place them into the rack slots, saving time.
HOWEVER, note that this does not allow nearly as much lube access to the case bodies as does the rack. For our purposes — neck-sizing and setting neck tension on new brass, this works well. If using this procedure with fired brass, take steps to ensure adequate lube to prevent stuck cases.
As always, we hope this will help our fellow handloaders. Good luck, and good shooting!
*A two-part test performed here involved spraying primed cases heavily, while getting more lube into the case mouth/body than even a careless handloader would likely apply. The second part of the test involved literally spraying considerable quantities of the lube directly into the cases, drenching the primers. After a several-day wait to allow the lube to penetrate the primers, they were then fired in a test barrel. All fired normally; no unusual reports were noted. This bolstered confidence that normal amounts of the lube would not adversely affect our ammunition, and we have been pleased with the results over several years.
Report by Craig Arnzen, Area 419
As the PRS and other tactical/practical competitions continue to grow, a guy tends to wonder, just how good are the top competitors? And what are they actually doing (and viewing) as they complete a stage? Well, a great video from the new Long Range Precision Shooters YouTube Channel let us see what the best in the sport see through their scopes when they shoot.
This video features Dave Preston, 2015 National Champion and perennial powerhouse, shooting the PRS Skills barricade. Dave Preston is widely considered the best in the nation running this PRS stage. Dave nearly always shoots 100% with the fastest recorded time. In this video you’ll see him successfully engage all eight shots in under 43 seconds — that’s crazy fast. This includes a POV sequence (4:35 time-mark) showing the actual view through Dave’s scope as he completes the stage.
Watch this video! Dave offers excellent advice on gun-handling and body positioning for barricades. Listen to what he says and you WILL shoot better.
This video features the PRS Skills Barricade, an 8-round, 4-position stage featured at the majority of PRS matches throughout country. It’s called a “Skills Stage” as it is run the same way at every national match and gives shooters the ability to compare skill levels based on hit percentage and speed.
The target is a 10″ plate at 400 yards. There are four different positions, with two shots each. Most people run this stage in about 70 seconds, some in the mid-60s, the greats in the high 50s, and Dave does it in the low 40s… mighty impressive!
The Right Gear Aids Stability and Lets You Shoot Faster
Let’s also take a look at two pieces of gear that really helped Dave Preston get stable and shoot fast.
1. BARRICADE BAG — To Get Stable, Really Stable
In the video Dave is using a Solo Sac from Short Action Precision This bag was designed by USMC Solomon Mansalala, and $5 of every purchase goes to help the Marine Scout Snipers buy gear. It’s a very soft/dense bag and is popular at matches.
The other bag that sees a LOT of use, and is far and away the most used, is the patented Gamechanger Bag from Reasor Precision Solutions and Armageddon Gear.
2. MUZZLE BRAKE — To Make Your Follow-Up Faster
You’ll notice that in the video the rifle is very steady through firing, even though he is not applying a lot of pressure to the rifle. Dave is using a Hellfire Muzzle Brake from Area 419. Combined with the soft-recoiling 6mmBR cartridge he is able to spot his impacts and make adjustments, and can also make very fast follow-up shots as his rifle hasn’t bounced way off target.
The 30 BR is an amazing little cartridge. However, 30 BR shooters do have to neck-up 6mmBR or 7mmBR brass and then deal with some issues that can arise from the expansion process. One of our Forum members was concerned about the donut that can form at the new (expanded) neck-shoulder junction. Respected bullet-maker Randy Robinett offers tips on how to deal with the “dreaded donut”.
The Forum member was concerned about thinning the brass if he turned his 30 BR necks after expansion: “Everything I have found on 30 BR case-forming says to simply turn off the bulge at the base of the neck caused by the old 6BR shoulder. I expanded my first case and measured the neck at 0.329″ except on the donut, where it measures 0.335″. Looking inside the case… reveals a groove inside the case under the donut. Now, it is a fact that when I turn that neck and remove the donut, the groove is still going to be there on the inside? That means there is now a thin-spot ring at the base of the neck that is .005 thinner than the rest of the neck. Has anyone experienced a neck cracking on this ring?”
Randy Robinett, who runs BIB Bullet Co., is one of the “founding fathers” of the 30 BR who help prove and popularize the 30 BR for benchrest score shooting. Randy offers this advice on 30 BR case-forming:
While the thinner neck-base was one of our original concerns, unless one cuts too deeply INTO the shoulder, it is not a problem. For my original 30BR chamber, thirty (30) cases were used to fire 6,400 rounds through the barrel. The cases were never annealed, yet there were ZERO case failures, neck separations, or splits. The case-necks were turned for a loaded-round neck diameter of .328″, and, from the beginning, sized with a .324″ neck-bushing.
The best method for avoiding the ‘bulge’ is to fire-form prior to neck-turning (several methods are successfully employed). Cutting too deeply into the shoulder can result in case-neck separations. I have witnessed this, but, with several barrels and thousands to shots fired, have not [personally] experienced it. The last registered BR event fired using that original barrel produced a 500-27x score and a second-place finish. [That’s] not bad for 6K plus shots, at something over 200 firings per case.
Check out the 30 BR Cartridge Guide on AccurateShooter.com
You’ll find more information on 30 BR Case-forming in our 30 BR Cartridge Guide. Here’s a short excerpt from that page — some tips provided by benchrest for score and HBR shooter Al Nyhus:
30 BR Case-Forming Procedure by Al Nyhus
The 30 BR cartridge is formed by necking-up 6mmBR or 7mmBR brass. You can do this in multiple stages or in one pass. You can use either an expander mandrel (like Joe Entrekin does), or a tapered button in a regular dies. Personally, I use a Redding tapered expander button, part number 16307. This expands the necks from 6mm to .30 cal in one pass. It works well as long as you lube the mandrel and the inside of the necks. I’ve also used the Sinclair expander body with a succession of larger mandrels, but this is a lot more work and the necks stay straighter with the Redding tapered button. This button can be used in any Redding die that has a large enough inside diameter to accept the BR case without any case-to-die contact.
Don’t be concerned about how straight the necks are before firing them the first time. When you whap them with around 50,000 psi, they will straighten out just fine! I recommend not seating the bullets into the lands for the first firing, provided there is an adequate light crush-fit of the case in the chamber. The Lapua cases will shorten from approx. 1.550″ to around 1.520″ after being necked up to 30-caliber I trim to 1.500″ with the (suggested) 1.520 length chambers. I don’t deburr the flash holes or uniform the primer pockets until after the first firing. I use a Ron Hoehn flash hole deburring tool that indexes on the primer pocket, not through the case mouth. — Al Nyhus
Many of our readers use AR-type rifles for Service Rifle matches, varmint hunting, 3-Gun competition, or defensive use. AR-platform rifles can be configured in a multitude of ways to suit the application. But if you plan to put together your own purpose-built AR rifle, how do you get started?
For AR Do-It-Yourselfers, we suggest reading Glen Zedicker’s book, the Competitive AR-15 Builders Guide. Following on Zedicker’s The Competitive AR15: Ultimate Technical Guide, the Builders Guide provides step-by-step instructions that will help non-professional “home builders” assemble a competitive match or varmint rifle. This book isn’t for everyone — you need some basic gun assembly experience and an aptitude for tools. But the AR-15 Builders’ Guide provides a complete list of the tools you’ll need for the job, and Zedicker outlines all the procedures to build an AR-15 from start to finish.
One of our Forum members who purchased the AR-15 Builders Guide confirms it is a great resource: “Much like any of the books Mr. Zediker puts out this one is well thought-out and is a no nonsense approach to AR building. I can not stress how helpful this book is from beginner to expert level.”
Along with assembly methods, this book covers parts selection and preparation, not just hammers and pins. Creedmoor Sports explains: “Knowing how to get what you want, and be happy with the result, is truly the focus of this book. Doing it yourself gives you a huge advantage. The build will honestly have been done right, and you’ll know it! Little problems will have been fixed, function and performance enhancements will have been made, and the result is you’ll have a custom-grade rifle without paying custom-builder prices.” Other good resources for AR projects is Gunsmithing the AR: The Bench Manual, and the Building Your AR from Scratch DVD.
NRA Media offers a series of informative videos about the Science of Shooting, covering a wide range of topics, from eye dominance to long-range ballistics. These videos feature high production values, with super-slow motion segments, as well as helpful computer graphics to illustrate the principles covered.
The videos are narrated by Jessie Duff, a top action pistol shooter (and the first women ever to achieve USPSA Grand Master status). Jessie is assisted by talented shooters such as Top Shot Season 4 Champion Chris Cheng. There are over forty videos in the Firearm Science Video Series. Here are five NRA videos, with links to others below. You’ll find all NRA Firearm Science Videos HERE
BULLET TRAJECTORY — Factors at Play and Zeroing Strategies
Host Jessie Duff and Veteran Air Force Sniper and Long Range Expert George Reinas help us understand the factors behind bullet trajectory. NOTE: There are some exaggerations in the graphics in the videos, and inconsistent terminology use, but it’s still a helpful basic primer on the subject of trajectories.
Olympic Gold Medalist Jamie Gray demonstrates the four positions used by competition shooters: Prone, Standing, Sitting, and Kneeling. Helpful overlay graphics show how the human skeleton aligns in each of these positions. This video should help hunters as well as competitive position shooters. If you shoot silhouette, definitely watch this video!
ZEROING RIFLES for Long Range — Tech Tips
The process of zeroing rifles for long range is covered in this Firearm Science video featuring George Reinas, a veteran Air Force sniper. George demonstrates how to adjust his scope to compensate for bullet drop at long range. Our friend Dennis Santiago was involved in the making of this video, which was filmed at the Burbank Rifle & Revolver Club in Southern California.
CHRONOGRAPHS — Calculating the Speed of a Bullet
This video shows a conventional chronograph with front and rear light sensors. The bullet first trips the front sensor and then the rear sensor as it flies over the unit. The difference in sensor time is used to calculate bullet speed. This is not the only kind of chrono in common use today. The popular MagnetoSpeed chrono works by tracking the bullet as it passes over two magnetic sensors mounted on a bayonet-style fixture on the barrel.
The high-tech LabRadar chronograph employs Doppler Radar to measure the speed of a bullet without the need to send the round directly over sensors. No need to set up tripods down-range. Just set the unit near your rifle’s muzzle, on the side. There is also an inertial trigger accessory for LabRadars. Interestingly, this video also explains how, in the days before electric lamps, digital processors, and radar, scientists used a mechanical “Ballistic Pendulum” to calculate bullet velocity using Newtonian physics. The Ballistic Pendulum (shown at right) was first used in the mid 1700s.
EYE DOMINANCE — How to Determine Which Eye is Dominant
Host Jessie Duff and longtime shooter Krystie Messenger demonstrate how eye dominance affects aim and teach you how to determine your dominant eye in this edition of Firearm Science. There are very simple tests you can do to determine your eye dominance. This Editor is right-handed but left-eye dominant. All competitive shooters should check for eye dominance. If you are cross-dominant, you can alter your head position or put a paper patch on one frame of your shooting glasses.
Hoppe’s has added another new video to its “How to Clean” Series, which provides step-by-step cleaning instructions on some of today’s most popular firearms. The 15-part video series can be seen on YouTube, Hoppes.com, and Hoppe’s Facebook page. There will eventually be 15 videos in the series. Currently, there are 8 Hoppe’s How-to-Clean videos live on Youtube.
Developed to provide effective, yet easy-to-follow cleaning instructions for a variety of different firearms, the Hoppe’s video series is a very helpful resource for first time gun owners. The “How to Clean” series also serves as a valuable refresher course for any firearms enthusiast. In the videos, host Luke Williams (Outdoors By Luke), covers recommended cleaning procedures for numerous popular rifles, pistols and shotguns. Below we link four videos from the series: Remington 700, MSR-15, Mossberg 500, and Smith & Wesson M&P Shield.
How to Clean Remington 700 Rifle
IMPORTANT NOTE: Here at AccurateShooter.com, with our custom match rifles, we may use different methods than shown above. Our preferred cleaning procedures may employ both different tools and different cleaning solvents/supplies. For example we like to use Wipe-Out foaming bore cleaner with two applications while the barrel is still warm. With every new barrel, we recommend cleaning conservatively until you learn what works best for your particular barrel and shooting style. Long strings of rapid-fire shooting can create tough barrel-fouling issues that may not arise when shooting slow-fire and cleaning every 40-50 rounds. In addition, some powder types foul much worse than others.
How to Clean AR-Platform MSR-15 Rifle
How to Clean Mossberg 500 Shotgun
How to Clean Smith & Wesson M&P Shield Pistol
These Videos Are Particularly Useful for New Gun Owners
“As the industry welcomes more first time firearms owners than ever before, the need to provide helpful cleaning instructions has never been greater”, said Eliza Graves, Sr. Brand Manager for Hoppe’s. “Through our instructional video series, longtime and novice gun owners alike can easily find helpful tips that will keep their firearms running like new”.
What can happen when the bottom-most primer in a primer feed tube goes off? A big bang, that’s what. Some or all of the primers in the vertical feeding tube can go off in a chain detonation. That’s exactly what happened to Dustin Ellermann, Top Shot Season 3 Champion. Scary experience, but thankfully Dustin was not injured. He writes: “Super thankful that I was wearing my Wiley X eye protection this weekend when I was reloading some .223 rounds. My press detonated nearly 100 small rifle primers. Shown here is the magazine feed tube. Not fun but it could have been much worse. Stay safe!”
When working with progressive reloading presses, you should definitely wear eye protection. Dustin’s chain detonation experience proves that — without a doubt. Remember you only have one set of eyes!
RCBS APS Strips — Alternative to Primer Tubes When you stack a column of primers in a single metal tube, you’re asking for trouble. As Dustin Ellermann learned, when one primer fires, the entire column can follow suit in a chain detonation. Thankfully, you do have options when it comes to primer feeding on a progressive press. RCBS developed an innovative, smart system with primers in horizontal plastic strips. Instead of being stored in a vertical tube, primers are placed in flat, plastic “APS” strips, with a ring of plastic separating each primer. Moving horizontally, primers are never stacked, so the chance of a chain detonation is reduced dramatically. The re-usable APS strips are color-coded for different primer types. You can buy CCI “pre-loaded” primer strips, or you can insert any brand of primers into strips using an RCBS strip-loader tool.
RCBS APS Strip Priming System This video shows how to use APS primer strips wiht a bench-mounted priming system.
AccurateShooter.com Editor Uses Strip Primers
This Editor owns an RCBS Pro-2000 progressive press. The RCBS strip-priming system was one key reason I selected the RCBS Pro-2000 over similar-priced progressives from Dillon and Hornady. I believe the strip primer system is safer, more positive, and easier to use. Before I purchased my RCBS progressive, I “road-tested” the competition. I loaded hundreds of rounds on each of four different progressives: Dillon 550B, Dillon 650, Hornady Lock-N-Load, and RCBS 2000. I was concerned about the primer feed tubes on the Dillons, and I found the RCBS rotary powder measure was much more precise (and easier to adjust) than the sliding bar system on the Dillon machines. The RCBS priming system was definitely more fool-proof than the system on the Hornady press (a first-generation L-N-L that had issues with primer feeding). After “test-driving” blue, red, and green brand progressives extensively, I settled on the RCBS Pro-2000. A decade later, I still think I made the right choice. I like the APS strips for big jobs, and I can also use them in the RCBS hand-priming tool (shown below). With the strips, it’s easy to prime 20 or 40 cases at a time, and then switch to another type of primer for comparison testing.
The APS priming system also works with press-mounted priming tool, bench-mounted tool, and APS hand-tool. EdLongRange uses the press-mounted tool: “I also like the APS approach but use the press-mounted unit (saves your hands/wrists — and I haven’t had a need for a progressive press in over 20 years). Loading the primers in the strips is a bit of a PITA but very manageable. As with all tools there is a learning curve.” CLICK HERE for video showing strip-loading tool and press-mounted APS tool. The RCBS press-mounted tool is no longer in production by RCBS, but you can still find it in some stores or via eBay.
Gage Pin Die System Product Review by F-Class John
Consistent neck tension is often considered key to precision reloading. Neck tension (or interference as it’s more accurately known) helps ensure that the bullet is held with a known amount of pressure ensuring a consistent release each time. The more common expansion method employs expander mandrels. However, there is another lesser-known but very effective method — using GAGE PINS. This article reviews a unique Porter’s Precision Products Reloading Die designed to work with high-quality Gage Pins.
Gage Pins, long-time tool of machinists, are used to measure the size of a bored hole. They come in a variety of sizes and classes. In the reloading world, most people use ZZ Gage Pins that are sized .0005″ apart and are accurate to .0002″. The nice thing about Gage Pins is that you can order them in either a + or – size which means their accuracy errors on one side or the other so by ordering sets of + and – you can effectively make half-sizes. It’s this flexibility and great range of sizes that make Gage Pins so attractive.
For all the good that Gage Pins can do, until now there has not been a handy way to use them in a reloading press. Some folks tried using a bullet puller to hold the Gage Pin. But on many presses, this can be inconvenient because of long handles or unusual height requirements. As a result, I have mostly resorted to using conventional expander mandrels.
But now I have started using precision Gage Pins, thanks to a special new Gage Pin die system from Porter’s Precision Products in Texas. Not long ago I received a video from a friend showing someone using a custom die specifically made for holding Gage Pins. It turns out that Porter’s Precision Products out of Texas makes a custom Gage Pin Die product that consists of a die body, collet, and die cap. Porter’s Precision also sell a wide range of Gage Pins that have been nicely tapered to prevent damage to brass.
Using the Porter’s Precision Gauge Pin Die for Expanding Necks
Using the Porter’s Precision Gage Pin die is pretty straight forward with one caveat. The instructions are very clear that the collet must be inserted at an angle into the threaded cap to help ensure it tightens correctly otherwise damage to the collet may occur. Once you do this a couple times it becomes very simple and shouldn’t be a concern, especially since there’s rarely a ready to actually remove the collet unless you’re changing from one caliber range to another.
With the cap and collet now threaded onto the die body, choose the Gage Pin you want to use, insert it into the collet and tighten the cap down. Once the pin is where you want it, use a set of wrenches to firmly tighten the cap down and you’re ready to go. Thread the die in your press and simply adjust the height to ensure the Gage Pin is being inserted fully into the neck of your brass. You want to make sure the entire neck is being expanded without damaging the rim by pushing it to far up inside the die.
General Thoughts — Gage Pins vs. Expander Mandrels
The actual use of Gage Pins on case neck doesn’t vary from expander mandrels. They both accomplish the same goal and which tool you choose really comes down to personal preference. Where Gage Pins really shine is in their durability and the vast selection of sizes/diameters/tolerances. You can even find long-wearing, reduced friction carbide Gage Pins, but they do cost more.
For me, using the Porter’s Precision Die allowed smooth operation and Porter’s Gage Pins are really well-made. This makes expanding a dream even without any lube in the necks (although I still recommend lube when using a steel Gage Pin, as opposed to carbide). If you’ve been in the market for a way to help expand your necks with enhanced consistency, give Gage Pins a try using the Porter’s Precision Gage Pin Die.
June is National Firearms Safety Month. As part of that effort, the National Shooting Sports Foundation (NSSF) has prepared tips for gun owners transporting firearms in their vehicles. Project ChildSafe and NSSF are emphasizing gun safety as National Safety Month kicks off, and as the nationwide surge in firearm sales continues and includes millions of first-time buyers.
HERE Are Key Guidelines for Safe, Secure Handling of Firearms in Vehicles:
• Take note of and safely control the muzzle direction of firearms in vehicles. This is one of the main rules of gun safety and applies to the inside of vehicles as well as any other location.
• When finished using your firearm outside your vehicle, unload it before you re-enter your vehicle.
• Even after a long hunt or a day in the sun at the range, always check, and then double check, that guns are unloaded before placing them in a car or truck.
• Be very careful if you must unload a firearm in the confined space of a vehicle so as not to have an accidental discharge. If your location allows, it is safer and easier to unload the firearm outside the vehicle.
• Never leave firearms in parts of the vehicle accessible to children or pets.
• Keep firearms and ammunition out of sight to avoid tempting thieves.
• Use secure temporary storage for firearms in vehicles.
• A lockable gun case or a lock box may be the most practical choice to securely store a gun in a vehicle. These come in a range of prices and models.
• If you’re concerned about quick access to your firearm, many types of lockable safes allow for extremely fast access of your gun while at the same time helping to prevent unauthorized access.
• Secure the lock box to the vehicle, if possible. Some companies make custom concealed compartments for specific model vehicles.
Storing Firearms in Vehicles to Prevent Theft and Misuse
We travel with our firearms all the time, taking them to the range, on hunting trips or carrying them on our person, as permitted by law. As a result, there will be times when you might have to leave your firearm in your vehicle. This creates a situation that deserves careful consideration. The last thing you want is to have your gun stolen and potentially misused by a criminal. In some states, you could even be subject under the law to serious penalties and fines for failure to properly secure a firearm. Unfortunately, thefts of firearms from vehicles are on the rise. Thieves commonly steal cars and trucks even when they don’t obviously contain firearms — a reminder that vehicle door locks are not totally secure.
As a responsible gun owner concerned about your firearms falling into the wrong hands, it’s best to always remember this rule: Your firearm must be under your control at all times; when it’s not, it should be placed in locked storage and out of sight. Locking the doors on your vehicle does not constitute secure firearm storage. As one writer put it: “Cars and trucks aren’t safes. And they’re not holsters. They’re not storage containers.”
The glove compartment or console of your car or truck, even if lockable, should not be considered a secure storage device either, as it can be pried open too easily. If you need to leave your firearm in a vehicle, here are some important safety considerations to keep in mind to help prevent theft and unauthorized access.






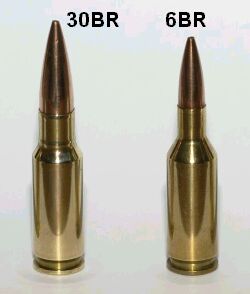 The 30 BR is an amazing little cartridge. However, 30 BR shooters do have to neck-up 6mmBR or 7mmBR brass and then deal with some issues that can arise from the expansion process. One of our Forum members was concerned about the donut that can form at the new (expanded) neck-shoulder junction. Respected bullet-maker Randy Robinett offers tips on how to deal with the “dreaded donut”.

 Many of our readers use AR-type rifles for Service Rifle matches, varmint hunting, 3-Gun competition, or defensive use. AR-platform rifles can be configured in a multitude of ways to suit the application. But if you plan to put together your own purpose-built AR rifle, how do you get started?
 This video shows a conventional chronograph with front and rear light sensors. The bullet first trips the front sensor and then the rear sensor as it flies over the unit. The difference in sensor time is used to calculate bullet speed. This is not the only kind of chrono in common use today. The popular

 When you stack a column of primers in a single metal tube, you’re asking for trouble. As Dustin Ellermann learned, when one primer fires, the entire column can follow suit in a chain detonation. Thankfully, you do have options when it comes to primer feeding on a progressive press. RCBS developed an innovative, smart system with primers in horizontal plastic strips. Instead of being stored in a vertical tube, primers are placed in flat, plastic “APS” strips, with a ring of plastic separating each primer. Moving horizontally, primers are never stacked, so the chance of a chain detonation is reduced dramatically. The re-usable APS strips are color-coded for different primer types. You can buy CCI “pre-loaded” primer strips, or you can insert any brand of primers into strips using an RCBS strip-loader tool.


