With schools closed for the summer and kids spending more time at home, firearms safety is more important than ever. Given that fact, the NSSF reminds gun owners to keep their guns locked up so they cannot be accessed by children. The National Shooting Sports Foundation (NSSF) and its partners urge gun owners to keep firearm safety a top priority and are making safety resources widely available as gun and ammunition sales increase, especially among first-time firearm purchasers.
For anyone considering buying a gun, Project ChildSafe’s Road To Responsible Firearm OwnershipMany Paths to Firearm Safety video series helps gun owners determine the best safe storage device for their home/lifestyle. You also view the Safe Storage Options chart.
NSSF encourages gun owners and non-gun owners to use the firearm safety resources available on its Project ChildSafe website. These include the McGruff Gun Safety videos for young children and this educational video explaining how to discuss gun safety with children:
“More parents are assuming the role of educators in their homes, so it’s a good to time have a talk with your kids about gun safety, even if you don’t own a gun”, states Joe Bartozzi, NSSF President and CEO. “If you do own a firearm, be sure your family understands the safety rules regarding firearms in your home, and always store guns responsibly when not in use.”
SSG Greg Markowski of the USAMU at Camp Perry, Ohio.*
The U.S. Army Marksmanship Unit (USAMU) fields pistol teams as well as rifle and shotgun competition squads. Consequently the USAMU’s Reloading Shop loads tens of thousands of pistol rounds every year. In this article, the USAMU’s handgun experts talk about reloading for handguns — with smart tips on how to achieve superior accuracy with 100% reliability. This article, which offers important insights on COAL, primers, crimps and more.
This video shows .45 ACP centerfire pistol competitors at Camp Perry
Precision Pistol Reloading — Recommended Methods
Optimize the Taper Crimp
One often-overlooked aspect of handloading highly-accurate pistol ammunition is the amount of crimp and its effect on accuracy. Different amounts of taper crimp are used with various handloads to obtain best accuracy. The amount is based on bullet weight, powder burn rate and charge, plus other factors. It is not unusual for our Shop to vary a load’s crimp in degrees of 0.001″ and re-test for finest accuracy.
Use Consistent Brass
Brass is also important to pistol accuracy. While accurate ammunition can be loaded using brass of mixed parentage, that is not conducive to finest results, particularly at 50 yards. It is important for the serious competitor/handloader to use brass of the same headstamp and ideally one lot number, to maximize uniformity. Given the volumes of ammunition consumed by active pistol competitors, using inexpensive, mixed surplus brass for practice, particularly at the “short line” (25 yards), is understandable. However [at 50 yards], purchasing and segregating a lot of high-quality brass to be used strictly for slow-fire is a wise idea.
Importance of Uniform COAL
Uniformity of the Case Overall Length (COAL) as it comes from the factory is also important to achieving utmost accuracy. More uniform case lengths (best measured after sizing) contribute to greater consistency of crimp, neck tension, ignition/burn of powder charge, and so on. Cartridge case-length consistency varies from lot to lot, as well as by maker. Some manufacturers are more consistent in this dimension than others. [Editor’s note: It is easy to trim pistol brass to uniform length. Doing this will make your taper crimps much more consistent.]
Primers and Powders — Comparison Test for Accuracy
Pay attention to primer brands, powder types and charges. Evaluating accuracy with a Ransom or other machine rest at 50 yards can quickly reveal the effect of changes made to handload recipes.
Bullet Selection — FMJ vs. JHP
Bullets are another vital issue. First, there is the question of FMJ vs. JHP. A friend of this writer spent decades making and accuracy-testing rifle and pistol bullets during QC for a major bullet manufacturer. In his experience, making highly-accurate FMJ bullets is much more difficult than making highly-accurate JHPs, in large part due to the way the jackets are formed. Small die changes could affect accuracy of FMJ lots dramatically. The CMP now allows “safe, jacketed ammunition” in Excellence-in-Competition (EIC) Service Pistol matches, although wadcutter ammunition is prohibited. Thus, the option to use very accurate JHP designs simplifies the life of CMP Service Pistol shooters in pursuit of the prestigious Distinguished Pistol Shot badge.
This animation showing 1911 Pistol operation has over 31 million YouTube views:
Hopefully, these tips will be helpful to any pistol shooters interested in accurate handloads, not just “Bullseye” shooters. Small tweaks to one’s normal routine can pay big dividends in improved accuracy and make practice and competition more rewarding. Stay safe, and good shooting!
TOP IMAGE: SSG Greg Markowski, a shooter/instructor with the USAMU, fires his pistol during the 2018 Civilian Marksmanship Program’s National Pistol Matches at Camp Perry, Ohio. At that event, Markowski claimed the General Mellon Trophy, General Patton Trophy and the General Custer Trophy. U.S. Army photo by Maj. Michelle Lunato/released by Defense Visual Information Distribution Service.
Today’s Movie Showcase features video reviews of the new Athlon Rangecraft radar chrono that offers exceptional performance for the price. At $399.99 MSRP, the new-for-2025 Athlon Rangecraft Velocity Pro Chronograph is about $200 cheaper than the popular Garmin Xero C1 Pro Chrono, which costs $599.99. So far, most tests show that this compact Athlon Chrono works very well and its Doppler Radar system is accurate. Velocities may be a few FPS faster that with a Garmin, but the ES/SD values are very close. If you are in the market for a new chronograph, definitely watch these videos. And take note — right now, for the Independence Day weekend, Brownells is offering a 15% off discount that can reduce the price of a new Athlon Chrono to $339.99 (use Code USA15 at checkout). NOTE — this deal may expire very soon!
Ultimate Reloader Test of Athlon Rangecraft Chronograph
Athlon’s NEW Rangecraft Velocity PRO Doppler Radar Chronograph is impressive, and it is a genuine rival to the popular Garmin. In this video Gavin Gear of UltimateReloader.com walks through the features and specs, and the hardware. Then the video covers the testing process and shows the workflow with this high-value, compact chrono.
Athlon Rangecraft Velocity Pro Chronograph, $399.99
The new Athlon Rangecraft Velocity Pro Radar Chronograph is an impressive and very affordable compact chrono, selling for $399.99 at most vendors. This employs Doppler radar allowing ultra-accurate velocity readings. Since the unit isn’t triggered by a muzzle blast, it can work with suppressors, muzzle brakes, and other muzzle devices. The Rangecraft Vel Pro reads velocities between 65 FPS and 5000 FPS. So far field tests have shown that the Athlon Rangecraft chrono is reliable and picks up all shots fired with all types of rifles and pistols (even airguns). However the listed velocities may be a few FPS different than a Magnetospeed or Labradar. Athlon also has a good Ballistics Lite App that works with this chrono — see video at 21:45 time-mark. The unit includes a compact tripod.
Athlon Rangecraft vs. Garmin Xero C1 — Chrono Comparison Test
Here are two short videos that show side-by-side comparison tests of the new Athlon Chrono with its main comparison, the Garmin. These vertical-format videos are easy to watch with your cell phone. The tester found the Athlon “had a faster calculation and refresh rate” than the Garmin. The Athlon also has “slightly larger display screen” and a two additional buttons for somewhat “easier ergonomics”. In this test the Athlon velocity readings were about 4 FPS faster than the Garmin.
Comparison Test: Athlon vs. Garmin vs. Magnetospeed
This 27-minute review by Full Circle Reloading starts with unboxing and set-up of the new Athlon Chrono. Then the video compares the features of the Athlon Rangecraft Chrono with the Garmin Xero C1 Pro chrono. Then, using a rifle fitted with a Magnetospeed barrel-mounted chrono, the host compares results from all three chronographs: Athlon, Garmin, and Magnetospeed. The results are very interesting. This is a “must-watch” video if you are considering upgrading from a Magnetospeed to a radar chronograph.
Field Test with 6mm ARC Rifle and 5.56 PSA Jackl and 9mm Pistol
This field test features two AR-type firearms (6mm ARC long barrel and 5.56 NATO 10.5″ barrel PSA Jakl) and a 9mm Springfield Echelon pistol. The tester says the fact that the Athlon is $200 less than the Garmin is “fantastic”. His Athlon Rangecraft Velocity Pro Doppler Radar unit performed very well with all the guns tested, delivering reliable velocity read-outs “without the fuss of barrel attachments or bulky setups”.
Athlon Chrono Integration with Athlon Ballistics Lite App
This 12.5-minute video shows how the Athlon Ballistics Lite App works with the new Athlon Rangemaster Chrono. The App “talks” to the unit via Bluetooth and so can then record the details of each shot including speed, deviation from average, Extreme Spread (ES), Standard Deviation (SD), and kinetic energy (after you’ve entered bullet weight). This information can be scrolled shot-by-shot as well as viewed in tables. You can create separate record for different firearms and different bullet types.
Brownells Athlon Chrono Feature and 15% Off Discount Code
As part of its July 4th weekend promotion, Brownells is offering 15% Off orders of $200 or more. To get this 15% discount, use Promo Code USA15 during checkout. And yes you can get a 15% discount on the popular new Athlon Rangecraft Radar Chronograph, with a $339.99 price after 15% discount. NOTE: This 15% discount may expire very soon.
Today, July 4th, we are celebrating a special birthday — the launching of a new nation that would become the world’s greatest exemplar of freedom and democracy. In our modern world, it is easy to lose sight of the challenges that faced our fore-fathers, and the continuing burdens we all share, as Americans, to maintain the struggle for freedom, both at home and abroad. It is more important than ever that we remember the ideals on which the nation was founded, and remember that our nation became great through the efforts and talents of a free citizenry, not through an all-powerful central government.
In the Beginning — Overcoming Great Odds
In a July 4th speech, Navy Lt. Ellen Connors wrote: “Our nation declared its independence in order for our families to live free –- not just for one generation but for future generations. And what odds [the founding fathers] faced. It must have seemed impossible. Our forefathers went up against the world’s most colossal empire since ancient Rome. No colony had ever successfully left a mother country to set up a self-governing state.”
The Price of Freedom… The Pride of A Nation
Here is a selection from Daniel Webster’s July 4th, 1851 Oration. His words ring true even now:
On the 4th of July, 1776, the assembled Representatives of the United States of America in Congress declared that these United Colonies are, and of right ought to be, FREE and INDEPENDENT States. This Declaration, made by most patriotic and resolute men, trusting in the justice of their cause and the protection of Heaven, and yet made not without deep solicitude and anxiety, has now stood for seventy-five years, and still stands. It was sealed in blood. It has met dangers, and overcome them; it has had enemies, and conquered them; it has had detractors, and abashed them all….
Every mans’ heart swells within him… as he remembers that seventy-five years have rolled away, and that the great inheritance of liberty is still his — his, undiminished and unimpaired, his in all its original glory; his to enjoy; his to protect; and his to transmit to future generations.
For many years, the Swarovski Optik website featured a blog with interesting technical articles. (Unfortunately some of these articles have been taken offline.) In the “On Target” series of blog stories, Swarovski provided a handy explanation of how optics systems work, with exploded diagrams of rifle scopes, spotting scopes, and binoculars. We’ve reproduced the key diagrams here. CLICK HERE for Swarovski On Target Archive.
Scope Terminology
Focusing Lens
The focusing lens is an adjustable lens inside the optical system for focusing the image at different distances…. In the case of rifle scopes, apart from focusing, the focusing lens also facilitates parallax compensation.
Objective Lens
The objective lens is the optical system’s front lens group facing the object and operates like a converging lens. Its purpose is to display an image which, at the image plane, appears upside down, laterally transposed and reduced, and which is subsequently displayed correctly again by the reversal system.
Diopter Adjustment
For rifle scopes, the reticle can be focused using the diopter adjustment on the eyepiece, thereby correcting any visual impairment. [Editor’s Note: Movable eyepiece diopter adjustment is not offered on all rifle scopes. It is a useful feature on Swarovski and other premium scopes. This allows shooters who need eyeglasses to get a sharply focus image even without wearing corrective lenses. Of course shooters should always wear ANSI-certified eye protection. With the diopter, folks who need correction can use inexpensive, non-Rx safety eyewear instead of expensive prescription safety glasses.]
Reversal System
The purpose of the reversal system is to reverse the image by means of prisms in binoculars and telescopes, and lenses in rifle scopes….The lens reversal system is needed in rifle scopes to control the variable magnification and move the exit pupil[.]
Resource tip by ELR Researcher. We welcome reader submissions.
We have all been there — you place a piece of tumbled brass in the shell-holder of your press, raise it into the die, and suddenly it is like somebody hit the brakes. The case is stuck in the die. Your first instinct is to reverse it out. You crank on the handle, and BANG! The rim rips off the case head and you are looking at a piece of brass stuck in the die.
A stuck case is one of the boo-boos that all of us reloaders have faced from time to time. If proper lubrication is applied, then it should not be a problem. No matter if you are a seasoned reloader or new to it, this situation can happen. Take your time, use the proper procedures, and you will be back in business in no time! This article explains how to avoid stuck cases (through proper lubrication) and how to use a stuck case removal system.
What Causes Stuck Cases
One of the first common mistakes reloaders face is the stuck case. It can be caused by too much or too little lube. Too much and a vacuum can be formed causing the case to become suctioned into the die. Too little lube and friction is the culprit. So what is the cure? There is no exact cure, but the best lube that we have found so far is just a dab of Imperial Sizing Die Wax on your fingers and applied in a thin coat on the body of the case, not the shoulder or neck. Too much of this wax can cause the vacuum effect, or can eventually load your die up with gobs of residue. If it is applied to the shoulder area, or the leftover wax moves up into the shoulder region of the die, you will see dents or dimples in the shoulder. [AccurateShooter.com Editor’s Note: For normal full-length sizing of small cases such as 220 Russian/PPC, 6mmBR, 6.5 Grendel, or 6.5×47 Lapua we recommend Ballistol (aerosol) lube. It is very slippery, goes on very thin, and does not gum up the die.]
A great way to ensure that your dies are clean is to use a simple chamber mop with a dab of your favorite solvent on it and clean out the die. Be sure all of the solvent is out after cleaning by spraying the die out with Quickscrub III or use a clean chamber mop. If you are storing your dies, you can apply a thin coat of a good oil to protect the steel such as TM oil or Starrett M1 Spray.
This video shows how to use an RCBS Stuck Case Removal Kit:
Using a Stuck Case Removal Kit
If you do stick a case in your die there are a few good stuck case removal kits available. Each one works in a similar fashion. I have found the Hornady kit very effective and easy to use. [Editor: Forster, Lyman, and RCBS also make good kits for removing a case stuck in a die.]
Basically what you do is remove the die from the press. Unscrew the decapping assembly and pull it out as far as you can. You then need to drill/tap threads into the stuck case head (this is why it is suggested to unscrew the decapping assembly as far as you can to get it clear of the drill bits). Once this is done screw the die back into the press. You then install the included shellholder attachment on the shellholder ram, and thread it into the case via a small wrench. With some elbow grease you can reverse the stuck case out of the die with the leverage of the press, and not damage the die.
However if the case is stuck… REALLY stuck, you may pull out the threads on the case and you are still left with a stuck case in the die without any way to pull it out. If the case is really difficult to remove even with the use of a stuck case removal kit, do not try to be Hercules with the press ram. Here is a trick that may work. Take the die with the stuck case and place it in your freezer for a couple of hours. Then repeat the removal with the cold die. The freezing temperatures may cause the brass to contract, and make removal easier. If this does not work it is recommended to send it to the die manufacturer. They will be able to remove the case without damaging the die.
Another fix if you can remove the decapping assembly completely is to use a tap hammer and a punch or small wooden dowel to knock the stuck case out. This isn’t the best way since it is very possible that you will damage the die internally or externally on the threads, or both. Send the die to the manufacturer to have this done properly. You will be happier in the long run.
This article appears courtesy Sinclair International. It first appeared in Sinclair’s Reloading Press Blog.
Most competitive shooters are pretty good about bore cleaning (some may even clean their bores too aggressively). However, we’ve found that many shooters neglect the chamber area and the bolt lug recesses. It’s too easy to clean the bore, slip out the guide rod and say “I’m done.” Sinclair Int’l explains why it’s important to clean the action interior: “Shooters use a lot of grease and oil on their bolts to reduce friction and to prevent wear[.] Unfortunately, both of these compounds attract grit, powder and primer residues. Cleaning your receiver is especially critical [with] custom actions where the fit between the action and bolt is held to very tight tolerances. Routine cleaning of the action will prevent unnecessary wear on the bolt body, locking lugs, and the action raceways/guide rails. Frequent action cleaning is also essential to keeping the trigger area free of debris which can cause trigger hang-ups and failures.”
Your rifle deserves a clean action and lug recesses. For action cleaning, our friend Danny Reever favors the PMA Action Cleaning Tool. This handy tool speeds up the cleaning process, letting you do a better job in less time. Danny reports: “I’ve been using the PMA Action Cleaning Tool Kit ($79.95) for quite some time. Previously, I used one of the old style (round knob) action-cleaning tools with cylindrical cotton rolls. I think the PMA Action Cleaning Tool Kit is easier to use, and possibly achieves better results. CLICK HERE to Read Full Tool Review.
Cleaning the Chamber
Combustion by-products, lubricants, and solvent residues can collect in your chamber. Severe build-up of grease and carbon can interfere with chambering. Also some solvents will promote corrosion. You need to keep your chambers clean.
1) Install a clean cotton mop of the correct size on the end of a chamber rod and insert the mop into the chamber. Rotate the mop several times to remove any brush bristles left behind and any excess solvent that was between the rod guide snout and the end of the chamber. Make sure the chamber is dry. Prior to storing a rifle you can oil the chamber but make sure the oil is removed prior to firing the rifle.
2) Alternatively, install an old bore brush on a chamber rod, overlap a couple of patches on the brush bristles, and wrap them around the brush completely. Then insert the patch-covered brush into the chamber while rotating it to remove the excess solvent and debris. Push it firmly into the neck area of the chamber. A similar method is to pierce a large patch on the end of the brush loop and insert it into the action, again rotating the brush as you push the patch up against the breech.
Cleaning the Lug Recess Area
The action lug recess area is one of the dirtiest places on a bolt-action rifle. To properly clean this area, always use a tool designed for the task, such as the $24.99 Sinclair Action Cleaning Tool (Brownells #749003115) which is part of the full Sinclair Action Cleaning Tool Kit ($48.99 at Brownells, #749004651).
1) Insert a cotton roll or cleaning felt into your lug recess cleaning tool and wet both ends and the face of the cotton roll/felt with solvent.
2) Insert the tool into the action and push it forward until it is positioned fully in the lug recess area and rotate the tool head several times. Then reverse the rotation for another few turns. While rotating the tool move it slightly in and out to cover the entire recess area and to also clean the breech face.
3) Remove the tool from the action and inspect the surface of the felt or cotton roll. If there is quite a bit of residue on both sides of the felt/roll, then repeat with another wet felt/roll.
4) When you feel the recess area is completely clean, insert a dry cotton roll into the tool and rotate the tool head to remove any remaining solvent and debris. If necessary, use a second dry cotton roll.
5) You can follow this step up with another pass of a mop or patches into the chamber to get any debris or solvent that pushed forward out of the lug recess area.
We are often asked “Can I get more velocity by switching primer types?” The answer is “maybe”. The important thing to know is that changing primer types can alter your load’s performance in many ways — velocity average, velocity variance (ES/SD), accuracy, and pressure. Because there are so many variables involved you can’t really predict whether one primer type is going to be better or worse than another. This will depend on your cartridge, your powder, your barrel, and even the mechanics of your firing pin system.
BE SAFE: Be cautious when changing primer types. Glen Zediker recommended decreasing your load ONE FULL GRAIN when changing to a different primer type, one that you haven’t used before.
Interestingly, however, a shooter on another forum did a test with his .308 Win semi-auto. Using Hodgdon Varget powder and Sierra 155gr MatchKing bullets, he found that Wolf Large Rifle primers gave slightly higher velocities than did CCI-BR2s. Interestingly, the amount of extra speed (provided by the Wolfs) increased as charge weight went up, though the middle value had the largest speed variance. The shooter observed: “The Wolf primers seemed to be obviously hotter and they had about the same or possibly better ES average.” See table:
Varget .308 load
45.5 grains
46.0 grains
46.5 grains
CCI BR2 Primers
2751 fps
2761 fps
2783 fps
Wolf LR Primers
2757 fps
2780 fps
2798 fps
Speed Delta
6 fps
19 fps
15 fps
You can’t extrapolate too much from the table above. This describes just one gun, one powder, and one bullet. Your Mileage May Vary (YMMV) as they say. However, this illustration does show that by substituting one component you may see significant changes. Provided it can be repeated in multiple chrono runs, an increase of 19 fps (with the 46.0 grain powder load) is meaningful. An extra 20 fps or so may yield a more optimal accuracy node or “sweet spot” that produces better groups. (Though faster is certainly NOT always better for accuracy — you have to test to find out.)
WARNING: When switching primers, you should exercise caution. More speed may be attractive, but you have to consider that the “speedier” primer choice may also produce more pressure. Therefore, you must carefully monitor pressure signs whenever changing ANY component in a load. In his books, the late Glen Zediker recommended decreasing your load ONE FULL GRAIN when changing to a different primer type, one that you haven’t used before.
We talked with the experts at Bartlein Barrels. They confirmed that they have seen many, many more barrels harmed by crown damage caused by improper cleaning than by anything else. If you use a bronze brush, Bartlein recommends that you REMOVE the BRUSH after it passes through the muzzle. This is because the bristles take a set (pointing to the breech) during the out-stroke. In other words the bristles angle back as you push towards the muzzle from the breech. If you drag the brush backwards at the muzzle, you force these bristles to reverse direction abruptly right as they cross the delicate crown. In time, that can damage the crown. NOTE: John Krieger of Krieger Barrels also advises his customers not to pull a bronze brush backwards across the crown.
Response to Skeptics
Whenever we’ve published similar advice, given by guys who are producing some of the most accurate barrels in the world, some readers get extremely angry. They say, “You’re crazy! I’ve was pullin’ triggers when you were still in diapers. I’ve got Hall of Fame points and I say there’s no way a phosphor bronze brush can ever do anything to steel. You’re full of it.” Well, these guys are entitled to their opinion. But here’s our response. Number one, we’re just telling you what the barrel-makers are telling US. Don’t kill the messenger. Number two, many of the guys who say bronze brushes can’t affect the crown are the same guys who feel they need to recrown their barrels every 400-500 rounds (Do we see a connection?). Third, if you don’t think a softer material can affect steel, look at the steel ferrules of a well-used fishing rod — there the steel is worn away by plastic. (With time, water will wear away granite.) Lastly, this Editor can tell you I’ve seen the damage myself, first-hand, using a magnifying glass on much-brushed benchrest barrels. Right at the muzzle, the top edge of the lands had sharp, jagged edges that looked like little shark’s teeth, or the edge of a serrated knife. By contrast, a new barrel will have a nice, smooth straight edge along the top of the lands at the muzzle.
Also Be Careful with Jags
Bartlein’s experts also told us to be careful about the jags you use. Dewey-style jags in particular can cause problems. These have a long shaft with multiple rings with diamond-pattern “teeth”. The teeth are designed to grip a patch. The problem is that the lower rings may be exposed below the patch fabric, so the teeth can grind directly on the rifling and/or crown. Bartlein says Dewey-style metal jags can damage a crown very quickly if any of the toothed rings are exposed, metal-on-metal. Tim North of Broughton barrels also advises against using the Dewey-style jags with toothed rings. Interestingly, Dewey uses the same type of diamond-shaped teeth on the bottom of its “Crocogator” primer pocket tool, so you know those knurled teeth can scrape.
Today, June 20, 2024 is Summer Solstice, the longest day of the year. And right now the Northeast USA is undergoing a major heatwave. That means “peak heat” summer conditions have arrived already. It’s vitally important to keep your ammo at “normal” temps during the hot summer months. Even if you use “temp-insensitive” powders, studies suggest that pressures can still rise dramatically when the entire cartridge gets hot, possibly because of primer heating.
It’s smart to keep your loaded ammo in an insulated storage unit, possibly with a Blue Ice Cool Pak if you expect it to get quite hot. Don’t leave your ammo in the car or truck — temps can exceed 140° in a vehicle parked in the sun.
The way ambient temperatures, barrel heating, and powder warming can affect cartridge pressures (and hence velocities) was covered in a study Pressure Factors: How Temperature, Powder, and Primer Affect Pressure by Denton Bramwell. In that article, the author used a pressure trace instrument to analyze how temperature affects ammo performance. Bramwell’s tests yielded some fascinating results.
For example, barrel temperature was a key factor: “Both barrel temperature and powder temperature are important variables, and they are not the same variable. If you fail to take barrel temperature into account while doing pressure testing, your test results will be very significantly affected. The effect of barrel temperature is around 204 PSI per F° for the Varget load. If you’re not controlling barrel temperature, you about as well might not bother controlling powder temperature, either. In the cases investigated, barrel temperature is a much stronger variable than powder temperature.”
This Editor had the personal experience of 6mmBR hand-loaded ammo that was allowed to sit in the hot sun for 45 minutes while steel targets were reset. The brass became quite warm to the touch, meaning the casings were well over 120° on the outside. When I then shot this ammo, the bullets impacted well high at 600 yards (compared to earlier in the day). Using a Magnetospeed, I then chron-tested the sun-heated ammo. The hot ammo’s velocity FPS had increased very significantly — all because I had left the ammo out in the hot sun uncovered for 3/4 of an hour.
LESSON: Keep your ammo cool! Keep loaded ammo in the shade, preferably under cover or in an insulated container. You can use a SEALED cool pack inside the container, but we do NOT recommend H20 ice packs. And don’t have the container do double duty for food and beverages.
Powder Heat Sensitivity Comparison Test
Our friend Cal Zant of the Precision Rifle Blog has published a fascinating comparison test of four powders: Hodgdon H4350, Hodgdon Varget, IMR 4451, and IMR 4166. The first two are Hodgdon Extreme powders, while the latter two are part of IMR’s Enduron line of propellants.
The testers measured the velocity of the powders over a wide temperature range, from 25° F to 140° F. Hodgdon H4350 proved to be the most temp stable of the four powders tested. [NOTE: New Alliant Reloder TS 15.5 has also proved very temp stable in AccurateShooter’s range tests.]


 Use Consistent Brass
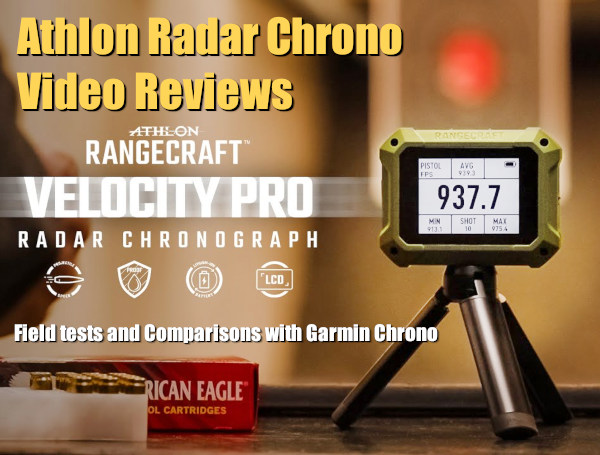


 A stuck case is one of the boo-boos that all of us reloaders have faced from time to time. If proper lubrication is applied, then it should not be a problem. No matter if you are a seasoned reloader or new to it, this situation can happen. Take your time, use the proper procedures, and you will be back in business in no time! This article explains how to avoid stuck cases (through proper lubrication) and how to use a stuck case removal system.


 The way ambient temperatures, barrel heating, and powder warming can affect cartridge pressures (and hence velocities) was covered in a study Pressure Factors: How Temperature, Powder, and Primer Affect Pressure by Denton Bramwell. In that article, the author used a pressure trace instrument to analyze how temperature affects ammo performance. Bramwell’s tests yielded some fascinating results.