One of our Forum members complained that he wasn’t able to set his primers flush to the rim. He tried a variety of primer tools, yet no matter what he used, the primers still didn’t seat deep enough. He measured his primers, and they were the right thickness, but it seemed like his primer pockets just weren’t deep enough. He was mystified as to the cause of the problem.
Well, our friend Boyd Allen diagnosed the problem. It was the decapping rod. If the rod is adjusted too low (screwed in too far), the base of the full-diameter rod shaft (just above the pin) will contact the inside of the case. That shaft is steel whereas your case is brass, a softer, weaker metal. So, when you run the case up into the die, the shaft can actually stretch the base of the primer pocket outward. Most presses have enough leverage to do this. If you bell the base of the primer pocket outwards, you’ve essentially ruined your case, and there is no way a primer can seat correctly.
The fix is simple. Just make sure to adjust the decapping rod so that the base of the rod shaft does NOT bottom out on the inside of the case. The pin only needs to extend through the flash hole far enough to knock the primer out. The photo shows a Lyman Universal decapping die. But the same thing can happen with any die that has a decapping rod, such as bushing neck-sizing dies, and full-length sizing dies.
Whenever you use a die with a decapping pin for the first time, OR when you move the die to a different press, make sure to check the decapping rod length. And it’s a good idea, with full-length sizing dies, to always re-check the height setting when changing presses.
There are a variety of decapping dies currently on the market, with models available from LEE, Lyman, Hornady, RCBS, Redding, and Sinclair Int’l.
LEE Universal Decapping Die Costs Just $11.49
Speaking of decapping tools, Midsouth Shooters Supply sells the LEE Universal Decapping Die for just $11.49 (item 006-90292), a very good deal. There are many situations when you may want to remove primers from fired brass as a separate operation (prior to case sizing). For example, if your rifle brass is dirty, you may want to de-cap before sizing. Or, if you load on a progressive press, things will run much more smoothly if you decap you brass first, in a separate operation.
Decapping Dies for Cases with Smaller Flashholes
TAKE NOTE: Some Euro Small Flash Holes are spec’d at 1.5mm or 0.059″, and max out at about .062″, so these need a smaller die pin.
The low-cost LEE Universal Decapping Die will work with cartridges from 17 Fireball all the way up to big Magnums. However, NOTE that the decapping pin supplied with this Lee die is TOO LARGE for LAPUA 220 Russian, 6mmBR, 6.5×47, 6.5 Creedmoor, .308 Win (Palma) and Norma 6 PPC flash holes. Because the pin diameter is too large for these brass types, you must either turn down the pin, or decap with a different tool for cases with .059-.062″ flash-holes.
Sinclair Int’l offers a Stainless Decapping Die that comes with BOTH .080 and .060 Pins. The $46.99 die ships with three decapping pins for standard .080″ flash holes, and two pins for .060″ flash holes.
Redding makes a Universal Decapping Die with an optional smaller-diameter decapping rod for the smaller .059-.062″ flash holes found on the BR and PPC cases. The use of this die is explained in the video below:
If you don’t match your ammo to your chamber, bad things can happen, that’s for sure. A while back, Forum member BigBlack had an experience at the gun range that reminds us of the importance of safety when shooting. He encountered evidence that someone had fired the wrong cartridge in a 7mm WSM rifle. The problem is more common than you may think. This Editor has personally seen novices try to shoot 9mm ammo in 40 S&W pistols. BigBlack’s story is along those lines, though the results were much more dramatic. It’s too bad a knowledgeable shooter was not nearby to “intervene” before this fellow chambered the wrong ammo.
7mm-08 is Not the Same as a 7mm WSM
BigBlack writes: “I know this has probably been replayed a thousand times but I feel we can never be reminded enough about safety. This weekend at the range I found a ruptured case on the ground. My immediate thoughts were that it was a hot load, but the neck area was begging for me to take a closer look, so I did. I took home the exploded case and rummaged through my old cases until I found a close match. From my investigative work it appears someone shot a 7mm-08 in a 7mm WSM. Take a look. In the above photo I’ve put together a 7mm WSM case (top), the ruptured case (middle), and a 7mm-08 case (bottom).”
The photo reveals what probably happened to the 7mm-08 case. The shoulder moved forward to match the 7mm WSM profile. The sidewalls of the case expanded outward in the much larger 7mm WSM chamber until they lacked the strength to contain the charge, and then the case sides ruptured catastrophically. A blow-out of this kind can be very dangerous, as the expanding gasses may not be completely contained within the action.
Can’t Happen to You? Think Again.
This kind of mistake — chambering the wrong cartridge — can happen to any shooter who is distracted, who places even a single wrong round in an ammo box, or who has two types of ammo on the bench. One of our Forum members was testing two different rifles recently and he picked up the wrong cartridge from the bench. As a result, he fired a .30-06 round in a .300 Win Mag chamber, and the case blew out. Here is his story:
“I took two of my hunting rifles I have not used for over 25 years to the range yesterday to get new scopes on paper, a .30-06 and .300 Win Mag. I had four boxes of old Winchester factory ammo (two of each cartridge), which had near identical appearances. I accidentally chambered a .30-06 round in the Sako .300 Win Mag rifle. It sprayed powder on my face and cracked the stock at the pistol grip. If I had not been wearing safety glasses I might be blind right now.
You should always wear protective eyewear, EVERY time you shoot.
“I feel lucky and am very thankful for being OK — other than my face looks funny right now. I am also grateful for learning a valuable lesson. I will never put two different cartridges on the bench at the same time again.”
“The overturning moment MW tends to rotate the bullet about an axis, which goes through the CG (center of gravity) and which is perpendicular to the plane of drag….
Ruprecht Nennstiel, a forensic ballistics expert from Wiesbaden, Germany, has authored a great resource about bullet behavior in flight. Nennstiel’s comprehensive article, How Do Bullets Fly, explains all the forces which affect bullet flight including gravity, wind, gyroscopic effects, aerodynamic drag, and lift. Nennstiel even explains the rather arcane Magnus Force and Coriolis Effect which come into play at long ranges. Nennstiel’s remarkable resource contains many useful illustrations plus new experimental observations of bullets fired from small arms, both at short and at long ranges.
Shadowgraph of .308 Winchester Bullet
A convenient index is provided so you can study each particular force in sequence. Writing with clear, precise prose, Nennstiel explains each key factor that affects external ballistics. For starters, we all know that bullets spin when launched from a rifled barrel. But Nennstiel explains in greater detail how this spinning creates gyroscopic stability:
“The overturning moment MW tends to rotate the bullet about an axis, which goes through the CG (center of gravity) and which is perpendicular to the plane of drag, the plane, formed by the velocity vector ‘v’ and the longitudinal axis of the bullet. In the absence of spin, the yaw angle ‘δ’ would grow and the bullet would tumble.
If the bullet has sufficient spin, saying if it rotates fast enough about its axis of form, the gyroscopic effect takes place: the bullet’s longitudinal axis moves into the direction of the overturning moment, perpendicular to the plane of drag. This axis shift however alters the plane of drag, which then rotates about the velocity vector. This movement is called precession or slow mode oscillation.”
Raise Your Ballistic IQ
Though comprehensible to the average reader with some grounding in basic physics, Nennstiel’s work is really the equivalent of a Ph.D thesis in external ballistics. You could easily spend hours reading (and re-reading) all the primary material as well as the detailed FAQ section. But we think it’s worth plowing into How Do Bullets Fly from start to finish. We suggest you bookmark the page for future reference. You can also download the complete article for future reference and offline reading.
Due to statutory requirements set forth in both the NICS Denial Notification Act and the Bipartisan Safer Community Act (BSCA), the ATF Form 4473 was revised in December of 2022. Incorporating industry member suggestions made during the recent 60 and 30-day Notice and Comment periods, ATF has further revised the form and now that newest version (August 2023) has been approved by the Office of Management and Budget for implementation. The new form becomes mandatory on 2/1/2024, but the ATF recommends using the updated Forum 4473 now.
The ATF encourages all federal firearms licensees (FFLs) to begin using the Revised Form immediately. The Revised Form is available on the ATF website, and can be downloaded and printed for immediate use. Note that the entire Form, including instructions, must be printed, and stored together. Hard copies of the Revised Form will be available through the ATF Distribution Center beginning November 1, 2023. The ATF eForm 4473 application is also being revised and notification will be sent when it is ready for use.
The Revised Form will become mandatory for use on February 1, 2024. Please contact your local ATF Industry Operations office should you have any questions regarding the changes to the form.
KEY FEATURES: Ballistics Solver, GPS Tagging, Weather Forecast, Field Notes with Photos
Hunters, here’s a great FREE mobile APP for both Apple and Android systems. The ZEISS Hunting App offers many practical functions: full-featured ballistics calculator, field notes with photo archive, compass function, GPS tagging for documentation of hunting experiences, and a detailed weather forecast service. The Hunting App is offered as a FREE download for Android and iOS (iPhone/iPad) mobile devices.
Three Minute Video Explains Zeiss Hunting App Features:
The Zeiss Hunting App integrates multiple useful features — ballistics solver, compass, GPS tagging, hunt history. The “Field Notes” function can record a wide variety of info — you can save photos, record your shots and hits, log animal sightings during the hunt, and even plot game locations on a map. Zeiss explains: “This allows users to optimally record events, the game population in the hunting territory, and their own hunting experiences.” Shots can be tagged via GPS through the shooter’s and the target’s position, and then displayed on a map. The Field Notes hunt diary shows all entries in chronological order.
Full-Featured Ballistics Solver
The integrated ballistic calculator allows hunters to easily customize the settings to suit their favorite cartridges. You can enter your own data, or choose bullet/cartridge info from a database containing over 7000 ammunition types from a variety of manufacturers. The ballistics solver can be programmed for for current weather conditions (temp/humidity), and the angle (inclination) of the shot.
Weather Functions
The weather tool offers a Five-Day Forecast, and you can choose multiple locations. In addition to the current location, users can also display the weather for their hunting areas of choice. The weather forecast includes temperature, precipitation, wind direction, wind speed, humidity, and air pressure. (Note: For precise ballistics solutions, you must input the ACTUAL conditions at your shooting location).
This video explains how to define a hunting zone and set GPS location tags on the map:
Hunt Log and Photos
The Field Notes function can do many things. You can log all your shots and hits, and you can plot game sightings during the hunt. Events can be augmented with photos and GPS data. With the Field Notes mapping function, you can even locate game populations in the hunting territory. A compass and automatic night mode round off the list of smart features.
This article comes from the Criterion Barrels website. It provides good, conservative advice about barrel cleaning. Understand that cleaning methods may need to be adapted to fit the amount and type of fouling (and the particular barrel). In general, we do try to minimize brushing, and we follow the procedures Criterion recommends respecting the crown/muzzle. We have also had very good success using wet patches followed by Wipe-Out bore foam. Along with the practices outlined by Criterion below, you may want to try Wipe-Out foam. Just be sure to use a fitted cleaning rod bore guide, to keep foam out of the action recesses and trigger assembly.
The above video shows how to apply Wipe-Out or other bore-cleaning foam. We use a slightly different method. First, we use 3-4 wet patches to remove loose carbon fouling. Then we apply the foam as shown, but usually from the muzzle end (with bore guide in chamber). Here’s the important point — after 20-30 minutes, once the bubbles have dissipated, we apply the foam a second time, getting more of the active ingredients into the barrel. We then patch out, as shown, after 3-4 hours.
What is the Best Way to Clean a Rifle Barrel?
We are asked this question quite frequently alongside requests for recommended break-in procedures. Improper barrel cleaning methods can damage or destroy a barrel, leading to diminished accuracy or even cause a catastrophic failure. When it comes to barrel maintenance, there are a number of useful techniques that we have not listed. Some techniques may work better with different barrel types. This series of recommendations is designed to incorporate a number of methods that the Criterion Barrels staff has used successfully both in the shop and on their personal rifles. Please feel free to to list your own recommendations in the below comments section.
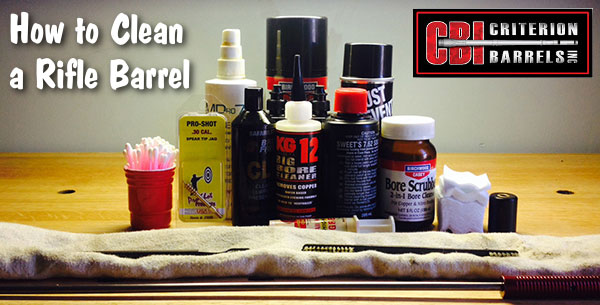
We recommend the use of the following components during rifle cleaning:
• Cloth patches (sized for the appropriate caliber)
• Brass jag sized properly for your bore [Aluminum and Nylon Jags also work]
• One-piece coated cleaning rod
• General bore cleaner/solvent (Example: Hoppes #9)
• Copper solvent of your choosing (Example: Sweets/KG 12)
• Fitted cleaning rod bore guide
• Plastic AP brush or toothbrush
• Q-Tips
• Plastic dental picks
• CLP or rust preventative type cleaner
There are a number of schools of thought relating to the frequency in which a barrel should be cleaned. At minimum we recommend cleaning a barrel after each shooting session to remove condensation, copper, and carbon build-up. Condensation is the greatest immediate threat, as it can cause the barrel to rust while the rifle sits in storage. Copper and carbon build-up may negatively impact future barrel performance, increasing the possibility of a failure in feed or function. Fouling should be removed whenever possible.
The below tips will help limit the wear of different parts of your barrel during routine maintenance, helping extend the life of the barrel and improving its performance.
The Lands and Grooves
This portion of the barrel may experience reduced efficiency due to copper fouling and cleaning rod damage. If copper fouling takes place during the initial break-in of the rifle, make sure to check our barrel break-in article.
For regular maintenance we suggest using a single piece coated cleaning rod rather than the traditional segmented rod or bore snake. While segmented rods and bore snakes may be convenient for field use, the corners between the segments may bow out and catch on the lands, scraping along the length of the rifling. Residual grit and particles from expended cartridges may also get caught between segments, resulting in an abrasive surface working its way down the length of the barrel. Most bore snakes will remove significant amounts of carbon fouling, but may fall short in the removal residual carbon buildup and copper fouling during deep cleaning. Good rods can be sourced from multiple manufacturers, but we have found good results using both Pro-Shot and Dewey brand products.
General cleaning requires the use of patches rather than nylon or brass bore brushes. Brass brushes may be required when aggressive cleaning is required, but can lead to unnecessary wear on the barrel if used frequently. This is not due to the nature of the soft brushes themselves, but from the abrasive particles of grit that become embedded in the material that is being run repeatedly through the bore. We recommend the use of bore guides when cleaning from both the muzzle and breech. These bore guides will help serve to protect the crown and throat from cleaning rod damage.
If significant resistance develops while running the cleaning rod through the bore, no attempt should be made to force it in further. Back the rod out and inspect the barrel to determine the cause of the resistance. The jag may be pushing between a bore obstruction and the rifling, digging a divot into the barrel before pushing the obstruction back through the muzzle. One way to minimize the risk of a stuck rod is by utilizing a slightly smaller patch during the initial push.
The process of cleaning the length of the rifling is relatively straightforward:
1. Check to make sure the rifle is safely unloaded.
2. Carry out any necessary disassembly procedures prior to cleaning.
3. Remove bolt (if possible) and insert fitted cleaning rod bore guide in action.
4. Soak a patch in bore solvent (similar to Hoppes #9).
5. Center and affix the patch on the brass jag, inserting it into the chamber end of the barrel. A misaligned patch may cause the jag to damage the lands of the rifling, so make sure the patch is centered on the jag. [Note, an aluminum or nylon jag will not show a “false positive”.]
6. Run the patch the full length of the barrel, retracting it upon reaching the end of the muzzle.
7. Let the solvent sit for a minute.
8. Continue to run patches through the bore until carbon residue is minimized.
9. Run a dry patch through the bore to ensure carbon residue has been removed.
10. Soak a patch in copper solvent (Sweet’s or KG-12).
11. Run the patch through the bore, leaving it to sit for 3-5 minutes (do not let solvent sit for more than 15 minutes.*)
12. Repeat this process until no blue residue remains on the patches.
13. Run a patch of Hoppes #9 and a dry patch through the bore to neutralize the copper solvent.
14. Inspect the barrel prior to reassembling the rifle, verifying that no bore obstructions remain.
*Please note that some ammonia-based copper solvents may prove to be corrosive if left sitting in the barrel for an extended period of time. It is essential that these solvents be removed within 15 minutes to avoid ruining the bore.
The Crown
The crown is the portion of the barrel where the bullet loses contact with the lands and grooves and proceeds to exit the firearm. The area most critical to accuracy potential is the angle where the bullet last touches the bore of the barrel.
Avoid damage to this area by using a plastic toothbrush and CLP type cleaner to scrub the crown from the exterior of the barrel. Even the most minimal variation in wear to the crown will negatively impact barrel performance, so be careful to avoid nicking or wearing away this part of the barrel.
Tech Tip by Doc Beech, Applied Ballistics Support Team
I am going to hit on some key points when it comes to bullet pointing. How much pointing and trimming needed is going to depend on the bullet itself. Specifically how bad the bullets are to begin with. Starting out with better-quality projectiles such as Bergers is going to mean two things. First that you don’t need to do as much correction to the meplat, but also that the improvement is going to be less. NOTE: We recommend you DO NOT POINT hunting bullets. Pointing can affect terminal performance in a bad way.
NOTE the change in the bullet tip shape and hollowpoint size after pointing:
Don’t Over-Point Your Bullets
What is important here is that you never want to over-point. It is far better to be safe, and under-point, rather than over-point and crush the tips even the slightest bit. To quote Bryan Litz exactly: “Best practice is to leave a tiny air gap in the tip so you’re sure not to compress the metal together which will result in crushing. Most of the gain in pointing is taking the bullet tip down to this point. Going a little further doesn’t show on target”. So in essence you are only bringing the tip down a small amount… and you want to make sure you leave an air gap at the tip.
Also keep in mind, bullet pointing is one of those procedures with variable returns. If you only shoot at 100-200 yards, bullet pointing will likely not benefit you. To see the benefits, which can run from 2 to 10% (possibly more with poorly designed bullets), you need be shooting at long range. Bryan says: “Typically, with pointing, you’ll see 3-4% increase in BC on average. If the nose is long and pointy (VLD shape) with a large meplat, that’s where pointing has the biggest effect; up to 8% or 10%. If the meplat is tight on a short tangent nose, the increase can be as small as 1 or 2%.” For example, If you point a Berger .308-caliber 185gr Juggernaut expect to only get a 2% increase in BC.
Should You Trim after Pointing?
Sometimes you can see tiny imperfections after pointing, but to say you “need” to trim after pointing is to say that the small imperfections make a difference. Bryan Litz advises: “If your goal is to make bullets that fly uniformly at the highest levels, it may not be necessary to trim them.” In fact Bryan states: “I’ve never trimmed a bullet tip, before or after pointing”. So in the end it is up to you to decide.
Pointing is Easy with the Right Tools
The process of pointing in itself is very simple. It takes about as much effort to point bullets as it does to seat bullets. We are simply making the air gap on the tip of the bullet ever-so smaller. Don’t rush the job — go slow. Use smooth and steady pressure on the press when pointing bullets. You don’t want to trap air in the die and damage the bullet tip. You can use most any press, with a caliber-specific sleeve and correct die insert. The Whidden pointing die has a micrometer top so making adjustments is very easy.
Bryan Litz actually helped design the Whidden Bullet Pointing Die System available from Whidden Gunsworks. When ordering, make sure that you pick up the correct caliber sleeve(s) and appropriate insert(s). The Whidden Bullet Pointing Die System comes with the die, one tipping insert, and one caliber-specific sleeve. To see which insert(s) you need for your bullet type(s), click this link:
The Magnetospeed V3 chronograph is affordable, easy to transport, and easy to set up. With a MagnetoSpeed barrel-mounted chrono you can quickly and easily record muzzle velocity (MV) without having to set up tripods or walk down-range. The compact MagnetoSpeed chronos are easy to operate and transport. With the full-featured V3 model, everything you need comes in a small fitted case. In the top photo are the components used with the MagnetoSpeed V3 Kit:
1. V3 Bayonet sensor
2. Display and control unit
3. Bayonet spacers (plastic and rubber)
4. Cords and mounting hardware (left), suppressor heat shield (right)
5. Alignment rod (square cross-section)
6. Rail adapter (sold separately)
Our friend Gavin Gear of UltimateReloader.com reviewed the MagnetoSpeed V3 and came away impressed. Gavin explains that a good chrono is essential: “If you want to load and shoot precision ammunition, you need the tools that will produce and validate the precision of your loads. A good chronograph is one of those tools! In this post I’m going to introduce you to the MagnetoSpeed V3 chonograph, the high-end electromagnetic chronograph which fills out the top slot in MagnetoSpeed’s equipment portfolio.”
In this 11-minute video Gavin reviews MagnetoSpeed’s top-of-the-line V3 Chronograph. He shows what ships with the unit, how to set it up for both rifles and pistols, and then he puts it through its paces showing how it captures velocity data. Gavin says he will follow-up with future videos showing how to link the MagnetoSpeed V3 to your mobile phone and how to log velocity data for future reference. To learn more about this high-tech chrono, visit UltimateReloader.com.
Given its compact size, reasonable price, and easy of set-up, we believe all serious shooters should have a MagnetoSpeed in their gear collection even if their primary chronograph is a LabRadar. The MagnetoSpeed V3 complete system is available now for $399.99 from Shop.GoHunt.com (MSRP is $449.00).
What would you do if you had a LIVE Round stuck in a chamber? Well, don’t hammer a wood dowel in the barrel, that’s for sure. Here is a tale of stupidity that could have injured the rifle owner. This account appeared on the Facebook Page of Brock & Norris Custom Rifles, a gunsmith shop in the United Kingdom.
Live, Loaded Round Stuck in Chamber — What NOT to Do!
Commentary by gunsmith Mike Norris
Here is a cautionary tale. A client came into the workshop with a problem which could have had very serious [even deadly] consequences. And it is not the first time we have seen this. Firing neck-sized-only ammunition, the client attempted to load a round which then jammed solid in the chamber. The bolt would not close and the round was unable to be extracted.
The problem was compounded by various attempts to push the loaded round from the chamber with cleaning rods and the assistance of a hammer (I kid you not!). All of which damaged the bore and the crown, culminating in a wooden dowel being hammered into the barrel which subsequently broke off in the bore. The end result was a barrel that was totally wrecked.
One Facebook friend posted: “Fortunate avoidance of a ‘Darwin Award’. I can hear it: ‘Go on hammer the bolt, she’ll go!’. We’re missing a ‘face palm’ emoji here.”
The Problem Started with a Neck-Sized Case
The moral of this story is DO NOT NECK SIZE cases. Mike advises: “Full-length size cases correctly. You only move the shoulder back 1 to 1.5 thousandths and the case will feed and extract EVERY TIME. Yes you will have to trim cases occasionally but it is one hell of a site cheaper and safer than jamming a live round in the barrel and wrecking the barrel trying to remove it. Not to mention the risk to life and limb!”
What Should Have Been Done in this Situation?
Mike was asked the best method for removing a stuck round. He stated: “The Grease Gun Method on a threaded barrel works*. However, in this case, this was not remotely possible due to 20 inches of wooden dowel being broken off in the bore as well. The live round (yes it was live!) was attempted to be removed by hammering on a brass cleaning rod (an actual hammer was used) to try to dislodge it. That brass rod broke, so then a wooden dowel was employed, and THAT broke as well.”
Mike cautions that, when a live, loaded round is involved you must be very careful: “Do not be taking chances with your own safety or others around you. When it is safe to do so, get the rifle to a professional. By the way he WILL [chide you] for being daft in the first place and then bringing the problem into his premises. Expect to be charged for the expertise to remove said obstruction, In the past I even had a client send me a loading die with a live .338 Lapua round in it through the Post no less!”
* This YouTube Video shows the successful removal of a jammed FIRED (not live) case from an AR15 barrel. You can see the fired case eject at 15:35 time-mark, after the primer pops out first. But note, this was NOT a live, loaded round. Extreme caution must be excercised with live rounds.
Hodgdon Reloading Data Center
Looking for a good load for a new rifle? Or perhaps you want to try a new powder and bullet combo for an existing rig. One of the best places to start for load data is Hodgdon’s online Reloading Data Center for pistol, rifle, and shotgun reloaders. Check out the Reloading Data Center at www.HodgdonReloading.com.
In the Data Center, you’ll find thousands of load recipes for pistol, rifle, and shotgun. Rifle shooters will find dozens of loads for their favorite Hodgdon, IMR, Accurate, Ramshot, and Winchester powders.
Benchrest, F-Class, Silhouette, ELR, and PRS/NRL competitors will find ultra-accurate loads for H4198, H4895, Varget, H4350, H4831sc, IMR 8208 XBR and other popular propellants. Hodgdon’s Reloading Center is “mobile-friendly” so it works well with smartphones and tables. Navigation is easy, and you can set the search criteria easily choosing your favorite powder or bullets. After choosing a cartridge, you can pre-select specific bullet weights and powder types. That quickly delivers just the information you want and need. You won’t have to scroll through scores of entries for bullets or powders you don’t use.
NOTE: This shows results for two bullet weights and two powder choices. With more powders and bullets selected you will get more results. The “BUY NOW” buttons link to the Hodgdon webstore.
Reloading Center is Smartphone-Friendly
Mobile users will notice that the current Hodgdon Reloading Center is “user-friendly” for smart-phone and tablet users. Controls have been optimized for touch-screens, and buttons are large and easy to use.
How to Get Started with Handloading
Getting started in Reloading? Ultimate Reloader offers a helpful introductory video that covers the basics. In addition, a recent Ultimate Reloader article reviews the types of reloading presses, plus the other gear you’ll need, from dies to powder dispensers.