Ace tactical shooter and gunsmith Jim See of Elite Accuracy LLC has tested a Frankford Arsenal rotary brass tumbler. Like the older Thumbler’s Tumblers, this can tumble your cases in a liquid solution. The wet-tumbling process worked very well Jim reports. Posting on Facebook, Jim noted: “I was super impressed with the Frankford Arsenal rotary tumbler and cleaning packs they sent me. I ran 350 pieces of brass for one hour. They now look great.” Jim appreciated not having to deal with dry tumbling media, such as crushed walnut shells. Dry media produces dust and can leave residues or clog flash-holes.
Interestingly, Jim recommends you try wet-tumbling WITHOUT using stainless media. At least give it a try. Tumbling without media simplifies the process and you don’t have to worry about pins stuck in flash-holes or case-necks*. Jim reports: “Stainless steel pins come with the Frankford kit, but mine hit the trash right out of the box. There is no need to clean the inside of your cases 100% and that’s all the pins add to the equation. The brass bumping brass with hot water and Frankford’s liquid cleaner works great all by itself.” One wag stated: “That’s great to hear. Stainless steel pins are a PITA.”
Other Facebook posters concurred with Jim’s evaluation of the Frankford Arsenal Rotary Tumbler:
“I’ve had one for a couple years, and it works well. I usually run about 250-300 Dasher cases at once in it. But I use the pins because I’m OCD about clean brass.” — David W.
“I’ve had one for a year and a half and it definitely works with or without pins.” — Luke C.
“I got one about six months ago and have yet to use any stainless steel media [pins]. I just use some dawn, distilled water, and Lemi Shine®. Turns nasty 5.56 range brass bright and shiny.” — Brian D.
“I don’t use the pins either and use a combination of Dawn soap and Lemi Shine.” — Jon N.G.
This video shows how to assemble and operate the Frankford rotary tumbler. But note, Jim See does NOT feel that it is necessary to use stainless media.
How to Dry Your Brass — Hair Dryer Vs. Machine
The downside of wet tumbling is that you end up with a pile of wet brass at the end of the cleaning cycle. There are many ways to dry brass, from drying in the sun to using a kitchen oven (be careful not to “overcook” your brass). One Facebook poster asked Jim: “What is your drying method for wet brass, and how long does it take?”
Jim See replied: “To start I just drain off the dirty water, and rinse the brass with clean hot water. Then I roll the brass on a towel for 30 seconds and put the brass in a one-gallon bucket. Next I insert a hair dryer in the bucket (with the brass) and let it run for about 5 minutes. With this procedure, the drying process for me is done in less than 10 minutes.”
Jack Lanhart has another method: “I use a food dehydrator. It takes 30 to 45 minutes.”
For those who don’t want to mess with towels and hair dryers, Frankford Arsenal offers a matching Platinum Series Case Dryer that simplifies the process of drying brass. Lyman also makes an excellent Cyclone Case Dryer. These drying machines each cost about $65.00 and both have multiple levels so you can separate different types of cartridge brass. Lyman states that “The forced heated air circulation of the Cyclone will dry your brass inside and out within an hour or two, with no unsightly water spots.” The Lyman dryer can also be used for ultrasonically-cleaned gun parts.
*The Frankford Rotary tumbler does include media separators if you choose to use the provided pins or other media. CLICK HERE for diagram showing how to use media separators.
Do primer types make a significant difference in accuracy or vertical dispersion at long range? The answer is “maybe”. Here’s one anecdotal study that tracked vertical variance among six different primer types. The tester is a good shooter with a very accurate rifle — four of the six 4-shot groups were under 2″ at 500 yards. This test doesn’t settle the question, but does suggest that it may be worth trying a few different primer types with your match ammo.
Here is a very interesting test for the 6 BRA (6mmBR Ackley) cartridge. Forum member James Phillips, a talented long-range benchrest shooter, tested SIX different primer types from three different manufacturers. To help determine vertical dispersion, James set his target out at 500 yards. He then proceeded to shoot 4-shot groups, in order, with each primer type. Velocities were recorded with a chrono. The photo above shows the results. James says: “I’ll retest the best two for accuracy and consistency with 10 shots each”. CLICK HERE for full-screen target photo.
As you can see, ALL the groups are pretty impressive. The smallest groups, 1.253″, was shot with CCI 400 primers. Next best (and very close) was CCI BR4, at 1.275″ for four shots. The “flat line” winner was the Remington 7.5, at upper left. There was almost no vertical. If you are intrigued by this interesting primer test, you can join the discussion in this Primer Test FORUM THREAD.
Primer Brand
Group Size
Velocity
Extreme Spread
Std Deviation
Remington 7.5
1.985″ 4 shot
2955 FPS
8 FPS
4.0 FPS
Federal 205M
2.200″ 4 shot
2951 FPS
11 FPS
4.8 FPS
Sellier Bellot SR
1.673″ 4 shot
2950 FPS
14 FPS
5.9 FPS
CCI 450M
2.341″ 4 shot
2947 FPS
14 FPS
6.6 FPS
CCI 400
1.253″ 4 shot
2950 FPS
3 FPS
1.3 FPS
CCI BR4
1.275″ 4 shot
2949 FPS
15 FPS
6.9 FPS
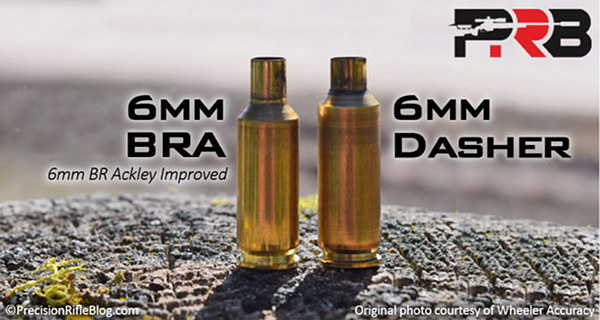
CARTRIDGE: 6mmBR Ackley, aka 6 BRA. Parent case is 6mmBR Norma. The 6 BRA is fire-formed to create a 40-degree shoulder and less body taper. Capacity is increased, but the neck is longer than a 6mm Dasher. The capacity is enough to get to the 2950+ FPS accuracy node. Some shooters say the 6 BRA is more forgiving than the 6mm Dasher. The 6 BRA is certainly easier to fire-form.
TEST REPORT — Conditions, Shooting Method, Loading Method
Tester James Phillips posted this report in ourShooters’ Forum:
Conditions: The testing was done in the morning over flags. The flags never moved or even twitched. I had as perfect conditions as I could have asked for. It was overcast so no mirage and no wind. There were no other shooters, just me.
Test Procedure: Each shot was precisely shot at my pace and centered the best possible using my Nightforce 15-55X scope. I did not use the round-robin method. Each four-shot group with the same was shot at one time. Then I moved onto the next primer. Everything felt right for each and every shot fired today. Of course I could repeat the test tomorrow and it could be exact opposite of today’s test. We can chase this forever. But [soon] I’m going to test the BR4 and 400 primer… for best accuracy and consistency for 10 shots each.
How Rounds Were Loaded: Each load was weighed to one (1) kernel of powder. So I know that’s as good as I can weigh them. Each bullet seating force was within 1# on my 21st Century hydraulic arbor press.
Previous Initial Load Testing: All groups were shot with 31.1 grains of H4895. During initial load testing I settled in on the Sellier & Bellot primer to finalize everything as it showed more promise over the CCI 450 Magnum I also tried. I was actually surprised to have seen the higher ES and SD from that primer today along with the vertical shown. [Editor: Look carefully — one shot from the CCI 450 is right in the center black diamond, stretching the vertical. By contrast the Rem 7.5 had almost no vertical.]
Velocity and NODE Considerations: I was about 5-6 FPS above what appeared to been my optimum velocity of 2943-2945 FPS, so I’ll test 5 shots of 31.0 and 5 of 31.1 and see what happens from there. I can only assume my velocities where higher due to the higher humidity and of course temps were 5 degrees warmer this morning as well. It wasn’t far off but I noticed it.
Lapua has hired skilled competitive shooter Ryan Sponauer as the new Rimfire Performance Center Manager for the sophisticated Lapua rimfire ammunition test center in Mesa, Arizona. At that center, rimfire rifle owners can test lots of Lapua rimfire ammo in their own rifles. In the Mesa, Arizona facility as well as other Lapua Rimfire Performance Centers, visitors can test lots of ammunition at both 50 and 100 meters simultaneously to determine which lots shoot best in their guns.
Sponauer brings a long and accomplished competitive shooting background to Mesa’s Lapua Rimfire Performance center. He started with three-position and prone at the age of 14 at The Blue Trail range in Wallingford, CT, where he won numerous state and regional matches. Sponauer, who graduated from the University of North Georgia, shot for their NCAA 3-P and Air Rifle teams, served as multi-year team captain, and managed lot testing ammunition for the team. Sponauer and his team went on to win the 2021 Southern Conference Championship.
Sponauer commented: “I am very excited to give back to the shooting community with this position because the sport has given me so much. The lot testing we offer gives any shooter a significant competitive edge allowing them to compete to their maximum potential.”
Patterned after the world-renowned Lapua Test Center in Germany, both the Marengo, Ohio, and Mesa, Arizona Lapua Rimfire Performance Centers allow shooters to test multiple lots of ammunition under tightly-controlled conditions. Each of the Lapua Rimfire Performance Centers offer the ability to test ammunition at both 50 and 100 meters, simultaneously. By comparing the results of various ammunition lots at both distances, the best performing lots can offer a competitive advantage. To learn more about the Lapua Rimfire Performance Centers or to schedule an appointment, visit Rimfiretest.com.
About Lapua
For 100 years, Lapua has been producing the highest quality small caliber cartridges and components for civilian and professional use. Lapua is a part of the Capstone Precision Group, exclusive U.S. distributor for Berger, Lapua, Vihtavuori and SK-Rimfire products. For more information, visit Lapua.com
The Bureau of Alcohol, Tobacco, Firearms and Explosives (ATF) has released the 35th Edition of State Laws and Published Ordinances — Firearms (ATF P 5300.5). This information will help FFLs and gun owners comply with federal and state firearm laws and, specifically, remain in compliance with the Gun Control Act of 1968. The information is found on the ATF website here: ATF.gov/firearms/state-laws-and-published-ordinances-firearms-35th-edition.
The ATF website has links to the particular laws for all 50 U.S. States as well as the American territories such as the U.S. Virgin Islands. This makes it quick and easy to check for updates in your region. We encourage readers to review the pertinent state or territory link provided on the ATF website that is relevant to your location. Click here for more information.
NOTE: The ATF Guide to State Laws has this caveat: This material is not intended to provide legal advice and should be used only for informational purposes. It is possible that a state may have passed a more recent law(s) or issued interpretations or regulations that have yet to be published and are not included in this publication. If you have any questions regarding state, county or local laws, please contact your state’s Attorney General.
The 17th Edition of the Cartridges of the World was released in June, 2022, so it is still quite current. This massive 704-page reference contains illustrations and load data for over 1500 cartridge types. That makes it a unique, very valuable resource. If you shoot a wide variety of cartridges, or are a cartridge collector, this book is a “must-have” resource. The latest 17th Edition includes 30+ new cartridge types and 1500+ photos. The print version costs $32.97 at Amazon.com plus $3.99 shipping. Or you can get the print book from Amazon 3rd party sellers starting at $27.38 delivered plus $3.99 shipping. The Kindle eBook version costs $19.47.
Updated 17th Edition with Feature Articles
The 17th Edition of Cartridges of the World includes cartridge specs, plus tech articles on Cartridge identification, SAAMI guidelines, wildcatting, and new cartridge design trends. Cartridges of the World, the most complete cartridge reference guide in print, includes a full-color section with feature articles such Cartridges of the AR-15, Creedmoor Cartridge Family, .404 Jeffrey, .30 Carbine, plus “Cartridges and Cans” (suppressors).
View Free Book Sample Content
FREE STUFF for You: If you want to see what you are getting, there is a very large sample section of the previous 16th Edition available online with over 100 pages of content and dozens of photos and illustrations. To access all this FREE INFO, CLICK HERE, then click on the cover photo where it says “Look Inside”.
NOTE: This is content from the 16th Edition, but most is the same in the 17th Edition.
Cartridges of the World 17th Ed. CHAPTERS:
Chapter 1: Current American Sporting Cartridges
Chapter 2: Obsolete American Rifle Cartridges
Chapter 3: Wildcat Cartridges
Chapter 4: Proprietary Cartridges
Chapter 5: Handgun Cartridges of the World
Chapter 6: Military Rifle Cartridges of the World
Chapter 7: British Sporting Rifle Cartridges
Chapter 8: European Sporting Rifle Cartridges
Chapter 9: American Rimfire Cartridges
Chapter 10: Shotgun Shells
Chapter 11: U.S. Military Ammunition
Chapter 12: Cartridge ID by Measurement
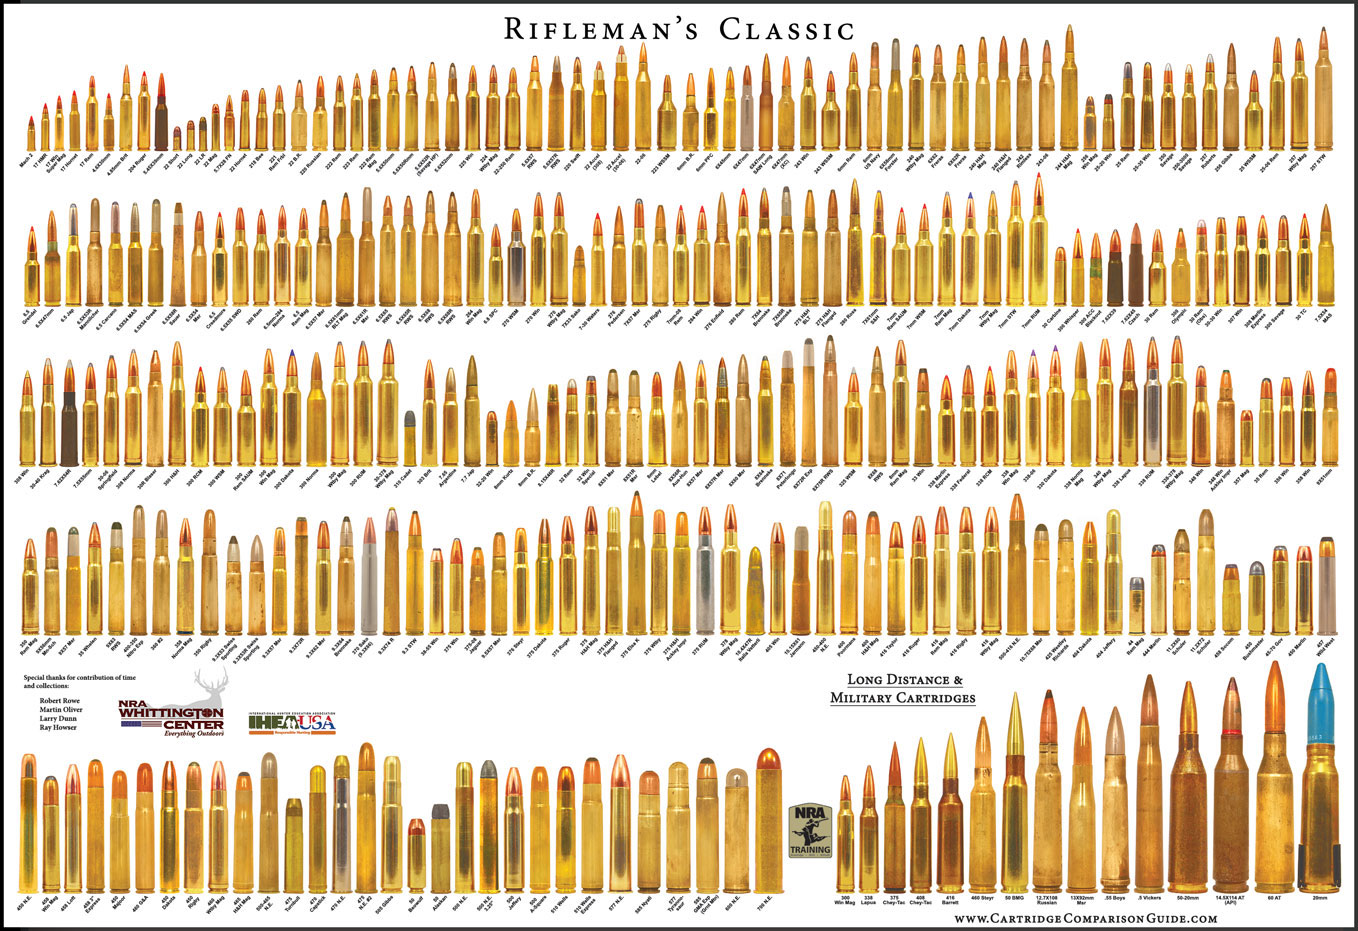
Need something for the walls of your “man cave” or reloading room? Looking for a great birthday gift for one of your shooting buddies? The creators of the Cartridge Comparison Guide offer a collection of wall posters showing ammunition types from 17 caliber rimfire cartridges all the way up to giant 35mm military rounds. ChamberIt.com currently offers 12 different large wall posters that display a huge variety of cartridge types. For example, the American Standard Poster (shown above) contains every standardized cartridge mass produced in the USA as of 2021. The cartridges are 100% to scale (life size). These posters feature full color images on high gloss / high quality 100-lb poster paper.
For example, the Rifleman’s Classic Poster (below), a full 38 inches wide and 27 inches tall, is the most comprehensive. This $17.76 poster displays over 300 rifle cartridge types at true size (within 4/1000 of an inch). Cartridges shown range from .17 caliber all the way up to the big boomers (including some cannon shells). The Rifleman’s Classic Poster includes nearly all American Standardized Rifle Cartridges and many European rifle cartridges.
Rifleman’s Classic Poster Click to view large size poster.
Ammunition Performance Specifications Poster
There is also an interesting Ammo Performance Specs poster. This shows dozens of popular hunting cartridges with the velocity, energy, momentum and recoil for each cartridge displayed in a bar graph.
This shows the actual size of the Ammo Performance Poster as displayed on a wall.
Small patches are not very efficient at distributing bore cleaning liquids inside your bore. The problem with a tight-fitting patch is that the solvent gets squeezed off in the first few inches. You can switch to a smaller jag, or a bore mop, but there is an even better way to get an ample amount of solvent in your bore. Just spray directly into the bore with a wash bottle, an inexpensive plastic bottle with an L-shaped dispensing neck, tapered at the end.
When using the wash bottle, you can either just plug the breech and spray from the muzzle end (where most copper fouling is), or, alternately, put the wash bottle neck directly in the chamber and spray forward. When spraying from the chamber forward, you may need to use a rubber O-Ring to seal off the action… depending on the bore size and the particular wash bottle’s neck spout diameter. We prefer to plug the breech and squirt from the muzzle.
Bottle Solvent Application Great for Smaller Bores
Using wet patches or wet brushes is an inefficient way to really saturate the tight bores of 17s, 20s, and 22s. Even with a cotton bore mop, most of the solvent will be squeezed out before it gets to the end of the bore, where most copper fouling occurs. For these smaller 17, 20, and 22-caliber bores, you can just take the wash bottle and stick the tapered nozzle right in the chamber. The tapered end will press fit in the throat, sealing off the chamber. With the barrel slightly nose-down, give the bottle a couple good squirts until the solvent mists out the muzzle. In just a few seconds, this will put more solvent in the bore than a half-dozen wet patches.
A solvent-filled wash bottle is also handy for wetting your brushes. It’s much easier to saturate a bore brush (without spilling solvent on your stock), by using the wash bottle. You can get wash bottles from USPlastic.com, Amazon.com, or lab supply stores.
Product innovation is all about “building a better mousetrap”, or in this case, building a better bore-cleaning patch. A real smart guy, Shane Smith, has invented a triangular patch that earned a patent. The U.S. Patent Office has awarded a utility patent for BoreSmith’s Triangle Patch™. This unique cleaning patch was designed by Shane Smith, a mathematician/physicist who employed his scientific and firearms knowledge to create innovative bore-cleaning products.
BoreSmith’s clever Triangle Patch™ (aka Pyramid Patch) presents more cleaning surface area to the bore wall than does a conventional square or round patch (of equivalent size). At the same time, the unique geometry makes Triangle Patches much less likely to jam in the barrel. This is because the notches in the sides of the triangle allow the patch to sit more uniformly on the jag (without bunching up). In addition, the Pyramid patch is must less likely to jam due to pleating. One reason conventional patches get stuck is unwanted 5-layer pleating. The special notches in the Pyramid patch remove all or most 5-layer pleating. As a result the patch does not bunch up and this also reduces rod bowing. SEE Triangle Patches HERE on Amazon.
Triangle Patch Function and Geometry Explained (See 1:18 time-mark):
NOTE: Despite what you may see in this video, you should ALWAYS insert brushes and patches from the chamber end first, using a fitted cleaning rod bore guide. With bolt-action rifles, NEVER insert a cleaning rod (with brush or jag) in through the muzzle. This may damage the delicate crown of your barrel.
The Triangle Patches work great with Boresmith’s patented dual-diameter bore brushes:
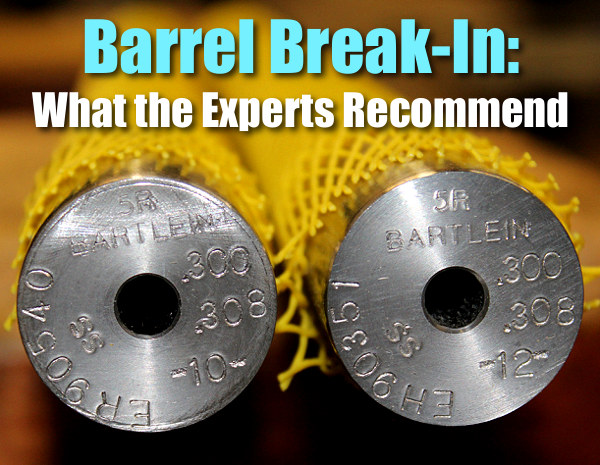
The question of barrel break-in is controversial. Some folks advocate an elaborate, lengthy cycle of shooting and brushing, repeated many times — one shot and clean, two shots and clean and so on. This, it is argued, helps barrels foul less and shoot more accurately. Others say minimal break-in, with patching and brushing after 10-15 rounds, is all you need. Still others contend that break-in procedures are a total waste of time and ammo — you should just load and shoot, and clean as you would normally.
We doubt if there will ever be real agreement among shooters concerning barrel break-in procedures. And one must remember that the appropriate break-in procedure might be quite different for a factory barrel vs. a custom hand-lapped barrel. This Editor has found that his very best custom barrels shot great right from the start, with no special break-in, other than wet patches at 5, 10, and 15 rounds. That said, I’ve seen some factory barrels that seemed to benefit from more elaborate break-in rituals.
What’s the best barrel break-in procedure? Eric Mayer of Varminter.com decided to ask the experts. Eric interviewed representatives of three leading barrel manufacturers: Krieger, Lothar-Walther, and Shilen. He recorded their responses on this video. In order of appearance, the three experts are:
Shilen, Krieger, and Walther Experts Talk about Barrel Break-in
Do I Need to Break-In a New Rifle Barrel?
Eric Mayer of Varminter.com says: “That is a simple question, [but it] does not necessarily have a simple answer. Instead of me repeating my own beliefs, and practices, on breaking-in a new rifle barrel, I decided to answer this one a bit differently. While we were at the 2016 SHOT Show, we tracked down three of the biggest, and most popular, custom barrel makers in the world, and asked them what they recommend to anyone buying their barrels, and why they recommend those procedures. We asked the question, and let the camera run!” Launch the video above to hear the answers — some of which may surprise you.
Barrel Break-in — Initial Inspection and Cleaning
This video explains that you should always inspect and clean the bore of your barrel before sending rounds through it. There may be remnants of the production process, such as lapping residues, that you’ll want to get out of the bore. We’ve even seen a few tiny metal pieces in some factory barrels. And it’s always wise to borescope a new barrel to see if there are visible defects in the rifling such as lands that have flawed edges — we’ve seen that on some cheaper barrels.
Barrel Break-In — Ian Klemm’s Surprising Observations
Here’s a 10-minute Vortex Nation interview with Ian Klemm. Ian, a 4-Time F-TR National Champion is one of America’s best long-range shooters. In this video, Ian explains his approach to barrel break-in, which may surprise you. Does barrel break-in even matter? Conventional wisdom says “Yes” and perhaps there’s some truth to that, but Ian argues that break-in is NOT nearly as important as the internet wants you to believe. Ian believes that you don’t need to waste a ton of time/ammo to get your barrel ready to shoot extremely accurately. This may be particularly true with premium hand-lapped custom barrels.
Barrel Break-In Procedures with Keith Glasscock
Keith Glasscock is also one of America’s greatest F-Class shooters who has finished second at the Nationals multiple times. Keith is also a highly-respected wind coach who has a popular YouTube video channel, Winning in the Wind. In this video, Keith explains his procedure for breaking-in his match barrels. He starts by bore-scoping the barrel and cleaning it. If he finds some burrs he may use some JB Bore Paste, a patch, and a worn brush and “give that throat a little scrub” (See 1:30 time-mark). He used different stroke lengths to avoid putting a “step” in the throat. When he’s satisfied he goes to the range. He fires the first five rounds, then cleans. He then fires quite a few rounds before cleaning the barrel again and beginning load development (See 8:25 time-mark).
General Barrel Break-in Procedures Recommended by Brownells
Brownells Gun Techs Steve Ostrem and Caleb Savant tackle a thorny topic: breaking in a new barrel. What IS breaking-in a barrel? And WHY do it? The rifling of a freshly machined barrel has microscopic burrs and sharp edges. “Breaking-in” is the process of putting bullets down the bore to smooth out those rough spots. The goal is to round down the sharp edges so they’re not stripping copper off a bullet as it travels the bore, which leads to fouling that leads to reduced accuracy and inconsistent groups. In a very minor way, you’re actually lapping the barrel. The breaking-in process works best on cut-rifled and button-rifled barrels. Cold hammer-forged, chrome-lined, or nitrided barrels — such as commonly found on AR-15s — may not benefit much from the process. Pistol barrels really don’t need to be broken in because larger-diameter bullets are not so much affected by tiny variations in the bore. Likewise, break-in is more helpful for a .17, .20, or .22 caliber rifle than a .45 caliber rifle.
George Gardner of G.A. Precision Talks About Barrel Break-In
G.A. Precision’s George Gardner is a leading figure in the PRS/NRL world. In this video, George makes the valid point that not all barrels require the same amount of break-in. George says some barrels require very little break-in, while others benefit from a more elaborate break-in process that helps reduce future copper and powder fouling. He calls this “seasoning” the barrel so it fouls less. For a typical barrel, George’s recommended process (4:25 time-mark) starts with one shot, then clean for three one-round cycles. This is followed by three shots then clean, with repeat 3-shot cycles if need. For cleaning George prefers nylon brushes (5:50 time-mark). NOTE: George also makes a very important point — you MUST swab the chamber and get it dry between cleaning cycles (5:30 time-mark).
Put the same load in a variety of barrels (with the same length and chamberings) and you’ll see a wide variance in muzzle velocity. In fact, it’s not unusual to see up to 100 fps difference from one barrel to the next. We demonstrated this with a comparison test of Lapua factory ammo.
Chron Testing Lapua Factory Ammo
At our Southern California test range some years ago, we chronographed Lapua 105gr 6mmBR factory ammo in three different 8-twist barrels of similar length. The results were fascinating. Lapua specs this ammo at 2790 fps, based on Lapua’s testing with its own 26″ test barrel. We observed a speed variance of 67 fps based on tests with three aftermarket barrels.
Barrel Velocity Variance
Brand ‘S’ and Brand ‘PN’ were pre-fit barrels shot on Savage actions. Brand ‘K’ was fitted to a custom action. All test barrels were throated for the 100-108 grain bullets, though there may have been some slight variances in barrel freebore. With a COAL of 2.330″, the rounds were “jumping” to the rifling in all barrels.
Among the four barrels, Brand ‘PN’ was the fastest at 2824 fps average — 67 fps faster than the slowest barrel. Roughly 10 fps can be attributed to the slightly longer length (27″ vs. 26″), but otherwise this particular barrel was simply faster than the rest. (Click Here for results of 6mmBR Barrel Length Velocity Test).
IMPORTANT: Results Are Barrel-Specific, Not Brand-Specific
These tests demonstrate that the exact same load can perform very differently in different barrels. We aren’t publishing the barrel-makers’ names, because it would be wrong to assume that ‘Brand X’ is always going to be faster than ‘Brand Y’ based on test results from a single barrel. In fact, velocities can vary up to 100 fps with two identical-spec barrels from the SAME manufacturer. That’s right, you can have two 8-twist, 26″ barrels, with the same land-groove configuration and contour, from the same manufacturer, and one can be much faster than another.
Don’t Demand More Than Your Barrel Can Deliver
We often hear guys lament, “I don’t get it… how can you guys get 2900 fps with your 6BRs and I can only get 2840?” The answer may simply be that the barrel is slower than average. If you have a slow barrel, you can try using more powder, but there is a good chance it may never run as fast as an inherently fast barrel. You shouldn’t knock yourself out (and over-stress your brass) trying to duplicate the velocities someone else may be getting. You need to work within the limits of your barrel.
Factory Ammo Provides a Benchmark
If you have a .223 Rem, 6mmBR, .243 Win, 6.5×47 Lapua, 6.5 Creedmoor, 6.5×55, .308 Win, .30-06 Springfield, or .338 LM Rifle, we recommend you buy a box of Lapua factory-loaded ammo. This stuff will shoot great (typically around half-MOA), and it can give you a baseline to determine how your barrel stacks up speedwise. [Editor’s NOTE: The original test was conducted in 2008. The velocity of current-production Lapua factory ammo might be higher or lower, so your results may vary.]
When you complete a new 6mmBR rifle, it’s definitely smart to get a box of the factory ammo and chronograph it. That will immediately give you a good idea whether you have a slow, average, or fast barrel. Then you can set your velocity goals accordingly. For example, if the factory 6BR ammo runs about 2780-2790 fps in your gun, it has an average barrel. If it runs 2820+ in a 26″ barrel (or 2835 fps in a 28″), you’ve got a fast tube.






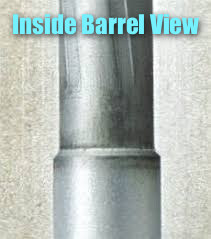 We doubt if there will ever be real agreement among shooters concerning barrel break-in procedures. And one must remember that the appropriate break-in procedure might be quite different for a factory barrel vs. a custom hand-lapped barrel. This Editor has found that his very best custom barrels shot great right from the start, with no special break-in, other than wet patches at 5, 10, and 15 rounds. That said, I’ve seen some factory barrels that seemed to benefit from more elaborate break-in rituals.

 Barrel Velocity Variance


