Here’a useful article by Sierra Bullets Media Relations Manager Carroll Pilant. This story, which originally appeared in the Sierra Bullets Blog, covers some of the more common ammo problems that afflict hand-loaders. Some of those issues are: excessive OAL, high primers, and improperly-sized cases. Here Mr. Pilant explains how to avoid these common problems that lead to “headaches at the range.
I had some gentlemen at my house last fall getting rifle zeros for an upcoming elk hunt. One was using one of the .300 short mags and every 3rd or 4th round would not chamber. Examination of the case showed a bulge right at the body/shoulder junction. These were new cases he had loaded for this trip. The seating die had been screwed down until it just touched the shoulder and then backed up just slightly. Some of the cases were apparently slightly longer from the base to the datum line and the shoulder was hitting inside the seating die and putting the bulge on the shoulder. I got to thinking about all the gun malfunctions that I see each week at matches and the biggest percentage stem from improper handloading techniques.
One: Check Your Cases with a Chamber Gage
Since I shoot a lot of 3-gun matches, I see a lot of AR problems which result in the shooter banging the butt stock on the ground or nearest solid object while pulling on the charging handle at the same time. I like my rifles too well to treat them that way (I cringe every time I see someone doing that). When I ask them if they ran the ammo through a chamber gage, I usually get the answer, “No, but I need to get one” or “I didn’t have time to do it” or other excuses. The few minutes it takes to check your ammo can mean the difference between a nightmare and a smooth running firearm.
A Chamber Gauge Quickly Reveals Long or Short Cases
Size Your Cases Properly
Another problem is caused sizing the case itself. If you will lube the inside of the neck, the expander ball will come out a lot easier. If you hear a squeak as the expander ball comes out of a case neck, that expander ball is trying to pull the case neck/shoulder up (sometimes several thousandths). That is enough that if you don’t put a bulge on the shoulder when seating the bullet … it can still jam into the chamber like a big cork. If the rifle is set up correctly, the gun will not go into battery and won’t fire but the round is jammed into the chamber where it won’t extract and they are back to banging it on the ground again (with a loaded round stuck in the chamber). A chamber gage would have caught this also.
Oversizing cases also causes problems because the firing pin doesn’t have the length to reach the primer solid enough to ignite it 100% of the time. When you have one that is oversized, you usually have a bunch, since you usually do several cases at a time on that die setting. If the die isn’t readjusted, the problem will continue on the next batch of cases also. They will either not fire at all or you will have a lot of misfires. In a bolt action, a lot of time the extractor will hold the case against the face of the breech enough that it will fire. The case gets driven forward and the thinner part of the brass expands, holding to the chamber wall and the thicker part of the case doesn’t expand as much and stretches back to the bolt face. If it doesn’t separate that time, it will the next time. When it does separate, it leaves the front portion of the case in the chamber and pulls the case head off. Then when it tries to chamber the next round, you have a nasty jam. Quite often range brass is the culprit of this because you never know how many times it has been fired/sized and in what firearm. Back to beating it on the ground again till you figure out that you have to get the forward part of the case out.
Just a quick tip — To extract the partial case, an oversized brush on a cleaning rod [inserted] and then pulled backward will often remove the case. The bristles when pushed forward and then pulled back act like barbs inside the case. If you have a bunch of oversized case that have been fired, I would dispose of them to keep from having future problems. There are a few tricks you can use to salvage them if they haven’t been fired though. Once again, a case gage would have helped.
Two: Double Check Your Primers
Another thing I see fairly often is a high primer, backwards primer, or no primer at all. The high primers are bad because you can have either a slam fire or a misfire from the firing pin seating the primer but using up its energy doing so. So, as a precaution to make sure my rifle ammo will work 100% of the time, I check it in a case gage, then put it in an ammo box with the primer up and when the box is full, I run my finger across all the primers to make sure they are all seated to the correct depth and you can visually check to make sure none are in backwards or missing.
Three: Check Your Overall Cartridge Length
Trying to load the ammo as long as possible can cause problems also. Be sure to leave yourself enough clearance between the tip of the bullet and the front of the magazine where the rounds will feed up 100%. Several times over the years, I have heard of hunters getting their rifle ready for a hunt. When they would go to the range to sight in, they loaded each round single shot without putting any ammo in the magazine. On getting to elk or deer camp, they find out the ammo is to long to fit in the magazine. At least they have a single shot, it could be worse. I have had hunters that their buddies loaded the ammo for them and then met them in hunting camp only to find out the ammo wouldn’t chamber from either the bullet seated to long or the case sized improperly, then they just have a club.
Four: Confirm All Cases Contain Powder
No powder in the case doesn’t seem to happen as much in rifle cartridges as in handgun cartridges. This is probably due to more handgun ammo being loaded on progressive presses and usually in larger quantities. There are probably more rifle cartridges that don’t have powder in them than you realize though. Since the pistol case is so much smaller internal capacity, when you try to fire it without powder, it usually dislodges the bullet just enough to stick in the barrel. On a rifle, you have more internal capacity and usually a better grip on the bullet, since it is smaller diameter and longer bearing surface. Like on a .223, often a case without powder won’t dislodge the bullet out of the case and just gets ejected from the rifle, thinking it was a bad primer or some little quirk.
For rifle cases loaded on a single stage press, I put them in a reloading block and always dump my powder in a certain order. Then I do a visual inspection and any case that the powder doesn’t look the same level as the rest, I pull it and the one I charged before and the one I charged after it. I inspect the one case to see if there is anything visual inside. Then I recharge all 3 cases. That way if a case had powder hang up and dump in the next case, you have corrected the problem.
On progressive presses, I try to use a powder that fills the case up to about the base of the bullet. That way you can usually see the powder as the shell rotates and if you might have dumped a partial or double charge, you will notice as you start to seat the bullet if not before. On a progressive, if I don’t load a cartridge in one smooth stroke (say a bullet tipped over sideways and I raised the ram slightly to reset it) Some presses actually back the charge back adding more powder if it has already dumped some so you have a full charge plus a partial charge. When I don’t complete the procedure with one stroke, I pull the case that just had powder dumped into it and check the powder charge or just dump the powder back into the measure and run the case through later.
Even with high-quality brass from Lapua, Peterson, Norma, Alpha and RWS, occasionally you may find one or two cases per box which have a small flake or obstruction in the flash-hole. This will appear like a thin crescent on one side of the flash hole (see photo). You should inspect ALL new brass before loading to identify any pieces with a partially-obstructed flash hole. It’s a good idea to remove any flake or thin crescent left as an artifact of the flash-hole forming process. Because the flash-hole itself is normally centered and of the correct diameter, it is not necessary to ream the flash-hole to a larger diameter. All you really need to do is remove the small obstruction(s). This can be done quickly with inexpensive tools.
Use a Small Pin Vise to Remove Flash-Hole Obstructions
Folks have asked if there is a tool that can remove obstructions from a Lapua small, BR-sized flash hole without opening the hole size. The Lapua PPC/BR flash hole is spec’d at 1.5mm, which works out to 0.059055″. Most of the PPC/BR flash-hole uniforming tools on the market use a 1/16″ bit which is nominally 0.0625″, but these often run oversize — up to 0.066″.
If you want to just clear out any obstructions in the flash hole, without increasing the flash hole diameter, you can use an inexpensive “pin vise” with an appropriate drill bit. For $0.99 ($0.50 on sale), eHobbyTools.com sells a 1.5mm drill bit, item 79186, that matches the Lapua flash hole exactly. Other vendors offer a #53 pin vise drill bit that measures .0595″ or .060″ (depending or source). An 0.0595″ bit is close enough. You can find pin vises and these small-diameter drill bits at hobby stores.
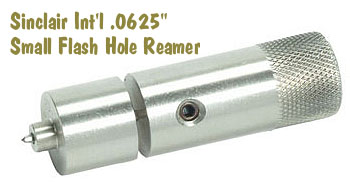
For quite some time, Sinclair Int’l has sold a similar device for small (PPC and BR-size) flash holes. Like the 07-3081 unit for large flash holes, the 073000 Reamer for small flash holes works from the outside, so it can index off the primer pocket. It reams to .0625″, and also costs $29.99. The standard dimension for Lapua 220 Russian and 6mmBR flash holes is 1.5mm or .0590″. This tool will permit standard-size decapping rods with .0625″ tips to work without binding. However, note that both Forster and Redding normally supply .057″ decapping pins with their PPC and BR dies. So, it is NOT necessary to ream your Lapua BR/PPC flashholes, unless you prefer to do so for uniformity. It IS, however, a good idea to check BR/PPC flash holes for burrs before loading the first time.
NOTE: If you purchase either the 073081 or 073000 Sinclair Flash Hole Reamer tools, we recommend you mic the cutter tip before you process a bunch of cases. Sometimes a tip comes through that is oversize. This will ream the flash holes larger than you may intend.
Here’s something all shooters need — a smartphone App that calculates bullet-hole group sizes from your own photos. The Ballistic-X App is simple to use. Take a photo of your target, set some values (such as bullet diameter and distance to target), then use the touchscreen to place circles around each hole. The App will calculate group size (in MOA or Mils), distance to point of aim, and provide all the info in an overlay. Then click “save” to record your group for posterity!
This App works well, is relatively easy to set-up, and costs just $7.99. It is available for both Android devices and iOS (Apple) devices. There are other ways to measure group sizes from target images, such as the excellent On-Target program, which we have used for years. However On-Target requires a software installation on a Windows platform desktop or laptop. Ballistic-X is a simple, easy-to-install App with versions for both Android and iOS (Apple) Mobile devices.
The Ballistic-X App has a relatively easy-to-use interface. Of course you can choose either MOA or Milrad group values, and Inch or Metric dimensions. There are various labeling options that provide useful info for Load Development. There is even an ATZ (Adjustment To Zero) feature for adjusting your turrets.
How to Use Ballistic-X App
1. Select Photo Source — Choose Camera to take new photo or get image from Photo Library.
2. Set Reference Values — Select Bullet Diameter and enter Distance to Target.
3. Establish Scale on Image — Mark two points on target photo to set scale. For example, if the target has a 1″-square grid lines, mark two points on grid for 1″ distance.
4. Mark Point Of Aim — Put the central X on the aim point.
5. Designate Shot Locations — Place the green circles around each shot.
6. Finalize Data Display — Position Overlay, select size/color options, and export file.
Android Options — Range Buddy FREE App
Along with Ballistic-X, there is another Mobile App, Range Buddy, that also measures shot groups. Range Buddy is currently offered for Android devices only. It is FREE, but has adverts. Range Buddy isn’t bad, but users complained about the program crashing, and there are compatibility issues with newer phones. We recommend you pay $7.99 and stick with Ballistic-X.
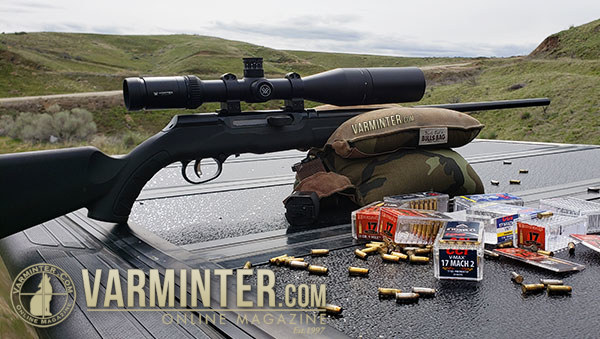
The 17 Mach 2 (aka “17 HM2″) is making a come-back. We’re glad. This high-velocity round fits actions and magazines designed for the .22 LR, so it’s an easy barrel-swap upgrade for most rimfire bolt-guns (semi-autos are more complicated). The 17 Mach 2 cartridge doesn’t deliver the velocity of the 17 HMR, but it is still way faster than a .22 LR. Expect 2000-2100 fps with 17 Mach 2 compared to 1250 fps for “High-Velocity” .22 LR ammo. And, importantly, 17 Mach 2 ammo is much less expensive than 17 HMR. If you shop around, you can get 50 rounds of 17 Mach 2 for under $8.75. That’s 40% cheaper than the typical $14.50 price of 17 HMR — a significant savings!
17 Mach 2 Major Selling Points:
1. 60% more velocity than typical “High-Velocity” .22 LR ammo.
2. 35%-40% less cost than average 17 HMR ammo.
3. 17 Mach 2 OAL is compatible with .22 LR receivers and magazines.
17 Mach 2 Rifle Reviews
Gun-makers have taken notice of the availability of 17 Mach 2 ammo, introducing new models chambered for this versatile little rimfire round. For a high-volume, small-species varminting, the 17 Mach 2 is much more effective than the .22 LR, and much less expensive than the larger 17 HMR.
New Savage A17 in 17 Mach 2
There are a number of reviews on new-generation 17 Mach 2 rifles. Recently Varminter.com reviewed the Savage A17 in 17 HM2. Editor Eric Mayer wrote: “This new addition to the A17 line comes at a time when the 17 Mach 2 round is experiencing a resurgence, with ammo now available from CCI and Hornady, including the lead-free NTX round from Hornady. This means … you don’t have to break the bank to buy a current, functioning, semi-auto 17 Mach 2 and you don’t have to … convert your 10/22.”
Eric shot four different types of 17 Mach 2 ammo, putting 1000+ rounds through the Savage. He was impressed: “I am very excited that Savage Arms has chambered their A17 rifle in the 17 Mach 2 / 17 HM2 round. After shooting the prototype, I can confidently say that this new A17 will become my go-to 17 Mach 2 rifle. This new rifle is a great option for varminters everywhere!”
Toggle Bolt Volquartsen Summit in 17 HM2
It’s rare for us to see a new rimfire that we’d really like to own, but the new Summit from Volquartsen fits the bill. This versatile rifle features a cool, straight-pull toggle bolt, similar to those on elite Biathalon rifles. You can see how this gun shoots in this informative 22 Plinkster video:
22 Plinkster Tests Volquartsen Summit Rifle in 17 Mach 2
The 17 Mach 2 (17 HM2) is making a comeback. Now leading manufacturers are offering this efficient little rimfire cartridge in some nice rifles. Both Anschutz and Volquartsen will offer new 17 Mach 2 rifles in 2019. The Volquartsen Summit features a lightweight, carbon fiber-wrapped barrel threaded 1/2-28 for brakes or suppressors. The Summit boasts a nice 1.75-lb trigger pull. The Summit’s CNC-machined receiver features a +20 MOA Rail. NOTE: The video shows a silhouette-style laminated wood stock. However, the Summit comes standard with a composite Magpul stock that actually works better for shooting from a bench.
17 Mach 2 — Best Rimfire Bang for the Buck?
If you are looking for a capable, squirrel-busting round or a fun plinking round, you should definitely consider the 17 Mach 2, especially since CCI has committed to production of the little cartridge. CCI recently rolled out its “Gen 2″ 17 Mach 2 VNT Ammo with polymer tip (see top of article).
Considering that 17 HMR ammo is now running $14.50 a box, the 17 Mach 2 is an excellent value by comparison. It is available from many vendors for under $8.75 per 50ct box. That’s under $0.18 per round. When you consider overall “bang for the buck”, for many shooters, it makes sense to use the 17 Mach 2 rather than a 17 HMR. You save money, barrel life is a little longer, and the 17 Mach 2 is still a much more potent cartridge than the .22 LR. Check out this comparison, and note how the 17 Mach 2 has a much flatter trajectory than the .22 LR. For varmint shooting, the 17 Mach 2 is clearly the better choice.
Hornady’s 17 Mach 2 has a 2100 FPS muzzle velocity vs. 1255 FPS for “High-Velocity” .22 LR.
Sierra Bullets has published load data for the 6mm Creedmoor cartridge, a necked-down version of the popular 6.5 Creedmoor. Sierra has released very comprehensive 6mm Creedmoor load data, covering fifteen (15) different bullets from 55 to 110 grains. NOTE: Hornady-brand brass was used for Sierra’s 6mm Creedmoor load tests, not the newer, stronger Lapua 6.5 CM brass with small primer pockets. Hand-loaders using Lapua 6.5 Creedmoor brass necked to 6mm may have to adjust their loads.
Sierra writes: “As soon as the 6.5 Creedmoor was released in 2007, a 6mm version was being envisioned. After the 6mm Creedmoor demonstrated its worth at 1000 yards it began to catch the attention of Precision Rifle Series (PRS) competitors. The 6mm Creedmoor is a great fit for those looking for an AR platform-friendly cartridge. It delivers velocities very similar to the .243 Win and yet fits the AR10 magazine length[.] The 30-degree shoulder makes this a very efficient case and helps prolong case life as well. The 6mm Creedmoor works well with powders such as H4350, [RE-16], RE-17, and Ramshot Hunter for heavier long-range bullet weights. Slightly faster powders such as RE-15, Win 760, and Vihtavuori N540 work well with lighter weight bullets.”
Sierra Bullets Tested for 6mm Creedmoor Load Data
55gr BlitzKing (#1502)
60gr HP (#1500)
70gr HPBT (#1505)
70gr BlitzKing (#1507)
75gr HP (#1510)
In developing its 6mm Creedmoor load data, Sierra tested a very wide selection of propellants, two dozen overall. For the smaller bullets, fast-burning powders such as Benchmark, H4895, and CFE223 were tested. For the heavier 100+ grain bullets, Sierra tested a selection of medium-burn-rate powders including H4350, Reloder 16, Reloder 17, Varget, and Superformance. Sierra did a very thorough job. We know this information will be welcomed by 6mm Creedmoor shooters.
Don’t know what powder to try first? For the 107-110 grain bullets, if you want best accuracy and low ES/SD, our Forum members recommend Alliant Reloder 16 and Hodgdon H4350. If you are seeking max velocity with the 110-grainer, look at Hodgdon Superformance and Reloder 19.
Here are Sierra’s 6mm Creedmoor Load Data Charts for 90-95 grain bullets plus the 107gr MK and 110gr MK. There are five other tables for other bullet types.
BONUS: PRB 6mm Creedmoor and 6.5 Creedmoor Load Survey
The Precision Rifle Blog compiled Load Data from PRS Competitors, for both 6mm Creedmoor and 6.5 Creedmoor. This is a good place to start. PRB surveyed the match loads for “173 of the top-ranked precision rifle shooters in the country”. One cautionary note: These PRS guys may be loading fairly hot, so work up gradually, 0.3 grains at a time. CLICK HERE.
You’d like to protect your hearing, and maybe you’re a little curious about how your rifle might shoot suppressed. So you’re thinking of buying a suppressor (aka “can”, “moderator”, “silencer”). You can’t just get one off the shelf at Walmart. Acquiring a suppressor requires filling out paperwork and paying a Federal $200 Tax Stamp. Plus there is typically a pretty long wait. However, the good news is that suppressor ownership is now legal in 42 of the 50 American states — that’s 84%! For most American adults, getting a suppressor is legal, provided pass the required background checks.
States Where Suppressor Ownership is Allowed
Currently, the following 42 states allow private ownership of suppressors: AL, AK, AZ, AR, CO, CT, FL, GA, ID, IN, IA, KS, KY, LA, ME, MD, MI, MN, MS, MO, MT, NE, NV, NH, NM, NC, ND, OH, OK, OR, PA, SC, SD, TN, TX, UT, VT, VA, WA, WV, WI, WY.
Note: Even if you live in one of the states listed, you should still verify that owning a suppressor is legal in your area. Some states may have municipal- or county-based restrictions.
States Where Suppressor Ownership is Prohibited
Unfortunately, there are still eight (8) States that forbid private ownership of suppressors. The eight No-Go States are: California, Delaware, Hawaii, Illinois, Massachusetts, New Jersey, New York, Rhode Island. In these eight states, private ownership of suppressors (aka “silencers”) is forbidden. Hopefully that a few of those eight hold-out states will change their laws in the months ahead.
Looking Inside a Suppressor in Action
Popular YouTube Channel Smarter Every Day recently released a cool video featuring rifle suppressors with see-through acrylic sleeves. The team filmed shots through the suppressors using ultra-high-speed (110,000 frame per second) cameras. When played back in super-slow-motion, you can see the flame propagate through the suppressor and the bullet move through each baffle before it exists the muzzle. Watch the results in the video below — it’s mesmerizing:
See Through Suppressor in Super Slow Motion (110,000 fps) — Click Arrow to Watch:
Suppressors, On Average, Reduce Noise Levels about 30 Decibels
In an article for Ammoland, gunwriter Sam Hoober says that you can expect about 30 decibels (dB) of noise reduction from the average suppressor: “Looking at a few different products, SilencerCo attests their suppressors reduce the sound pressure of a 9mm gunshot to anywhere from 125.7 dB to 131.5 dB, depending on the model. Advanced Armament Co, another popular supplier, attests a 23 dB to 33 dB reduction or down to 127 dB. Liberty Suppressors, another manufacturer, attests a reduction of 24 dB to 38 dB, depending on model and other factors. In short, we can presume something on the order of 30 dB of attenuation as an average.”
Using that 30 dB number you can quickly discern that you’ll still need hearing protection — good hearing protection — when shooting any suppressed firearm (even a .22 LR). “Spikes of 130 dB and more can result in permanent hearing damage instantly”. Source: NRA Blog.
Burris Signature Rings with polymer inserts are an excellent product. The inserts allow you to clamp your scope securely without ring marks. Moreover, using the matched offset inserts you can “pre-load” your scope to add additional elevation. This helps keep the scope centered in its elevation range while shooting at long range. Additionally, with a -20 insert set in the front and a +20 insert set in the rear, you may be able to zero at very long ranges without using an angled scope base — and that can save money. (To move your point of impact upwards, you lower the front of the scope relative to the bore axis, while raising the rear of the scope.)
Insert Elevation Values and Ring Spacing
People are sometimes confused when they employ the Burris inserts. The inset numbers (-10, +10, -20, +20 etc.) refer to hundredths of inch shim values, rather than to MOA. And you need the correct, matched top/bottom pair of inserts to give you the marked thousandth value. Importantly, the actual amount of elevation you get with Burris inserts will depend BOTH on the insert value AND the spacing between ring centers.
Forum member Gunamonth has explained this in our Shooters’ Forum:
Working with Burris Signature Rings
Burris inserts are [marked] in thousandths of an inch, not MOA. To know how many MOA you gain you also need to know the ring spacing. For example, with a -20 thou insert set in the front and a +20 thou insert set in the rear, if the ring spacing is 6″, the elevation change will be approximately +24 MOA upwards.
Here’s how we calculate that. If you have a 2 X 0.020″ “lift” over a distance of 6 inches (i.e. 0.040″ total offset at 0.5 feet) that’s equivalent to 0.080″ “lift” over 12 inches (one foot). There are 300 feet in 100 yards so we multiply 0.080″ X 300 and get 24″ for the total elevation increase at 100 yard. (Note: One inch at 100 yards isn’t exactly a MOA but it’s fairly close.)
Here’s a formula, with all units in inches:
Total Ring Offset
——————– X 3600 = Change @ 100 yards
Ring Spacing
(.020 + .020)
—————– X 3600 = 24 inches at 100 yards
Ring Spacing: 6 inches
NOTE: Using the above formula, the only time the marked insert offset will equal the actual MOA shift is when the center to center ring spacing is 3.60″. Of course, you are not required to use 3.60″ spacing, but if you have a different spacing your elevation “lift” will be more or less than the values on the inserts.
Try a club match this summer! Every summer weekend, there are hundreds of local club “fun matches” conducted around the country. One of the good things about club shoots is that you don’t have to spend a fortune on equipment to have fun. But we’ve seen that many club shooters handicap themselves with a few common equipment oversights or lack of attention to detail while reloading. Here are SIX TIPS that can help you avoid these common mistakes, and build more accurate ammo for your club matches.
1. Align Front Rest and Rear Bag
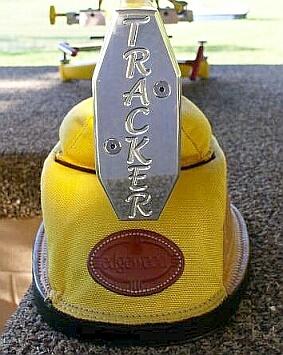
We see many shooters whose rear bag is angled left or right relative to the bore axis. This can happen when you rush your set-up. But even if you set the gun up carefully, the rear bag can twist due to recoil or the way your arm contacts the bag. After every shot, make sure your rear bag is aligned properly (this is especially important for bag squeezers who may actually pull the bag out of alignment as they squeeze).
Forum member ArtB adds: “To align my front rest and rear bag with the target, I use an old golf club shaft. I run it from my front rest stop through a line that crosses over my speed screw and into the slot between the two ears. I stand behind that set-up and make sure I see a straight line pointing at the target. I also have a piece of tape that I’ve placed on the golf shaft that indicates how far the back end of the rear bag should be placed from the front rest stop.”
2. Avoid Contact Interference
We see three common kinds of contact or mechanical interference that can really hurt accuracy. First, if your stock has front and/or rear sling swivels make sure these do NOT contact the front or rear bags at any point of the gun’s travel. When a sling swivel digs into the front bag that can cause a shot to pop high or low. To avoid this, reposition the rifle so the swivels don’t contact the bags or simply remove the swivels before your match. Second, watch out for the rear of the stock grip area. Make sure this is not resting on the bag as you fire and that it can’t come back to contact the bag during recoil. That lip or edge at the bottom of the grip can cause problems when it contacts the rear bag. Third, watch out for the stud or arm on the front rest that limits forward stock travel. With some rests this is high enough that it can actually contact the barrel. We encountered one shooter recently who was complaining about “vertical flyers” during his match. It turns out his barrel was actually hitting the front stop! With most front rests you can either lower the stop or twist the arm to the left or right so it won’t contact the barrel.
3. Weigh Your Charges — Every One
This may sound obvious, but many folks still rely on a powder measure. Yes we know that most short-range BR shooters throw their charges without weighing, but if you’re going to pre-load for a club match there is no reason NOT to weigh your charges. You may be surprised at how inconsistent your powder measure actually is. One of our testers was recently throwing H4198 charges from a mechanical measure for his 30BR. Each charge was then weighed twice with a Denver Instrument lab scale. Our tester found that thrown charges varied by up to 0.7 grains! And that’s with a premium measure.
4. Measure Your Loaded Ammo — After Bullet Seating
Even if you’ve checked your brass and bullets prior to assembling your ammo, we recommend that you weigh your loaded rounds and measure them from base of case to bullet ogive using a comparator. If you find a round that is “way off” in weight or more than .005″ off your intended base to ogive length, set it aside and use that round for a fouler. (Note: if the weight is off by more than 6 or 7 grains you may want to disassemble the round and check your powder charge.) With premium, pre-sorted bullets, we’ve found that we can keep 95% of loaded rounds within a range of .002″, measuring from base (of case) to ogive. Now, with some lots of bullets, you just can’t keep things within .002″, but you should still measure each loaded match round to ensure you don’t have some cases that are way too short or way too long.
5. Check Your Fasteners
Before a match you need to double-check your scope rings or iron sight mounts to ensure everything is tight. Likewise, you should check the tension on the screws/bolts that hold the action in place. Even with a low-recoiling rimfire rifle, action screws or scope rings can come loose during normal shooting.
6. Make a Checklist and Pack the Night Before
Ever drive 50 miles to a match then discover you have the wrong ammo or that you forgot your bolt? Well, mistakes like that happen to the best of us. You can avoid these oversights (and reduce stress at matches) by making a checklist of all the stuff you need. Organize your firearms, range kit, ammo box, and shooting accessories the night before the match. And, like a good Boy Scout, “be prepared”. Bring a jacket and hat if it might be cold. If you have windflags, bring them (even if you’re not sure the rules allow them). Bring spare batteries, and it’s wise to bring a spare rifle and ammo for it. If you have just one gun, a simple mechanical breakdown (such as a broken firing pin) can ruin your whole weekend.
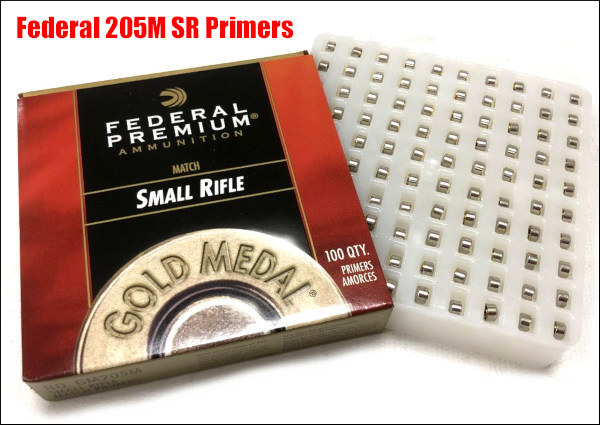
Do you know how gun primers are made — how the explosive elements are applied into those tiny cups? Find out by watching this video filmed at a Federal ammunition factory. It starts out with empty primer cups loaded, 1000 at a time, into trays using vibration (0:05 time-mark). While much of the process is automated, there is still a significant role played by production workers who apply a green, paste-like charging compound to the inside of hundreds of primer cups.
At the 0:17-second time-mark you can see the factory worker “charging” the primers with the priming compound. After the cups are filled, then the plate of cups “mates up with a plate of anvils” (0:40 time-mark). Then the primers are unloaded from trays and inspected.
Primer “Mysteries and Misconceptions” Article
There is an excellent article about primers on the Shooting Times website. This authoritative Shooting Times article explains the fine points of primer design and construction. The author reveals some little-known facts about primers and corrects common misconceptions. Here are some highlights:
Size Matters
Useful Trivia — even though Small Rifle and Small Pistol primer pockets share the same depth specification, Large Rifle and Large Pistol primers do not. The standard pocket for a Large Pistol primer is somewhat shallower than its Large Rifle counterpart, specifically, 0.008 to 0.009 inch less.
Magnum Primers
There are two ways to make a Magnum primer — either use more of the standard chemical mix to provide a longer-burning flame or change the mix to one with more aggressive burn characteristics. Prior to 1989, CCI used the first option in Magnum Rifle primers. After that, we switched to a mix optimized for spherical propellants that produced a 24% increase in flame temperature and a 16% boost in gas volume.
Foiled Again
Most component primers have a little disk of paper between the anvil and the priming mix. It is called “foil paper” not because it’s made of foil but because it replaces the true metal foil used to seal early percussion caps. The reason this little disk exists is strictly a manufacturing convenience. Wet primer pellets are smaller than the inside diameter of the cup when inserted and must be compacted to achieve their proper diameter and height. Without the foil paper, the wet mix would stick to the compaction pins and jam up the assembly process.
Most bolt-action rifle shooters work the bolt with their trigger-pulling hand. This is because most rifles sold to right-handed shooters come with right-side bolts, while “lefty” rifles come with left-side bolts. This “standard” configuration requires the shooter to take his dominant, trigger-pulling hand off the stock to cycle the bolt, then re-position his hand on the stock, and “re-claim” the trigger. Often the shooter must lift or move his head to work the bolt, and that also requires him to re-establish his cheek weld after each and every shot. Not good.
This really doesn’t make much sense for precision shooting with fore-end support*. There is a better way. If you leave your trigger hand in position and work the bolt (and feed rounds) with the opposite hand, then you don’t need to shift grip and head position with each shot. All this requires is a weakside-placed bolt, i.e. a left bolt for a right-handed shooter or a right bolt for a left-handed shooter. The video below shows a “Lefty” working a right bolt. Note how efficient this is:
As our friend Boyd Allen explains: “If you think about it, if you are going to work with a factory action where your options are left bolt and left port or right bolt and right port, and you are building a rifle that will only be shot from a rest, using the left/left for a RH shooter or using a right/right for a LH shooter works better than the conventional configuration”.
Shoot Like a Champ and Work the Bolt with Your Weakside Hand
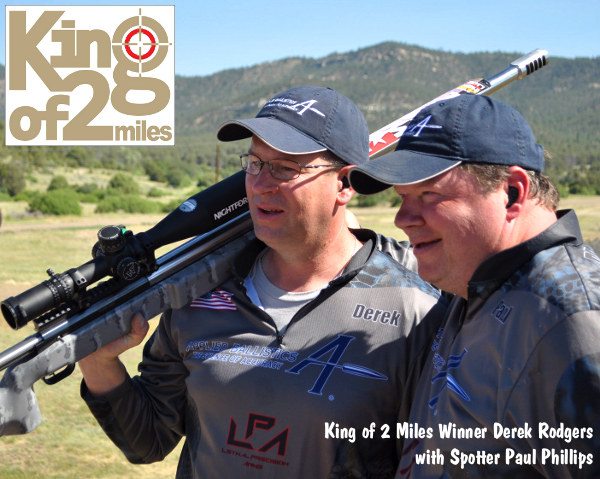
Derek Rodgers is a recent F-TR World Champion, a King of 2 Miles champion, AND is the only person to have won BOTH the U.S. F-Open and the U.S. F-TR National Championships.
And guess what? Derek runs this kind of “opposite” bolt set-up. Yep, Derek shoots right-handed with a left bolt. Though Derek is a right-hander, he shoots with a Left Bolt/Left Port (LBLP) action. He pulls the trigger with his right index finger, while working the left-side bolt with his left (weakside) hand. This allows him to stay in position, and maintain his cheekweld. He places his right hand on the grip, while manipulating the bolt (and feeding rounds) with his non-trigger-pulling hand.
Recent F-TR World Champion and King of 2 Miles Derek Rodgers
This is the rifle with which Derek won the 2013 F-TR National Championship.
*For true standing, off-hand shooting (whether in competition or on a hunt), a conventional strongside bolt placement makes sense, since the non-dominant arm must support the front of the rifle all the time. When shooting from bipod or rest, it’s a different story.


 Oversizing cases also causes problems because the firing pin doesn’t have the length to reach the primer solid enough to ignite it 100% of the time. When you have one that is oversized, you usually have a bunch, since you usually do several cases at a time on that die setting. If the die isn’t readjusted, the problem will continue on the next batch of cases also. They will either not fire at all or you will have a lot of misfires. In a bolt action, a lot of time the extractor will hold the case against the face of the breech enough that it will fire. The case gets driven forward and the thinner part of the brass expands, holding to the chamber wall and the thicker part of the case doesn’t expand as much and stretches back to the bolt face. If it doesn’t separate that time, it will the next time. When it does separate, it leaves the front portion of the case in the chamber and pulls the case head off. Then when it tries to chamber the next round, you have a nasty jam. Quite often range brass is the culprit of this because you never know how many times it has been fired/sized and in what firearm. Back to beating it on the ground again till you figure out that you have to get the forward part of the case out.






 1. Align Front Rest and Rear Bag
 5. Check Your Fasteners