“The pessimist complains about the wind; the optimist expects it to change; the realist adjusts the sails.” — William Arthur Ward
Readers often ask us: “Is there a decent, easy-to-comprehend book that can help my wind-reading?” Many of our Forum members have recommended The Wind Book for Rifle Shooters by Linda Miller and Keith Cunningham.
New Edition — Hardback and eBook
The latest, updated edition of The Wind Book for Rifle Shooters was released in May 2020. This 144-page book, first published in 2007, is a great resource. But you don’t have to take our word for it. If you click this link, you can read book excerpts and decide for yourself. When the Amazon page opens, look below the book cover photo, and click the bar labeled “Read Sample”. This lets you preview chapters from the Wind Book, and view some illustrations. Along with the new hardback edition ($22.99), Amazon offers a Kindle (eBook) edition for $14.99.
Other books cover wind reading in a broader discussion of ballistics or long-range shooting, such as Applied Ballistics for Long-Range Shooting by Bryan Litz. But the Miller & Cunningham book is ALL about wind reading from cover to cover, and that is its strength. The book focuses on real world skills that can help you accurately gauge wind angle, wind velocity, and wind cycles.
All other factors being equal, it is your ability to read the wind that will make the most difference in your shooting accuracy. The better you understand the behavior of the wind, the better you will understand the behavior of your bullet. — The Wind Book for Rifle Shooters
The Wind Book for Rifle Shooters covers techniques and tactics used by expert wind-readers. There are numerous charts and illustrations. The authors show you how to put together a simple wind-reading “toolbox” for calculating wind speed, direction, deflection and drift. Then they explain how to use these tools to read flags and mirage, record and interpret your observations, and time your shots to compensate for wind.
I believe this is a must-have book if you are a long-range sport shooter. I compete in F-Class Open and when I first purchased this book and read it from cover to cover, it helped me understand wind reading and making accurate scope corrections. Buy this book, read it, put into practice what it tells you, you will not be disappointed. — P. Janzso
If you have one book for wind reading, this should be it. Whether you’re a novice or experienced wind shooter this book has something for you. It covers how to get wind speed and direction from flags, mirage, and natural phenomenon. In my opinion this is the best book for learning to read wind speed and direction. — Muddler
What is Parallax?
Parallax is the apparent movement of the scope’s reticle (cross-hairs) in relation to the target as the shooter moves his eye across the exit pupil of the riflescope. This is caused by the target and the reticle being located in different focal planes.
Why is it Important?
The greater the distance to the target and magnification of the optic, the greater the parallax error becomes. Especially at longer distances, significant sighting error can result if parallax is not removed.
How to Remove Parallax
This Nightforce Tech Tip video quickly shows how to remove parallax on your riflescope.
While keeping the rifle still and looking through the riflescope, a slight nod of the head up and down will quickly determine if parallax is present. To remove parallax, start with the adjustment mechanism on infinity and rotate until the reticle remains stationary in relation to the target regardless of head movement. If parallax has been eliminated, the reticle will remain stationary in relation to the target regardless of eye placement behind the optic.
Based on the questions we get on a daily basis on our 800 (Customer Support) line, twist is one of the most misunderstood subjects in the gun field. So let’s look deeper into this mystery and get a better understanding of what twist really means.
When you see the term 1:14″ (1-14) or 1:9″ twist, just exactly what does this mean? A rifle having a 1:14″ twist means the bullet will rotate one complete revolution every fourteen inches of the barrel. Naturally a 1:9″ turns one time every nine inches that it travels down the barrel. Now, here’s something that some people have trouble with. I’ve had calls from shooters thinking that a 1:14″ twist was faster than a 1:9″ because the number was higher with the 1:14″. The easiest way to remember this is the higher the number, the slower the twist rate is.
Now, the biggest misconception is that if a shooter has a .223 with a 1:8″ twist, his rifle won’t stabilize a 55gr bullet or anything lighter. So let’s look at what is required. The longer a bullet is for its diameter, the faster the twist has to be to stabilize it. In the case of the .223 with a 1:8″ twist, this was designed to stabilize 80gr bullets in this diameter. In truth the opposite is true. A 1:8″ will spin a 55gr faster than what is required in order to stabilize that length of bullet. If you have a bullet with good concentricity in its jacket, over-spinning it will not [normally] hurt its accuracy potential. [Editor’s Note: In addition, the faster twist rate will not, normally, decrease velocity significantly. That’s been confirmed by testing done by Bryan Litz’s Applied Ballistics Labs. There may be some minor speed loss.]
Many barrel-makers mark the twist rate and bore dimensions on their barrel blanks.
Think of it like tires on your truck. If you have a new set of tires put on your truck, and they balance them proper at the tire shop, you can drive down a street in town at 35 MPH and they spin perfect. You can get out on the highway and drive 65 MPH and they still spin perfect. A bullet acts the same way.
Once I loaded some 35gr HP bullets in a 22-250 Ackley with a 1:8″ twist. After putting three shots down range, the average velocity was 4584 FPS with an RPM level of 412,560. The group measured .750″ at 100 yards. This is a clear example that it is hard to over-stabilize a good bullet.
Twist-rate illustration by Erik Dahlberg courtesy FireArmsID.com. Krieger barrel photo courtesy GS Arizona.
Shoot 101 Quiz
How much of an expert are you when it comes to firearms and ballistics? Test your knowledge with this interactive test. Guns & Ammo magazine created a series of features called Shoot 101. These articles provide “how to” information about shooting, optics, and outdoor gear.
On the Guns & Ammo website, you’ll find the Shoot 101 Ballistics Quiz. The 15 questions are pretty basic, but it’s still fun to see if you get all the answers correct.
You don’t need a lot of technical knowledge. And it’s not all about flight ballistics. Roughly a third of the questions are about projectile types and bullet construction. Note, for some reason the layout doesn’t show all the possible answers at first. So, for each question, be sure to scroll down using the blue scroll bar on the right.
This 600+ page resource covers rifles, shotguns, handguns, muzzleloaders, airguns, optics and more. We like the print edition, but there is also a Kindle eBook version for $19.99 on Amazon. Both paperback and Kindle versions provide hundreds of photos plus new product roundups, in-depth product tests, and scores of articles and stories.
There are dozens of photo-illustrated feature articles. Among the notable stories are a guide to the new Hornady 7 PRC cartridge, a detailed history of .45-70 Gov’t rifles (from 1878 to the present day), an extensive review of single-shot falling block rifles, and a feature on custom and engraved rifles.
Gun Digest 2024 Editor-in-Chief Phil Massaro has assembled a large team of respected industry authors for the new book, including Kristin Alberts, Joe Arterburn, Craig Boddington, Joe Coogan, Rick Hacker, Jay Leyendecker, Robert Sadowski, Ron Spomer, Patrick Sweeney, Wayne van Zwoll, and many more.
Gun Digest 2024 covers hunting, personal defense, target shooting, gunsmithing, and collecting. There are Updated Ballistics Tables, and the catalog section shows off the newest offerings in rifles, handguns, shotguns, muzzleloaders and air rifles. The new 78th Edition has a vast collection of gun histories, in-depth reviews, and new product roundups. Written by top gun writers, the feature stories cover every aspect of guns and shooting — hunting, personal defense, target practice, gun making, and collecting. In addition to this, the Gun Digest 2024 book includes gun field tests, ballistic tables and more.
Reports from the Field cover the newest firearms and accessories. A Testfire section brings readers up to date on product performance. And there are over 30 feature stories, including the Guns of Western Movies/TV, Rimfire Handguns, and Hunting rifles.
Other Good Books from Gun Digest Media
Gun Digest Media produces numerous other quality books for rifle, pistol, and shotgun owners. Here are four books we recommend. These are offered in both paperback and eBook versions:
Splatterburst 1″ circles, 62 per sheet, 10-pk $9.99. These can be pasted on other paper backers.
We’ve all seen conventional splatter targets with a single large black bullseye. When a shot hits the target, a halo (usually neon yellow) appears around the bullet hole. This makes it easier to see your shot placements indoors, or at long range outdoors. Today we feature a variety of other targets that also offer the cool halo/splatter effect. We’ve found grids, multiple bull targets, sheets with 62 one-inch circle pasters, handgun training targets, and even white background splatter targets (that produce black halos). Try out some of these targets for fun (kids love plinking with splatter targets).
When neck-turning cases, it’s a good idea to extend the cut slightly below the neck-shoulder junction. This helps keep neck tension more uniform after repeated firings, by preventing a build-up of brass where the neck meets the shoulder. One of our Forum members, Craig from Ireland, a self-declared “neck-turning novice”, was having some problems turning brass for his 20 Tactical cases. He was correctly attempting to continue the cut slightly past the neck-shoulder junction, but he was concerned that brass was being removed too far down the shoulder.
Craig writes: “Everywhere I have read about neck turning, [it says] you need to cut slightly into the neck/shoulder junction to stop doughnutting. I completely understand this but I cant seem to get my neck-turning tool set-up to just touch the neck/shoulder junction. It either just doesn’t touch [the shoulder] or cuts nearly the whole shoulder and that just looks very messy. No matter how I adjust the mandrel to set how far down the neck it cuts, it either doesn’t touch it or it cuts far too much. I think it may relate to the bevel on the cutter in my neck-turning tool…”
Looking at Craig’s pictures, we’d agree that he didn’t need to cut so far down into the shoulder. There is a simple solution for this situation. Craig is using a neck-turning tool with a rather shallow cutter bevel angle. This 20-degree angle is set up as “universal geometry” that will work with any shoulder angle. Unfortunately, as you work the cutter down the neck, a shallow angled-cutter tip such as this will remove brass fairly far down. You only want to extend the cut about 1/32 of an inch past the neck-shoulder junction. This is enough to eliminate brass build-up at the base of the neck that can cause doughnuts to form.
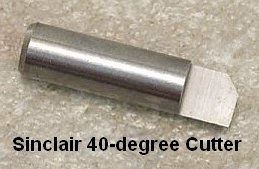
The answer here is simply to use a cutter tip with a wider angle — 30 to 40 degrees. The cutter for the K&M neck-turning tool (above) has a shorter bevel that better matches a 30° shoulder. There is also a 40° tip available. PMA Tool and 21st Century Shooting also offer carbide cutters with a variety of bevel angles to exactly match your case shoulder angle*. WalkerTexasRanger reports: “I went to a 40-degree cutter head just to address this same issue, and I have been much happier with the results. The 40-degree heads are available from Sinclair Int’l for $15 or so.” Forum Member CBonner concurs: “I had the same problem with my 7WSM… The 40-degree cutter was the answer.” Below is Sinclair’s 40° Cutter for its NT-series neck-turning tools. Item NT3140, this 40° Cutter sells for $14.99. For the same price, Sinclair also sells the conventional 30° Cutter, item NT3100.
Al Nyhus has another clever solution: “The best way I’ve found to get around this problem is to get an extra shell holder and face it off .020-.025 and then run the cases into the sizing die. This will push the shoulder back .020-.025. Then you neck turn down to the ‘new’ neck/shoulder junction and simply stop there. Fireforming the cases by seating the bullets hard into the lands will blow the shoulder forward and the extra neck length you turned by having the shoulder set back will now be blended perfectly into the shoulder. The results are a case that perfectly fits the chamber and zero donuts.”
Today’s video showcase covers bore-sighting methods and technology. Bore-sighting the old-fashioned way — by looking down the bore of a rifle at a target — is not difficult. With a conventional bolt-action rifle, visual bore-sighting can be done quickly and easily. Rest your gun securely on bags, remove your bolt and set up a 50-yard target with a large bright orange or black center circle. Look through the back of the action and you should be able to sight down the bore with your own eyes just fine. There’s no need for expensive hardware. In fact it may be easier to bore-sight the “old-fashioned way” rather than try to see a laser in bright sunlight at 50 yards (or even 25).
However, with lever guns and semi-auto rifles, including the popular AR15, M1 Garand, and M1A, the design of the receiver may make it virtually impossible to sight down the bore with the naked eye. That’s where a modern laser bore-sighting device comes in handy. For those situations where a bore-sighting tool is needed, we recommend a laser bore-sighter that fits inside your chamber. An in-chamber laser device, as shown below, is handy and has less safety risk than a tool which fits in the end of the barrel.
How to Bore-Sight Your Rifle in Five Minutes
This video from Australia shows the basics of the bore-sighting process. First set up a target 50 yards (or closer) from your shooting station. Make sure the rifle is well-supported and stable. When the target is ideally centered in the BORE of the barrel, then adjust the reticle on your scope to center the crosshairs on the middle of the target. Then, after checking down-range, take a few test shots. Finally, move the target out to 100 yards and confirm your zero, as explained at the close of today’s article.
Vortex Shows How to Bore-Sight Rifles
This well-made, informative video from Vortex covers the basics of bore-sighting. Bore sighting your rifle is a simple way to establish an initial zero to get you on target faster and save you ammo at the range. Thankfully, it doesn’t take a ton of gear or ammunition to bore-sight a rifle effectively. Video host Jimmy from Vortex provides a handy, step-by-step guide in this 10-minute video.
Bore-Sighting Using a Barrel-Mounted Laser Bore-Sighter
If you wondered why a barrel-mounted laser bore-sighter was off-center? Or if you want to learn how to use one properly, this video shows how to safely and properly zero a scope using a barrel-mounted laser bore sight device. Another option is a small cartridge-sized laser that fits inside the chamber. These sell for under $25.00 and are convenient. There are safety advantages to in-chamber lasers.
Initial Bore-Sighting at Home (Before You Head to the Range)
This useful video shows how to bore-sight a rifle at home. This can save time (and money for ammo) when you do get to the range to confirm your scope’s zero. This home procedure works best if the target is well-illuminated while the rifle is in a shadowed area, creating the best contrast. Also make sure the rifle is on a steady support — such as a portable gun vise or sandbags front and rear.
Bore-Sighting with a Red Dot (Reflex) Sight
As with conventional scopes, if you have a red dot sight or reflex optic, you’ll need to bore-sight your rifle, then zero the optic. [Reflex sights use a reflex lens to project a dot or reticle onto the target, whereas red dot sights use a flat, reflective surface to display a red dot reticle.] In this video, retired Navy SEAL Mark Cochiolo demonstrates how to bore-sight then adjust a red dot. Bore sighting allows you to zero your red dot so that your shots hit near your intended point of impact.
Learn More about Bore-Sighting with Tools
To learn more about bore-sighting, you can view a detailed article on the Warne Scope Mounts website. This features through-the-barrel images and discussion of tools that fit in the chamber or barrel to project a laser beam down-range. Shown below are cartridge-sized projecting lasers that fit in a rifle’s chamber. These are available for a wide variety of cartridge/chamber sizes.
WARNING: If you use an in-barrel laser be sure to remove it BEFORE chambering a round. ANY obstruction in the barrel can cause serious injury or even death if you fire a round.
Bore Sight Grid Tool with Arbors
The Bushnell Bore Sight with Arbors is a bore-sighting tool that many gun stores and gunsmiths use. This device uses arbors but does not transmit a laser.
You attach the tool to the end of the barrel and align it with your scope. A grid is visible inside the bore-sighter. Look at that grid and then and align your scope’s reticle with the grid. This Bushnell unit ships with three expandable arbors in 22-270 caliber, 7mm-35 caliber, and 35-45 caliber.
How to Zero a Hunting Rifle Efficiently
Once you have bore-sighted your rifle to get “on target” successfully, then you want to zero your optic so that the shot falls exactly where you want it at your target distance, typically 100 yards. This Vortex video shows you how to quickly and efficiently sight-in and zero a hunting rifle before heading out into the field. This video explains a simple procedure that lets you get a solid zero in just three shots. Of course you probably want to fire a few more rounds to confirm your zero before you head off to your hunting grounds, but this will let you get on-target with a minimum amount of time and ammo expended. This helpful video now has 3.2 million views on YouTube!
Fouling Shots and Cold Bore Condition
If you recently cleaned your rifle, you may want to fire two or three fouling shots before you start this procedure. But keep in mind that you want to duplicate the typical cold bore conditions that you’ll experience during the hunt. If you set your zero after three fouling shots, then make sure the bore is in a similar condition when you actually go out hunting.
What can happen when the bottom-most primer in a primer feed tube goes off? A big bang, that’s what. Some or all of the primers in the vertical feeding tube can go off in a chain detonation. That’s exactly what happened to Dustin Ellermann, Top Shot Season 3 Champion. Scary experience, but thankfully Dustin was not injured. He writes: “Super thankful that I was wearing my Wiley X eye protection this weekend when I was reloading some .223 rounds. My press detonated nearly 100 small rifle primers. Shown here is the magazine feed tube. Not fun but it could have been much worse. Stay safe!”
When working with progressive reloading presses, you should definitely wear eye protection. Dustin’s chain detonation experience proves that — without a doubt. Remember you only have one set of eyes!
RCBS APS Strips — Alternative to Primer Tubes When you stack a column of primers in a single metal tube, you’re asking for trouble. As Dustin Ellermann learned, when one primer fires, the entire column can follow suit in a chain detonation. Thankfully, you do have options when it comes to primer feeding on a progressive press. RCBS developed an innovative, smart system with primers in horizontal plastic strips. Instead of being stored in a vertical tube, primers are placed in flat, plastic “APS” strips, with a ring of plastic separating each primer. Moving horizontally, primers are never stacked, so the chance of a chain detonation is reduced dramatically. The re-usable APS strips are color-coded for different primer types. You can buy CCI “pre-loaded” primer strips, or you can insert any brand of primers into strips using an RCBS strip-loader tool.
RCBS APS Strip Priming System This video shows how to use APS primer strips wiht a bench-mounted priming system.
AccurateShooter.com Editor Uses Strip Primers
This Editor owns an RCBS Pro-2000 progressive press. The RCBS strip-priming system was one key reason I selected the RCBS Pro-2000 over similar-priced progressives from Dillon and Hornady. I believe the strip primer system is safer, more positive, and easier to use. Before I purchased my RCBS progressive, I “road-tested” the competition. I loaded hundreds of rounds on each of four different progressives: Dillon 550B, Dillon 650, Hornady Lock-N-Load, and RCBS 2000. I was concerned about the primer feed tubes on the Dillons, and I found the RCBS rotary powder measure was much more precise (and easier to adjust) than the sliding bar system on the Dillon machines. The RCBS priming system was definitely more fool-proof than the system on the Hornady press (a first-generation L-N-L that had issues with primer feeding). After “test-driving” blue, red, and green brand progressives extensively, I settled on the RCBS Pro-2000. A decade later, I still think I made the right choice. I like the APS strips for big jobs, and I can also use them in the RCBS hand-priming tool (shown below). With the strips, it’s easy to prime 20 or 40 cases at a time, and then switch to another type of primer for comparison testing.
NOTE: Unfortunately, most of the RCBS APS system tools are no longer in production. But the tools and strips are still available on eBay and many reloading Forums, in some cases “new in box”. This Editor’s APS hand priming tool is still working great after 15 years.
The APS priming system also works with press-mounted priming tool, bench-mounted tool, and APS hand-tool. EdLongRange uses the press-mounted tool: “I also like the APS approach but use the press-mounted unit (saves your hands/wrists — and I haven’t had a need for a progressive press in over 20 years). Loading the primers in the strips is a bit of a PITA but very manageable. As with all tools there is a learning curve.” CLICK HERE for video showing strip-loading tool and press-mounted APS tool. The RCBS press-mounted tool is no longer in production by RCBS, but you can still find it in some stores or on eBay.
Savage Arms offers a series of Shooting Tips in the Savage Blog. Here is a helpful article from Team Savage Shooter Stan Pate. This covers how to ship your rifle safely, and then re-establish zero properly when the gun is reassembled after transport.
Traveling with Firearms — Important Advice
Traveling with firearms can be stressful. You must comply with multiple regulations and then trust your expensive guns to airline baggage handlers. And after arrival you’ll need to put your rifles back together and confirm the zeros. This article offers helpful travel advice from Team Savage shooter Stan Pate. Pate has traveled the globe competing with match rifles. Here he shares his tips for making trips easier on you and your firearms.
Easier Air Travel With Firearms
TSA isn’t nearly as careful with your rifles as you are. Proper storage before sending your firearm up a conveyer belt and into the belly of a plane is critical. Stan Pate spends lots of time each year traveling the skies and has devised a system for keeping his rifle safe when going to and from.
“Never travel with your firearm completely assembled,” Pate cautions. “A fully assembled firearm is much heavier [as a total unit] than one that has been broken-down and stored [in separate sections]. More weight creates more in-the-case movement, which can result in damage. I learned this the hard way years ago. My rifle was actually broken in half when traveling to an international competition. Record your torque settings, use those settings during reassembly and your return to zero should be no problem.”
“Be sure to check on current TSA rules and regulations before travel to be aware of any changes that may effect how you pack your rifles,” says Pate.
Rifle Reassembly and Resetting Zero
The quicker you can reestablish your zero, the quicker you can relax and stop worrying about if your rounds are going to hit their mark during competition. Pate, over the years, has developed a system for rifle reassembly and getting back to zero as quickly as possible. While his torque settings may not be the same as yours, the process can still be used.
“The barreled-action goes back on the stock, and then I tighten all three receiver screws finger tight,” says Pate. “Next, I tighten the front two receiver screws down to 35-inch pounds. The rear receiver screws on this particular rifle likes 15-inch pounds. [Note: Proper torque settings will vary with your action and stock type. Most actions have TWO screws, not three.] Scope attachment comes next, and I follow manufacturer settings when tightening it down. All that’s left to do now is go zero your rifle.”
This video explains an efficient method to Re-Zero your rifles


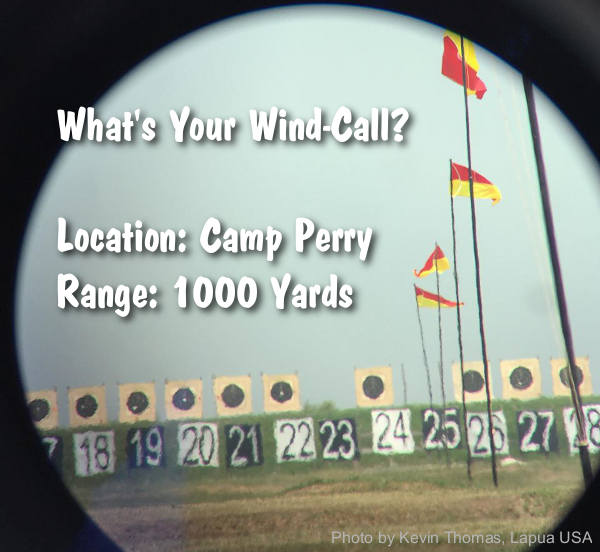
 Readers often ask us: “Is there a decent, easy-to-comprehend book that can help my wind-reading?” Many of our Forum members have recommended The Wind Book for Rifle Shooters by Linda Miller and Keith Cunningham.


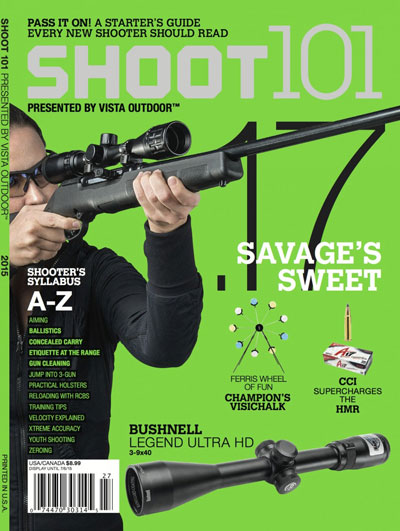 Shoot 101 Quiz


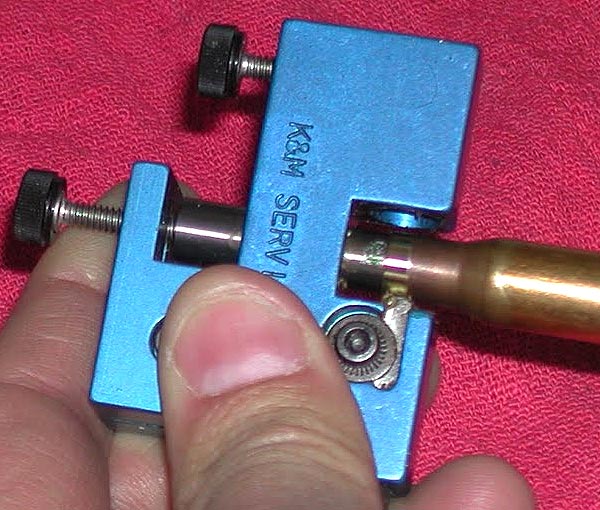
 When neck-turning cases, it’s a good idea to extend the cut slightly below the neck-shoulder junction. This helps keep neck tension more uniform after repeated firings, by preventing a build-up of brass where the neck meets the shoulder. One of our Forum members, Craig from Ireland, a self-declared “neck-turning novice”, was having some problems turning brass for his 20 Tactical cases. He was correctly attempting to continue the cut slightly past the neck-shoulder junction, but he was concerned that brass was being removed too far down the shoulder.



 When you stack a column of primers in a single metal tube, you’re asking for trouble. As Dustin Ellermann learned, when one primer fires, the entire column can follow suit in a chain detonation. Thankfully, you do have options when it comes to primer feeding on a progressive press. RCBS developed an innovative, smart system with primers in horizontal plastic strips. Instead of being stored in a vertical tube, primers are placed in flat, plastic “APS” strips, with a ring of plastic separating each primer. Moving horizontally, primers are never stacked, so the chance of a chain detonation is reduced dramatically. The re-usable APS strips are color-coded for different primer types. You can buy CCI “pre-loaded” primer strips, or you can insert any brand of primers into strips using an RCBS strip-loader tool.


