Christmas Day is just a week away. Books have always been popular holiday gifts. If you haven’t completed your holiday shopping, here are some recommended titles that should please the serious shooters and firearms enthusiasts on your shopping list. For shooting clubs, books also make great end-of-season member awards. Most of us would rather have a useful book than one more piece of wood to toss in a box in the closet.
Here Are TEN TITLES Recommended for Serious Shooters:
If you’re a serious long-range shooter, consider adding this book to your library. Relying on extensive ballistics testing, Modern Advancements contains some fascinating research results, including the effects of twist rate on muzzle velocity, BC, and precision. Other sections detail the evolution of modern rifle, bullet, and optics designs. And there is an important comparison test of chronographs. Laser rangefinders and wind measurement devices are explained in detail by contributing author Nick Vitalbo. This book is a valuable resource for anyone who wants to understand the current “state of the art” in today’s shooting world. There is a ton of “hard science” in this book — not just opinions.
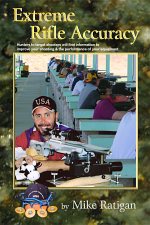
This book should be on the shelf of every short-range benchrest shooter. (Shooters in other disciplines will find the book helpful as well.) Butch Lambert says Mike’s book is “far and away the best Benchrest book written. Very comprehensive, it touches on every aspect of our game.” Mike’s 368-page book is dedicated to getting the most from modern rifle accuracy equipment with an emphasis on shooting 100-200-300 yard group benchrest tournaments. This book covers the most popular hardware plus new equipment offerings are covered, including external mount scopes, actions, triggers, stocks, wind flags, and more. Also covered are rifle handling techniques, note taking, tuning, bullet selection, goals, and match strategies. Mike provides many tips that will help active competitors update their own competitive program.
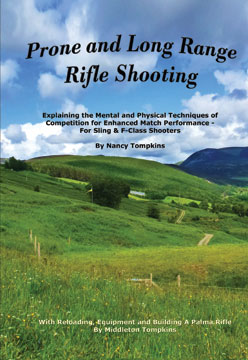
Nancy Tompkins is one of the greatest long-range shooters in American history. She has won five National Long-range Championships. Tompkins’ treatise is a must-read for serious Palma, F-Class, and High Power shooters. The revised Second edition includes F-Class equipment and techniques, and newly updated information. Color pictures. Topics include Mental & Physical training, Reading Wind & Mirage Shooting Fundamentals, International Competition, and Loading for Long Range. Nancy Tompkins is a 4-time winner of the National Long Range Championships, and has won countless other major events. Nancy has been on six Palma Teams (as both a shooter and a coach).
Tony Boyer, the most successful shooter in the history of short-range benchrest competition, shares many of his match-winning tips in this 323-page book. The book covers all aspect of the benchrest discipline: loading, windflags, rest set-up, addressing the rifle, and match strategies. This is a high-quality publication, filled with valuable insights. Every serious benchrest shooter should read Tony’s book. Boyer has dominated registered benchrest in a fashion that will never be duplicated, having amassed 142 U.S. Benchrest Hall of Fame points. The next closest shooter, Allie Euber, has 47 Hall of Fame points. This handsome, full-color book is 323 pages long, with color photos or color illustrations on nearly every page.
This book by 11-time National High Power Champion David Tubb focuses on position shooting and High Power disciplines. Section One covers fundamentals: position points, natural point of aim, breathing, triggering mechanics and follow-through, sling selection and use, getting started, getting better, avoiding obstacles. Section Two covers mechanics of offhand, sitting, and prone positions. Section Three covers shooting skills, including wind reading and mental preparation. Section Four covers the technical side of shooting, with extensive disuctions of rifle design, load development, reloading barrel maintenance, and rifle fitting. We consider this book a “must-read” for any sling shooter, and there is plenty of good advice for F-Class shooters too.
Many of our Forum members have recommended The Wind Book for Rifle Shooters by Linda Miller and Keith Cunningham. This 146-page book, published in 2007, is a very informative resource. But you don’t have to take our word for it. If you click this link, you can read book excerpts on Amazon.com. This lets you preview the first few chapters, and see some illustrations. Other books cover wind reading in a broader discussion of ballistics or long-range shooting. But the Miller & Cunningham book is ALL about wind reading from cover to cover, and that is its strength. The book focuses on real world skills that can help you accurately gauge wind angle, wind velocity, and wind cycles.
Rifle Accuracy Facts by Harold R. Vaughn, (Softcover and Hardcover, Used Price Varies)
Decades after it was written, Vaughn’s work remains a seminal treatise on accuracy. Vaughn was a serious scientist, working for the Sandia National Laboratories. Many “gun writers” toss out hunches about rifle accuracy. Vaughn, by contrast, did serious empirical testing and statistical analysis. Vaughn wondered why some guns shot well while seemingly identical rifles did not. Rifle Accuracy Facts covers a wide variety of topics, including internal ballistics, chamber design, barrel vibration, bullet imbalance, external ballistics, scope design and more. Writer Boyd Allen notes: “If you are serious about precision shooting, Vaughn’s book belongs in your library.”
The Accurate Rifle by Warren Page, $14.95 (Softcover), $20.99 (Hardcover)
We include this book in our list because it is an older classic that has been out of print for a while. Warren Page was the shooting Editor of Field & Stream magazine for 24 years. Long out of print, this seminal work on rifle accuracy was republished in 1996 with an updating chapter by Dave Brennan, long-time Editor of Precision Shooting magazine. If you are interested in the progress of rifle accuracy, it is worth reading this book to see how technology has developed over time (and what older methods still work today). This would make a great gift for an older shooter who grew up reading Warren Page articles in Field & Stream.
Steven Boelter’s 352-page book is a comprehensive study of all types of rimfire ammunition (including 17s and 22 mags), with over 600 photos. In a remarkable undertaking, Steven Boelter fired every brand and sample of rimfire ammo he could acquire (including .22 LR, 17 Mach 2, 17 HMR and .22 WMR), and recorded all the results. In all, Steven tested 11 brands and 137 different rimfire rounds, firing over 32,000 test rounds.
Always controversial, Bill Calfee is nonetheless a major player in the world of rimfire accuracy. Calfee-built rimfire rifles have set many records and won many titles. He harbors strong opinions about what works and what doesn’t, but if you are involved in rimfire competition you should read this book. This work covers all aspects of rimfire gunsmithing and accurizing: barrels, tuners, chambering, triggers, stock design, bedding, action design and much more. He examines each aspect of rimfire accuracy discussing all of the components and their contribution to the improved accuracy. We don’t agree with all of Calfee’s theories about accuracy, but this book still remains a “must-read” for those serious about precision rimfire shooting.
Applied Ballistics LLC will offer its first-ever Ballistics Seminar early next year in Tustin, Michigan. This two-day seminar will feature Ballistician Bryan Litz and other experts including Eric Stecker, President of Berger Bullets, and Ray Gross, Captain of the U.S. F-TR Rifle Team. Bryan, the primary speaker, will present material from his books, the Applied Ballistics Lab, and his experience shooting in various disciplines. Bryan recently won both the Mid-Range and Long-Range F-TR National Championships. Bryan will be assisted by Nick Vitalbo, Owner of nVisti Tactical Innovations and lead engineer for Applied Ballistics. The seminar, held February 29 through March 1, 2016, will include classroom sessions followed by live fire demonstrations with sophisticated instrumentation.
Ballistic Solvers – How they work, best practices, demos.
Weapon Employment Zone (WEZ) Analysis – How to determine and improve hit percentage.
Optics and Laser Technology — State of the Art.
The seminar costs $500.00. But consider this — each seminar participant will receive the entire library of Applied Ballistics books and DVDs, valued at $234.75, PLUS a free copy of Applied Ballistics Analytics software, valued at $200.00. So you will be getting nearly $435.00 worth of books, DVDs, and software. In addition, a DVD of the seminar will be mailed to each attendee after the seminar concludes.
Bryan Litz explains: “Subjects will be introduced from an academic-first, principles perspective. Once the scientific basis for the material is established, the ideas are further demonstrated with examples from instrumented live fire. We explain the science, and then present examples of the principles in action. You’ll leave with an understanding of the subject matter, as well as a knowledge of how to apply it in the real world.” To learn more about the Ballistics Seminar, read this AccurateShooter Forum Thread.
Early Bird Special — Save $100.00
If you register before the end of December, 2015, you’ll receive $100.00 off the regular $500 registration fee. This $400.00 Early Bird Special price can be secured by registering through the Applied Ballistics online store.
The two-day seminar will be held at the Kettunen Center in Tustin Michigan. Lodging costs range from $115-$240 (all-inclusive). This price includes three meals each day, and starts at 3:00 pm the day before the seminar, and goes to breakfast the morning after the seminar concludes. Contact the Kettunen Center directly to reserve accommodations.
Have you recently purchased a new scope? Then you should verify the actual click value of the turrets before you use the optic in competition (or on a long-range hunt). While a scope may have listed click values of 1/4-MOA, 1/8-MOA or 0.1 Mils, the reality may be slightly different. Many scopes have actual click values that are slightly higher or lower than the value claimed by the manufacturer. The small variance adds up when you click through a wide range of elevation.
In this video, Bryan Litz of Applied Ballistics shows how to verify your true click values using a “Tall Target Test”. The idea is to start at the bottom end of a vertical line, and then click up 30 MOA or so. Multiply the number of clicked MOA by 1.047 to get the claimed value in inches. For example, at 100 yards, 30 MOA is exactly 31.41 inches. Then measure the difference in your actual point of impact. If, for example, your point of impact is 33 inches, then you are getting more than the stated MOA with each click (assuming the target is positioned at exactly 100 yards).
How to Perform the Tall Target Test
The objective of the tall target test is to insure that your scope is giving you the proper amount of adjustment. For example, when you dial 30 MOA, are you really getting 30 MOA, or are you getting 28.5 or 31.2 MOA? The only way to be sure is to verify, don’t take it for granted! Knowing your scopes true click values insures that you can accurately apply a ballistic solution. In fact, many perceived inaccuracies of long range ballistics solutions are actually caused by the scopes not applying the intended adjustment. In order to verify your scope’s true movement and calculate a correction factor, follow the steps in the Tall Target Worksheet. This worksheet takes you thru the ‘calibration process’ including measuring true range to target and actual POI shift for a given scope adjustment. The goal is to calculate a correction factor that you can apply to a ballistic solution which accounts for the tracking error of your scope. For example, if you find your scope moves 7% more than it should, then you have to apply 7% less than the ballistic solution calls for to hit your target.
NOTE: When doing this test, don’t go for the maximum possible elevation. You don’t want to max out the elevation knob, running it to the top stop. Bryan Litz explains: “It’s good to avoid the extremes of adjustment when doing the tall target test.I don’t know how much different the clicks would be at the edges, but they’re not the same.”
Should You Perform a WIDE Target Test Too?
What about testing your windage clicks the same way, with a WIDE target test? Bryan Litz says that’s not really necessary: “The wide target test isn’t as important for a couple reasons. First, you typically don’t dial nearly as much wind as you do elevation. Second, your dialed windage is a guess to begin with; a moving average that’s different for every shot. Whereas you stand to gain a lot by nailing vertical down to the click, the same is not true of windage. If there’s a 5% error in your scope’s windage tracking, you’d never know it.”
Verifying Scope Level With Tall Target Test
Bryan says: “While setting up your Tall Target Test, you should also verify that your scope level is mounted and aligned properly. This is critical to insuring that you’ll have a long range horizontal zero when you dial on a bunch of elevation for long range shots. This is a requirement for all kinds of long range shooting. Without a properly-mounted scope level (verified on a Tall Target), you really can’t guarantee your horizontal zero at long range.”
NOTE: For ‘known-distance’ competition, this is the only mandatory part of the tall target test, since slight variations in elevation click-values are not that important once you’re centered “on target” at a known distance.
Ben Avery 10/30/2015 panorama photo by Tracy Hogg. CLICK HERE to zoom image.
Today is the Team Match Day at the F-Class Long-Range National Championships. F-Open and F-TR team shooters will have to deal with damp conditions on the range, as a storm front recently dropped rain at the Ben Avery Shooting Facility outside Phoenix. James Crofts says: “The 2×1000 Team match today is going to be a good day. Wind will be up to 10 mph and quartering.”
In the F-TR division, competition will be fierce. The Michigan F-TR Team, winner of the Mid-Range Championship earlier this week, looks to add a matching 1000-Yard National Team victory today. The shooters of Team X-Men, lead by 2014 individual F-TR Champion James Crofts, hope to reverse their fortunes, and win at the longer distance. And Team Sinclair, the “winningest” squad in F-Class history, looks to grab another title. Team Sinclair boasts multiple champions on its squad, including Derek Rodgers, the only man to have won both the F-TR and F-Open National Championship.
This past weekend, Bryan Litz of Applied Ballistics LLC, topped a field of great shooters to win the 2015 NRA F-TR Mid-Range National Championship. Bryan shot very well, mastering conditions that were tricky and sometimes bewildering, particularly at the shortest range, 300 yards. Consider this, Lou Mudica had the top score on Day Two (all 600 yards), yet he was way down at 41st position on Day One (300/500/600 yards). Finishing Second Overall was Scott Harris. Bryan’s Michigan team-mate Jim Grissom was third, while Bryan’s father (and MI team-mate) Bill Litz was fourth.
F-TR Top Ten at Mid-Range National Championship
Bryan was using a low-profile, carbon/composite-stocked rifle built by John Pierce. Bryan told us: “This was the same rifle and almost the same load with which I won the Midwest Palma match in the summer of 2014. (Story HERE.) My gear consisted of Pierce rifle, Bartlein barrel, Nightforce scope, Berger bullets, Lapua brass, Hodgdon powder (All those companies are sponsors of the USA F-TR team as well as the Michigan F-TR team.) My load for the Mid-Range Nationals was 43.0 grains of Varget with the Berger 215gr Hybrid bullet seated 0.005″ off the rifling.”
Click Image for Full-Size Version:
A lot of wind shooting strategy isn’t just about knowing exactly where to hold at any given point in time. A big part of it is recognizing periods of predictable readable conditions versus UNpredictable unreadable conditions and avoiding shooting in them. — Bryan Litz
At the Mid-Range Nationals, wind conditions at the shorter yardages caught many competitors by surprise. As a result, many shooters, including 2014 F-TR National Champion James Crofts, shot better at 600 yards than at 300. That seems surprising… but there is a reason. Bryan Litz explains that conditions at shorter distances are sometimes more difficult to read than at 1000 yards.
Bryan Litz Talks about Mid-Range Wind-Reading Strategies
Mid-Range is marked by more uncertainty than long range shooting. At long range you can see more flags, more mirage, and conditions tend to be more readable although they have a greater effect. At mid range, the closer you are to the target the less readable the conditions tend to be. Often times at 300 yards there is no mirage and very sparse flags to get a read on. You can still get blown out at 300 yards! 500 yards can be a little better and at 600 sometimes you can get a pretty good read on it, but the majority of strategy for shooting Mid-Range is managing the uncertainty. What is your plan for shooting blind?
Suppose you’re shooting along pretty well centered up in the 10 Ring. Suddenly you shoot a 9 out the side and can’t see an indicator that explains why. Stop! Clearly something is going on which is not readable. It’s likely to be around for a period of time. Its best just to wait for that uncertainty to blow through and start shooting again when things settle out again. How do you know when things have settled out? When everybody else is pretty much back into the 10 Ring for a little while, then you know that a stable condition has settled back in. Take your best guess and get back into it.
A lot of wind shooting strategy isn’t just about knowing exactly where to hold at any given point in time. A big part of it is recognizing periods of predictable readable conditions versus UNpredictable unreadable conditions and avoiding shooting in them. Good equipment is a must, and ballistic performance matters, but when it comes to winning a match versus placing in the top 10, it all comes down to who employs the winning strategy for the various different conditions. It can be more like a chess game then shooting. Competitive judgment is key.
Bryan Litz didn’t do too badly in the Mid-Range Team Match either, shooting a 200-10X. Bryan’s team-mate John Pierce shot a brilliant 200-15X. Looks like those low-profile Pierce-built rigs really hammer:
John Pierce (left) and Bryan Litz, who is holding his Pierce-built F-TR rifle.
The 2015 United States F-Class National Championships are underway now at the Ben Avery Shooting Facility in Phoenix. There’s a “hybrid” format this year. For 2015, the Nationals combine both Mid-Range and Long-Range competitions in one week-long mega-match. The Mid Range F-Class Nationals take place 24-27 October 2015, with shooting at 300, 500, and 600 yards. The Long Range National Championships then run October 28 through 31, with all targets at 1000 yards. The competition consists of two different divisions: F-Open and F-TR (Target Rifle).
The wind arrived early on Saturday…
It started off somewhat windy on Saturday, October 24 for the 300-yard and 500-yard matches. Bryan Litz mastered the conditions to end up leading the F-TR division. (Guess that knowing a thing or two about ballistics helps when the wind is blowing). James Crofts, 2014 F-TR National Champion, shoot well at 500 yards, but struggled at 300 yards (the X-Ring is just 1.5″ at 300 yards). He observed: “Not a bad day today — overall 13th. Bryan Litz has the overall F-TR lead. I’m down 20 for the day but there are lots of shots left to go.”
All the shooting today (Sunday, October 25th), will be at 600 yards. Jim posted from Phoenix: “It’s time to start Day Two of the F-Class Mid-Range Nationals. All 600 yards today and I’m ready. Looks like it could be a tricky day with gusty winds but it will be the same for everyone.”
James Crofts at the 500-yard line. He had a tougher time at 300 yards.
Applied Ballistics LLC will release updated editions of two popular resource books: Applied Ballistics for Long-Range Shooting (3rd Edition) and Ballistic Performance of Rifle Bullets (2nd Edition). Retail price is $54.95 for each title, or $94.95 if purchased together. Pre-orders are now being accepted with a $5 discount per book. You can pre-order the new editions through the Applied Ballistics store. The new editions are expected to ship by the second week of December.
Applied Ballistics for Long Range Shooting (ABLRS), Bryan Litz’s “Magnum Opus”, will have significant enhancements. New for the Third Edition is content on Weapon Employment Zone (WEZ) analysis. WEZ analysis is the study of hit percentage, and how that will be affected by the uncertainties in your environment. Existing academic material is augmented with modern experimental findings. The Third Edition also includes a CD-ROM disc with Applied Ballistics’ latest version of its ballistic software. NOTE: The third edition of ABLRS does NOT include the library of bullet data. That bullet library now exists as a separate reference book: Ballistic Performance of Rifle Bullets.
Ballistic Performance of Rifle Bullets — Data for 533 Bullets AND Rimfire Ammo
The updated, Second Edition of Ballistic Performance of Rifle Bullets contains the current library of all modern bullets tested by the Applied Ballistics Laboratory. Expanding on the First Edition, which had data on 400 bullets from .22 to .408 caliber, this Second Edition contains data on 533 bullets from .22 through .50 caliber. In addition to the centerfire bullet data, the Second Edition contains live fire data on 90 types of rimfire ammo which were all tested for muzzle velocity and BC through five different barrels of various twist/length configurations. This library of experimental test data is the most extensive and accurate resource ever assembled for small arms bullets. Numerous modern ballistics programs draw from the library of tested BCs that are published in this book.
These four photos show the substantial changes in the shock wave and turbulence patterns for the same 7.5mm bullet at different velocities. The “M” stands for Mach and the numerical value represents the velocity of the bullet relative to the speed of sound at the time of the shot. Photos by Beat Kneubuehl.
“Going transonic” is generally not a good thing for bullets. The bullet can lose stability as it enters the transonic zone. It can also become less slippery, losing BC as a consequence of dynamic instability. In this video, Bryan Litz of Applied Ballistics analyzes what happens to bullet stability (and BC) as projectiles approach the speed of sound. Transonic effects come into play starting about Mach 1.2, as the bullet drops below 1340 fps.
Transonic Ballistics Effects Explainedby Bryan Litz
What happens when the bullet slows to transonic speed, i.e. when the bullet slows to about 1340 feet per second? It is getting close to the speed of sound, close to the sound barrier. That is a bad place to fly for anything. In particular, for bullets that are spin-stabilized, what the sound barrier does to a bullet (as it flies near Mach 1) is that it has a de-stabilizing effect. The center of pressure moves forward, and the over-turning moment on the bullet gets greater. You must then ask: “Is your bullet going to have enough gyroscopic stability to overcome the increasing dynamic instability that’s experienced at transonic speed?”
Some bullets do this better than others. Typically bullets that are shorter and have shallow boat-tail angles will track better through the transonic range. On the contrary, bullets that are longer… can experience a greater range of pitching and yawing in the transonic range that will depress their ballistic coefficients at that speed to greater or lesser extents depending on the exact conditions of the day. That makes it very hard to predict your trajectory for bullets like that through that speed range.
When you look at transonic effects on stability, you’re looking at reasons to maybe have a super-fast twist rate to stabilize your bullets, because you’re actually getting better performance — you’re getting less drag and more BC from your bullets if they are spinning with a more rigid axis through the transonic flight range because they’ll be experiencing less pitching and yawing in their flight.
To determine how bullets perform in the “transonic zone”, Bryan did a lot of testing with multiple barrels and various twist rates, comparing how bullets act at supersonic AND transonic velocities. Bryan looked at the effect of twist rates on the bullets’ Ballistic Coefficient (BC). His tests revealed how BC degrades in the transonic zone due to pitching and yawing. Bryan also studied how precision (group size) and muzzle velocity were affected by twist rates. You may be surprised by the results (which showed that precision did not suffer much with faster barrel twist rates). The results of this extensive research are found in Bryan’s book Modern Advancements in Long Range Shooting.
Bryan notes: “A lot of gunpowder was burned to get these results and it’s all published in layman’s terms that are easy to understand”. If you’re interested in learning more about transonic bullet stability, you may want to pick up a copy of Bryan’s book.
Tech Tip by Doc Beech, Applied Ballistics Support Team
I am going to hit on some key points when it comes to bullet pointing. How much pointing and trimming needed is going to depend on the bullet itself. Specifically how bad the bullets are to begin with. Starting out with better-quality projectiles such as Bergers is going to mean two things. First that you don’t need to do as much correction to the meplat, but also that the improvement is going to be less. NOTE: We recommend you DO NOT POINT hunting bullets. Pointing can affect terminal performance in a bad way.
NOTE the change in the bullet tip shape and hollowpoint size after pointing:
Don’t Over-Point Your Bullets
What is important here is that you never want to over-point. It is far better to be safe, and under-point, rather than over-point and crush the tips even the slightest bit. To quote Bryan Litz exactly: “Best practice is to leave a tiny air gap in the tip so you’re sure not to compress the metal together which will result in crushing. Most of the gain in pointing is taking the bullet tip down to this point. Going a little further doesn’t show on target”. So in essence you are only bringing the tip down a small amount… and you want to make sure you leave an air gap at the tip.
Also keep in mind, bullet pointing is one of those procedures with variable returns. If you only shoot at 100-200 yards, bullet pointing will likely not benefit you. To see the benefits, which can run from 2 to 10% (possibly more with poorly designed bullets), you need be shooting at long range. Bryan says: “Typically, with pointing, you’ll see 3-4% increase in BC on average. If the nose is long and pointy (VLD shape) with a large meplat, that’s where pointing has the biggest effect; up to 8% or 10%. If the meplat is tight on a short tangent nose, the increase can be as small as 1 or 2%.” For example, If you point a Berger .308-caliber 185gr Juggernaut expect to only get a 2% increase in BC.
Should You Trim after Pointing?
Sometimes you can see tiny imperfections after pointing, but to say you “need” to trim after pointing is to say that the small imperfections make a difference. Bryan Litz advises: “If your goal is to make bullets that fly uniformly at the highest levels, it may not be necessary to trim them.” In fact Bryan states: “I’ve never trimmed a bullet tip, before or after pointing”. So in the end it is up to you to decide.
Pointing is Easy with the Right Tools
The process of pointing in itself is very simple. It takes about as much effort to point bullets as it does to seat bullets. We are simply making the air gap on the tip of the bullet ever-so smaller. Don’t rush the job — go slow. Use smooth and steady pressure on the press when pointing bullets. You don’t want to trap air in the die and damage the bullet tip. You can use most any press, with a caliber-specific sleeve and correct die insert. The Whidden pointing die has a micrometer top so making adjustments is very easy.
Bryan Litz actually helped design the Whidden Bullet Pointing Die System, so you can order the Pointing Die and Inserts directly from Applied Ballistics. Just make sure that you pick up the correct caliber sleeve(s) and appropriate insert(s). As sold by Applied Ballistics, the Whidden Bullet Pointing Die System comes with the die, one tipping insert, and one caliber-specific sleeve. To see which insert(s) you need for your bullet type(s), click this link:
The better, up-to-date ballistics programs let you select either G1 or G7 Ballistic Coefficient (BC) values when calculating a trajectory. The ballistic coefficient (BC) of a body is a measure of its ability to overcome air resistance in flight. You’ve probably seen that G7 values are numerically lower than G1 values for the same bullet (typically). But that doesn’t mean you should select a G1 value simply because it is higher.
Some readers are not quite sure about the difference between G1 and G7 models. One forum member wrote us: “I went on the JBM Ballistics website to use the web-based Trajectory Calculator and when I got to the part that gives you a choice to choose between G1 and G7 BC, I was stumped. What determines how, or which one to use?”
The simple answer to that is the G1 value normally works better for shorter flat-based bullets, while the G7 value should work better for longer, boat-tailed bullets.
G1 vs. G7 Ballistic Coefficients — Which Is Right for You?
G1 and G7 refer both refer to aerodynamic drag models based on particular “standard projectile” shapes. The G1 shape looks like a flat-based bullet. The G7 shape is quite different, and better approximates the geometry of a modern long-range bullet. So, when choosing your drag model, G1 is preferrable for flat-based bullets, while G7 is ordinarily a “better fit” for longer, boat-tailed bullets.
Drag Models — G7 is better than G1 for Long-Range Bullets
Many ballistics programs still offer only the default G1 drag model. Bryan Litz, author of Applied Ballistics for Long Range Shooting, believes the G7 standard is preferrable for long-range, low-drag bullets: “Part of the reason there is so much ‘slop’ in advertised BCs is because they’re referenced to the G1 standard which is very speed sensitive. The G7 standard is more appropriate for long range bullets. Here’s the results of my testing on two low-drag, long-range boat-tail bullets, so you can see how the G1 and G7 Ballistic coefficients compare:
G1 BCs, averaged between 1500 fps and 3000 fps:
Berger 180 VLD: 0.659 lb/in²
JLK 180: 0.645 lb/in²
The reason the BC for the JLK is less is mostly because the meplat was significantly larger on the particular lot that I tested (0.075″ vs 0.059″; see attached drawings).
For bullets like these, it’s much better to use the G7 standard. The following BCs are referenced to the G7 standard, and are constant for all speeds.
Many modern ballistics programs, including the free online JBM Ballistics Program, are able to use BCs referenced to G7 standards. When available, these BCs are more appropriate for long range bullets, according to Bryan.
[Editor’s NOTE: BCs are normally reported simply as an 0.XXX number. The lb/in² tag applies to all BCs, but is commonly left off for simplicity.]


 Verifying Scope Level With Tall Target Test


 The better, up-to-date ballistics programs let you select either G1 or G7 Ballistic Coefficient (BC) values when calculating a trajectory. The ballistic coefficient (BC) of a body is a measure of its ability to overcome air resistance in flight. You’ve probably seen that G7 values are numerically lower than G1 values for the same bullet (typically). But that doesn’t mean you should select a G1 value simply because it is higher.
 Drag Models — G7 is better than G1 for Long-Range Bullets


