A good riflescope is essential for many types of competition, and the vast majority of hunters have scoped rifles. Some F-Class and benchrest competitors are now using optics with up to 60X magnification. Over the past 30 years, scopes have continued to evolve with improved glass, more reticle types, vastly increased elevation travel, bigger main tubes, FFP and SFP options, and even built-in electronics.
When shopping for a riflescope, it’s useful to understand how scopes work — how the internal mechanisms control windage and elevation, how parallax controls work, and how magnification levels are controlled.
Basics of How Riflescopes Work
This Burris video (above) covers the key aspects of scope function: zoom magnification, windage control, elevation control, parallax control (front or side mount), and ocular lens focus. There are some tips on getting a new scope running smoothly — it’s wise to rotate the power control a few times as well as both windage and elevation knobs. The video below also explains how to set ocular focus controls optimally.
Scope Break-In Methods and Diagnosing Issues — Great Video
We recommend that all serious shooters watch this video start to finish. A very knowledgeable scope engineer, Leupold’s Mike Baccellieri, explains the fine details of scope operation — with very useful recommendations on how to ready a new scope for use (See 36:50 time-mark). With a new optic he advises to run the controls multiple times to full travel. Also, take your time to get the diopter control just right (See 26:40 time-mark).
The video also explains why, with a new scope or one that hasn’t been used much, it is sometimes effective to rotate the elevation PAST the desired setting then come back a click (See 35:40 time-mark). In addition, near the end of the video, the expert explains how you can use a mirror to determine if the scope mount (base and/or rings) is NOT aligned with the bore axis, forcing excess travel to get on target (See 42:00 time-mark). We have seen this caused by scope rails attached slightly off axis.
Large diameter turrets make windage and elevation markings easier to see, and the click “feel” may be more noticeable given the greater diametrical travel between clicks.
First Focal Plane (FFP) vs. Second Focal Plane (SFP)
The main visual difference between First Focal Plane (FFP) and Second Focal Plane (SFP) scopes is the appearance of the reticle (and its hash marks) at different magnification levels. With a FFP scope, the reticle increases in visible size (and line thickness) with increased magnification. This is so the angular hash marks remain constant (in Mils or MOA angular span) at all magnification levels. So, on a 10-30X FFP scope, a 0.1 Mil hash mark represents the SAME angular measurement at 10X, 20X, or 30X (or any magnification). The downside of the FFP system is that the reticle lines can appear very thick at high magnification. But for a PRS/NRL match, with targets at multiple distances, it is important that the hash marks represent the same angular measurement at all power settings.
On a Second Focal Plane (SFP) scope, by contrast, the reticle lines (and hash marks) appear visually (in thickness) the same at all magnification levels. This means the hash mark divisions will only be precise at one magnification level, as designed by the manufacturer. For example, you could have exact 1 MOA Hash marks at 10X. But zoom the scope to 20X and the same reticle hash mark would then cover 2 MOA. SFP scopes are popular with competition shooters who shoot at specific known distances. Not having thick reticle lines at 25X to 50X is an advantage when aiming at precise benchrest and F-Class targets.
ZEISS now makes excellent FFP Scopes with both MOA and Milrad options
Minute of Angle (MOA) vs. Milliradian (MILRAD or MIL)
This video also explains MOA vs. MRAD (Milliradian) controls. A Minute of Angle (MOA) is an angular measurement that represents 1.047″ at 100 yards. Modern MOA scopes are typically configured with 1/4 MOA or 1/8 MOA clicks. A Milliradian (MRAD) is another angular measurement defined as one-thousandth of a radian. Milrad scopes are commonly configured with 0.1 Milrad clicks. How much is a 0.1 mil at 100 yards? One mil equals 3.6 inches at 100 yards; therefore, 1/10th of that, 0.1 Mil, equals 0.36” – roughly a third of an inch – at 100 yards. That’s pretty close to the common quarter-inch (1/4 MOA) increment found on MOA riflescopes.
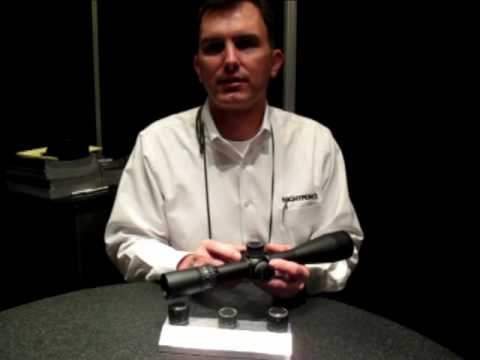
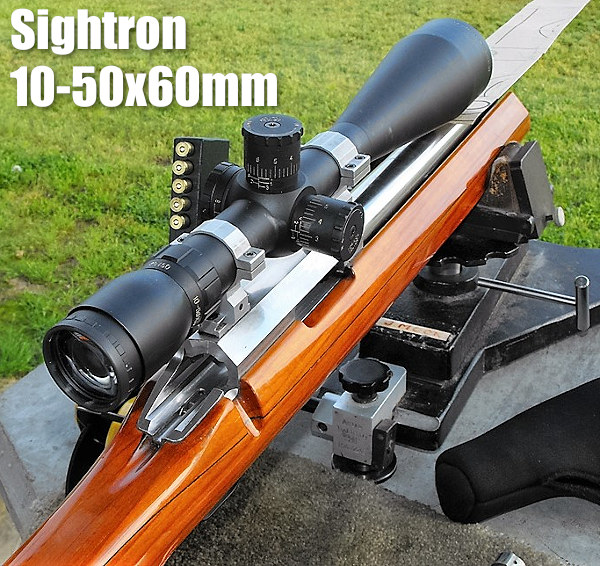
Sightron makes excellent high-magnification SFP zoom scopes favored by many competitors. These have proven quite reliable and offer very good performance for the price.
Scope Mounting Method and Alignment
When mounting a scope, you want to make sure the scope is aligned properly, so that vertical travel is precisely up and down, not offset. Begin by supporting the rifle with a good front and rear rest. Use a portable level to ensure the rifle is not tilting slightly left or right around the barrel bore axis. Then you want to align your scope’s vertical axis. For this, we recommend setting up a plumb bob — a weighted line that hangs straight down. This can be set up indoors or outdoors. Align your reticle’s vertical axis precisely with the plumb bob line, making sure not to move the rifle.
One caution — we have seen some riflescopes that are internally off-axis by up to 4 degrees. In this case, you can align the reticle’s vertical axis with the plumb bob line but then find that your turrets are slightly titled. That is a scope manufacturing fault that will result in some error when you input a large click value (e.g. 10+ MOA up or down).
When mounting your scope, a key factor to consider is the eye relief — the distance of the rear “ocular” lens to your eye. When mounting the scope, put your head in the position at which you normally shoot. NOTE: As your optimal head position may be quite a bit different when shooting prone vs. shooting from a bench, you may want to adjust the scope placement for different shooting positions. This Editor had to move his comp rifle scope about an inch rearward when local club matches changed from prone to bench.
Have you recently purchased a new scope? Then you should verify the actual click value of the turrets before you use the optic in competition (or on a long-range hunt). While a scope may have listed click values of 1/4-MOA, 1/8-MOA or 0.1 Mils, the reality may be slightly different. Many scopes have actual click values that are slightly higher or lower than the value claimed by the manufacturer. The small variance adds up when you click through a wide range of elevation.
In this video, Bryan Litz of Applied Ballistics shows how to verify your true click values using a “Tall Target Test”. The idea is to start at the bottom end of a vertical line, and then click up 30 MOA or so. Multiply the number of clicked MOA by 1.047 to get the claimed value in inches. For example, at 100 yards, 30 MOA is exactly 31.41 inches. Then measure the difference in your actual point of impact. If, for example, your point of impact is 33 inches, then you are getting more than the stated MOA with each click (assuming the target is positioned at exactly 100 yards).
How to Perform the Tall Target Test
The objective of the tall target test is to insure that your scope is giving you the proper amount of adjustment. For example, when you dial 30 MOA, are you really getting 30 MOA, or are you getting 28.5 or 31.2 MOA? The only way to be sure is to verify, don’t take it for granted! Knowing your scopes true click values insures that you can accurately apply a ballistic solution. In fact, many perceived inaccuracies of long range ballistics solutions are actually caused by the scopes not applying the intended adjustment. In order to verify your scope’s true movement and calculate a correction factor, follow the steps in the Tall Target Worksheet. This worksheet takes you thru the ‘calibration process’ including measuring true range to target and actual POI shift for a given scope adjustment. The goal is to calculate a correction factor that you can apply to a ballistic solution which accounts for the tracking error of your scope. For example, if you find your scope moves 7% more than it should, then you have to apply 7% less than the ballistic solution calls for to hit your target.
NOTE: When doing this test, don’t go for the maximum possible elevation. You don’t want to max out the elevation knob, running it to the top stop. Bryan Litz explains: “It’s good to avoid the extremes of adjustment when doing the tall target test.I don’t know how much different the clicks would be at the edges, but they’re not the same.”
Should You Perform a WIDE Target Test Too?
What about testing your windage clicks the same way, with a WIDE target test? Bryan Litz says that’s not really necessary: “The wide target test isn’t as important for a couple reasons. First, you typically don’t dial nearly as much wind as you do elevation. Second, your dialed windage is a guess to begin with; a moving average that’s different for every shot. Whereas you stand to gain a lot by nailing vertical down to the click, the same is not true of windage. If there’s a 5% error in your scope’s windage tracking, you’d never know it.”
Verifying Scope Level With Tall Target Test
Bryan says: “While setting up your Tall Target Test, you should also verify that your scope level is mounted and aligned properly. This is critical to insuring that you’ll have a long range horizontal zero when you dial on a bunch of elevation for long range shots. This is a requirement for all kinds of long range shooting. Without a properly-mounted scope level (verified on a Tall Target), you really can’t guarantee your horizontal zero at long range.”
NOTE: For ‘known-distance’ competition, this is the only mandatory part of the tall target test, since slight variations in elevation click-values are not that important once you’re centered “on target” at a known distance.
Let’s say you’ve purchased a new scope, and the spec-sheet indicates it is calibrated for quarter-MOA clicks. One MOA is 1.047″ inches at 100 yards, so you figure that’s how far your point of impact (POI) will move with four clicks. Well, unfortunately, you may be wrong. You can’t necessarily rely on what the manufacturer says. Production tolerances being what they are, you should test your scope to determine how much movement it actually delivers with each click of the turret. It may move a quarter-MOA, or maybe a quarter-inch, or maybe something else entirely. (Likewise scopes advertised as having 1/8-MOA clicks may deliver more or less than 1 actual MOA for 8 clicks.)
Reader Lindy explains how to check your clicks: “First, make sure the rifle is not loaded. Take a 40″ or longer carpenter’s ruler, and put a very visible mark (such as the center of an orange Shoot’N’C dot), at 37.7 inches. (On mine, I placed two dots side by side every 5 inches, so I could quickly count the dots.) Mount the ruler vertically (zero at top) exactly 100 yards away, carefully measured.
Place the rifle in a good hold on sandbags or other rest. With your hundred-yard zero on the rifle, using max magnification, carefully aim your center crosshairs at the top of the ruler (zero end-point). Have an assistant crank on 36 (indicated) MOA (i.e. 144 clicks), being careful not to move the rifle. (You really do need a helper, it’s very difficult to keep the rifle motionless if you crank the knobs yourself.) With each click, the reticle will move a bit down toward the bottom of the ruler. Note where the center crosshairs rest when your helper is done clicking. If the scope is accurately calibrated, it should be right at that 37.7 inch mark. If not, record where 144 clicks puts you on the ruler, to figure out what your actual click value is. (Repeat this several times as necessary, to get a “rock-solid”, repeatable value.) You now know, for that scope, how much each click actually moves the reticle at 100 yards–and, of course, that will scale proportionally at longer distances. This optical method is better than shooting, because you don’t have the uncertainly associated with determining a group center.
Using this method, I discovered that my Leupold 6.5-20X50 M1 has click values that are calibrated in what I called ‘Shooter’s MOA’, rather than true MOA. That is to say, 4 clicks moved POI 1.000″, rather than 1.047″ (true MOA). That’s about a 5% error.
I’ve tested bunches of scopes, and lots have click values which are significantly off what the manufacturer has advertised. You can’t rely on printed specifications–each scope is different. Until you check your particular scope, you can’t be sure how much it really moves with each click.
I’ve found the true click value varies not only by manufacturer, but by model and individual unit. My Leupold 3.5-10 M3LR was dead on. So was my U.S.O. SN-3 with an H25 reticle, but other SN-3s have been off, and so is my Leupold 6.5-20X50M1. So, check ‘em all, is my policy.”
From the Expert: “…Very good and important article, especially from a ballistics point of view. If a ballistics program predicts 30 MOA of drop at 1000 yards for example, and you dial 30 MOA on your scope and hit high or low, it’s easy to begin questioning BCs, MVs, and everything else under the sun. In my experience, more than 50% of the time error in trajectory prediction at long range is actually scope adjustment error. For serious long range shooting, the test described in this article is a MUST!” — Bryan Litz, Applied Ballistics for Long-Range Shooting.
Have you recently purchased a new scope? Then you should verify the actual click value of the turrets before you use the optic in competition (or on a long-range hunt). While a scope may have listed click values of 1/4-MOA, 1/8-MOA or 0.1 Mils, the reality may be slightly different. Many scopes have actual click values that are slightly higher or lower than the value claimed by the manufacturer. The small variance adds up when you click through a wide range of elevation.
In this video, Bryan Litz of Applied Ballistics shows how to verify your true click values using a “Tall Target Test”. The idea is to start at the bottom end of a vertical line, and then click up 30 MOA or so. Multiply the number of clicked MOA by 1.047 to get the claimed value in inches. For example, at 100 yards, 30 MOA is exactly 31.41 inches. Then measure the difference in your actual point of impact. If, for example, your point of impact is 33 inches, then you are getting more than the stated MOA with each click (assuming the target is positioned at exactly 100 yards).
How to Perform the Tall Target Test
The objective of the tall target test is to insure that your scope is giving you the proper amount of adjustment. For example, when you dial 30 MOA, are you really getting 30 MOA, or are you getting 28.5 or 31.2 MOA? The only way to be sure is to verify, don’t take it for granted! Knowing your scopes true click values insures that you can accurately apply a ballistic solution. In fact, many perceived inaccuracies of long range ballistics solutions are actually caused by the scopes not applying the intended adjustment. In order to verify your scope’s true movement and calculate a correction factor, follow the steps in the Tall Target Worksheet. This worksheet takes you thru the ‘calibration process’ including measuring true range to target and actual POI shift for a given scope adjustment. The goal is to calculate a correction factor that you can apply to a ballistic solution which accounts for the tracking error of your scope. For example, if you find your scope moves 7% more than it should, then you have to apply 7% less than the ballistic solution calls for to hit your target.
NOTE: When doing this test, don’t go for the maximum possible elevation. You don’t want to max out the elevation knob, running it to the top stop. Bryan Litz explains: “It’s good to avoid the extremes of adjustment when doing the tall target test.I don’t know how much different the clicks would be at the edges, but they’re not the same.”
Should You Perform a WIDE Target Test Too?
What about testing your windage clicks the same way, with a WIDE target test? Bryan Litz says that’s not really necessary: “The wide target test isn’t as important for a couple reasons. First, you typically don’t dial nearly as much wind as you do elevation. Second, your dialed windage is a guess to begin with; a moving average that’s different for every shot. Whereas you stand to gain a lot by nailing vertical down to the click, the same is not true of windage. If there’s a 5% error in your scope’s windage tracking, you’d never know it.”
Verifying Scope Level With Tall Target Test
Bryan says: “While setting up your Tall Target Test, you should also verify that your scope level is mounted and aligned properly. This is critical to insuring that you’ll have a long range horizontal zero when you dial on a bunch of elevation for long range shots. This is a requirement for all kinds of long range shooting. Without a properly-mounted scope level (verified on a Tall Target), you really can’t guarantee your horizontal zero at long range.”
NOTE: For ‘known-distance’ competition, this is the only mandatory part of the tall target test, since slight variations in elevation click-values are not that important once you’re centered “on target” at a known distance.
Let’s say you’ve purchased a new scope, and the spec-sheet indicates it is calibrated for quarter-MOA clicks. One MOA is 1.047″ inches at 100 yards, so you figure that’s how far your point of impact (POI) will move with four clicks. Well, unfortunately, you may be wrong. You can’t necessarily rely on what the manufacturer says. Production tolerances being what they are, you should test your scope to determine how much movement it actually delivers with each click of the turret. It may move a quarter-MOA, or maybe a quarter-inch, or maybe something else entirely. (Likewise scopes advertised as having 1/8-MOA clicks may deliver more or less than 1 actual MOA for 8 clicks.)
Reader Lindy explains how to check your clicks: “First, make sure the rifle is not loaded. Take a 40″ or longer carpenter’s ruler, and put a very visible mark (such as the center of an orange Shoot’N’C dot), at 37.7 inches. (On mine, I placed two dots side by side every 5 inches, so I could quickly count the dots.) Mount the ruler vertically (zero at top) exactly 100 yards away, carefully measured.
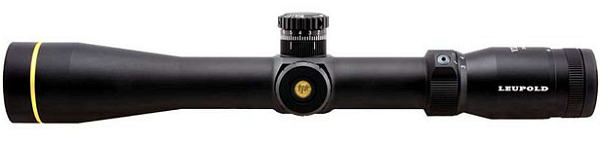
New S1 and S5 Knurled Dials can be user-installed in place of older Leupold turret caps.
Leupold & Stevens makes good scopes, but the standard turrets with screw-on caps are inconvenient for some users. It’s too easy to misplace the caps. Also the standard turrets are not the easiest to grip, particularly with gloved hands. To improve the “gripability” of its scope turrets, Leupold now offers new S1 and S5 screw-on knurled dials that fit in place of the cap covers. These aluminum dials offer large, knurled surfaces that are easy to grip, even when wearing gloves. “These screw-on dials mean no more lost caps or the need for a coin to make adjustments in the field,” said Tim Lesser, Leupold’s Product Development Director. The S1 is for MOA scopes while the S5 is for MIL scopes.
The S1 and S5 dials simply replace Leupold’s screw-on turret caps, so the user can install these easily without tools. It is NOT necessary to send your scope(s) back to the factory. Just remove the caps on your windage and elevation turrets, and screw the knurled dials in their place. The S1/S5 dials automatically align with the adjustment slot and securely tighten down. These dials are interchangeable between different riflescopes in the field. MSRP is $50 per dial set (either S1 or S5).
The S1 dial is engraved in ¼-MOA increments while the S5 (for mil-based turrets) is marked in 0.1 MIL. Both come with a locking zero stop and can be equipped with the Custom Dial System® (CDS) through the Leupold Custom Shop. The Leupold S1 and S5 dials are compatible with most Leupold riflescopes with click adjustments, with the exception of the VX-1 series and older riflescopes with friction adjustments. For those with bullet-drop-compensating reticles, the S1 and S5 are completely compatible. The screw on dials are covered by Leupold’s full lifetime guarantee.
At SHOT Show we got a “first look” at the new Kahles K-1050, a 10-50x56mm scope with unique, centerline parallax control. This is a very interesting new high-magnification competition scope. Kahles’s patented centerline parallax control allows the marksman to adjust windage, elevation, AND parallax all with ONE HAND. If you’re in prone position, for example, you simply reach forward with your right hand to dial windage, then slide your hand to the central turret to dial elevation and, finally, set the parallax by adjusting a separate concentric ring.
Watch Video to See Kahles K-1050 Features and Centerline Parallax Control
NOTE: The big-diameter metal ring is OPTIONAL. You can remove the big metal ring and still adjust parallax (from centerline) using a smaller, built-in control ring on the top turret.
Designed for benchrest and field target use, this scope has a 30mm main tube, 55 MOA elevation, and 1/8-MOA clicks. There are three (3) total turret revolutions. The turret “Rev Count” is displayed with a clever red-and-white striped “barber pole” button in the center of the top turret. One red stripe indicates REV 1, red + white indicates REV 2, and red + white + red indicates REV 3. It’s simple, but it works.
The new K-1050 also features a nice European-style +/- diopter control on the eyepiece. If you have less that perfect vision, this allows you to get a sharp target image even without eyeglasses.
We liked the scope. The glass was bright and sharp, and the clicks were positive and precise. Competition shooters have shown great interest in the new K-1050, and Kahles plans to bring the new scope to the USA by mid-summer 2013. Price is expected to be around $2800.00 USD.
Here’s something that can save you lots of time and aggravation on a varminting trip. This little $110 gizmo is great for varmint hunters and any one who needs to make a quick shot in shifty wind conditions. Instead of the traditional 1/4-MOA hash marks, the Kenton windage turret features markers corresponding to the wind drift your ammo will encounter at various distances (with 10 mph full value winds). You just dial the distance.
Custom-Calibrated Windage Knobs
Kenton Industries’ Tuned Windage Compensator (TWC) has built-in windage marks for 10 mph cross-winds at 100-1000 yards. How do they do that? Well the knobs are calibrated either for specific calibers/loads, or they can make custom knobs using your observed field data. The knobs can compensate for various wind speeds (2-20 mph) and angles (15°- 90°), by applying some simple conversion ratios. As a general rule, with a “full-value”, i.e. 90°, crosswind, the wind drift will go up or down in direct proportion to the change in windspeed. That means, for example, a 10 mph crosswind will push the bullet twice as much sideways as a 5 mph crosswind.
Two versions of Kenton’s TWC knobs are offered. The $109.95 TWC #1 features calculated ballistics for standardized factory ammo for the caliber and barrel length you specify. The $109.95 TWC #2 feature customized windage settings based on bullet BC, environmental conditions, elevation, and ballistic information you provide.
Custom Elevation Knobs
Kenton also makes a $109.95 elevation-compensating TTC knob, that can be customized to your rifle. With this elevation turret, yardages are marked in 50-yard increments, and you can literally just “dial in your distance”. However, to work effectively the TTC knob must be tailored to a particular load (velocity and bullet). Moreover, actual bullet drop will differ with changes in altitude, temperature, and shooting angle — so it’s not as simple as it sounds, and you may need multiple knobs if you shoot a variety of loads. Kenton offers it TTC #1 model calibrated for standardized factory ammo. The TTC #2 is calibrated out to the maximum effective range of your cartridge based on bullet type, muzzle velocity, altitude, and temperature. Select the type of yardage format to be used. The #2 is recommended for wildcatters or for those who want to adjust to specific conditions. Lastly, a TTC #3 elevation knob is offered that relies on the purchaser’s actual recorded drop data from the field. The TTC #3 elevation knob will be calibrated based on the click-value or MOA you provide for each 50-yard increment.
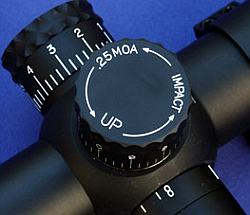
Nightforce Optics has enhanced their elevation adjustments in this year’s lineup of high-magnification Nightforce scopes. Now you can get DOUBLE the elevation travel with a SINGLE TURN of the elevation knob. For an NXS with 1/4-MOA clicks, this means you can get a full 20 MOA of elevation travel with a single turn of the knob.
Bravo, Nightforce — this simple enhancement can make a BIG difference in the field. With most “high-performance” calibers, 20 MOA will get you to 700 yards or beyond. This means that the varminter can zero at all likely hunting yardages within the same revolution of the turret. That makes life much simpler, and reduces the chance of being way off in your elevation. No more confusion about which revolution you’re on….
Likewise, a tactical shooter, moving from near to far targets and back again, can likely stay on the same revolution at most target yardages. Even if you shoot out to 1000 yards, you will be able to get all the way out to 1K within two complete revolutions. This upgrade — doubling the elevation travel in each turret revolution — gives Nightforce scopes practical performance (inside 700 yards) similar to much more expensive scopes fitted with a single-turn or double-turn elevation systems (such as the U.S. Optics EREK knob). The new high-speed adjustment system will be offered in Nightforce’s 15x, 22x, 32x, and 42x series of scopes. Anticipated delivery date for scopes with the high-speed adjustment is May, 2010.
What About Retro-fitting Older NF Scopes?
Nightforce plans to provide an upgrade path for existing Nightforce scopes “eventually, but not right away”. The upgrade would allow installation of the “high-speed adjustment” system on older NF scopes. We don’t have any more specifics. Nightforce has NOT revealed how much the high-speed conversion would cost or when it might be available for pre-2010 scopes.


 Verifying Scope Level With Tall Target Test
 Reader Lindy explains how to check your clicks: “First, make sure the rifle is not loaded. Take a 40″ or longer carpenter’s ruler, and put a very visible mark (such as the center of an orange Shoot’N’C dot), at 37.7 inches. (On mine, I placed two dots side by side every 5 inches, so I could quickly count the dots.) Mount the ruler vertically (zero at top) exactly 100 yards away, carefully measured.


 Verifying Scope Level With Tall Target Test


 Designed for benchrest and field target use, this scope has a 30mm main tube, 55 MOA elevation, and 1/8-MOA clicks. There are three (3) total turret revolutions. The turret “Rev Count” is displayed with a clever red-and-white striped “barber pole” button in the center of the top turret. One red stripe indicates REV 1, red + white indicates REV 2, and red + white + red indicates REV 3. It’s simple, but it works.
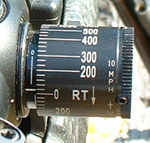 Here’s something that can save you lots of time and aggravation on a varminting trip. This little $110 gizmo is great for varmint hunters and any one who needs to make a quick shot in shifty wind conditions. Instead of the traditional 1/4-MOA hash marks, the Kenton windage turret features markers corresponding to the wind drift your ammo will encounter at various distances (with 10 mph full value winds). You just dial the distance.