Eurooptic vortex burris nightforce sale


teslong borescope digital camera barrel monitor


As an Amazon Associate, this site earns a commission from Amazon sales.


October 8th, 2012

Setting Up A Tube-Gun for Prone Shooting

Salazar tubegun

This 2010 story is reprinted at readers’ request.
In the past few years, tubeguns have really taken over in high power circles. At many matches you’ll see more tubeguns than conventional prone rifles, and a high percentage of those tubeguns will have been built using an Eliseo (Competition Machine) CSS chassis kit.

Step-By-Step Guide to Stock Set-Up
If you are a new tubegun shooter, or if you are planning a tubegun build this winter, German Salazar has prepared a comprehensive set-up guide for Eliseo tubeguns. Eliseo’s CSS chassis system affords a myriad of adjustments. Initially, one can be overwhelmed by all the variables: Length of Pull, Length to Sights, Length to Handstop, Cheekpad Height, Buttstock Offset, Buttstock Cant Angle, Handstop Angle, and Forearm Rotation.

Salazar tubegunIn his Guide to Configuring the Eliseo Tubegun, Salazar shows how to adjust the Tubegun so that a shooter’s prone position is stable, repeatable, and comfortable. Salazar covers each adjustment, step by step. If you follow his instructions, starting with setting Length of Pull, you should find that your hold becomes more stable, the gun moves less from shot to shot, and your eye position relative to the sights is improved.

German explains the set-up process: “Adjusting the stock is a process that you must work at and it builds on itself. As you get one adjustment right, the others begin to fall into place. Our hope is that you take from this article a system for adjusting the stock, not an exact set of dimensions; and that you understand that it will take continuous work over a period of time to really refine the adjustments. Your goal is not to obtain a ‘perfect set of dimensions’ but rather a perfect feel that accomplishes the three objectives of stability, durability and comfort and the knowledge of how to change the adjustments to achieve those objectives under varying conditions such as sloped firing lines or other terrain features.”

>> CLICK HERE to Read Full Eliseo Tubegun Article

Read More at RiflemansJournal.com
German Salazar runs the excellent Rifleman’s Journal website, where you will find dozens of informative articles like this story.

Permalink Competition, Shooting Skills No Comments »
October 8th, 2012

Portable B&D Workmate Reloading Bench

portable reloading benchA while back, we featured a portable reloading bench built on a Black & Decker Workmate. That proved a VERY popular do-it-yourself project so we’re showing it again, in case you missed it the first time.

Texan Robert Lewis made himself a great portable reloading bench from plywood mounted to a Black & Decker Workmate. The bench, roughly 22″ x 19″ on top, folds up to fit easily in your car’s trunk or behind the seats in a pick-up truck cab. Four recessed bolts hold the wood top section to the collapsible B&D Workmate.The sides and back of the unit are attached to the base with small nails. There is a small shelf (also nailed in place) which can be used to clamp a powder measure or hold a scale. Shown in the photo is a Harrell’s Benchrest measure and Harrell’s single-stage “C” press.

Click for Larger Photo.

The whole unit can be built for about $65.00 with pine, or $80.00 with oak (as shown). Robert explained: “The Workmate was $40. If someone bought a 2’x4′ sheet of 3/4″ oak plywood, I think it is around $30. Using pine plywood would be about half that. Fasteners were $3. Spar Urethane would be $5.”

Robert told us: “I used a couple ideas I found on the web. The Larry Willis website gave me the idea to use the Black and Decker Workmate as a base. I found the Workmate on sale for $40 and the top is made from oak plywood I had in my shop. I sealed the wood with three coats of Spar Urethane. The whole thing folds into a nice package for transportation to and from the range.”

Editor’s NOTE: In the time that’s transpired since we first ran this story, the price of a Black & Decker workmate has gone up. However you can still pick a WM225 Workmate for under $60.00. Target is currently selling WM225 Workmates for $59.99.

Click HERE for FREE WORKBENCH PLANS.

portable shooting bench

Permalink Reloading, Tech Tip 8 Comments »
October 8th, 2012

TECH TIP: How to Speed Up Your RCBS ChargeMaster 1500

RCBS ChargeMaster 1500
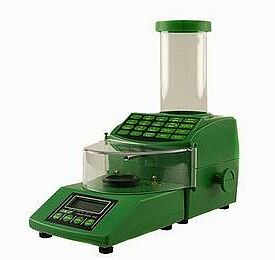
The RCBS ChargeMaster 1500 electronic powder scale and dispenser is the most popular product of its kind on the market. In our original Electronic Powder Dispenser Comparison Test, the ChargeMaster normally dispensed most kinds of powder faster than competitive units from Lyman and PACT. However, after the initial release of the ChargeMaster 1500, RCBS “tweaked” the software a bit to achieve more consistent charge-throws. This slowed down the process somewhat. Some owners have wanted to speed up their ChargeMaster. This IS possible with a relatively simple reprogramming. Most of the internal parameters of the Chargemaster can be modified, under guidance from the tech staff at RCBS.

Gunsmith and Forum member NAT Lambeth reports: “I thought My RCBS ChargeMaster 1500 Combo was fast enough. But I still called RCBS and asked for the programing changes to see if I could speed it up. It was a lot easier than I thought. My 1500 Combo was taking from 15-30 seconds to dispense the powder to the tenth of a grain. I reprogrammed the numbers and now it takes between 7 and 15 seconds to dispense to a tenth. This effectively doubled my loading speed. I only changed the HSB_A1, HSB_B1, and BSP_C1 settings.”

Key ChargeMaster Parameters with Default Settings
HSB_A1 (15.68) Grains under target weight to go from full to high speed
HSB_B1 (3.42) Grains under target weight to go from high to slow speed
BSP_C1 (1.08) Grains under target weight to go from slow to final trickle speed

Nat cautions that you should talk to a RCBS tech before attempting to re-program your ChargeMaster: “You will benefit from talking to the RCBS tech. I have now gone back and played with the numbers a couple of times. (The numbers given to me by the tech at RCBS were still a little conservative.) I think each machine may have its own likes and dislikes. If you get too aggresive with lowering your numbers it will over-throw your intended load.

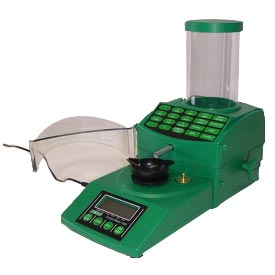
Source for ALL the Parameters
There is an extensive discussion of RCBS ChargeMaster programming on the South Africa Hunting Rifle Shooting Assn. (SAJSV) Forum. In this SAJSV Forum ARTICLE, Jaco Brink lists virtually all the programming codes. Importantly, Jaco also provides the default values for various parameters. This is very important, because the ChargeMaster does not have a “return to default” option. Once you change any value, if you want to return to the original value you must enter it manually.

Jaco cautions: “I have to advise you to only make changes to your scale if you are confident to do so, and remember that there is not a ‘return to default’ setting in the scale. If all else fails return your scale to the default settings [I have listed].”

CLICK HERE for list of RCBS ChargeMaster Default Programming Values

Use a McDonald’s Straw to Reduce “Over-Throws”
Jaco Brink provided another useful tip to avoid “over-throws” (excess charge weight): “The RCBS employee advised me to take a McDonnell’s straw (because it is thicker than a normal straw), cut off about a half inch piece and put it into the tube where the powder exits. This caused the last part of an extruded powder to clutter less, and reduced the amount of overthrows dramatically.”

CLICK HERE for more ChargeMaster 1500 optimization TIPS.

Permalink Reloading, Tech Tip 9 Comments »