Eurooptic vortex burris nightforce sale


teslong borescope digital camera barrel monitor


As an Amazon Associate, this site earns a commission from Amazon sales.


May 4th, 2014

Aussie Sets Southern Hemisphere 1K Record with Borrowed Rifle

We recently wrote about a spectacular 2.6872″ ten-shot group shot at 1000 yards in Montana. Well Australian Peter Varley recently turned in another amazing group at 1000 yards — this time 2.010″ for FIVE shots. And he did it with a borrowed gun! That’s not the smallest 1K group ever shot on the planet*, but it’s still an Australian and (we believe) a Southern Hemisphere record. Varley shot the 2.010″ group with a borrowed 17-lb Light Gun at a Canberra Rifle Club match in March of this year. Congrats to Peter for his outstanding shooting. And “hats off” to fellow Queenslander John McQuire, who loaned Peter the rifle.

Shown below is Peter Varley with his target, plus a close-up. You’ll note that two of the five (5) shots go through a paster. You’ll find pasters all over these targets because the Canberra Club “recycles” these large 1K targets many times.

Peter Varley 1000 Yards Light Gun Record

Peter Varley 1000 Yards Light Gun Record

Peter reports: This was shot at a 1000-yard match on the Canberra Rifle Range on Sunday, March 9, 2014. I traveled 1300 kilometers (807 miles) from Nambour (Sunshine Coast) Queensland to Canberra in the Australian Capital Territory.

I had left my rifle case keys at the motel and resigned myself to target butts duty or a lazy day. A friend, John McQuire from Mackay (Central Queensland Coast) said: “Get my 6.5 x 47 out, clean up, and you’re in the first detail (relay)”. So it was a borrowed gun for the shoot. The match commenced around 9:00 am. Conditions were very good — winds were very light with no mirage to speak of. Everything fell into place.”

Gun Specifications: Lawton 7500 action with Jewell trigger, PacNor barrel chambered for 6.5×47 Lapua, home-made custom stock, March 10-60x scope

6.5x47L Load: Lapua 123gr Scenars, with CCI 450 primers and Varget (ADI 2208) powder.

Peter Varley 1000 Yards Light Gun Record

*The current NBRSA Light Gun 1000 Yard 5-shot group record is 1.473″ by Bill Schrader in 2002. Tom Sarver is credited with an even smaller 5-shot IBS Light Gun record.

Permalink Competition 5 Comments »
May 4th, 2014

Are You Spinning Your Bullets Fast Enough? Twist Rate Calculator Predicts Gyroscopic Stability

Berger twist rate calculatorBerger Twist-Rate Stability Calculator
On the Berger Bullets website you’ll find a handy Twist-Rate Stability Calculator that predicts your gyroscopic stability factor (SG) based on mulitiple variables: velocity, bullet length, bullet weight, barrel twist rate, ambient temperature, and altitude. This very cool tool tells you if your chosen bullet will really stabilize in your barrel.

LIVE DEMO BELOW — Just enter values in the data boxes and click “Calculate SG”.

How to Use Berger’s Twist Rate Calculator
Using the Twist Rate Calculater is simple. Just enter the bullet DIAMETER (e.g. .264), bullet WEIGHT (in grains), and bullet overall LENGTH (in inches). On its website, Berger conveniently provides this info for all its bullet types. For other brands, we suggest you weigh three examples of your chosen bullet, and also measure the length on three samples. Then use the average weight and length of the three. To calculate bullet stability, simply enter your bullet data (along with observed Muzzle Velocity, outside Temperature, and Altitude) and click “Calculate SG”. Try different twist rate numbers (and recalculate) until you get an SG value of 1.4 (or higher).

Gyroscopic Stability (SG) and Twist Rate
Berger’s Twist Rate Calculator provides a predicted stability value called “SG” (for “Gyroscopic Stability”). This indicates the Gyroscopic Stability applied to the bullet by spin. This number is derived from the basic equation: SG = (rigidity of the spinning mass)/(overturning aerodynamic torque).

Berger twist rate calculatorIf you have an SG under 1.0, your bullet is predicted not to stabilize. If you have between 1.0 and 1.1 SG, your bullet may or may not stabilize. If you have an SG greater than 1.1, your bullet should stabilize under optimal conditions, but stabilization might not be adequate when temperature, altitude, or other variables are less-than-optimal. That’s why Berger normally recommends at least 1.5 SG to get out of the “Marginal Stability” zone.

In his book Applied Ballistics For Long-Range Shooting, Bryan Litz (Berger Ballistician) recommends at least a 1.4 SG rating when selecting a barrel twist for a particular bullet. This gives you a safety margin for shooting under various conditions, such as higher or lower altitudes or temperatures. Try changing the altitude and temperature in the calculator and you will see that the SG can increase or decrease when these environmental factors change. Under optimal circumstances you should aim for a 1.4, that way if you change circumstances you are still over 1.1.

Erik Dahlberg rifling illustration courtesy FireArmsID.com.

Story idea from EdLongrange. We welcome reader submissions.

Permalink - Articles 6 Comments »
May 4th, 2014

Tech Tip: Measuring Shoulder Bump with Harrell’s Collar

Harrell’s Precision sells “semi-custom” full-length bushing dies for the PPC and 6BR chamberings. While the Harrell brothers do not cut the die to spec, they carry a large selection of dies made with slightly different internal dimensions. When you send in your fired brass, the Harrells choose a die from inventory with just the right amount of sizing (diameter reduction) at the top and bottom of the case. Given the quality, and precise fit, Harrell’s full-length dies are a good value at $75.00 plus shipping.

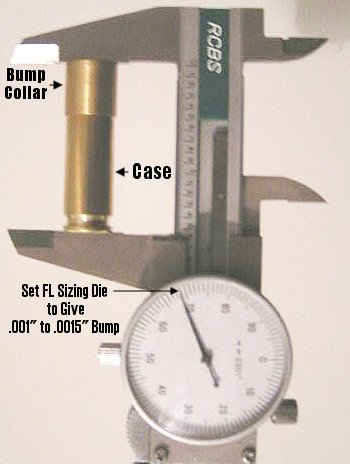
Bump Measuring Collar
The Harrell brothers provide a nice bonus item with each full-length die — a neat, little shoulder bump measuring device as shown in the photo at right. Hornady/Stoney Point sells a stand-alone tool that does the same job, but the Harrell’s bump collar is simpler and faster. To measure your shoulder bump, simply place the Harrell’s bump collar over the upper section of your deprimed case (before sizing) and measure the OAL with your calipers. The collar should seat on the shoulder without any wobble. After taking the measurement, then size the case in your full-length die, replace the collar and repeat the measurement. You want to set your die so the shoulder moves back about .001″ to .0015″ for most applications. (With semi-auto guns you may want more bump — .003″ or more.)

When measuring for shoulder bump, you need to remove the primers first. Our friend Boyd Allen explains: “Use a decapping tool or die to remove the fired primer before taking the initial measurement. When working to thousandths, even the raised edge of a crater or a slightly raised primer can throw you off by a significant amount.”

Permalink Reloading, Tech Tip 4 Comments »