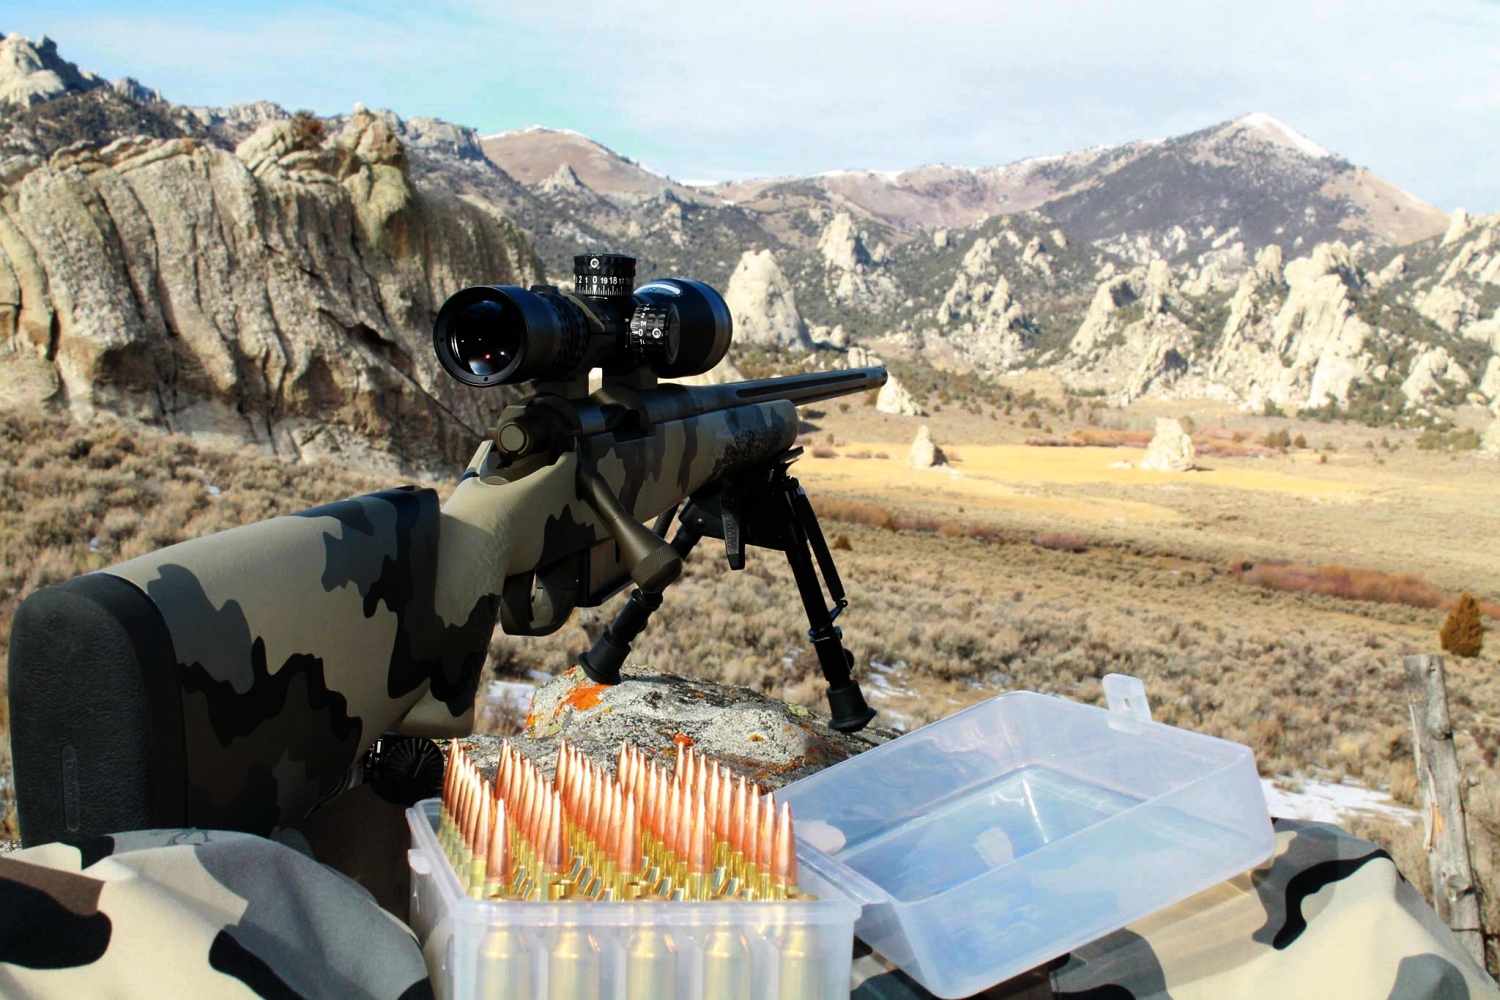
Here are some great rifle-centric landscape images courtesy of Nightforce Optics. Perhaps these “gunscapes” will encourage you to grab your rifle and head out into the woods this weekend. These images are part of an ongoing series of rifle photos posted on the Nightforce Facebook page. Can you identify the optics, and any of the locations? To see a full-screen version of each image, just click on any photo, and a larger version will load.
CLICK Any Image for Larger View
Parting Shot…
This is NOT a Photoshop job — that’s the actual view through a Nightforce scope of a deer. Photographer (and rifle-owner) Brandon F. says: “Ya’ll might enjoy this picture of a Fort Hood white tail… 400m away.”
Here is Ernie Bishop’s pride and joy, a specialty pistol nicknamed “Batman” because the black carbon-fiber stock looks like the Batmobile. This is one sophisticated handgun. Complete with scope, the Batman pistol weighs under 7.5 pounds, thanks to the ultra-light stock. The carbon stock is 6 inches wide at the fore-end, yet weighs just one pound. Ernie tells us: “This gun shoots amazing and is easy to shoot especially with my SEB MAX Rest.” Ernie adds, “The gun will soon also have a field-usable rear-grip stock so I can shoot it prone from a bipod as well.”
The Batman pistol is chambered for the 6mm “Long Dasher”, a 6mm 40°-shouldered variant of the 6.5×47 Lapua. Ernie loads Berger 105gr Hybrid bullets pushed by Hodgdon H-4350 powder.
Gun Specifications The gun, crafted by Eric Wallance of Nawaka Firearms, features an XP-100 action, Jewell trigger, and 15″-long, Brux 1:8″-twist barrel with aluminum muzzle brake. Interestingly, this gun does not have a traditional recoil lug. Instead, gunsmith Wallace milled out a lug from the bottom of the XP-100 action to save weight. On top of the action, the rig carries a Sightron Inc S-III 6-24X56mm scope in Kelbly rings on a custom +20 MOA rail.
Long Dasher Wildcat
Shown at right is a “Long Dasher” 40° wildcat created by Forum member Sunbuilder. This is very similar to Ernie Bishop’s chambering, though there may be small variations related to reamer design (such as freebore). Sunbuilder’s 6-6.5×47 Improved (aka “Long Dasher”) reamer was made by Dave Kiff of Pacific, Tool & Gauge. This wildcat cartridge adds about 2.0 grains capacity to the 6.5×47 necked down to 6mm. The case certainly is impressive with that 40° shoulder. We’re just waiting for the tactical guys to starting run this improved cartridge with its original 6.5mm bore.
Here are three FIVE-shot groups at 500 yards, shot by Ernie’s Batman pistol:
In our Shooters’ Forum, a member recently noted that he needed to pull down (disassemble) some ammunition that was loaded incorrectly by one of his shooting buddies. You can use an impact puller to do this task, but if you have more than a dozen rounds or so, you may prefer to use a collet-style bullet puller. These work very quickly and positively, making quick work of big jobs. The efficiency of the collet-style puller is worth the investment if you frequently disassemble ammo. These devices retail for under $25.00 (collets sold separately). Normally, you’ll need a specific collet for each bullet diameter. But collets are not that costly, so this isn’t a big deal, particularly if you only load a few calibers, such as .223, 6mm, and .308.
Hornady and RCBS use different mechanisms to tighten the collet around the bullet. On Hornady’s Cam-Lock Bullet Puller, a lever-arm on the top of the bullet puller serves to tighten the collet around the bullet. Simply rotate the lever from the vertical to the horizontal position to grab the bullet. Lower the ram to remove the case. The bullet will drop out when you return the lever arm to the vertical position. This is demonstrated in the video below:
Hornady Cam-Lock Bullet Puller Demonstrated
Collet bullet-pullers resemble a loading die with a lever or handle on the top. They screw into a standard reloading press. Hornady and RCBS both make collet-style bullet pullers. They use the same basic principle — the device tightens a collet around the bullet, and then the bullet is separated from the case by lowering the press ram. NOTE: Collet pullers may leave small marks on your bullets, unlike impact (kinetic) pullers.*
Like the Hornady tool, the RCBS Bullet Puller employs a collet to grab the bullet. However, the RCBS tool tightens the collet in a different way. The head of the RCBS tool is threaded internally. By rotating the lever arm clockwise in a horizontal circle you squeeze the collet around the bullet. To remove the bullet, after lowering the press ram, simply spin the lever arm back in the opposite direction. The use of the RCBS tool is demonstrated in this video:
RCBS Collet Bullet Puller Demonstrated:
WARNING: When removing bullets from loaded cartridges, always make sure there are no obsructions or debris in your shell-holder or under the loaded round. NEVER engage a primer seating accessory on your press when working with loaded rounds. You can cause a round to discharge by contacting the primer! Also, we recommend you keep your head and torso away from the bullet puller tool at all times.
*By contrast, impact pullers rarely mark bullets, particularly if you put a little bit of foam or paper wadding in the closed end of your impact puller. When dismantling loaded rounds, powder kernels can get trapped in the wadding, so you should remove and replace the wadding before changing to cartridges loaded with a different powder type (assuming you intend to save the powder).
There is nothing more frustrating (or embarassing) than sending a live round into your expensive new chronograph. As the photo below demonstrates, with most types of chronographs (other than the barrel-hung Magnetospeed), you can fatally injure your expensive chrono if it is not positioned precisely.
When setting up a chrono, we always unload the rifle, remove the bolt and bore-sight to ensure that the path of the bullet is not too low. When bore-sighting visually, set up the rifle securely on the sandbags and look through the bore, breech to muzzle, lining up the barrel with your aim point on the target. Then (during an appropriate cease-fire), walk behind the chronograph. Looking straight back through the “V” formed by the sky-screens, you should be able to see light at the end of the barrel if the gun is positioned correctly. You can also use an in-chamber, laser bore-sighter to confirm the visual boresighting (see photo).
Adjust the height, angle and horizontal position of the chronograph so the bullet will pass through the middle of the “V” below the plastic diffusers, no less than 5″ above the light sensors. We put tape on the front sky-screen supports to make it easier to determine the right height over the light sensors.
Use a Test Backer to Confirm Your Bullet Trajectory
You can put tape on the support rods about 6″ up from the unit. This helps you judge the correct vertical height when setting up your rifle on the bags. Another trick is to hang a sheet of paper from the rear skyscreen and then use a laser boresighter to shine a dot on the paper (with the gun planted steady front and rear). This should give you a good idea (within an inch or so) of the bullet’s actual flight path through the “V” over the light sensors. Of course, when using a laser, never look directly at the laser! Instead shine the laser away from you and see where it appears on the paper.
Alignment of Chronograph Housing
Make sure the chrono housing is parallel to the path of the bullet. Don’t worry if the unit is not parallel to the ground surface. What you want is the bullet to pass over both front and rear sensors at the same height. Don’t try to set the chrono height in reference to the lens of your scope–as it sits 1″ to 2″ above your bore axis. To avoid muzzle blast interference, set your chronograph at least 10 feet from the end of the muzzle (or the distance recommended by the manufacturer).
Rifles with Elevated Iron Sights
All too often rookie AR15 shooters forget that AR sights are positioned roughly 2.4″ above the bore axis (at the top of the front sight blade). If you set your bullet pass-through point using your AR’s front sight, the bullet will actually be traveling 2.4″ lower as it goes through the chrono. That’s why we recommend bore-sighting and setting the bullet travel point about 5-8″ above the base of the sky-screen support shafts. (Or the vertical distance the chronograph maker otherwise recommends). NOTE: You can make the same mistake on a scoped rifle if the scope is set on very tall rings, so the center of the cross-hairs is much higher than the bore axis line.
TARGET AIM POINT: When doing chrono work, we suggest you shoot at a single aiming point no more than 2″ in diameter (on your target paper). Use that aiming point when aligning your chrono with your rifle’s bore. If you use a 2″ bright orange dot, you should be able to see that through the bore at 100 yards. Using a single 2″ target reduces the chance of a screen hit as you shift points of aim. If you shoot at multiple target dots, place them in a vertical line, and bore sight on the lowest dot. Always set your chron height to set safe clearance for the LOWEST target dot, and then work upwards only.
Other Chronograph Tips from Forum Members:
When using a chronograph, I put a strip of masking tape across the far end of the skyscreens about two-thirds of the way up. This gives me a good aiming or bore-sighting reference that’s well away from the pricey bits. I learned that one the hard way. — German Salazar
A very easy and simple tool to help you set up the chronograph is a simple piece of string! Set your gun (unloaded of course) on the rest and sight your target. Tie one end of the string to the rear scope ring or mount, then pull the string along the barrel to simulate the bullet path. With the string showing the bullet’s path, you can then easily set the chronograph’s placement left/right, and up/down. This will also let you set the chrono’s tilt angle and orientation so the sensors are correctly aligned with the bullet path. — Wayne Shaw
If shooting over a chrono from the prone position off a bipod or similar, beware of the muzzle sinking as recoil causes the front of the rifle to drop. I “killed” my first chronograph shooting off a gravel covered firing point where I’d not given enough clearance to start with and an inch or two drop in the muzzle caused a bullet to clip the housing. — Laurie Holland
At the request of our readers, we provide select “Deals of the Week”. Every Monday morning we offer our Bargain selections. Here are some of the best deals on firearms, hardware, reloading components, and shooting accessories. Be aware that sale prices are subject to change, and once clearance inventory is sold, it’s gone for good. You snooze you lose.
1. Stocky’s Stocks — Composite Stock with Bedding Block
Here’s a killer deal on a versatile Stocky’s Long Range Stock with aluminum V-block bedding system. For just $199.99, order this for Rem/Rem Clone long actions or short actions, with either narrow or wide (varmint/tactical) barrel channel. This would be a good choice for a varmint rifle. This is also offered with a matte black, tan, or olive baked-on textured finish for $229.97.
2. RCBS — Buy Green, Get Green Rebate
RCBS is running a very attractive Rebate Program currently. If you spend $300.00 on qualifying products you get a $75.00 rebate. Spend $50 and get a $10.00 Rebate. This program is limited to one (1) rebate redemption per calendar year, with a maximum of $75.00. CLICK HERE for more information. NOTE: To qualify, you must supply completed RCBS rebate coupon, original UPC barcodes from package, and original cash register receipt and/or dated, itemized sales invoice.
3. Midsouth — Nosler .308 Match Monster Bullets, $119.99 for 500
Looking for high-quality, name-brand .308-caliber bullets? You won’t beat the price on these Nosler bullets from Midsouth Shooters Supply. Five options are offered: 155 grain, 168 grain, 168 grain (with cannelure), 170 grain, and 190 grain. The 155s and 168s are just $119.99 for FIVE HUNDRED bullets. The 170s cost $131.28/500 while the big 190s cost $137.74/500. Those are insanely good prices, any way you cut it. The price on the 168s works out to just $23.99 per hundred. You could easily pay $40.00 per hundred for bullets of this quality. These are not seconds or blems — the are quality Nosler-made bullets produced for Midsouth’s Match Monster bulk sales program.
4. Sportsman’s Guide — Frankford Arsenal Case Tumbler Kit
For just $69.99, this Frankford Arsenal Kit provides everything you need to clean brass: Vibratory Tumbler, Rotary Media Separator, Bucket, Corn Cob Media (3 lbs.), and Brass Polish. The Case Tumbler holds up to 600 9mm cases or 350 .223 Rem cases. The separator system is generous, with a 3.5-gallon bucket. NOTE: Sportsman’s Guide Buyers Club members can purchase for $62.99.
5. CDNN Sports — Ruger American Ranch Rifle (Tan), $389.99
Here’s a nice little varmint rifle from Ruger with some nice features at a very attractive price, $389.99. This .223 Rem rifle features a 16.5″ hammer-forged barrel barrel threaded 1/2″-28 at the muzzle for brake or suppressor. The action, which features a 70° three-lug bolt, and Picatinny-style scope rail, sits in an aluminum bedding block. The crisp trigger adjusts down to 3 pounds. With a weight (before optics) of 6.1 pounds, this is a handy carry-around varminter.
6. MidwayUSA — Padded Scoped Rifle Case, $24.99
This 48″-long, thickly-padded gun case will hold most tactical-style rifles and hunting rifles. At a fraction of the cost of a big, cumbersome drag bag, this case may be all you need. The heavy duty padding is over 1″ thick on both sides to protect your rifle and optics investment from rough handling. A large pocket will hold a couple boxes of ammo and other accessories. We like this bag much better than the typical gun-store soft cases. It offers much better padding and more room for large scopes. It is on sale this week at MidwayUSA for just $24.99 in four colors: black, tan, OD green, and gray. In addition to the 48″ case shown, 40″ and 44″ versions are available.
This article appears courtesy Target Shooter magazine from the UK.
Field Target (FT) and Hunter Field Target (HFT) airgun disciplines are popular outdoor shooting sports that simulate the challenges of hunting small game. One of the unique aspects of FT competition is target range-finding using parallax and optical focus. (HFT is limited to lower power scopes, so this type of range-fiding is not used in HFT.) Range-finding is very important because the pellets shot by FT airguns drop rapidly once they leave the muzzle (pellets can drop roughly 5″ at 50 yards). If you don’t have your scope set to the correct distance, you’ll probably miss the target high or low.
FT competitors employ high-magnification (35-55X) scopes to sight targets placed from 10 to 55 yards (7.3 to 50m in the UK). Because these scopes have very short depth-of-field at high-magnification, the target will be out of focus unless you have the scope focus/parallax control set very precisely. But competitors can use this to their advantage — once the target is precisely focused, you have effectively established its distance from the shooter. FT scopes often have large-diameter wheels on the side parallax control so the focus can be set very precisely. You can then read marks placed on the scope to adjust the amount of elevation need to put the pellet on target.
To simplify the adjustment of elevation on FT rifles, competitors will place tapes on the windage knobs with marks that correspond to distances in 3-5 yard (or smaller) increments. These marks allow you to quickly spin your elevation to the setting matching the target range established with your focus/parallax control.
Field Target Accessories
There are a variety of specialized products for FT competitors that help you set up your scope for precise ranging. First, Compufoil offers a computer program, ScopeKnob, that lets you easily create accurate elevation knob tapes for your scope. ScopeKnob even comes with a built-in Ballistics Module that will calculate the pellet trajectory for you and plot range settings for your tape. Chairgun.com also offers ChairGunPRO, specialized airgun ballistics software that lets you simultaneously compare four different pellets, or different scope heights.
In the past, the A-Team offered replacement elevation knobs optimized for use with yardage marking tapes. These were offered in two versions, one which replaced the existing turret altogether and a second which clamped OVER the factory turret. Shown at right is the larger-diameter version in place over the factory turret. Unfortunately we don’t know a current source for this product, but this may help you crate something similar on your own.
Last but not least, Pyramid Air offers large-diameter parallax control wheels. According to Pyramid: “The enlarged sidewheel is the most popular FT scope accessory of all. It lets you put white artist’s tape around the rim to mark the actual distances at which the scope focuses”. A 6″ sidewheel provides over 18″ of space on which to inscribe yardage, and that means you can have a meaningful separation between 18 yards and 20 — where there is a huge parallax and trajectory difference. Though the ranges are already engraved on the rim of the wheel, field target competitors will measure them again on an actual range and write the markings on a strip of white artist’s tape.
Tips on Field Target Scope Set-Up
The creator’s of the A-Team knobs suggest taking your time when setting up a scope for Field Target competition: “We normally take from three to four hours preparing a scope to be mounted on a gun. We mark the scope in 1-yard increments from 9 to 40 yards, then to 55 yards by 3 or 5-yard increments depending on the scope being calibrated.”
One of our Forum members complained that he wasn’t able to set his primers flush to the rim. He tried a variety of primer tools, yet no matter what he used, the primers still didn’t seat deep enough. He measured his primers, and they were the right thickness, but it seemed like his primer pockets just weren’t deep enough. He was mystified as to the cause of the problem.
Well, our friend Boyd Allen diagnosed the problem. It was the decapping rod. If the rod is adjusted too low (screwed in too far), the base of the full-diameter rod shaft (just above the pin) will contact the inside of the case. That shaft is steel whereas your case is brass, a softer, weaker metal. So, when you run the case up into the die, the shaft can actually stretch the base of the primer pocket outward. Most presses have enough leverage to do this. If you bell the base of the primer pocket outwards, you’ve essentially ruined your case, and there is no way a primer can seat correctly.
The fix is simple. Just make sure to adjust the decapping rod so that the base of the rod shaft does NOT bottom out on the inside of the case. The pin only needs to extend through the flash hole far enough to knock the primer out. The photo shows a Lyman Universal decapping die. But the same thing can happen with any die that has a decapping rod, such as bushing neck-sizing dies, and full-length sizing dies.
Whenever you use a die with a decapping pin for the first time, OR when you move the die to a different press, make sure to check the decapping rod length. And it’s a good idea, with full-length sizing dies, to always re-check the height setting when changing presses.
Lee Universal Decapping Die on SALE for $9.89
Speaking of decapping tools, MidwayUSA has the Lee Universal Decapping Die on sale this month (June, 2010), for just $9.89 (item 136543). There are many situations when you may want to remove primers from fired brass as a separate operation (prior to case sizing). For example, if your rifle brass is dirty, you may want to de-cap before sizing. Or, if you load on a progressive press, things will run much more smoothly if you decap you brass first, in a separate operation. The Lee Universal Decapping Die will work with cartridges from 17 Fireball all the way up to 45-70. However, NOTE that the decapping pin supplied with this Lee die is TOO LARGE for LAPUA 6.5×47, 6BR, 220 Russian, and Norma 6 PPC flash holes. Because the pin diameter is too large for these brass types, you must either turn down the pin, or decap with a different tool for cases with .059″ flash-holes. Otherwise, the Lee Decapping Die works well and it’s a bargain.
With barrels, one wonders “Can a little more length provide a meaningful velocity gain?” To answer that question, Rifleshooter.com performed an interesting test, cutting a .308 Win barrel from 28″ all the way down to 16.5″. The cuts were made in one-inch intervals with a rotary saw. At each cut length, velocity was measured with a Magnetospeed chronograph. To make the test even more interesting, four different types of .308 Win factory ammunition were chronographed at each barrel length.
Test Barrel Lost 22.7 FPS Per Inch (.308 Win Chambering)
How much velocity do you think was lost, on average, for each 1″ reduction in barrel length? The answer may surprise you. With a barrel reduction from 28″ to 16.5″, the average speed loss of the four types of .308 ammo was 261 fps total. That works out to an average loss of 22.7 fps per inch. This chart shows velocity changes for all four ammo varieties:
Summary of Findings: The average velocity loss per inch, for all four ammo types combined, was 22.7 FPS. By ammo type, the average loss per inch was: 24.6 (Win 147 FMJ), 22.8 (IMI 150 FMJ), 20.9 (Fed GMM 168gr), and 22.5 (Win 180PP).
Interestingly, these numbers jive pretty well with estimates found in reloading manuals. The testers observed: “The Berger Reloading manual says for the 308 Winchester, ‘muzzle velocity will increase (or decrease) by approximately 20 fps per inch from a standard 24″ barrel’.”
How the Test Was Done
The testers described their procedure as follows: “Ballistic data was gathered using a Magnetospeed barrel mounted ballistic chronograph. At each barrel length, the rifle was fired from a front rest with rear bags, with five rounds of each type of ammunition. Average velocity and standard deviation were logged for each round. Since we would be gathering data on 52 different barrel length and ammunition combinations and would not be crowning the barrel after each cut, we decided to eliminate gathering data on group sizes. Once data was gathered for each cartridge at a given barrel length, the rifle was cleared and the bolt was removed. The barrel was cut off using a cold saw. The test protocol was repeated for the next length. Temperature was 47° F.”
CLICK HERE to Read the Rifleshooter.com Test. This includes detailed charts with inch-by-inch velocity numbers, multiple line charts, and complete data sets for each type of ammo. Rifleshooter.com also offers ballistics graphs showing trajectories with different barrel lengths. All in all, this was a very thorough test by the folks at RifleShooter.com.
Much Different Results with 6mmBR and a Longer Barrel
The results from Rifleshooter.com’s .308 barrel cut-down test are quite different than the results we recorded some years ago with a barrel chambered for the 6mmBR cartridge. When we cut our 6mmBR barrel down from 33″ to 28″, we only lost about 8 FPS per inch. Obviously this is a different cartridge type, but also our 6mmBR barrel end length was 5″ longer than Rifleshooter.com’s .308 Win start length. Velocity loss can be more extreme with shorter barrel lengths (and bigger cartridges). Powder burn rates can also make a difference.
You probably know by now that David Tubb has introduced a new two-stage trigger for Remington 700 rifles, the Model T7T. Priced at $385.00, the new T7T Trigger is a true two-stage design: first and second stages are independently adjustable for both weight and feel. Overall (combined stage) trigger pull weight can be adjusted from just under 1 pound to slightly over 3.5 pounds.
If you are interested in the 7ZT, watch these two videos. The first shows how to adjust pull-weights for both stages. The second video shows how to modify your stock to provide clearance for the T7T.
This video shows how to adjust the new Tubb T7T two-stage trigger for Remington 700s:
The new T7T is a quality product. We’ve received good feedback from “early adopters” who tell us the two-stage function works well. While installation of the T7T may require minor modifications to your action, most gun owners with basic mechanical skills can install the T7T by themselves. The T7T is made using stainless steel and aluminum for maximum corrosion resistance. Note, installation of the T7T trigger (either Right-Hand or Left-Hand) also requires a companion T7T bolt release, offered by DavidTubb.com for $10.00.
This video shows how to modify your stock to fit the T7T trigger:
In 2015, IMR® Powder introduced a new line of powders with Enduron® Technology. These powders are designed to address several performance gaps as powder technology has advanced. Here are key features of the Enduron line of propellants:
Enduron powders contain an additive that drastically reduces copper fouling in the gun barrel. Copper fouling should be minimal, allowing shooters to spend more time shooting and less time cleaning a rifle to retain accuracy.
The new Enduron line is insensitive to temperature changes. Whether a rifle is sighted in during the heat of summer, hunted in a November snowstorm or hunting multiple locations with drastic temperature swings, point of impact with ammunition loaded with Enduron technology will be very consistent.
Enduron powders provide optimal load density, assisting in maintaining low standard deviations in velocity and pressure, a key feature for top accuracy.
Enduron technology is environmentally friendly, crafted using raw materials that are not harmful to the environment.
New IMR 4955 for Larger Cartridges
For 2016, IMR has introduced IMR 4955, a new Enduron extruded powder that is a top performer with popular cartridges such as 270 Winchester, 25-06 Remington, 280 Remington, 300 Winchester Magnum and many more. This new powder falls directly between the new IMR 4451 and IMR 7977 in burn speed, providing excellent performance for most big-game cartridges. Like all Enduron Technology powders, IMR 4955 is temperature insensitive, as shown below.
Adding this propellant to the Enduron line filled in an important place on reloading benches. IMR 4955, plus the original three Enduron powders, provide excellent loading solutions for cartridges from 223 Remington to the massive 500 Nitro Express Magnum. Further, in these days of powder shortages, these new Enduron powders can fill a gap by providing comparable performance to select Hodgdon® powders. Specifically, IMR 4955 is a great choice for cartridges that work well with Hodgdon H4831.
IMR Enduron 4955 is available in one-pound (1 lb.) and eight-pound (8 lb.) containers from quality reloading retailers.


 The gun, crafted by Eric Wallance of Nawaka Firearms, features an XP-100 action, Jewell trigger, and 15″-long, Brux 1:8″-twist barrel with aluminum muzzle brake. Interestingly, this gun does not have a traditional recoil lug. Instead, gunsmith Wallace milled out a lug from the bottom of the XP-100 action to save weight. On top of the action, the rig carries a Sightron Inc S-III 6-24X56mm scope in Kelbly rings on a custom +20 MOA rail.
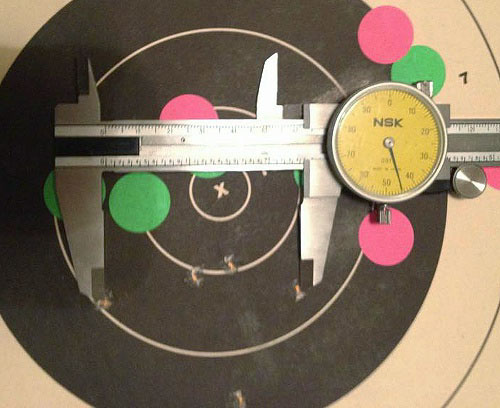

 Like the Hornady tool, the
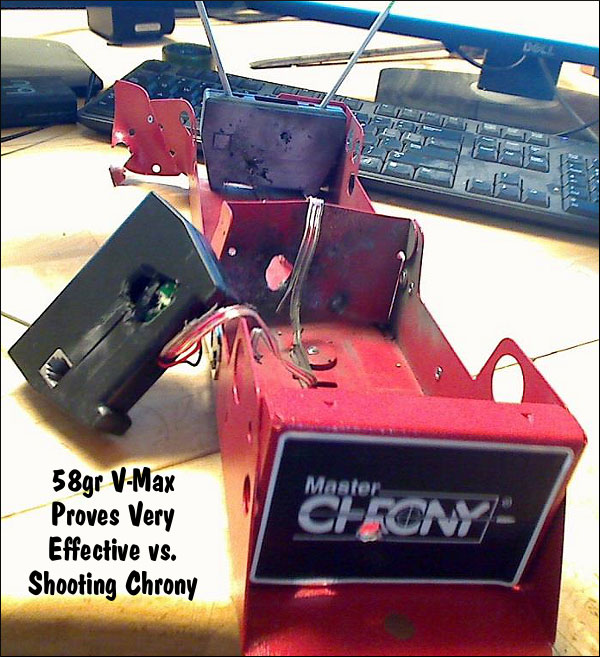
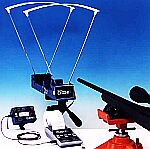 When setting up a chrono, we always unload the rifle, remove the bolt and bore-sight to ensure that the path of the bullet is not too low. When bore-sighting visually, set up the rifle securely on the sandbags and look through the bore, breech to muzzle, lining up the barrel with your aim point on the target. Then (during an appropriate cease-fire), walk behind the chronograph. Looking straight back through the “V” formed by the sky-screens, you should be able to see light at the end of the barrel if the gun is positioned correctly. You can also use an in-chamber, laser bore-sighter to confirm the visual boresighting (see photo).


 In the past, the A-Team offered replacement elevation knobs optimized for use with yardage marking tapes. These were offered in two versions, one which replaced the existing turret altogether and a second which clamped OVER the factory turret. Shown at right is the larger-diameter version in place over the factory turret. Unfortunately we don’t know a current source for this product, but this may help you crate something similar on your own.


