Saturday Movies: How Rifle Scopes Function — Optics & Controls

A good riflescope is essential for many types of competition, and the vast majority of hunters have scoped rifles. Some F-Class and benchrest competitors are now using optics with up to 60X magnification. Over the past 30 years, scopes have continued to evolve with improved glass, more reticle types, vastly increased elevation travel, bigger main tubes, FFP and SFP options, and even built-in electronics.
When shopping for a riflescope, it’s useful to understand how scopes work — how the internal mechanisms control windage and elevation, how parallax controls work, and how magnification levels are controlled.
Basics of How Riflescopes Work
This Burris video (above) covers the key aspects of scope function: zoom magnification, windage control, elevation control, parallax control (front or side mount), and ocular lens focus. There are some tips on getting a new scope running smoothly — it’s wise to rotate the power control a few times as well as both windage and elevation knobs. The video below also explains how to set ocular focus controls optimally.
Scope Break-In Methods and Diagnosing Issues — Great Video
We recommend that all serious shooters watch this video start to finish. A very knowledgeable scope engineer, Leupold’s Mike Baccellieri, explains the fine details of scope operation — with very useful recommendations on how to ready a new scope for use (See 36:50 time-mark). With a new optic he advises to run the controls multiple times to full travel. Also, take your time to get the diopter control just right (See 26:40 time-mark).
The video also explains why, with a new scope or one that hasn’t been used much, it is sometimes effective to rotate the elevation PAST the desired setting then come back a click (See 35:40 time-mark). In addition, near the end of the video, the expert explains how you can use a mirror to determine if the scope mount (base and/or rings) is NOT aligned with the bore axis, forcing excess travel to get on target (See 42:00 time-mark). We have seen this caused by scope rails attached slightly off axis.

Large diameter turrets make windage and elevation markings easier to see, and the click “feel” may be more noticeable given the greater diametrical travel between clicks.
First Focal Plane (FFP) vs. Second Focal Plane (SFP)
The main visual difference between First Focal Plane (FFP) and Second Focal Plane (SFP) scopes is the appearance of the reticle (and its hash marks) at different magnification levels. With a FFP scope, the reticle increases in visible size (and line thickness) with increased magnification. This is so the angular hash marks remain constant (in Mils or MOA angular span) at all magnification levels. So, on a 10-30X FFP scope, a 0.1 Mil hash mark represents the SAME angular measurement at 10X, 20X, or 30X (or any magnification). The downside of the FFP system is that the reticle lines can appear very thick at high magnification. But for a PRS/NRL match, with targets at multiple distances, it is important that the hash marks represent the same angular measurement at all power settings.
On a Second Focal Plane (SFP) scope, by contrast, the reticle lines (and hash marks) appear visually (in thickness) the same at all magnification levels. This means the hash mark divisions will only be precise at one magnification level, as designed by the manufacturer. For example, you could have exact 1 MOA Hash marks at 10X. But zoom the scope to 20X and the same reticle hash mark would then cover 2 MOA. SFP scopes are popular with competition shooters who shoot at specific known distances. Not having thick reticle lines at 25X to 50X is an advantage when aiming at precise benchrest and F-Class targets.

ZEISS now makes excellent FFP Scopes with both MOA and Milrad options
Minute of Angle (MOA) vs. Milliradian (MILRAD or MIL)
This video also explains MOA vs. MRAD (Milliradian) controls. A Minute of Angle (MOA) is an angular measurement that represents 1.047″ at 100 yards. Modern MOA scopes are typically configured with 1/4 MOA or 1/8 MOA clicks. A Milliradian (MRAD) is another angular measurement defined as one-thousandth of a radian. Milrad scopes are commonly configured with 0.1 Milrad clicks. How much is a 0.1 mil at 100 yards? One mil equals 3.6 inches at 100 yards; therefore, 1/10th of that, 0.1 Mil, equals 0.36” – roughly a third of an inch – at 100 yards. That’s pretty close to the common quarter-inch (1/4 MOA) increment found on MOA riflescopes.
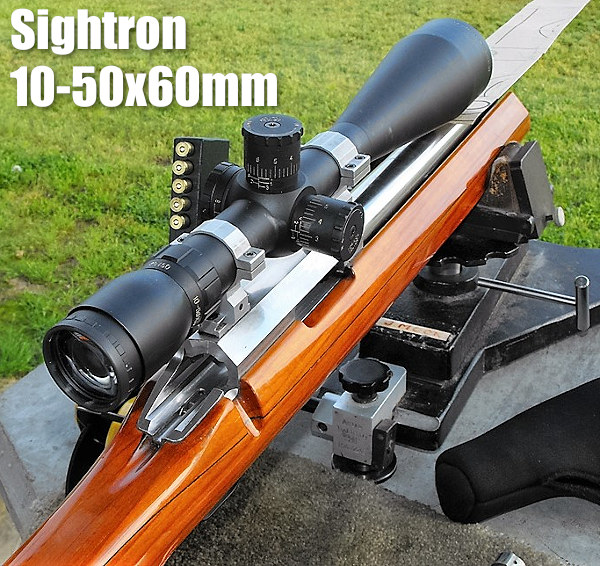
Sightron makes excellent high-magnification SFP zoom scopes favored by many competitors. These have proven quite reliable and offer very good performance for the price.
Scope Mounting Method and Alignment
When mounting a scope, you want to make sure the scope is aligned properly, so that vertical travel is precisely up and down, not offset. Begin by supporting the rifle with a good front and rear rest. Use a portable level to ensure the rifle is not tilting slightly left or right around the barrel bore axis. Then you want to align your scope’s vertical axis. For this, we recommend setting up a plumb bob — a weighted line that hangs straight down. This can be set up indoors or outdoors. Align your reticle’s vertical axis precisely with the plumb bob line, making sure not to move the rifle.
One caution — we have seen some riflescopes that are internally off-axis by up to 4 degrees. In this case, you can align the reticle’s vertical axis with the plumb bob line but then find that your turrets are slightly titled. That is a scope manufacturing fault that will result in some error when you input a large click value (e.g. 10+ MOA up or down).

When mounting your scope, a key factor to consider is the eye relief — the distance of the rear “ocular” lens to your eye. When mounting the scope, put your head in the position at which you normally shoot. NOTE: As your optimal head position may be quite a bit different when shooting prone vs. shooting from a bench, you may want to adjust the scope placement for different shooting positions. This Editor had to move his comp rifle scope about an inch rearward when local club matches changed from prone to bench.
Video collection suggested by Boyd Allen