In a helpful NSSF video, Ryan Cleckner explains why you normally should avoid canting your rifle — rotating it clockwise or counter-clockwise. Cleckner explains that canting the rifle in one direction or another will change the point of impact: “When you rotate the rifle, not only does the [POI move] in the direction that you’re rotated, [but] it also loses some of its elevation as it rolls down.” This, Cleckner explains, can make you miss on one side or the other:
Cant to the Left — You’re going to miss low and left.
Cant to the Right — You’re going to miss low and right.
In this video, starting at the one-minute mark, Cleckner shows the effect of rifle canting when engaging a 600-yard target. A few degrees of cant (either to the left or to the right), moves the shot POI completely off the steel silhouette target. The POI change occurs mainly because you are lowering (and laterally shifting) the scope sight-line relative to the bore axis, effectively changing your zero.
David Tubb has explained: “Every 1 degree you are off on a cant, is about six inches of difference laterally at 1000 yards”.
Position Shooting with Sling — Rifle Cant Considerations
Cleckner’s discussion assumes that the scope or sights are set to hit center with the rifle level and plumb. That works for most situations when shooting prone off bipod, front mechanical rest, or front sandbag. However, many sling shooters, including David Tubb and John Whidden, do tilt or cant their rifles slightly inward because this allows a more comfortable hold with sling, or allows better eye-to-sight alignment. Holding the rifle at an angle can work — but the angle of cant must be consistent for every shot. Canting the rifle is not a sin by itself. However, after you confirm your zero on your target, the degree of cant must be the same for EVERY shot. You must maintain that exact same degree of rotation on each shot or you will experience the shot POI movement Cleckner illustrates. Consistency is the key.
John Whidden, 5-time Nat’l Long Range Champion, holds a Palma rifle. John now shoots a match rifle with an Anschutz stock which he holds more upright, but still with some counter-clockwise cant. John also installed his iron sights at an angle so that the adjustments are correct (and plumb) even with his canted hold: “While it may not be obvious in the picture, the sights on my rifle are set up so that they’re straight vertical and horizontal while I hold the rifle canted. Making sure your adjustments (scope or sights) are vertical and horizontal is a critical piece of the pie.”
Inexpensive 30mm and 1″ Scope-Mounted Bubble Levels
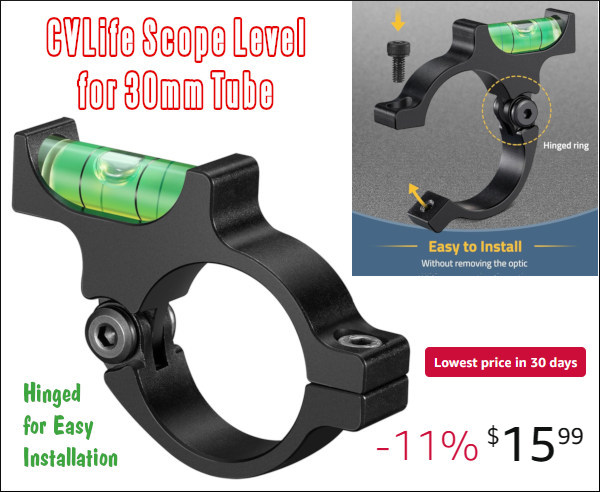
The best way to avoid inconsistent rifle canting is to use a bubble level fitted to rail or scope. One very affordable product is the CVLIFE Scope Bubble Level. This features a 30mm milled inside diameter with a handy hinge to simplify mounting. This unit installs easily, the level is nicely elevated, and user reviews have been very positive. You could easily pay $40.00 or more for a 30mm scope level. This costs just $15.99 on Amazon. If you have a 1″ scope tube, consider the SME dual-diameter level. This fits 30mm tubes PLUS has an insert to fit 1″ tubes. It’s $22.99 at MidwayUSA.
Rifleshooter.com does some great original research — providing “hard data” you can’t find anywhere else. Here are the eye-opening results of Rifleshooter.com’s 6.5 Creedmoor barrel cut-down test. You may be surprised at the results. Read on…
What do you get when you cut a 6.5 Creedmoor-chambered barrel down to just over 16 inches? A lot more velocity than you might think. Our friends at Rifleshooter.com performed a barrel cut-down test with 6.5 Creedmoor test rifle, shortening the barrel from 27 to 16.1 inches in one-inch increments. Surprisingly, with a 142gr Sierra MK, the total velocity loss (as measured with a Magnetospeed) was just 158 FPS, an average of 14.4 FPS per inch of barrel length. With the lighter 120gr A-Max bullet, the total velocity loss was 233 FPS, or 21.8 FPS average loss per inch of barrel.
To perform this velocity test, our friend Bill, Rifleshooter.com’s editor, built up a 6.5 Creedmoor rifle using a Remington Model 7 action, 1:8″ twist Green Mountain CM barrel, and MDT LSS Chassis, all obtained from Brownells.com.
Test Procedure
Five (5) rounds of each type of cartridge were fired at each barrel length and the velocity data was recorded with a MagnetoSpeed V3 barrel-mounted chronograph. The rifle was then cleared and the barrel was cut back one inch at a time from 27″ to just over 16″. NOTE: During this winter test, the air temperature was a very chilly 23° F. One would expect higher velocities across the board had the outside temperature been higher.
The photo below shows how the barrel was cut down, inch-by-inch, using a rotary saw. The barrel was pre-scored at inch intervals. As the main purpose of the test was to measure velocity (not accuracy) the testers did not attempt to create perfect crowns.
6.5 Creedmoor vs. Other Mid-Sized 6.5mm Cartridges
The 6.5 Creedmoor is a very popular cartridge with the tactical and PRS crowd. This mid-size cartridge offers good ballistics, with less recoil than a .308 Winchester. There’s an excellent selection of 6.5mm bullets, and many good powder choices for this cartridge. When compared to the very accurate 6.5×47 Lapua cartridge, the 6.5 Creedmoor offers similar performance with less expensive brass. For a tactical shooter who must sometimes leave brass on the ground, brass cost is a factor to consider. Here’s a selection of various 6.5mm mid-sized cartridges. Left to right are: 6.5 Grendel, 6.5×47 Lapua, 6.5 Creedmoor with 120gr A-Max, 6.5 Creedmoor with 142gr Sierra MK, and .260 Remington.
When asked to compare the 6.5 Creedmoor to the 6.5×47 Lapua, Rifleshooter.com’s editor stated: “If you don’t hand load, or are new to precision rifle shooting, get a 6.5 Creedmoor. If you shoot a lot, reload, have more disposable income, and like more esoteric cartridges, get a 6.5×47 Lapua. I am a big fan of the 6.5×47 Lapua. In my personal experience, the 6.5×47 Lapua seems to be slightly more accurate than the 6.5 Creedmoor. I attribute this to the quality of Lapua brass.” Now that Lapua offers 6.5 Creedmoor brass with small primer pockets, the 6.5 Creedmoor is even more attractive.
The creator of Rifleshooter.com also operates a Custom Rifle Building enterprise and gun shop in Long Island, New York: 782 Custom Guns Ltd.. He tells us: “We offer an unparalleled level of gunsmith machine shop services in the Long Island region. From precision rifles (USMC M40A3/A5/A6 XM3 clones) to customized Remington 870 and Mossberg 590 shotguns, and customized 1911s, chances are if you can dream it, we can build it!”
On the Defensive Edge Website, you’ll find a good article by Shawn Carlock about wind reading. Shawn is a veteran law enforcement marksman and a past USPSA national precision rifle champion. Shawn offers good advice on how to estimate wind speeds and directions using a multitude of available indicators — not just your wind gauge: “Use anything at your disposal to accurately estimate the wind’s velocity. I keep and use a Kestrel for reading conditions….The Kestrel is very accurate but will only tell you what the conditions are where you are standing. I practice by looking at grass, brush, trees, dust, wind flags, mirage, rain, fog and anything else that will give me info on velocity and then estimate the speed.”
Shawn also explains how terrain features can cause vertical wind effects. A hunter on a hilltop must account for bullet rise if there is a headwind blowing up the slope. Many shooters consider wind in only one plane — the horizontal. In fact wind has vertical components, both up and down.
» CLICK HERE to Download Full Article as Printable PDF
If you have piloted a small aircraft you know how important vertical wind vectors can be. Match shooters will also experience vertical rise when there is a strong tailwind blowing over an up-sloping berm ahead of the target emplacements. Overall, Shawn concludes: “The more time you spend studying the wind and its effect over varying terrain the more successful you will be as a long-range shooter and hunter.”
This Editor, as a life-long sailor, also has some suggestions about wind. Many folks may not realize that wind can cycle, both in direction and in speed (velocity). If you are patient, you should be able to sense the timing of the cycles, which will help you predict shifts in wind direction and velocity. While it is tempting to shoot in the lulls, sometimes the true wind vector (angle + speed) may be most constant when the wind is blowing stronger.
Another tip for hunters is to orient your shot, when possible, in alignment with the wind direction. Try to face into the wind, or have the wind at your back. This is especially effective when shooting in a varmint field. Use a string of tape on a pole to show wind angle. Then shoot directly into the wind or with the wind directly at your back. This will minimize horizontal deflection caused by the wind.
One side of this gauge is the “go” side which quickly tells you the depth of a primer pocket, whether any crimp is properly removed, and whether the primer pocket is loose. If it feels loose on the “go” side, use the other end of the tool, the “no go” side, to test to see if the primer pocket is too loose to hold a primer. If the no-go slides into the pocket, then you know to junk that brass.
Primer Pocket Growth and Useful Case Life
Repeated firings at stout pressures can cause primer pockets to grow in diameter. This can create an unsafe condition if your primers are not seating properly. Are your primer pockets “good to go”, or have they been pushed to the point of no return? Do you really know? Many guys try to gauge primer pocket tightness by “feel”, as they seat the primer. But that method isn’t precise. Now there’s a better way…
The folks at Ballistictools.com have created a handy set of precision-machined gauges that let you quickly and accurately check your primer pockets. These gauges (aka “gages”) are offered in two sizes — for large and small primer pockets. A two-piece set of both large and small gauges costs just $25.99. These gauges let you quickly measure the depth of a primer pocket, and check if the crimp has been removed properly. Most importantly, the gauge tells you if the primer pocket has opened up too much. One side of the gauge has an enlarged diameter plug. If that “No-Go” side fits in the primer pocket, you should ditch the case — it’s toast.
Precision ground from O-1 tool steel, The Ballistic Tools primer pocket gauges serve multiple functions. The inventor of these tools explains: “I created the prototype of this tool for my own use in brass processing. I needed a way to quickly and easily measure primer pockets that was reliable and did not require wasting a primer. This tool has been indispensable for me and I would never go back to the old method of uncertainty and guessing.”
Product tip from Boyd Allen. We welcome reader submissions.
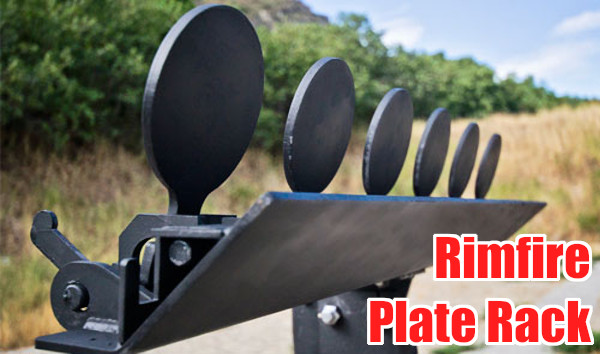
The Action Target Sport Plate Rack is specifically designed for .22 LR Rimfire shooting. This rack features six 4″-diameter plates that reset with a provided cable.
Shooting plates is fun. You get immediate feedback — “instant gratification” when you make a hit. When shooting steel inside 100 yards, we like to use .22 LR rimfire guns. The ammo is inexpensive, noise levels are lower (though you still need ear protection), and at close ranges there are fewer issue with ricochets and bullet splash-back. Additionally, for busy folks who don’t have time to reload, you can pick up a .22 LR rifle or pistol, grab a couple $5 boxes of ammo, and get to the range in a few minutes. The convenience means it is easier to shoot every week if you like.
In the video below, SFC Joel Turner from the USAMU’s Action Shooting Team offers a few pointers on how to shoot plates quickly and accurately. He’s using a centerfire pistol, but the same principles apply for rimfire handguns. Click speaker icon to activate audio.
High-Capacity KelTec .22 LR CP33 Pistol is Great for Plates
If you like shooting plates with rimfire guns, one of the better new pistols for the job is Kel-Tec’s CP33. We tested this interesting handgun at the 2019 SHOT Show Media Day at the Range, and were impressed. The pistol is big, but balances well. The sights are easy to see, and the full-length rail lets you easily mount a variety of optics. The trigger is surprisingly good — better than 90% of rimfire handguns out there. For the plates game, this “quad-stack” gun can handle long stages without mag changes. The standard clear-sided CP33 magazine holds 33 rounds of .22 LR ammo.
If you are interested in an affordable, but very accurate, high-capacity semi-auto rimfire pistol you should consider Kel-Tec’s new CP33. Shooting Sports USA (SSUSA) notes: “The rapid growth of rimfire competition in Steel Challenge has prompted some gun makers to enter the fray. Kel-Tec is one, and their new CP33 .22 LR pistol has a lot of potential.”
Overall SSUSA’s tester, Chris Christian, was impressed with the gun, saying it balanced well and the sights aligned naturally: “…the neutral-balance-point grip produced an almost instinctive sight alignment.”
Precision rifle shooters don’t have to hit a big-league fastball, or launch a top-fuel dragster in the blink of an eye. Nonetheless, reaction times are important in our sport — both for competitive shooters and hunters. Want to catch that prairie dog before he slips down his hole? You’ll need to be quick. Want to win at short-range benchrest? Then you’ll need to watch your windflags and respond quickly to a change. Miss a major wind-shift and you could ruin your whole weekend.
Here’s a fun test of reaction times from HumanBenchmark.com. The way it works is that, after clicking “Start”, you wait until the background color changes from red to green. The instant you see green, immediately click your mouse. The average (median) reaction time is 273 milliseconds, according to the data collected so far. Hint: If you keep your finger “preloaded” in contact with your mouse button you can shave some milliseconds — but don’t “jump the gun”.
Tips for Faster Times
Here are three tips to speed up your reaction times:
1) Respond to the color change (by itself), rather than wait to read the word “CLICK!” after the box shifts to green.
2) Try focusing at the corner of the box, rather than the center. This may help you react “without thinking”.
3) Have your index finger “poised and ready” over the left button–you can shave milliseconds by very slightly depressing the button before you actually click.
Progressive reloading presses offer shooters speed and efficiency in producing custom-tailored rifle and pistol ammunition. However, there is a wide choice of Progressive Presses and a bewildering array of options to consider. In this video, the 6.5 Guys and UltimateReloader.com’s Gavin Gear provide an overview of the leading Progressive Presses on the market along with key considerations for precision rifle shooters. If you are considering getting a Progressive for rifle ammo reloading, you should watch this informative, 25-minute video.
10 Tips for Reloading Rifle Ammo on a Progressive Press:
1. Make sure the brass is very clean. Don’t mix old range pick-up brass with newer brass.
2. Apply a thin, spray lube to all cases before the sizing/loading cycle.
3. Consider priming your brass separately (with a hand or bench tool) before the operation. Then inspect the primers before loading powder and bullets.
4. Always wear eye protection when loading with the Progressive, particularly if you are priming cases.
5. With masking tape, mark the powder measure/dropper with the powder type and cartridge charge weight. Check the charge mass multiple times (see below).
6. Cycle a few cases, sizing and adding powder but NOT seating bullets. Weigh the powder charges to ensure the powder measure is dispensing the correct charge. Sometimes this will change a couple tenths as it “settles down” after the first few charges.
7. Check the brass for shoulder bump and bullet seating depth carefully for the first few rounds, then check again periodically.
8. Try to maintain a steady pace and operate the handle the same way every time.
9. Visually inspect the powder charge in each case (before bullet seating), and use a lock-out die if your Progressive Press has enough stations.
10. Never, ever mix pistol and rifle powders! If you have previously loaded pistol ammo with your Progressive, make sure ALL the powder (every flake and kernel) is removed from all parts of the powder-dropping system before you add rifle powder.
Visit these sites for more Reloading and Precision Shooting Videos:
If you are considering purchasing a progressive reloading press, definitely watch this 79-minute video covering a dozen presses from six leading manufacturers: Dillon, Frankford Arsenal, Hornady, Lee, Mark 7 (Lyman), and RCBS. Along with the big comparison video, Gavin Gear has prepared a detailed, 17-page online article which covers all of the presses in the shootout.
In this Ultimate Reloader Progressive Shootout video reviewer Gavin Gear demonstrates how each press works and provides data on costs, output rates, capabilities, and accessories.




 The folks at