With the Berger Southwest Nationals commencing this week, we thought our readers would appreciate a showcase of two impressive, state-of-the-art F-Open match rifles. The first, show above, is the .284 RAHM (40° .284 Win Imp) with which Brian Bowling captured the 2019 F-Class Open Division Long Range National Championship. The second rifle belongs to barrel-maker Bryan Blake. Like Bowling’s rifle, Blake’s rig features a low-profile Cerus stock, but with purple highlights. Both rifles have 6-groove, cut-rifled barrels from Blake Barrel & Rifle and both sport Nightforce scopes.
Twin World-Class F-Open Rifles
Report from Bryan Blake of Blake Barrel & Rifle
We had been producing gun barrels for about 1.5 years prior to the 2019 NRA Long Range F-Class Nationals. Brian Bowling started shooting our 7mm barrels in May of 2019. Bowling and I are both on the Rutland team, Team Cerus, which has seven members. Bowling and I received the first Cerus XL stocks from Cerus Rifleworks in August of 2018. The stock was a very straight design.
With our barrels, these F-Open rigs can shoot! In 2018, Brian Bowling and I had the only two clean scores for the first match at the 1000-yard team NRA Nationals. In spring of 2019, I worked with Will of Cerus Rifleworks to see if we could come up with a lower center of gravity design to enhance what was already the straightest stock out there. We developed the Cerus XR stock which features stepped metal rails on the fore-end. I cut my XL Cerus stock and designed the rail system attached to the sides of the fore-end. Bowling’s stock (with black rails) was the second XR in the shooting world. On his very first weekend match at 600 yards he shot a 200-20X with the new XR stock and Blake 7mm 1:8.5″-twist barrel. He was using Berger 184gr 7mm bullets.
In 2019, at the NRA F-Class Long-Range Nationals, Brian Bowling won the F-Open National Championsship with a strong performance. He finished with a ton of Xs, three points ahead of the second place competitor. Before Brian’s impressive victory, we were told by many top shooters that a 6-groove barrel has never won any F-Class Mational event, and hypothetically never would. Well with Brian Bowling’s excellent shooting and reloading capabilities, we achieved a feat many said couldn’t be done.
Bowling’s Championship-winning rifle features a Bat Model B action in the Cerus XR stock. His Blake barrel is chambered for the .284 RAHM wildcat cartridge. This is a 40-degree (40°) version of the .284 Winchester. The .284 RAHM has a straighter case body compared to the original .284 Win.
We built Bowling’s rifle, doing everything except the final clear finish. We can do that work, but were short on time for the Nationals last year. We are proud of the chambering work we do and the quality of our bedding jobs.
Bryan Blake’s F-Open Rifle — the Purple XR
The Purple XR-stocked gun I shoot was built in August of 2019, right before the 2019 NRA F-Class Nationals. The natural wood is complimented by highlights finished with a bright purple metallic epoxy resin that Will from Cerus dreamed up. For this rifle we mated a BAT 3LL action with Blake barrels (switch-barrel configuration). Up front the fore-end rails are painted purple “plum crazy” to match the purple resin. The purple XR is finished with automotive “high solids” clear-coat, and block-sanded for a smooth, flawless look.
Blake’s Rifle is a Switch Barrel — 7mm and .30 Caliber
This Purple XR was set up to be a switch barrel rig, with both a 7mm BBM and a .30 BBM*. These BBM wildcats are based on shortened and straightened .300 WSM with a 40-degree shoulder. On my purple XR rifle as well as Bowling’s rifle, we employ Nightforce optics and load Berger bullets. These are the only glass and projectiles we use in our rifles.
The Purple XR is extremely accurate. Check out this 2.6″ group, shot at 1000 yards during a club match at the Ben Avery Range in Arizona. Yes, that is 1/4-MOA at 1K! Many folks would be very happy with that group at 600 yards. At 1000 yards it is remarkable. No, the rifle can’t do that every time. But this does demonstrate that the Purple XR is a tack-driver. CLICK HERE to see a 3.9 inch, 15-shot group at 1000 yards on the F-Class target (150-15X).
About Blake Barrel and Rifle — History and Barrel-Making Process
Blake Barrel and Rifle was re-launched in 2018. The business was actually started by my grandfather, Robert Blake, in 1966. In 1969 my grandfather stopped doing gunsmithing and making single-point cut-rifled barrels. He transitioned to doing industrial work, and less work for the public. After all those years he and my father, Dave Blake, kept the barrel-making equipment in storage. They kept the gun-drilling machines in the shop as they used them to drill long, deep holes in anything from aircraft parts to electric motor rotors.
In 2012 we got the diamond single-point, sine-bar rifling machine out of storage, along with the Pratt and Whitney double-spindle reaming machine. We then completely rebuilt and updated the equipment. We modified the gun-drill to be a counter-rotating drilling system. What that means is the drill spins at about 20% of the rotational speed, and the barrel at 80%. The counter-rotation keeps the drill on the center axis of the barrel more precisely than just rotating the barrel, or just rotating the drill. We are able to consistently drill holes in our barrel steel (primarily 416R) that at the end of a 33.25″ blank that is only .005″ off of center axis.
We then ream the barrels to be .0004″ below desired finish bore size. After the reaming process we mandrel-hone the bores to be .0001″ below finish bore size. This process eliminates reamer marks in the barrel bore. Therefore very minimal lapping is needed after rifling to remove any tooling marks. We then rifle the barrel to any twist rate we like. With a fine lap after rifling, the barrel has no tooling marks and all surface metal is flowing in the direction of the twist of the rifling.
* 7mm BBM stands for “Blake Bramley Magnum”. Dan Bramley and I developed that cartridge together in October of 2017. The .30 BBM is the “Blake Barrel Magnum”, which I developed in May of 2018.
On January 23, 2020, the Trump administration published new rules that will significantly help the U.S. firearms industry and American gunsmiths. The new regulations officially take effect on March 9, 2020.
The rule changes modify export control of American firearms, as well as related parts, components, and accessories. Under the new Federal rules, export of common firearms and parts will now be controlled by the Department of Commerce, NOT by the Department of State under its International Traffic in Arms Regulations (ITAR). Those draconian ITAR provisions had adversely affected small parts manufacturers and gunsmiths through hefty fees and burdensome paperwork even if they did not actually ship guns overseas.
Gun author Ryan Cleckner explains: “Up until this change, the Department of State regulated exports of most firearms and their related parts, ammo, and information through [ITAR] which contain a list of covered firearm types called the United States Munitions List (USML). The USML includes all rifles, handguns, and short-barreled shotguns. The Department of Commerce, on the other hand, has the Export Administration Regulations (EAR) which regulates the export of all firearm types on a list, called the Commerce Control List (CCL), including regular shotguns (those with a barrel length of at least 18″) and their related parts, ammo, and information.”
1. Manufacturers will no longer have to pay a $2,250 annual registration fee.
2. No long approval process [for exports].
3. No Congressional approval needed for deals over $1 million.
4. Easier sharing of technical information for designs/R&D.
We caution our readers that these gun export regulatory changes do NOT alter domestic gun control laws in America. And gun exports are still subject to government oversight. However, Cleckner explains: “Instead of dealing with the ITAR rules and State Department licensing, the firearms industry will be able to use the more efficient export system through the Department of Commerce for most firearms. Certain firearms, like machine guns, will still stay under State Department control (under ITAR).”
According to the NRA-ILA: “No more will small, non-exporting businesses — including gunsmiths — be caught up in an expansive regulatory scheme for manufacturers of ‘munitions’ and their parts that requires a $2,250 annual registration fee with U.S. State Department. Americans will again be free to publish most technical information about firearms and ammunition — including on the publicly-accessible Internet — without fear of accidentally running afoul of State Department restrictions that could land them in federal prison.”
The new regulations will simplify overseas travel by hunters and competition shooters. Americans temporarily traveling overseas with their own guns and ammunition won’t have to register them in a government database or fill out commercial exporting forms.
Meanwhile, commercial exporters of non-military grade firearms and ammunition will have fewer fees to pay and will benefit from a more flexible, business-oriented regulatory environment. But note, actual exports of firearms and ammunition will still require authorization/licensing by the federal government. End-users of the guns in the countries of destination will also remain subject to U.S. monitoring.
The NRA-ILA observes: “This latest action is just one more example of how President Trump continues to move forward with his positive agenda to protect the right to keep and bear arms and the businesses that comprise America’s firearms industry. American manufacturing, as well as lawful firearm ownership at home and abroad, stand to make big gains under the president’s export reform initiative.”
The Berger Southwest Nationals (SWN), 2020’s biggest centerfire rifle match west of the Mississippi, is coming up next week. We know that many of our regular readers will be flying to Phoenix to attend the SWN. Here are some travel tips from experts in the industry.
If you’ll be traveling by air in the days ahead, be careful when transporting firearms through airports. It is important that you comply with all Homeland Security, TSA, and Airline policies when transporting guns and ammunition. Following the rules will help ensure you (and your gear) make it to your destination without hassles, delays or (God forbid), confiscations.
Good Advice from an Airport Police Officer
To help our readers comply with rules and regulations for air travel, we offer these guidelines, courtesy “Ron D.”, a member of our Shooters’ Forum. Before he retired, Ron D. served as a Police Officer assigned to Chicago’s O’Hare airport. Here Ron offers some very important advice for shooters traveling with firearms and expensive optics.
First, Ron explains that airport thieves can spot bags containing firearms no matter how they are packaged: “Don’t think you’re safe if your guns are placed in cases designed for golf clubs or trade show items. Baggage is X-Rayed now and cases are tagged with a special bar code if they contain firearms. It doesn’t take long for bad guys to figure out the bar coding for firearms.”
Carry-On Your Scopes and Expensive Items
Ron advises travelers to avoid placing very expensive items in checked baggage: “When traveling by air, carry on your rangefinder, spotting scope, rifle scope, medications, camera, etc. You would be surprised at the amount of people that carry-on jeans and shirts, but put expensive items in checked baggage. Better to loose three pairs of jeans than some expensive glass.”
Mark Bags to Avoid Confusion
Ron notes that carry-on bags are often lost because so many carry-on cases look the same. Ron reports: “People do accidentally remove the wrong bag repeatedly. I frequently heard the comment, ‘But it looks just like my bag’. When de-planing, keep an eye on what comes out of the overhead that your bag is in. It’s easy to get distracted by someone that has been sitting next to you the whole flight. I tie two streamers of red surveyors’ tape on my carry-on bag.” You can also use paint or decals to make your carry-on bag more distinctive.
General Advice for Air Travelers
Ron cautions: “Keep your hands on your items before boarding. One of the most often heard comments from theft victims was, ‘I just put my computer down for a minute while I was on the phone.’ Also, get to the baggage claim area quickly. If your family/friends can meet you there, so can the opportunists. Things do get lost in the claim area. Don’t be a Victim. Forewarned is forearmed.”
Choosing a Rifle Transport Case
Forum member David C., who will compete at the 2020 Berger SWN, offers this advice: “If you plan to fly with your rifle, a 55″-long case such as the Pelican 1770 may be too big and heavy. The 1770 is 36 pounds on its own and is quite unwieldly to move around. I would recommend going with a smaller case such as the Pelican 1720 with 42″-long interior. It weighs 19 pounds and if you separate your stock from the barreled action, everything fits just fine, as you can see below.” Editor: Note that you can also store a full-size spotting scope in the case along with your rifle:
Retired Airport Police Officer Ron D. advises: “Buy the best [rifle case] that you can afford. Don’t cry when your $3,000+ Benchrest rifle has a cracked stock or broken scope. Think about what it would be like to travel across the country and arrive with a damaged rifle. Baggage handling is NOT a fine art. There is no guarantee that your rifle case will be on top of all the other baggage. Then there is shifting of baggage in the belly of the plane. Ponder that for a while. Rifle and pistol cases must be locked. It doesn’t take a Rocket Scientist to figure out that a simple pry tool will open most case locks. There is not much that you can do to disguise a rifle case. It is what it is, and opportunists know this. Among thieves, it doesn’t take long for the word to get around about a NEW type of case.”
Great Deals on Plano All-Weather Cases at Amazon
Match season has begun, and that means hauling gear either in cars or on planes. Either way you need good cases for your firearms. We found the Plano All Weather Gun Cases at bargain prices. These are well-built and designed to protect whatever you put in them for a third the cost of some other brands. No Plano cases are not as refined as Pelican or SKB cases, but if you’re on a tight budget, the Planos can do the job. Read this article for more information on Plano cases.
Barrel-maker Dan Lilja’s website has an excellent FAQ page that contains a wealth of useful information. On the Lilja FAQ Page as you’ll find informed answers to many commonly-asked questions. For example, Dan’s FAQ addresses the question of barrel life. Dan looks at factors that affect barrel longevity, and provides some predictions for barrel life, based on caliber, chambering, and intended use.
NOTE: This article was very well-received when it was first published last year. We are reprising it for the benefit of readers who missed it the first time.
Dan cautions that “Predicting barrel life is a complicated, highly variable subject — there is not a simple answer. Signs of accurate barrel life on the wane are increased copper fouling, lengthened throat depth, and decreased accuracy.” Dan also notes that barrels can wear prematurely from heat: “Any fast varmint-type cartridge can burn out a barrel in just a few hundred rounds if those rounds are shot one after another without letting the barrel cool between groups.”
Q. What Barrel Life, in number of rounds fired, can I expect from my new barrel?
A: That is a good question, asked often by our customers. But again there is not a simple answer. In my opinion there are two distinct types of barrel life. Accurate barrel life is probably the type most of us are referencing when we ask the question. But there is also absolute barrel life too. That is the point where a barrel will no longer stabilize a bullet and accuracy is wild. The benchrest shooter and to a lesser extent other target shooters are looking at accurate barrel life only when asking this question. To a benchrest shooter firing in matches where group size is the only measure of precision, accuracy is everything. But to a score shooter firing at a target, or bull, that is larger than the potential group size of the rifle, it is less important. And to the varmint hunter shooting prairie dog-size animals, the difference between a .25 MOA rifle or one that has dropped in accuracy to .5 MOA may not be noticeable in the field.
The big enemy to barrel life is heat. A barrel looses most of its accuracy due to erosion of the throat area of the barrel. Although wear on the crown from cleaning can cause problems too. The throat erosion is accelerated by heat. Any fast varmint-type cartridge can burn out a barrel in just a few hundred rounds if those rounds are shot one after another without letting the barrel cool between groups. A cartridge burning less powder will last longer or increasing the bore size for a given powder volume helps too. For example a .243 Winchester and a .308 Winchester both are based on the same case but the .308 will last longer because it has a larger bore.
And stainless steel barrels will last longer than chrome-moly barrels. This is due to the ability of stainless steel to resist heat erosion better than the chrome-moly steel.
Barrel Life Guidelines by Caliber and Cartridge Type
As a very rough rule of thumb I would say that with cartridges of .222 Remington size you could expect an accurate barrel life of 3000-4000 rounds. And varmint-type accuracy should be quite a bit longer than this.
For medium-size cartridges, such as the .308 Winchester, 7×57 and even the 25-06, 2000-3000 rounds of accurate life is reasonable.
Hot .224 caliber-type cartridges will not do as well, and 1000-2500 rounds is to be expected.
Bigger magnum hunting-type rounds will shoot from 1500-3000 accurate rounds. But the bigger 30-378 Weatherby types won’t do as well, being closer to the 1500-round figure.
These numbers are based on the use of stainless steel barrels. For chrome-moly barrels I would reduce these by roughly 20%.
The .17 and .50 calibers are rules unto themselves and I’m pressed to predict a figure.
The best life can be expected from the 22 long rifle (.22 LR) barrels with 5000-10,000 accurate rounds to be expected. We have in our shop one our drop-in Anschutz barrels that has 200,000 rounds through it and the shooter, a competitive small-bore shooter reported that it had just quit shooting.
Remember that predicting barrel life is a complicated, highly variable subject. You are the best judge of this with your particular barrel. Signs of accurate barrel life on the wane are increased copper fouling, lengthened throat depth, and decreased accuracy.
Benchrest Barrel Life — You May Be Surprised
I thought it might be interesting to point out a few exceptional Aggregates that I’ve fired with 6PPC benchrest rifles with barrels that had thousands of rounds through them. I know benchrest shooters that would never fire barrels with over 1500 shots fired in them in registered benchrest matches.
I fired my smallest 100-yard 5-shot Aggregate ever in 1992 at a registered benchrest match in Lewiston, Idaho. It was a .1558″ aggregate fired in the Heavy Varmint class. And that barrel had about 2100 rounds through it at the time.
Another good aggregate was fired at the 1997 NBRSA Nationals in Phoenix, Arizona during the 200-yard Light Varmint event. I placed second at this yardage with a 6PPC barrel that had over 2700 rounds through it at the time. I retired this barrel after that match because it had started to copper-foul quite a bit. But accuracy was still good.
Teslong Borescopes Update — WiFi and Rigid Rod Versions Product Report by F-Class John
Not more than a few months after the Teslong corded borescope hit the market to massive applause they’ve released a cordless WiFi-enabled corded version as well as a rigid rod model — two new models with important new features/functionality. When I originally reviewed the Teslong borescope I was blown away with the value, clarity, and ease of use. SEE Review HERE. That original Teslong really was a game changer in the borescope market. The large number of forum threads springing up since the Teslong release shows that that digital borescopes have finally found a large and enthusiastic customer base.
IMPORTANT: Guys — Watch the Videos!!! John does a great job showing the set-up and use of these Borescopes. You really need to WATCH THE VIDEOS! They show much more than we can illustrate with still images.
Despite all the love people have shown for the original, plug-in Teslong borescope, one common complaint was that it could not be used with smartphones or small tablets. With that in mind, Teslong surprised the market with the release of a cordless WiFi version that works with just about any device that has a WiFi connection. The new WiFi unit, which is in very high demand, costs around $75, just $25 more than the original plug-in version. NOTE –YES this WiFi unit DOES work with both iOS (Apple) and Android smartphones and tablets. However, you may wish to try a couple different Apps.
To use the WiFi Teslong, simply download Teslong’s viewer App, turn the unit on and connect to the Teslong WiFi in your device settings. While it does take a couple steps to connect each time, you are rewarded with a cordless version that can be used at home or the range equally well. Watch the video and you can see how the Wifi unit is set up and how it is used to inspect both a barrel and a sizing die. Do watch the video — it explains all. Along with live video feed, the WiFi control handle has a button to record still images.
Important — some guys had initial problems getting the WiFi image to display on their smartphones but that was normally just a software configuration issue. If you are patient, and follow the instructions, you should be fine. Some older guys had to enlist the aid of a 10-year-old grandkid. Note, as of 1/29/2020, the WiFi Version is temporarily out of stock on Amazon, but it can be ordered for $74.99 from the Teslong Webstore.
New Teslong Rigid Rod Borescope
Along with the WiFi version, Teslong has also released a borescope with the lens mounted on the end of a rigid metal shaft — a configuration similar to classic optical borescopes such as the Hawkeye. This new “shafty” Teslong has the same electro-optical sensors, connectors, and adjustable light as the original Teslong. However, this new rigid rig now uses a solid rod instead of a flexible cable. Having a solid rod makes using the unit much easier since you’re not fighting the cable. The rod also makes rotating the unit inside the bore more intuitive as it lacks the cable spring back of the flexible version.
Located on the borescope is an inch scale allowing the user to easily to measure how far into the bore they’ve gone for easy identification of any issues later. The whole unit comes in a nice heavy-duty cardboard tube that makes it easy to store and I can see it lasting as long as the unit itself.
Why choose the rigid Teslong? Importantly, the lack of a tethered cord allows you to rotate the unit more easily inside the barrel. Compared to the original corded Teslong, I did find that running the rigid borescope down the barrel without the mirror provided a larger view. That may be beneficial to some users. Overall, the optical clarity and definition remain excellent — certainly on par with the original unit.
General Teslong Borescope User Tips
The new Wifi and Rigid Teslong borescope share some basic features with the original plug-in, corded Teslong. All three devices feature a mirror on the end that screws on and has a jam nut to keep it in place and can be adjusted for focal length based on the caliber and they’re now including several extras in case of damage or loss. While they’ve always been good about replacing them free of charge there is a wait time, so the inclusion of extras is a nice bonus.
SUMMARY — Both WiFi and Rigid Teslong Borescopes Perform Well, Are Great Values
Overall these two new units are great additions to Teslong’s lineup giving users two great units to choose from. While most folks may gravitate to the WiFi version, I think there’s room for all three models (WiFi, Corded Plug-in, Rigid Plug-in).
Many people may find the corded or rigid versions more practical for around the house where they don’t necessarily need the cordless version and don’t want to worry about keeping it charged all the time. For any range use or out of town matches the WiFi with its smaller footprint and ability to work with any electronic device will probably make more sense and will help justify the additional cost. In the end, the amazing thing is that no matter which version you choose you’ll have a great borescope that will help improve your shooting.
M1 Garand Springfield Armory July 1941 production. Facebook photo by Shinnosuke Tanaka.
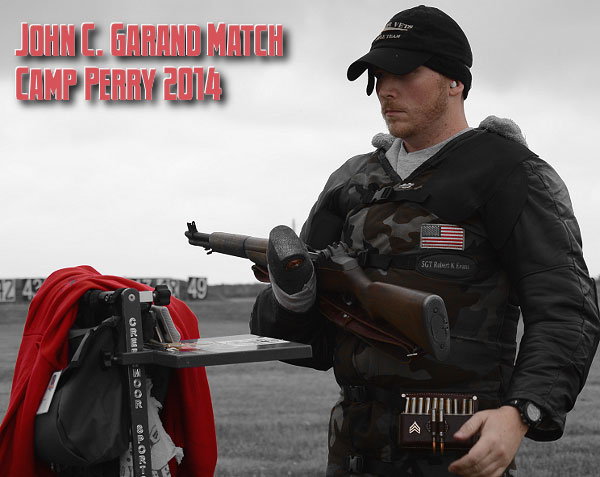
My father carried a Garand in WWII. That was reason enough for me to want one. But I also loved the look, feel, and heft of this classic American battle rifle. And the unique “Ping” of the ejected en-bloc clip is music to the ears of Garand fans. Some folks own a Garand for the history, while others enjoy competing with this old war-horse. Around the country there are regular competition series for Garand shooters, and the CMP’s John C. Garand Match is one of the most popular events at Camp Perry every year. This year’s Garand Match will be held Saturday, August 1, 2020. SEE CMP 2020 NM Calendar.
The CMP also has a John C. Garand Match each June as part of the D-Day Competition at the Talladega Marksmanship Park. Here’s a video from the inaugural Talladega D-Day Event in 2015. This year’s Talladega D-Day Matches run June 3-7, 2020.
Watch Prone Stage from the Inaugural Talladega D-Day Match in 2015
M1 Garand Manual
Recommended M1 Garand Manual
Among the many M1 Garand manuals available, we recommend the CMP’s U.S. Rifle, Caliber .30, M1: ‘Read This First’ Manual. This booklet covers take-down, reassembly, cleaning, lubrication, and operation. The manual, included with CMP rifles, is available for $3.25 from the CMP eStore. The author of Garand Tips & Tricks says: “It’s one of the best firearms manuals I’ve seen. I highly recommend it.”
M1 Garand Slow-Motion Shooting Video
What really happens when an M1 Garand fires the final round and the En-Bloc clip ejects with the distinctive “Ping”? Well thanks to ForgottenWeapons.com, you can see for yourself in super-slow-motion. The entire cycling process of a Garand has been captured using a high-speed camera running at 2000 frames per second (about sixty times normal rate). Watch the clip eject at the 00:27 time-mark. It makes an acrobatic exit, spinning 90° counter-clockwise and then tumbling end over end.
2000 frame per second video shows M1 Garand ejecting spent cartridges and En-bloc clip.
M1 Garand History
Jean Cantius Garand, also known as John C. Garand, was a Canadian designer of firearms who created the M1 Garand, a semi-automatic rifle that was widely used by the U.S. Army and U.S. Marine Corps during World War II and the Korean War. The U.S. government employed Garand as an engineer with the Springfield Armory from 1919 until he retired in 1953. At Springfield Armory Garand was tasked with designing a basic gas-actuated self-loading infantry rifle and carbine that would eject the spent cartridge and reload a new round. It took fifteen years to perfect the M1 prototype model to meet all the U.S. Army specifications. The resulting Semiautomatic, Caliber .30, M1 Rifle was patented by Garand in 1932, approved by the U.S. Army on January 9, 1936, and went into mass production in 1940. It replaced the bolt-action M1903 Springfield and became the standard infantry rifle known as the Garand Rifle. During the World War II, over four million M1 rifles were manufactured.
There are important safety and behavior rules you need to follow at a gun range. Sometimes bad range etiquette is simply annoying. Other times poor gun-handling practices can be downright dangerous. The NRA Blog has published a useful article about range safety and “range etiquette”. While these tips were formulated with indoor ranges in mind, most of the points apply equally well to outdoor ranges. You may want to print out this article to provide to novice shooters at your local range or club.
8 Tips for Gun Range Etiquette
Story by Kyle Jillson for NRABlog
Here are eight tips on range etiquette to keep yourself and others safe while enjoying your day [at the range]. Special thanks to NRA Headquarters Range General Manager Michael Johns who assisted with this article.
1. Follow the Three Fundamental Rules for Safe Gun Handling
ALWAYS keep the gun pointed in a safe direction.
ALWAYS keep your finger off the trigger until ready to shoot.
ALWAYS keep the gun unloaded until ready to use.
This NSSF Video Covers Basic Gun Range Safety Rules:
2. Bring Safety Gear (Eye and Ear Protection)
Eye and Ear protection are MANDATORY for proper safety and health, no matter if “required” by range rules or not. It is the shooter’s responsibility to ensure proper protection is secured and used prior to entering/using any range. Hearing loss can be instantaneous and permanent in some cases. Eyesight can be ruined in an instant with a catastrophic firearm failure.
3. Carry a Gun Bag or Case
Common courtesy and general good behavior dictates that you bring all firearms to a range unloaded and cased and/or covered. No range staff appreciates a stranger walking into a range with a “naked” firearm whose loaded/unloaded condition is not known. You can buy a long gun sock or pistol case for less than $10.
4. Know Your Range’s Rules
Review and understand any and all “range specific” rules/requirements/expectations set forth by your range. What’s the range’s maximum rate of fire? Are you allowed to collect your brass? Are you required to take a test before you can shoot? Don’t be afraid to ask the staff questions or tell them it’s your first time. They’re there to help.
5. Follow ALL Range Officer instructions
ROs are the first and final authority on any range and their decisions are generally final. Arguing/debating with a Range Officer is both in poor taste and may just get you thrown out depending on circumstances.
6. Don’t Bother Others or Touch Their Guns
Respect other shooters’ privacy unless a safety issue arises. Do NOT engage other shooters to correct a perceived safety violation unless absolutely necessary – inform the RO instead. Shooters have the right and responsibility to call for a cease fire should a SERIOUS safety event occur. Handling/touching another shooter’s firearm without their permission is a major breech of protocol. Offering unsolicited “training” or other instructional suggestions to other shooters is also impolite.
7. Know What To Do During a Cease Fire
IMMEDIATELY set down your firearm, pointed downrange, and STEP AWAY from the shooting booth (or bench). The Range Officer(s) on duty will give instructions from that point and/or secure all firearms prior to going downrange if needed. ROs do not want shooters trying to “secure/unload” their firearms in a cease fire situation, possibly in a stressful event; they want the shooters separated from their guns instantly so that they can then control the situation as they see fit.
8. Clean Up After Yourself
Remember to take down your old targets, police your shooting booth, throw away your trash, and return any equipment/chairs, etc. Other people use the range too; no one wants to walk up to a dirty lane.
Optics companies from around the globe had scores of new scopes and optics products on display at SHOT Show 2020. We visited Athlon, Burris, Bushnell, Leica, Leupold, Kahles, IOR/Valdada, March, Nightforce, Sightron, Swarovski, Vortex, and Zeiss displays. Here are some of the notable scope and optics products we saw this year.
Vortex Optics — Viewing Vortex Scopes with Carl Bernosky
One of the highlights of our show was meeting our friend Carl Bernosky at the Vortex Booth. Carl, a 10-time National High Power Champion, showed us the Vortex Golden Eagle. This affordable 15-60x52mm Second Focal Plane (SFP) optic is very popular with F-Class competitors, as it offers a 4X magnification range all the way up to 60 power. The Golden Eagle’s $1499.99 price is 40% less than some other brands with similar specs.
March Optics — New PRS Scope, New Genesis
At the March Optics booth we met Gary Costello, a talented British F-Class competitor. Gary showed us a number of new offerings, including March’s new 4.5-28x52mm PRS Scope (above). Compact and light weight (29.8 oz), this features a 25° wide angle, fast-focus eyepiece and HM lens technology with two new reticle options. This new scope boasts a whopping 36 Mils elevation and 20 Mils windage travel.
Also new for 2020 is March’s 5-42x56mm FFP Long Range Tactical scope suitable for PRS, ELR, and long range hunting. This boasts 40 Mil elevation, 14 Mil windage, and two new reticles, one of which is a tree reticle optimized for ranging and rapid hold-offs/hold-overs. This features a 26°, fast-focus eyepiece. Weight is 33.5 ounces.
This is the new 4-40x52mm FFP “Mini Genesis” featuring High master lens technology. This boasts 86 MILS of elevation, 24° fast-focus eyepiece, and zero set elevation. The Genesis technology provides an optically-centered lens capable of engaging targets up to 3 miles.
Leica — New 5-30x56mm PRS FFP Scope
At the Leica pavilion at SHOT show, we checked out the Leica’s new PRS 5–30x56i riflescope (SRP: $2,895) This is an impressive First Focal Plane (FFP) scope with 6X zoom, and a full 32 MILS (100+ MOA) of elevation range. This scope comes with a zoom ring throw lever and zero-stop turrets. Leica will offer the PRS 5-30x56i scope (MSRP $2699.00) with three reticle options: iL-4A, iBallistic, and iPRB. The iPRB is a modern “tree” reticle designed with input from Precision Rifle Blog (PRB) editor Cal Zant. CLICK HERE for PRB full report.
Zeiss — Rings with Integrated Level, Ultra-Compact Binoculars
At the Zeiss booth we checked out the beautifully-crafted Zeiss Precision Rings with level. Offered in both 30mm and 36mm, these rings feature an integral anti-cant bubble level in the top half, easily visible from any shooting position. Constructed of 7075-T6 aluminum, these rings are available in low, medium, and high heights, all with matte-black, hard-anodized finish. Also new this year are ZMOAi-T20 and ZMOA-T30 reticles for the Zeiss Conquest V4 riflescope line.
Hunters and sportsmen should check the ultra-compact Victory Pocket 8×25 binoculars. These feature a unique off-set hinge, allowing them to be VERY slim when folded. These binocs blow away anything we’ve ever seen that is so compact and easy to carry.
Nightforce — New SOCOM FFP Scope and new NX8 series
At the Barrett booth we viewed Nightforce’s new SOCOM 7-35x56mm F1 Scope developed for the U.S. Military. Called the P-VPS for “Precision Variable Power Scope”, this features a Termor 3 Reticle and integrated top rail for mounting a laser. Nightforce’s MIL-SPEC ATACR™ 5-25×56 F1 and the MIL-SPEC ATACR™ 7-35×56 F1 variants of the Nightforce Optics ATACR product line were selected by United States Special Operations Command (USSOCOM) to fill the Precision-Variable Power Scope component of the Miniature Aiming Systems – Day Optic (MAS-D) Program.
For 2020, Nightforce will also be selling new NX8 riflescopes, with an 8X zoom, evolved from Nightforce’s NXS series. The NX8 2.5–20x50mm F1 is available in MOAR and Tremor3 reticles . Likewise the NX8 4–32x50mm F1 is offered with MOAR ($2,150 MSRP) and Tremor3 ($2,400 MSRP) reticles. Both NX8 scopes feature DigIllum reticle illumination, ZeroStop technology, and either MOA or mil-radian adjustments.
Swarovski — Z8i Series with 8X Zoom Ratio
At the Swarovski Booth, a SHOT Show attendee checks out new reticle options.
At SHOT 2020, Swarovski showcased its impressive Z8i series riflescopes, which offer 8X zoom range. These, we think, are particularly good for long range hunters. You get a wide field of view for scanning, then plenty of magnification for a precise shot at very long range. There are five Z8i models: 1-8x24mm; 1.7-13.3x42mm; 2-16x50mm; 2.3-18x56mm; and 3.5-28x50mm.
Konus — Universal Cantilever Scope Mount
If you need more forward placement of a long optic, Konus has an effective new accessory. Attached to a Picatinny rail base, the new Konus Universal Adjustable Cantilever scope mount ($89 MSRP) allows you to move your optic forward. It adjusts from 6.5 inches to 8.3 inches in length, with seven settings in between. The mount fits both 1-inch and 30mm riflescope tubes. We also like the fact that this simplifies movement of a scope from one rifle to another.
Could this be the world’s smallest spotting scope? Well the Noblex NS 8-24×50 ED is certainly the world’s smallest spotter with high-grade ED (extra-low dispersion) glass. Crafted in Germany by Noblex GmbH, this mini-spotter weighs just 1.17 lbs. (530 grams) with eyepiece. As you can see, the entire unit could easily fit in a glovebox, and yes, we were impressed with the quality of the glass despite the small size. Could this be the ideal competition spotter for watching mirage during a match? 24-power is plenty for that task.
100+ More Optics Products — Specifications and Photos
Want to see more Riflescopes, Spotting Scopes, and Rangefinders? CLICK HERE for the SHOTBusiness.com 2020 Optics Guide. This features specifications and prices for 100+ products.
FREE Digital Editions of SHOT Show Daily
Below are links for FREE digital editions of the SHOT Show Daily, the print publication handed out at SHOT Show. Packed with stories and photos, each edition has a special new products theme. The daily news of the 2020 Las Vegas SHOT Show is produced by Bonnier Corporation and NSSF®. These SHOT Daily editions are definitely worth checking out — there are hundreds of photos of new products.
Sinclair International has created a series of helpful articles on rifle cartridge reloading. Today’s feature lists ten basic steps for precision hand-loading, with links to longer, detailed Sinclair Int’l technical articles providing more complete information. There’s a lot of helpful info here guys, if you click all the links to access the ten “long form” articles.
Tying It All Together: 10 Steps To Precision Handloads
Feature based on article by Roy Hill, Brownells/Sinclair Copywriter
Sinclair International offers a series of detailed articles on hand-loading precision rifle ammunition. The articles are included in Sinclair’s GunTech Articles Archive, but sorting through the index to find each article takes time. To help you access all these articles quickly, here’s a handy summary of ten key topics, with links to longer articles covering each subject in detail.
Part 1: The first step in making high-quality handloads is to carefully choose the best brass for your application. You need to know how to identify the different types of brass and how to choose the best kind for the ammo you want to load. CLICK HERE for Part 1.
Part 2: Even high-quality brass can have burrs around the flash hole that can interfere with the primer flame and cause inconsistent ignition – which can lead to shot groups opening up. Flash hole deburring is a critical step in making sure primers ignite powder consistently. CLICK HERE for Part 2.
Part 3: The next step is to make sure the primer pockets are square and uniform. Like flash hole deburring, primer pocket uniforming may reduce variations in primer ignition by ensuring more consistent primer seating. CLICK HERE for Part 3.
Part 4: Making sure all your cases are precisely the same length is crucial, especially when you use cases that have been fired before. Case trimming is the way to get there. CLICK HERE for Part 4.
Part 5: After trimming, cases still have to be resized. In order for them to work through the resizing die, they have to be lubricated. The case lube method you choose is crucial to making precision handloads. CLICK HERE for Part 5.
Part 6: Now it’s time to choose the dies that will resize your cases. There are several important options to consider in selecting the right sizing dies. CLICK HERE for Part 6.
Part 7: Wait! You’re not quite ready to start sizing yet. There’s yet more to consider before you start cranking cases through the press. Learn more about setting up and adjusting your sizing dies. CLICK HERE for Part 7.
Part 8: Once the cases are completely prepped, it’s time to start putting fresh components back into them. We start off by seating primers. CLICK HERE for Part 8.
Part 9: After the primers are seated, it’s time to drop in the powder. There are several tools that will help you handle powder for precision handloads. CLICK HERE for Part 9.
Part 10: The final step in the process is carefully seating the bullet to just the right depth. And then… you’re ready to try your loads at the range. CLICK HERE for Part 10.


 First, Ron explains that airport thieves can spot bags containing firearms no matter how they are packaged: “Don’t think you’re safe if your guns are placed in cases designed for golf clubs or trade show items. Baggage is X-Rayed now and cases are tagged with a special bar code if they contain firearms. It doesn’t take long for bad guys to figure out the bar coding for firearms.”