|
|
August 30th, 2014
 The February 2013 edition of Shooting Sports USA magazine has an interesting feature by Glen Zediker. In this Transporting Success, Part I article, Zediker explains the advantages of loading at the range when your are developing new loads or tuning existing loads. Glen, the author of the popular Handloading for Competition book, discusses the gear you’ll need to bring and he explains his load development procedure. In discussing reloading at the range, Glen focuses on throwing powder and seating bullets, because he normally brings enough sized-and-primed brass to the range with him, so he doesn’t need to de-prime, re-size, and then re-prime his cases. The February 2013 edition of Shooting Sports USA magazine has an interesting feature by Glen Zediker. In this Transporting Success, Part I article, Zediker explains the advantages of loading at the range when your are developing new loads or tuning existing loads. Glen, the author of the popular Handloading for Competition book, discusses the gear you’ll need to bring and he explains his load development procedure. In discussing reloading at the range, Glen focuses on throwing powder and seating bullets, because he normally brings enough sized-and-primed brass to the range with him, so he doesn’t need to de-prime, re-size, and then re-prime his cases.
Zediker writes: “Testing at the range provides the opportunity to be thorough and flexible. You also have the opportunity to do more testing under more similar conditions and, therefore, get results that are more telling. Once you are there, you can stay there until you get the results you want. No more waiting until next time.”
Zediker starts with three-shot groups: “I usually load and fire three samples [with] a new combination. I’ll then increase propellant charge… based on the results of those three rounds, and try three more. I know that three rounds is hardly a test, but if it looks bad on that few, it’s not going to get any better.”
Glen reminds readers to record their data: “Probably the most important piece of equipment is your notebook! No kidding. Write it down. Write it all down.”

 There’s More to the Story… There’s More to the Story…
Editor’s Note: In Zediker’s discussion of loading at the range, he only talks about throwing powder and seating bullets. In fact, Glen opines that: “there is little or no need for sizing.” Well, maybe. Presumably, for each subsequent load series, Zediker uses fresh brass that he has previously sized and primed. Thus he doesn’t need to de-prime or resize anything.
That’s one way to develop loads, but it may be more efficient to de-prime, re-size, and load the same cases. That way you don’t need to bring 50, 80, or even 100 primed-and-sized cases to the range. If you plan to reload your fired cases, you’ll need a system for de-priming (and re-priming) the brass, and either neck-sizing or full-length sizing (as you prefer). An arbor press can handle neck-sizing. But if you plan to do full-length sizing, you’ll need to bring a press that can handle case-sizing chores. Such a press need not be large or heavy. Many benchresters use the small but sturdy RCBS Partner Press, an “O-Design” that costs about $79.00. You may even get by with the more basic Lee Precision Compact Reloading Press, shown in Zediker’s article. This little Lee press, Lee product #90045, retails for under $30.00.

August 23rd, 2014
Are you a gun-loving number cruncher? Then you need to read a new Shooting Industry Magazine Report. This report, filled with reams of hard data from the past two decades, reveals the state of the gun-making industry. You may be stunned to see how firearm production has skyrocketed in the past few years. In fact, total U.S. firearm production rose to 8,872,456 units in 2012, compared to 6,351,479 in 2011. That’s a 39.7% increase. SEE MORE STATS.

U.S. Gun-Makers Set Production Records
The top three firearm manufacturers all increased production substantially in 2012 compared to 2011, setting new production records. In 2012, the #1 American gun-maker, Ruger, boosted production 48% over 2011 levels. The #2 company, Remington Arms, raised production 13% in 2012, while #3 Smith and Wesson increased production 31% in 2012 compared to the year before. What’s more, in 2012, each one of these three U.S. manufacturers built more than a million firearms. That’s an historic first according to Shooting Industry Magazine.
More Guns = Higher Demand for Ammo and Reloading Components
If you have been wondering “Where did all the powder and .22 LR ammo go?”, take a good look at the chart above. There has been an enormous boost in production in recent years. Unquestionably, many of the buyers of all those new guns are looking for ammo to shoot. This helps explain why ammo and reloading components are in short supply.
Gun Sales Are Below Record 2013 Levels, But Are Still Very High
Gun sales peaked in 2013, and there has been a slow-down in 2014. However, it does look like 2014 sales will outpace 2012. The Shooting Industry Magazine report declares: “During May 2014, NICS conducted 877,655 (NSSF-adjusted) background checks. While this was a 9.9% decrease, compared to May 2013, it was the second highest May in NICS history. More importantly, it was a 4% increase over May 2012. This trend — a decrease in background checks compared to 2013, but an increase compared to 2012 — is reflected in the early months of 2014.”
Report Tip from EdLongrange. We welcome reader submissions.
August 8th, 2014

Story based on report by Lars Dalseide for NRABlog.com
You could say shooting is in her blood. Raised in a home where national titles were about as regular as Johnny Carson on late night, it was only a matter of time until Michelle Gallagher won a National NRA Rifle title of her own. Or, as is the case this year, a fourth National NRA Long Range Rifle Championship.
“I started shooting when I was about 7,” Gallagher explained. “Mom was taking me and Sherri (her sister) to the range ever since we were little kids. “
As with most shooters, it all started with smallbore. Working on stance, trigger control, and reading the wind, the light rifle fulfilled every shooting desire until an international match in New Zealand for the Palma World Championships. “I saw those Palma team jackets and that was it. I wanted one of those jackets. So we went home and Mid (her stepfather Middleton Tompkins) built me a Palma gun.”
Michelle Gallagher with Tompkins Trophy for the NRA Long Range High Power Rifle Championship.

Though the desire for a jacket was strong, the switch from smallbore to high power didn’t come without complications. In fact, Gallagher admits to shooting with her eyes closed for the first six months.
“It was such a big kick.”
Soon the kick wasn’t so big. Using the skills she acquired in smallbore, Gallagher rose through the ranks until winning her first NRA Long Range High Power Rifle title three years later. With two more championships under her belt, she ultimately achieved her initial High Power goal in 2007 with a spot on the United States International Palma team.
Jacket and all.
Preparing for the NRA Rifle Championships
Gallagher doesn’t shoot much of the sling rifle these days. In fact, the last time she wrapped said sling around her left arm and sent a few shots 1000 yards down range was the 2013 NRA Long Range High Power Championships. Which begs the question — how did she manage to win without any practice?
“I’ve been shooting F-Class.”
Now how does shooting on a bipod make you a better sling rifle shooter?
“You have to take the targets into consideration,” she began. “On F-Class targets the 10 ring is [the size of the High Power] X-Ring. So the wind calls have to be spot on, there’s not as big a cushion as you get with sling rifles. And I think that helps a lot.”
Another part of Gallagher’s preparation that helps a lot is her relationship with her parents. World class shooters on their own, their status has changed from mentors to peers. An odd situation at first, the family eventually found a way to make it work.
“They still help me a lot, but they ask for my advice as well. They taught me a great deal and I’ve tweaked that with my own experience. Now we’re building off of each other rather than just me asking for advice.”
Michelle (right) gets advice from mother Nancy Tompkins (left) while SSG Brandon Green looks on.

Rediscovering her NRA Long Range stride 13 years after her last win means Michelle is likely to stick around the sling rifle arena for a little while longer. The thrill of the NRA Championships still puts a twinkle in her eye: “There’s just something about shooting here at Camp Perry … It’s just special.”
August 4th, 2014
 Shiny brass — it may not shoot more accurately, but it does make you feel better about your hand-loaded ammo. While it’s not necessary to get brass “bright and shiny” after every firing, it is a good idea to clean powder residue, grime, and grit off your brass before you run cases into sizing dies. There are many ways to clean cartridge cases. A quick wipe with solvent on a patch may suffice for recently-shot cases. Older brass with baked-on carbon may require lengthy tumbling. Ultrasonic cleaning is another popular option that gets your brass clean inside and out. Shiny brass — it may not shoot more accurately, but it does make you feel better about your hand-loaded ammo. While it’s not necessary to get brass “bright and shiny” after every firing, it is a good idea to clean powder residue, grime, and grit off your brass before you run cases into sizing dies. There are many ways to clean cartridge cases. A quick wipe with solvent on a patch may suffice for recently-shot cases. Older brass with baked-on carbon may require lengthy tumbling. Ultrasonic cleaning is another popular option that gets your brass clean inside and out.
Sinclair International has a series of helpful videos on brass cleaning. These short “how-to” videos, hosted by Bill Gravatt, Sinclair’s past President, cover the various processes you can use — tumbling, ultrasonic cleaning, chemical cleaning, and cleaning by hand.
Video ONE — Cleaning Brass in Vibratory or Rotary Tumbler
TIP: Brass that has recently been shot will clean more easily than brass that has been sitting many days or weeks. If your tumbling media is fresh the job should be done in an hour or less. It’s your choice whether to tumble with primers removed or with primers still in the cases. If you choose to tumble with primers out, we suggest you deprime with a depriming die, rather that put dirty brass into your sizing die. Some people like to add a teaspoon of liquid polish to the media. This does work, cutting tumble time, and making your brass more shiny. However, if you add liquid polish, do that BEFORE you add the brass and let the tumbler run for a 15 minutes to get the polish completely mixed into the media. Otherwise you can else up with gooey gunk inside your cases — a very bad thing.
Video TWO — Ulstrasonic Case Cleaning
TIP: There are many different types of solutions you can use. Soapy water suffices for some folks, particularly if you add a little Lemi-Shine. The Hornady and Lyman solutions work well, and can be used multiple times, provided you strain the solution to remove dirt and grit after cleaning sessions. Many ultrasonic cleaning machines have timers. Experiment with dwell time to see how long you need to immerse your brass. A very small amount of Ballistol in the solution will help lubricate your necks on the inside. This can make bullet seating go more smoothly, with more consistent neck tension.
Video THREE — Chemical Cleaners (Soaking without Ultrasound)
TIP: After using chemical cleaners, such as the Iosso solution, you need to water-rinse your brass thoroughly. A kitchen strainer helps with this (see video at 0:20). Also, don’t forget your brass in the chemical solution — follow the manufacturers recommendations and don’t exceed the recommended dwell time. Chemical cleaners work surprisingly well to remove grease and grime, and the solution can be re-used multiple times. However, if you want your cases to look bright and shiny (like new brass), you will probably have to tumble.
Video FOUR — Manual Cleaning (By Hand)
TIP: Keep some oversize patches in your range kit. At the end of your shooting sessions, wipe off your fired brass with a patch dampened with a mild, non-corrosive solvent (once again Ballistol works well). Before the carbon sets up on your brass it is very easy to remove. For tougher jobs, you can use 0000 Steel Wool (as Bill recommends in the video). You may find that timely hand-cleaning lets you avoid tumbling altogether — or you may choose to tumble (or ultra-sound) your brass only after a half-dozen or so firings.
August 2nd, 2014
 Brux Barrels, based in Lodi, Wisconsin, has earned a reputation for producing great-shooting tubes. Brux-made barrels have won their fair share of matches, and set some notable records in the process. Last year, Rodney Wagner shot the smallest five-shot, 600-yard group (.0349″) in the history of rifle competition, using a Brux barrel chambered for the 6mm Dasher. Brux Barrels, based in Lodi, Wisconsin, has earned a reputation for producing great-shooting tubes. Brux-made barrels have won their fair share of matches, and set some notable records in the process. Last year, Rodney Wagner shot the smallest five-shot, 600-yard group (.0349″) in the history of rifle competition, using a Brux barrel chambered for the 6mm Dasher.
Folks often ask us why Brux barrels shoot so well. “What’s the secret?” they ask. We can only answer with what Brux explains on its own website: “To make a cut-rifled barrel you have to start off with the proper ingredients: the best steel available, skill, and experience. Since there are really only two main suppliers of barrel-quality steel, the skill and experience is what really makes a barrel maker stand out.” Here is how Brux’s co-owners, Norman Brux and Ken Liebetrau, explain all the procedures involved in making a Brux cut-rifled barrel:
| Brux Barrel-Making Process, Start to Finish
We start out with either 4150 chrome-moly or 416R stainless steel double stress-relieved bar stock. The bar stock starts out at 1-9/32″ in diameter and 20-24 feet long so we cut it to length.
Step two is to rough-contour the outside of the barrel blank in a lathe.
Thirdly, the blank gets mounted into a Barnes gun drill. The cutter bit has holes through which oil or coolant is injected under pressure to allow the evacuation of chips formed during the cutting process. This is called “oil-through” or “coolant-through”. Without this, you wouldn’t want to even attempt drilling a hole 30” long and under ¼” in diameter. The combination of a 3600rpm and good flushing allows us to drill a beautifully straight and centered hole .005” under “land” diameter at a rate of 1” per minute.
Clean the barrel.
Next the blank is sent back to the lathe to machine the finished contour of the outside.
Clean the barrel again.
Now, the blank is sent on to the Pratt & Whitney reamer in which an “oil through” reaming tool is used to cut away the extra .005” left in the drilling process. The reamer makes an extremely accurate bore size and after it is finished the bore will have a better surface finish and will be at the proper “land” diameter.
Clean the barrel again.
In the sixth step we hand lap each barrel to remove any slight tool marks that may have been left by the reamer and inspect every one with a bore scope. If the barrel doesn’t meet our standards for surface finish and tolerance it doesn’t get any further.
Clean the barrel again.
The barrels then go onto the rifling machine which is responsible for cutting the all so familiar grooves in the bore. A caliber/land configuration-specific rifling head is used to progressively shave away small amounts of steel to form the rifling grooves. This is accomplished by simultaneously pulling the rifling head through the reamed blank as the blank is spun at a controlled rate. After each cut, the blank is rotated 90 degrees (for a four-land configuration) and after one full rotation (360 degrees) the rifling head is slightly raised to shave off the next bit of material. This process is repeated until we reach groove diameter.
Clean the barrel again.
Lastly, the barrel is hand-lapped again (to ensure a smooth bore), and a final inspection is performed with the bore scope.
The barrel is cleaned one last time, wrapped, packed, and shipped to [the customer]. |
Anyone reading this detailed description of the Brux barrel-making process will doubtless come away with a new appreciation for the time, effort, and dedication required to produce a premium match-grade cut-rifled barrel. Obviously, there are no easy shortcuts and great attention to detail is required each step of the way. As shooters we’re lucky that we have barrel-makers so dedicated to their craft.
Credit James Mock for steering us to this Barrel Making 101 feature on the Brux website.
July 30th, 2014
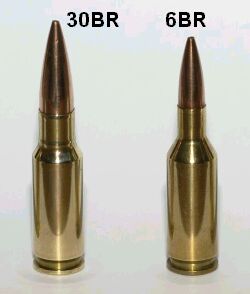 The 30BR is an amazing little cartridge. However, 30BR shooters do have to neck-up 6mmBR brass and then deal with some issues that can arise from the expansion process. One of our Forum members was concerned about the donut that can form at the new (expanded) neck-shoulder junction. Respected bullet-maker Randy Robinett offers tips on how to deal with the “dreaded donut”. The 30BR is an amazing little cartridge. However, 30BR shooters do have to neck-up 6mmBR brass and then deal with some issues that can arise from the expansion process. One of our Forum members was concerned about the donut that can form at the new (expanded) neck-shoulder junction. Respected bullet-maker Randy Robinett offers tips on how to deal with the “dreaded donut”.
The Forum member was concerned about thinning the brass if he turned his 30BR necks after expansion: “Everything I have found on 30BR case-forming says to simply turn off the bulge at the base of the neck caused by the old 6BR shoulder. I expanded my first case and measured the neck at 0.329″ except on the donut, where it measures 0.335″. Looking inside the case… reveals a groove inside the case under the donut. Now, it is a fact that when I turn that neck and remove the donut, the groove is still going to be there on the inside? That means there is now a thin-spot ring at the base of the neck that is .005 thinner than the rest of the neck. Has anyone experienced a neck cracking on this ring?”
Randy Robinett, who runs BIB Bullet Co., is one of the “founding fathers” of the 30BR who help prove and popularize the 30 BR for benchrest score shooting. Randy offers this advice on 30BR case-forming:
While the thinner neck-base was one of our original concerns, unless one cuts too deeply INTO the shoulder, it is not a problem. For my original 30BR chamber, thirty (30) cases were used to fire 6,400 rounds through the barrel. The cases were never annealed, yet there were ZERO case failures, neck separations, or splits. The case-necks were turned for a loaded-round neck diameter of .328″, and, from the beginning, sized with a .324″ neck-bushing.
The best method for avoiding the ‘bulge’ is to fire-form prior to neck-turning (several methods are successfully employed). Cutting too deeply into the shoulder can result in case-neck separations. I have witnessed this, but, with several barrels and thousands to shots fired, have not [personally] experienced it. The last registered BR event fired using that original barrel produced a 500-27x score and a second-place finish. [That’s] not bad for 6K plus shots, at something over 200 firings per case.
Check out the 30BR Cartridge Guide on AccurateShooter.com
You’ll find more information on 30BR Case-forming in our 30 BR Cartridge Guide. Here’s a short excerpt from that page — some tips provided by benchrest for score and HBR shooter Al Nyhus:
30BR Case-Forming Procedure by Al Nyhus
The 30BR cartridge is formed by necking-up 6BR or 7BR brass. You can do this in multiple stages or in one pass. Most of the top shooters prefer the single-pass method. You can use either an expander mandrel (like Joe Entrekin does), or a tapered button in a regular dies. Personally, I use a Redding tapered expander button, part number 16307. This expands the necks from 6mm to .30 cal in one pass. It works well as long as you lube the mandrel and the inside of the necks. I’ve also used the Sinclair expander body with a succession of larger mandrels, but this is a lot more work and the necks stay straighter with the Redding tapered button. This button can be used in any Redding die that has a large enough inside diameter to accept the BR case without any case-to-die contact.
Don’t be concerned about how straight the necks are before firing them the first time. When you whap them with around 50,000 psi, they will straighten out just fine! I recommend not seating the bullets into the lands for the first firing, provided there is an adequate light crush-fit of the case in the chamber. The Lapua cases will shorten from approx. 1.550″ to around 1.520″ after being necked up to 30-caliber I trim to 1.500″ with the (suggested) 1.520 length chambers. I don’t deburr the flash holes or uniform the primer pockets until after the first firing. I use a Ron Hoehn flash hole deburring tool that indexes on the primer pocket, not through the case mouth. — Al Nyhus
July 1st, 2014
 The July 2014 digital edition of Shooting Sports USA magazine is now available. Along with the cover story on the Bianchi Cup, this month’s issue has many interesting articles. And the price is right — this month’s Shooting Sports USA eZine is FREE for the taking. Just Click This Link to load the July 2014 eZine edition right in your web browser. The July 2014 digital edition of Shooting Sports USA magazine is now available. Along with the cover story on the Bianchi Cup, this month’s issue has many interesting articles. And the price is right — this month’s Shooting Sports USA eZine is FREE for the taking. Just Click This Link to load the July 2014 eZine edition right in your web browser.
For all competitive shooters, we highly recommend a 6-page article on Mental Training by Editor Chip Lohman. Drawing on scientific studies, Lohman reveals that practice and specialized training can actually improve mental function and create beneficial physical changes in the brain itself. Lohman quotes one study which revealed that “Brain scans of concert violinists and taxi drivers show enlargement of the areas important to the practice of their profession.” Morever, Lohman notes that “the trained brain has a better idea of tripping the correct nerves and muscles, leading to memory within the muscle itself.”

What this means is that competitive shooters can benefit from mental training in profound ways that were not previously understood. If you want to shoot higher scores at your next match, you should definitely read this article, part 2 of a series.
From the ’50s — How to Shoot the High Power Rifle
Another highlight of this month’s Shooting Sports USA eZine is a “golden oldie” article, “How to Shoot the High Power Rifle”. First published in American Rifleman way back in August, 1955, this article covers basic High Power technique. Lt. Col Jim Crossman talks about position shooting, sling use, practice methods, and procedures for relaxing between firing sequences. Much of the advice Lt. Col. Crossman offers can still benefit today’s High Power shooters.

June 30th, 2014
The gyro-stabilized two-wheeled Segway was supposed to revolutionize personal transportation. That may never happen (mall cops excepted), but remote-controlled Segways just might revolutionize the way military and police personnel train for urban engagements.

Robotic Segway “Smart Targets” for Live-Fire Training
An Australian company, Marathon Robotics, has created wheeled robot targets — remote-controlled Segways fitted with target silhouettes. The Segway Robots can move and respond like humans, ducking into doorways, or dispersing at the sound of gunfire. This provides challenging, ultra-realistic training for military and police sharp-shooters. This is not just science fiction. Australian Special Forces units already train in a mock urban center populated with Marathon’s rolling robots. And the U.S. Marine Corps has hired Marathon to create a similar robot-equipped, live-fire training venue.
 Marathon combined computer gaming technology with armored, remote-controlled Segways to create the ultimate 21st century moving target. The lower halves of the Segways are armor-plated, so the expensive electronic innards don’t get damaged by an errant shot. On top is mounted a replica human torso. The torso section can be clothed to distinguish “civilians” from military targets, or to distinguish terrorists from hostages. Marathon combined computer gaming technology with armored, remote-controlled Segways to create the ultimate 21st century moving target. The lower halves of the Segways are armor-plated, so the expensive electronic innards don’t get damaged by an errant shot. On top is mounted a replica human torso. The torso section can be clothed to distinguish “civilians” from military targets, or to distinguish terrorists from hostages.
Marathon’s sophisticated software can control multiple Segway Robots at the same time. A group of Segways can be programmed to mimic a squad on patrol, or a group of terrorists holding hostages. The control software allows autonomous or “intelligent” behavior by the Segway Robots. For example, the Segways can disperse automatically at the sound of a gunshot, and the Segways can be trained to seek cover in hallways or behind objects. Importantly, the Segway Robots are capable of human-like movement — they can stop quickly, turn 360° and retreat slowly, or accelerate to a human running pace. Marathon’s Segway Robots are equipped with laser range finders so they can avoid running into obstacles, including people on the move. The “Segbots” lean forward slightly as they walk forward, like people do.
To really understand how the Robotic Smart Targets work, watch this amazing video:

RESOURCES: Marathon Targets Webpage | Smart Targets Product Info (PDF) | Photo Gallery

June 29th, 2014
Riflescopes are mechanical contraptions. One of the sad realities about precision shooting is that, sooner or later, you will experience a scope failure. If you’re lucky it won’t happen in the middle of a National-level competition. And hopefully the failure will be dramatic and unmistakable so you won’t spend months trying to isolate the issue. Unfortunately, scope problems can be erratic or hard to diagnose. You may find yourself with unexplained flyers or a slight degradation of accuracy and you won’t know how to diagnose the problem. And when a 1/8th-MOA-click scope starts failing, it may be hard to recognize the fault immediately, because the POI change may be slight.
When An Expensive Scope Goes Bad
Recently, this editor had a major-brand 8-25x50mm scope go bad. How did I know I had a problem? Well the first sign was a wild “drop-down” flyer at a 600-yard match. After shooting a two-target relay, I took a look at my targets. My first 5-shot group had five shots, fairly well centered, in about 2.2″. Pretty good. Everything was operating fine. Then I looked at the second target. My eye was drawn to four shots, all centered in the 10 Ring, measuring about 2.4″. But then I saw the fifth shot. It was a good 18″ low, straight down from the X. And I really mean straight down — if you drew a plumb line down from the center of the X, it would pass almost through the fifth shot.
That was disconcerting, but since I had never had any trouble with this scope before, I assumed it was a load problem (too little powder?), or simple driver error (maybe I flinched or yanked the trigger?). Accordingly, I didn’t do anything about the scope, figuring the problem was me or the load.

But, at the next range session, things went downhill fast. In three shots, I did manage to get on steel at 600, with my normal come-up for that distance. Everything seemed fine. So then I switched to paper. We had a buddy in the pits with a walkie-talkie and he radioed that he couldn’t see any bullet holes in the paper after five shots. My spotter said he thought the bullets were impacting in the dirt, just below the paper. OK, I thought, we’ll add 3 MOA up (12 clicks), and that should raise POI 18″ and I should be on paper, near center. That didn’t work — now the bullets were impacting in the berm ABOVE the target frame. The POI had changed over 48″ (8 MOA). (And no I didn’t click too far — I clicked slowly, counting each click out loud as I adjusted the elevation.) OK, to compensate now I took off 8 clicks which should be 2 MOA or 12″. No joy. The POI dropped about 24″ (4 MOA) and the POI also moved moved 18″ right, to the edge of the target.
 For the next 20 shots, we kept “chasing center” trying to get the gun zeroed at 600 yards. We never did. After burning a lot of ammo, we gave up. Before stowing the gun for the trip home, I dialed back to my 100-yard zero, which is my normal practice (it’s 47 clicks down from 600-yard zero). I immediately noticed that the “feel” of the elevation knob didn’t seem right. Even though I was pretty much in the center of my elevation (I have a +20 MOA scope mount), the clicks felt really tight — as they do when you’re at the very limit of travel. There was a lot of resistance in the clicks and they didn’t seem to move the right amount. And it seemed that I’d have four or five clicks that were “bunched up” with a lot of resistance, and then the next click would have almost no resistance and seem to jump. It’s hard to describe, but it was like winding a spring that erratically moved from tight to very loose. For the next 20 shots, we kept “chasing center” trying to get the gun zeroed at 600 yards. We never did. After burning a lot of ammo, we gave up. Before stowing the gun for the trip home, I dialed back to my 100-yard zero, which is my normal practice (it’s 47 clicks down from 600-yard zero). I immediately noticed that the “feel” of the elevation knob didn’t seem right. Even though I was pretty much in the center of my elevation (I have a +20 MOA scope mount), the clicks felt really tight — as they do when you’re at the very limit of travel. There was a lot of resistance in the clicks and they didn’t seem to move the right amount. And it seemed that I’d have four or five clicks that were “bunched up” with a lot of resistance, and then the next click would have almost no resistance and seem to jump. It’s hard to describe, but it was like winding a spring that erratically moved from tight to very loose.
At this point I announced to my shooting buddies: “I think the scope has taken a dump.” I let one buddy work the elevation knob a bit. “That feels weird,” he said: “the clicks aren’t consistent… first it doesn’t want to move, then the clicks jump too easily.”
Convinced that I had a real problem, the scope was packed up and shipped to the manufacturer. So, was I hallucinating? Was my problem really just driver error? I’ve heard plenty of stories about guys who sent scopes in for repair, only to receive their optics back with a terse note saying: “Scope passed inspection and function test 100%. No repairs needed”. So, was my scope really FUBAR? You bet it was. When the scope came back from the factory, the Repair Record stated that nearly all the internal mechanicals had been replaced or fixed: “Replaced Adjustment Elevation; Replaced Adjustment Windage; Reworked Erector System; Reworked Selector; Reworked Parallax Control.”
How to Diagnose Scope Problems
When you see your groups open up, there’s a very good chance this is due to poor wind-reading, or other “driver error”. But my experience showed me that sometimes scopes do go bad. When your accuracy degrades without any other reasonable explanation, the cause of the problem may well be your optics. Here are some of the “symptoms” of scope troubles:
1. Large shot-to-shot variance in Point of Impact with known accurate loads.
2. Uneven tracking (either vertical or horizontal).
3. Change of Point of Impact does not correspond to click inputs.
4. Inability to zero in reasonable number of shots.
5. Unexpected changes in needed click values (compared to previous come-ups).
6. Visible shift in reticle from center of view.
7. Changed “feel” or resistance when clicking; or uneven click-to-click “feel”.
8. Inability to set parallax to achieve sharpness.
9. Turrets or other controls feel wobbly or loose.
10. Internal scope components rattle when gun is moved.
Source of Problem Unknown, but I Have a Theory
Although my scope came with a slightly canted reticle from the factory, it had otherwise functioned without a hitch for many years. I was able to go back and forth between 100-yard zero and 600-yard zero with perfect repeatability for over five years. I had confidence in that scope. Why did it fail when it did? My theory is side-loading on the turrets. I used to carry the gun in a thick soft case. I recently switched to an aluminum-sided hard case that has pretty dense egg-crate foam inside. I noticed it took some effort to close the case, though it was more than big enough, width-wise, to hold the gun. My thinking is that the foam wasn’t compressing enough, resulting in a side-load on the windage turret when the case was clamped shut. This is just my best guess; it may not be the real source of the problem. Remember, as I explained in the beginning of this story, sometimes scopes — just like any mechanical system — simply stop working for no apparent reason.
June 27th, 2014
 Kevin Thomas of Lapua USA recently acquired a bit of living history — a reproduction Model 1873 Trapdoor Springfield. Here is Kevin’s story of his new rifle and the legacy it carries. Kevin Thomas of Lapua USA recently acquired a bit of living history — a reproduction Model 1873 Trapdoor Springfield. Here is Kevin’s story of his new rifle and the legacy it carries.
This week marked the 138th Anniversary of Lt.Col. George Armstrong Custer’s historic ride into the valley of the Little Big Horn, along with 200+ men of the U.S. Seventh Cavalry. June 25, 1876 did not go well, as Custer and his men became a well-known, sad footnote in U.S. history. [Editor: Well it was sad for Custer fans. Native Americans have a different perspective.]
For years now, I’ve wanted one of the rifles Custer and his men carried that day, a Model 1873 Trapdoor Springfield, chambered for the 45/70 cartridge. I finally acquired one, when I walked into a gunstore a while back and saw a handsome repro Trapdoor sitting peacefully on the shelf. It called to me.

Somewhere in the distance, I could hear the bugle calls, the Sioux and Cheyenne war cries and the thundering of cavalry across the plain. It simply had to go home with me, and so it did. It seemed an especially insistent demand with this being the 138th anniversary and all, so I took it along to our regular Wednesday night practice session. All I can say is, I’m glad we don’t have to do rapid-fire with one of these in our matches today, because they do have a mule-like kick to them!

The Trapdoors were a cost saving measure that the Armory came up with at the end of the Civil War, to convert muzzle-loading Springfield muskets into breech-loading cartridge arms. A quick look will give several dead giveaways that many of the parts on the “new” rifle were actually interchangeable with the old 1861 and 1863 Springfield muskets. The parts that were altered or newly fabricated were relatively minor changes.

Above, you can see where these rifles got their name. Loading was done by flipping a lever which opened up a trap door that provided access to the chamber. Flipping that same lever and opening the trap door then ejected the case after firing.

Here is the opposite side, trapdoor open. The ring and slide on the side of the stock was to facilitate an attachment point for a lanyard that the troopers wore over their shoulders. Remember, they often used these while at a full gallop, not an easy feat!
|


