Jessie Harrison — one of the greatest female pistol shooters on the planet. In the video below, Jessie offers good tips on safe handgun mag changes.
In this Pro Tip Video, Jessie Harrison talks about Dry-Fire Pistol Training:
One of our Forum members asked: “Are there any good books on pistol marksmanship? I’m looking for a book that covers techniques and concepts….” Here are eight recommended titles that can make you a better pistol shooter. These books run the gamut from basic handgun training to CCW to Olympic-level bullseye shooting.
More Good Guidebooks for Competitive Pistol Shooters
There are other good books which can help competition pistol shooters. For new pistol shooters, we recommend the NRA Guide to the Basics of Pistol Shooting. This full-color publication is the designated student “textbook” for the NRA Basic Pistol Shooting Course.
If you’re interested in bullseye shooting, get the USAMU’s The Advanced Pistol Marksmanship Manual. This pistol marksmanship guide has been a trusted resource since the 1960s. Action Shooters should read Practical Shooting: Beyond Fundamentals by Brian Enos, a well-known pistol competitor with many titles. Julie Golob’s popular SHOOT book covers pistol marksmanship, along with 3-Gun competition. Julie holds multiple national pistol shooting titles.
AccurateShooter.com may earn a small Affiliate commission on books sold through Amazon.
Want to learn the basics of position shooting? Then you should check out an article by Gary Anderson, DCM Emeritus, in On the Mark digital magazine (Summer 2014, pp. 6-13). This article covers all the key elements: body position (prone, sitting, standing), sling use/adjustment, sight picture, aiming process, and trigger control. While this 8-page article was specifically written for Rimfire Sporter shooters, the techniques described by Anderson apply to all types of position shooting, whether you shoot air rifles, smallbore rifles, or centerfire rifles.
Here’s what Anderson says about aiming — how to keep your sights steady and get them centered on the middle of the target:
Trigger Contact and Center As soon as aiming at the target begins, the index finger must move from the trigger-guard to contact the trigger. It is important to get initial pressure on the trigger as soon as aiming begins. Then the shooter must focus on the sight picture and centering the sight picture movements over the aiming point. No one, not even champion shooters, can hold the aligned sights perfectly still. The sights are going to move a little bit or a lot, depending on the shooter’s skill level. The secret is to center those sight picture movements over the aiming point on the target (see trace illustration) before pulling the trigger.
When the sight picture movements on the target are centered, the last step in firing the shot is to add… smooth pressure on the trigger until the shot breaks.
Anderson also discusses the 5 Basics of Shot Technique:
BONUS: Olympic Gold Medalist Jamie Gray
Here’s an interesting video about three-position shooting. Produced by GOnra Media, this video demonstrates rifle hold and body alignment for prone, standing, sitting, and kneeling positions. Olympic Gold Medalist Jamie Gray demonstrates the proper stance and position of arms and legs for each of the positions. Ideally, in all of the shooting positions, the shooter takes advantage of skeletal support. The shooter should align the bones of his/her arms and legs to provide a solid foundation. A shooter’s legs and arms form vertical planes helping the body remain stable in the shooting position.
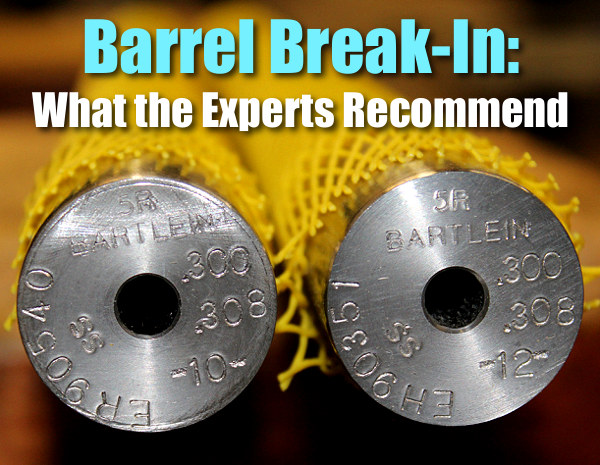
The question of barrel break-in is controversial. Some folks advocate an elaborate, lengthy cycle of shooting and brushing, repeated many times — one shot and clean, two shots and clean and so on. This, it is argued, helps barrels foul less and shoot more accurately. Others say minimal break-in, with patching and brushing after 10-15 rounds, is all you need. Still others contend that break-in procedures are a total waste of time and ammo — you should just load and shoot, and clean as you would normally.
We doubt if there will ever be real agreement among shooters concerning barrel break-in procedures. And one must remember that the appropriate break-in procedure might be quite different for a factory barrel vs. a custom hand-lapped barrel. This Editor has found that his very best custom barrels shot great right from the start, with no special break-in, other than wet patches at 5, 10, and 15 rounds. That said, I’ve seen some factory barrels that seemed to benefit from more elaborate break-in rituals.
What’s the best barrel break-in procedure? Eric Mayer of Varminter.com decided to ask the experts. Eric interviewed representatives of three leading barrel manufacturers: Krieger, Lothar-Walther, and Shilen. He recorded their responses on this video. In order of appearance, the three experts are:
Shilen, Krieger, and Walther Experts Talk about Barrel Break-in
Do I Need to Break-In a New Rifle Barrel?
Eric Mayer of Varminter.com says: “That is a simple question, [but it] does not necessarily have a simple answer. Instead of me repeating my own beliefs, and practices, on breaking-in a new rifle barrel, I decided to answer this one a bit differently. While we were at the 2016 SHOT Show, we tracked down three of the biggest, and most popular, custom barrel makers in the world, and asked them what they recommend to anyone buying their barrels, and why they recommend those procedures. We asked the question, and let the camera run!” Launch the video above to hear the answers — some of which may surprise you.
Barrel Break-in — Initial Inspection and Cleaning
This video explains that you should always inspect and clean the bore of your barrel before sending rounds through it. There may be remnants of the production process, such as lapping residues, that you’ll want to get out of the bore. We’ve even seen a few tiny metal pieces in some factory barrels. And it’s always wise to borescope a new barrel to see if there are visible defects in the rifling such as lands that have flawed edges — we’ve seen that on some cheaper barrels.
Barrel Break-In — Ian Klemm’s Surprising Observations
Here’s a 10-minute Vortex Nation interview with Ian Klemm. Ian, a 4-Time F-TR National Champion is one of America’s best long-range shooters. In this video, Ian explains his approach to barrel break-in, which may surprise you. Does barrel break-in even matter? Conventional wisdom says “Yes” and perhaps there’s some truth to that, but Ian argues that break-in is NOT nearly as important as the internet wants you to believe. Ian believes that you don’t need to waste a ton of time/ammo to get your barrel ready to shoot extremely accurately. This may be particularly true with premium hand-lapped custom barrels.
Barrel Break-In Procedures with Keith Glasscock
Keith Glasscock is also one of America’s greatest F-Class shooters who has finished second at the Nationals multiple times. Keith is also a highly-respected wind coach who has a popular YouTube video channel, Winning in the Wind. In this video, Keith explains his procedure for breaking-in his match barrels. He starts by bore-scoping the barrel and cleaning it. If he finds some burrs he may use some JB Bore Paste, a patch, and a worn brush and “give that throat a little scrub” (See 1:30 time-mark). He used different stroke lengths to avoid putting a “step” in the throat. When he’s satisfied he goes to the range. He fires the first five rounds, then cleans. He then fires quite a few rounds before cleaning the barrel again and beginning load development (See 8:25 time-mark).
General Barrel Break-in Procedures Recommended by Brownells
Brownells Gun Techs Steve Ostrem and Caleb Savant tackle a thorny topic: breaking in a new barrel. What IS breaking-in a barrel? And WHY do it? The rifling of a freshly machined barrel has microscopic burrs and sharp edges. “Breaking-in” is the process of putting bullets down the bore to smooth out those rough spots. The goal is to round down the sharp edges so they’re not stripping copper off a bullet as it travels the bore, which leads to fouling that leads to reduced accuracy and inconsistent groups. In a very minor way, you’re actually lapping the barrel. The breaking-in process works best on cut-rifled and button-rifled barrels. Cold hammer-forged, chrome-lined, or nitrided barrels — such as commonly found on AR-15s — may not benefit much from the process. Pistol barrels really don’t need to be broken in because larger-diameter bullets are not so much affected by tiny variations in the bore. Likewise, break-in is more helpful for a .17, .20, or .22 caliber rifle than a .45 caliber rifle.
George Gardner of G.A. Precision Talks About Barrel Break-In
G.A. Precision’s George Gardner is a leading figure in the PRS/NRL world. In this video, George makes the valid point that not all barrels require the same amount of break-in. George says some barrels require very little break-in, while others benefit from a more elaborate break-in process that helps reduce future copper and powder fouling. He calls this “seasoning” the barrel so it fouls less. For a typical barrel, George’s recommended process (4:25 time-mark) starts with one shot, then clean for three one-round cycles. This is followed by three shots then clean, with repeat 3-shot cycles if need. For cleaning George prefers nylon brushes (5:50 time-mark). NOTE: George also makes a very important point — you MUST swab the chamber and get it dry between cleaning cycles (5:30 time-mark).
A carpet is used up front for smoother tracking with the Joy-Pod’s flat, ski-style feet. The arms of the Joy-Pod were painted to match the stock. The rear bag features low-drag material on the ears.
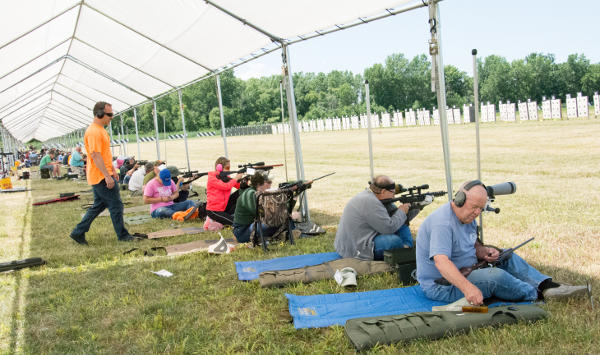
F-Class competition grows in popularity every year. Unlike F-Open, the F-TR (Target Rifle) class is limited to the .223 Remington (5.56×45) or .308 Winchester (7.62×51) chamberings. F-TR rifles also use bipods rather than a front rest. But these are no ordinary Harris-style bipods. Modern F-TR bipods have a wide footprint for added stability and many F-TR shooters favor SEB Co-Axial joystick bipods (aka “Joy-Pods”). Today we are featuring an F-TR rig that showcases the types of components, and accessories used by top F-TR competitors — including a coaxial bipod and Labradar Chronograph. If you’re considering getting started in the F-TR game, take a close look at this modern F-TR build from Forum member DM.Oakes.
Modern F-TR Rig with Borden Action, Krieger Barrel, and SEB Joy-Pod
This handsome .308 Win F-TR rig features a smooth-running Borden BRM action, 30-inch 1:10″-twist Krieger barrel, and an X-Ring Laminated Wood stock. Up front is a coaxial “Joy-Pod” joystick bipod. This is a state-of-the art, wide footprint bipod used by many competitors at the Worlds in Canada. The long joystick allows the “driver” to quickly adjust both elevation and windage in a smooth, continuous motion. The Joy-Pod can be adjusted so it will hold setting during the shot — you don’t have to “hard-hold” the joystick. Many shooters let the joystick slide through their fingers as the rifle moves back on recoil. With a little practice (and careful placement of the rear sand-bag), the tracking is excellent and you can slide the gun right back to point of aim after each shot.
This F-TR rifle is shown during load testing with a LabRadar chronograph.
» Full LabRadar Field Test/Review by Ray Gross
If you are considering purchasing a LabRadar Chronograph system, we strongly suggest you read the very thorough and informative LabRadar Review by Ray Gross, past Captain of the USA F-TR team. Ray notes: “It takes me about 3 minutes to set up [my LabRadar] at the range. Because there are no downrange screens, I do not have to hold up other shooters on the range like I would when setting up a traditional chronograph. The convenience alone will mean that I will use it more often than my old chronograph. Every time I take it out, I enjoy it a little bit more.”
Bang Clang! The 2023 Steel Challenge World Speed Shooting Championship is featured on Shooting USA TV this week. The Shooting USA Steel Challenge episode runs August 23, 2023 on the Outdoor Channel. Show times are: Wednesdays, 9:00 PM Eastern and Pacific, 8:00 PM Central. After those broadcast times, you can watch the show via Vimeo on Demand for $0.99 per episode.
This past April, the fastest speed shooters in the world showcased their skills at the Steel Challenge Championship at the CMP Talladega Marksmanship Complex in Alabama. The Steel Challenge course consists of eight 5-target close-range stages. This discipline has been called “drag racing with guns”. Draw and shoot 5 steel targets with time as your score. The shooter with the lowest overall time wins. This is a very popular event — when registration opened for the 2023 Steel Challenge, more than 700 slots filled in just 12 minutes.
The 2023 Steel Challenge at Talladega was featured this month on the NRA Shooting Sports USA site.
There are multiple pistol and revolver classes, both rimfire and centerfire, iron sights and optics. Increasing in popularity (and speed) are the rimfire rifle and pistol-caliber centerfire rifle classes. There are 13 gun classes in total, the most for any shooting championship. In the centerfire handgun match, the fastest times are posted by competitors using enhanced open guns with compensators and red-dot optics.
Here is a full length Shooting USA Steel Challenge Episode from 2017:
Shooting USA Video covers Course of Fire, Firearms Classes, and Target Layouts (1:20)
Definitely watch the 4-minute video (above) produced by Shooting USA. It explains the classes, shows the stages, and illustrates ALL the different gun classes, pistol AND rifle. You can also see some of the world’s fastest shooters including Jessie Harrison (1:47, 3:44) and Max Michel (3:48). Be amazed by the speed of semi-auto rimfire rifles — five targets hit in under two seconds!
The Steel Challenge was founded in 1981 by Mike Dalton and Mike Fichman, in Southern California. The two Mikes wanted an exciting alternative to paper targets and came up with the all-steel format. The Steel Challenge World Speed Shooting Championships have grown to one of the largest professional pistol competitions in America. In 2022, scores of competitors competed at the Talladega Marksmanship Park for glory and cash prizes. The Steel Challenge is governed by the Steel Challenge Shooting Association (SCSA) that consists of eight standardized stages with three types of steel targets: small circle, big circle, and square. Here is a steel challenge layout in Germany.
CMP Announces Western Fall Classic Event for October 2023
If you missed this year’s Civilian Marksmanship Program (CMP) Western Games and Highpower Matches in March 2023, here’s your second chance to attend. The CMP will be returning to the Ben Avery Shooting Facility October 10-15, 2023, for the Western Fall Classic – a condensed version of the Western CMP Games, CMP Pistol & CMP Highpower (HP) Rifle Matches. Despite the shorter schedule, the event will still offer a wide variety of events for rifle and pistol competitors. Adults and juniors of all experience levels are welcome to attend.
The CMP Western Fall Classic in Arizona will feature three days of popular CMP Games rifle competitions including: Garand/Springfield/Vintage & Modern Military Matches, a Carbine Match, a Rimfire Sporter Match, and the Vintage Sniper Match. In addition, handgun shooters can compete in CMP Match Pistol 2700, EIC Service Pistol, EIC Service Revolver, EIC .22 Rimfire Pistol, Military & Police Service Pistol, and As-Issued Pistol matches.
The Highpower Rifle portion of the Western Fall Classic will include a 2-Man Team Match, two days of CMP 800 Aggregate Matches, a CMP Service Rifle EIC Match and a Mid-Range 3×600 event. For educational purposes, a Rifle & Pistol Marksmanship 101 Classes with introductory EIC Matches are also part of the October lineup.
The Civilian Marksmanship Program is a federally chartered 501 (c) (3) non-profit corporation. It is dedicated to firearm safety and marksmanship training and to the promotion of marksmanship competition for citizens of the United States. For more information about the CMP and its programs, log onto www.TheCMP.org.
The CMP National Rimfire Sporter Match is a fun competition with affordable smallbore rifles with either scopes or iron sights. All you need are a .22 LR rifle, sling, and ammo.
Each year, the Rimfire Sporter Match attracts hundreds of shooters to Camp Perry on the shores of Lake Erie. If there is a single CMP event at Camp Perry that offers the most diverse group of competitors (of all ages), and the lowest cost of entry, that would be the annual Rimfire Sporter Match.
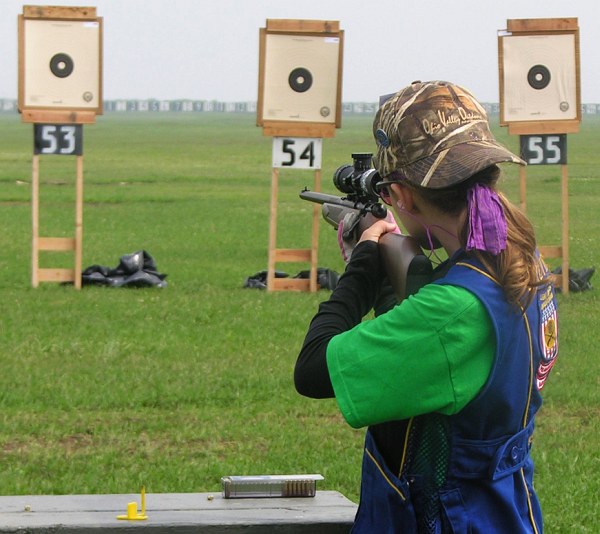
This year’s summer match was held on Saturday, July 8, 2023 at the Viale Range during the first weekend of the National Match Schedule at Camp Perry. One of the most popular annual Camp Perry events, the Rimfire Sporter Rifle match features .22 LR competition in open sights (O-Class), telescopic (T-Class) and tactical/unlimited (TU) classes, fired at 25 and 50 yards. A CMP/AMU Rimfire Sporter Small Arms Firing School was held on July 7, 2023.
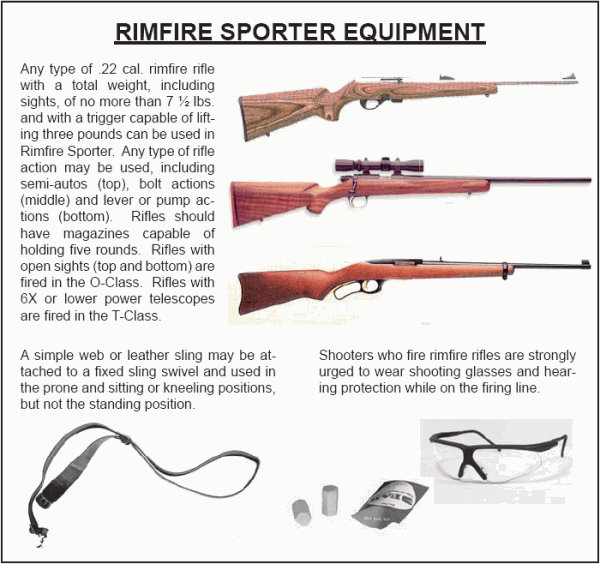
The Rimfire Sporter Match is for smallbore rifles that weigh 7 1/2 pounds or less with sights. Firing is done at 25 and 50 yards in prone, sitting and standing positions, in slow and rapid fire modes. The CMP has a special smart-phone App that will help speed up scoring.
Each year, the Rimfire Sporter Match attracts hundreds of shooters to the shore of Lake Erie at Camp Perry. The CMP National Rimfire Sporter Rifle Match offers shooters a recreation-oriented competition where they use affordable, smallbore sporter rifles with either scopes or iron sights. All you need are a .22 LR rifle, sling, and ammo.
Hundreds of shooters compete in the Rimfire Sporter Match at Camp Perry.
Prior to the match at Camp Perry, Rimfire Sporter competitors check-in, have their rifles weighed, triggers checked, and receive their squad assignments.
Rifles may be manually operated or semi-automatic, in three classes: the standard “O Class” for open-sighted rifles, “T-Class” for telescope-sighted rifles, and the “Tactical Rimfire” Class. Firing is done at 50 and 25 yards on a target with a 1.78″ ten-ring. The target is simple enough for a beginner to hit, yet challenging enough that only one competitor in the history of the match has ever fired a perfect 600 score.
Rimfire Sporter Course of Fire
At the Rimfire Sporter Match, competitors complete slow fire prone, rapid fire prone, slow fire sitting or kneeling, rapid fire sitting or kneeling, slow fire standing, and rapid fire standing shot sequences.
What is Required for the Camp Perry Rimfire Sporter Match
Competitors need to bring their own .22 cal. Rimfire rifle(s) and ammunition. Special target shooting equipment, shooting jackets, or shooting gloves are not permitted, but you can bring a spotting scope and ground cloth or shooting mat. The firing points have grass (sometimes a bit wet with rain). Competitors are strongly urged to wear hearing and eye protection. Assistance for disabled competitors is provided.
A free Shooters’ Clinic is usually held in connection with the Rimfire Sport match at Camp Perry. The Clinic covers Rimfire Sporter rules, safety instructions, course of fire, and competition procedures. Shooters who have not previously attended a CMP Rimfire Sporter Match are strongly encouraged to attend.
Do you want to see more Rimfire Sporter photos? CLICK HERE to view the CMP Zenfolio Archive with 1200+ photos from Rimfire Sporter Matches at Camp Perry and elsewhere.
From the late ’70s through 1983, a huge, concrete-walled warehouse in Houston was used for benchrest testing. Virgil King and Bob Fisher set up a bullet-catching backstop at the end of a 30-yard-wide, 325-yard-long fire lane that remained unobstructed even when the warehouse was in use. This allowed accuracy tests in virtually perfect “no wind” conditions. Over a six-year period, about 30 shooters were invited to test their rifles. The results were amazing, with numerous “zero groups” being shot in the facility. Many of the lessons learned in the legendary Houston Warehouse still help benchresters achieve better accuracy today.
Dave Scott explains why the Warehouse was so unique:
“Over a period of six years, the levels of accuracy achieved in the Houston Warehouse went beyond what many precision shooters thought possible for lightweight rifles shot from sandbags and aimed shot-to-shot by human eye. For the first time, a handful of gifted, serious experimenters — armed with the very best performing rifles (with notable exceptions) — could boldly venture into the final frontiers of rifle accuracy, a journey made possible by eliminating the baffling uncertainties of conditions arising from wind and mirage. Under these steel skies, a shooter could, without question, confirm the absolute limits of accuracy of his rifle, or isolate the source of a problem. In the flawlessly stable containment of the Houston Warehouse … a very few exceptional rifles would display the real stuff, drilling repeated groups measuring well below the unbelievably tiny .100″ barrier. The bulk of rifles, however, embarrassed their owners.”
Scott’s article also reveals some interesting technical points: “One thing that IS important is that the bullet be precisely seated against the lands. T.J. Jackson reported this fact in the May 1987 issue of Precision Shooting. In a letter to the Editor, T.J. wrote, ‘…in all our testing in that Houston warehouse… and the dozens and dozens of groups that Virgil King shot in there ‘in the zeroes’… he NEVER fired a single official screamer group when he was ‘jumping’ bullets. All his best groups were always seated into the lands, or at the very least… touching the lands. Virgil said his practice was to seat the bullets so the engraving was half as long as the width of the lands. He noticed an interesting phenomenon with rifles that could really shoot: if the bullets were seated a little short and the powder charge was a bit on the light side, the groups formed vertically. As he seated the bullets farther out and increased the powder charge, the groups finally became horizontal. If he went still farther, the groups formed big globs. He said the trick is to find the midway point between vertical and horizontal. That point should be a small hole.”
You should definitely read the complete article, as it provides many more fascinating insights, including shooting technique, barrel cleaning, neck-turning, and case prep.
EDITOR: Will the lessons of the Houston Warehouse work elsewhere? Is this repeatable magic? We remind readers that what T.J. Jackson discovered worked for his barrels, his cartridge type, and his choice of bullets. Jumping bullets can definitely produce good results in other cartridge types with bullets such as Berger Hybrids. Still, the Houston results are intriguing. Any time someone shoots in the “zeros” one should pay attention to how that was achieved.
Emil Kovan is one of the top F-Class shooters in the world. He won the 2014 United States F-Open Championship, finished second at the 2015 USA Nationals, and then finished second at the 2016 Canadian F-Open Nationals. Most recently Emil was a member of the World Championship-winning F-Open Team USA that competed this spring in South Africa. He definitely knows what it takes to build top-tier F-Open rifles. Today’s feature story first ran a few seasons back, and today there are some more stock and optics options, but this is still a very impressive F-Open rig. To learn more about the latest F-0pen Magnum chambering options read Emil Kovan’s recent Daily Bulletin story, Cartridges for F-Class — Rise of the Magnums.
“What are the best components for an F-Open class rifle, and why?” That’s a question that I get asked all the time and will try to answer in this article. Two months ago, I was contacted by Duane, a gentleman I met at the 2015 F-Class Nationals. He was interested in building a rifle with the impressive Master Class Low Profile F-Open Stock, created by Carl Bernosky and Alex Sitman of Master Class Stocks.
I have known Alex Sitman for many years, and use his stocks exclusively, but was not very familiar with his new Low Profile F-Open stock. After a brief conversation with Alex, I placed an order, and had the stock inletted and bedded at my shop in a month. My first impression was “Wow that’s a long stock” — the forearm is significantly longer than on the original Master Class F-Class prone stock. I bolted the barreled action in, and squeezed the end of the forearm and barrel together, the stock flexed a little bit, but not as much as other designs that I have tested. I think that’s due to having “more meat” in the receiver area. The full stock depth continues farther forward that on some other “low profile” designs. That makes the stock stiffer in the vertical plane, reducing the hinging effect forward of the action. The stock was finished in gloss black per the customer’s request. Interestingly, I found that the multiple layers of paint and clearcoat stiffened the stock up quite a bit.
CLICK IMAGE below for full-screen version
Low Center of Gravity Tames Torque
Compared to the original Master Class F-Open stock, the barrel sits about an inch lower. Lower center of gravity equals less torque, and that is very important when shooting heavy bullets in fast twist barrels. Another significant improvement is that the toe of the stock is flat and parallel to the forearm. I added a 3/4″ track rail in the rear, and milled the underside of the fore-end to create two parallel “rails” in the front to help the stock track better.
One of the biggest reasons why I like Master Class stocks, is the pistol grip. I don’t shoot “free recoil” and a comfortable pistol grip is super important to me when selecting a stock. The new Master Class Low Profile stock shares the same grip as the old model. This allows the stock to accommodate either a “hard hold” style or a more free-recoil style of shooting — whatever the rifle’s owner prefers. This design versatility is one reason I recommend Master Class stocks. Shooters may experiment with either shooting style to find what suits them best.
Cartridge Choice — A 40° .284 Win Improved
Duane decided to have the barrel chambered for my 284 KMR IMP (Improved) wildcat. What is .284 KMR IMP and why choose it over the straight .284 Winchester? Improved by definition means “made better”, I took a great cartridge, and modified it to increase capacity, reduce pressure, and increase brass life.
There are many “improved” variants of the original .284 Winchester: 7mm Walker, .284 Shehane, .284 Ackley and so on. My version, the 284 KMR IMP, shares the .010″ blown-out sidewalls of the .284 Shehane, but I have further increased the case capacity by changing the shoulder angle from 35 to 40 degrees. The 284 KMR IMP allows you to almost match magnum cartridge velocity in a standard-bolt-face action. If you want to run 180gr-class 7mm bullets over 2900 FPS, it is cheaper and more convenient to have a barrel chambered in 284 KMR IMP than to spend $650 for a magnum bolt.
Tuning Loads for the .284 Win Improved Cartridges
The 284 KMR IMP seems to have two nodes, one around 2820 fps and other at 2940 fps. My match load clocks at 2935 fps with single-digit ES. Note –I selected that load based on accuracy, NOT raw speed. A lot of novice (or hard-headed) shooters make the mistake to push their cartridges to the max, and disregard more accurate loads at lower velocity.
The sport of F-Class is rapidly growing, and the equipment used is improving constantly. I remember that only few years ago, an F-Open rifle that could shoot sub-one-inch of vertical at 300 yards was considered competitive. Now, we are pursuing sub-one-inch vertical at 600 yards! It takes a great rifle to approach that goal, but it is also up to the shooter to learn and experiment as much as possible in order to achieve success.
Dies for an Improved .284 Win Cartridge
One of the biggest challenges in campaigning a wildcat cartridge has been obtaining great dies. When searching for custom dies, it almost seems like that the odds are stacked against us. The most common problem is wait-time — custom die orders can take months to be completed. Also, most custom die makers want you to send them two or three cases, each fire-formed three times. I find that funny because if could somehow properly size the cases for three fire-forming cycles, I would not need a sizing die.
Custom-made dies should size the case just right, but sometimes the die’s internal dimensions are slightly off, and this leads to problem number two: dies sizing too much (or even worse) too little. I had a one “custom” die that would not size the bottom of the case enough. This made the extraction of fired cases very difficult. I feel that the best option (if available) for shooters interested in wildcat chambers is to have their gunsmiths make the dies. I offer that die-making service in addition to barrel chambering.
BAT Machine “M” Action
Duane decided to use a BAT M action for this rifle, and I think that he could not have made a better choice. We are blessed with many good match-quality receivers: Barnard, BAT, Borden, Kelbly, Nesika, and Stiller just to mention a few. These are all very well-made and suitable for F-Class. Among BAT Machine Co.actions, I like BAT models M, MB, and 3LL best. I prefer these because because of their size (large bedding footprint) smoothness, timing, options available, and last but not least visual appearance.
Trigger: I recommend and use Jewell triggers. Other good options are: Kelbly, CG Jackson (good 2-Stage) Anschutz (best 2-Stage for Bat and Kelbly actions), Bix’N Andy, and David Tubb.
Barrel: Duane made another good choice here. He decided to go with a Brux 1:8.5″-twist, 4-groove cut-rifled barrel. If you look at the F-Class and Long Range benchrest equipment lists, you will see that cut-rifled barrels are currently dominating. Many records have been shot with both button-rifled, and cut-rifled barrels. I have shot both, and prefer cut-rifled barrels. I am not saying that button-rifled barrels are not capable of shooting as well as cut-rifled barrels, but on average, in my experience, four out of five cut-rifled barrels (from top makers) will shoot well, vs. three out of five buttoned barrels. YMMV, but this is what I’ve observed.
Scope: Duane’s rifle was fitted with a Nightforce 15-55x52mm Competition scope with DDR-2 reticle. This optic is ultra clear, reasonably lightweight (28 oz.), super reliable, and has 1/8 MOA clicks — what you want for long range F-Class competition. In this 15-55X NF model, I like the DDR-2 reticle best, because fine cross hairs (FCH) are hard to see in heavy mirage. The DDR-2 has a heavier horizontal line, with a center dot. March scopes are also very popular and very well-made.
Thanks for reading, and keep ‘em in the middle…
About Emil Kovan Along with being a skilled, respected gunsmith, Emil Kovan has been a very successful F-Class competitor. He was U.S. F-Open National Champion in 2014, and finished second at the U.S. F-Open Nationals in 2015. Most recently he was a member of the World Championship-winning F-Open Team USA that competed this spring in South Africa. He definitely knows what it takes to build top-tier F-Open rifles.
– 2014 F-Class Open National Champion
– 2015 F-Class Open National Championship, Silver Medal
– F-Class Open National Championship Teams, 2015, 2014, 2013, Shooting Team Member
– Over 15 wins in Regional and State Championships in Palma, F-TR, F-Open
– 2013 U.S. National Team Member
– 2023 F-Open Gold Medal Team USA Member, 2023 World Championship in South Africa
BONUS Reading: F-Open Magnum Cartridge Options
Thinking about building a new F-Open rifle? Not sure about the chambering choice ? CLICK HERE to read Emil Kovan’s recent July 2023 article outlining the most popular magnum cartridges for F-Open competition. The .284 Win is still a great option, but bigger magnums do have some advantages.
Most bolt-action rifle shooters work the bolt with their trigger-pulling hand. This is because most rifles sold to right-handed shooters come with right-side bolts, while “lefty” rifles come with left-side bolts. This “standard” configuration requires the shooter to take his dominant, trigger-pulling hand off the stock to cycle the bolt, then re-position his hand on the stock, and “re-claim” the trigger. Often the shooter must lift or move his head to work the bolt, and that also requires him to re-establish his cheek weld after each and every shot. Not good.
This really doesn’t make much sense for precision shooting with fore-end support*. There is a better way. If you leave your trigger hand in position and work the bolt (and feed rounds) with the opposite hand, then you don’t need to shift grip and head position with each shot. All this requires is a weakside-placed bolt, i.e. a left bolt for a right-handed shooter or a right bolt for a left-handed shooter. The video below shows a “Lefty” working a right bolt. Note how efficient this is:
As our friend Boyd Allen explains: “If you think about it, if you are going to work with a factory action where your options are left bolt and left port or right bolt and right port, and you are building a rifle that will only be shot from a rest, using the left/left for a RH shooter or using a right/right for a LH shooter works better than the conventional configuration”.
Shoot Like a Champ and Work the Bolt with Your Weakside Hand
Derek Rodgers is a recent F-TR World Champion, a King of 2 Miles champion, AND is the only person to have won BOTH the U.S. F-Open and the U.S. F-TR National Championships.
And guess what? Derek runs this kind of “opposite” bolt set-up. Yep, Derek shoots right-handed with a left bolt. Though Derek is a right-hander, he shoots with a Left Bolt/Left Port (LBLP) action. He pulls the trigger with his right index finger, while working the left-side bolt with his left (weakside) hand. This allows him to stay in position, and maintain his cheekweld. He places his right hand on the grip, while manipulating the bolt (and feeding rounds) with his non-trigger-pulling hand.
Recent F-TR World Champion and King of 2 Miles Derek Rodgers
This is the rifle with which Derek won the 2013 F-TR National Championship.
*For true standing, off-hand shooting (whether in competition or on a hunt), a conventional strongside bolt placement makes sense, since the non-dominant arm must support the front of the rifle all the time. When shooting from bipod or rest, it’s a different story.


 As soon as aiming at the target begins, the index finger must move from the trigger-guard to contact the trigger. It is important to get initial pressure on the trigger as soon as aiming begins. Then the shooter must focus on the sight picture and centering the sight picture movements over the aiming point. No one, not even champion shooters, can hold the aligned sights perfectly still. The sights are going to move a little bit or a lot, depending on the shooter’s skill level. The secret is to center those sight picture movements over the aiming point on the target (see trace illustration) before pulling the trigger.


 We doubt if there will ever be real agreement among shooters concerning barrel break-in procedures. And one must remember that the appropriate break-in procedure might be quite different for a factory barrel vs. a custom hand-lapped barrel. This Editor has found that his very best custom barrels shot great right from the start, with no special break-in, other than wet patches at 5, 10, and 15 rounds. That said, I’ve seen some factory barrels that seemed to benefit from more elaborate break-in rituals.


 Dave Scott explains why the Warehouse was so unique:


 Along with being a skilled, respected gunsmith, Emil Kovan has been a very successful F-Class competitor. He was U.S. F-Open National Champion in 2014, and finished second at the U.S. F-Open Nationals in 2015. Most recently he was a member of the World Championship-winning F-Open Team USA that competed this spring in South Africa. He definitely knows what it takes to build top-tier F-Open rifles.


