|
|
October 29th, 2007
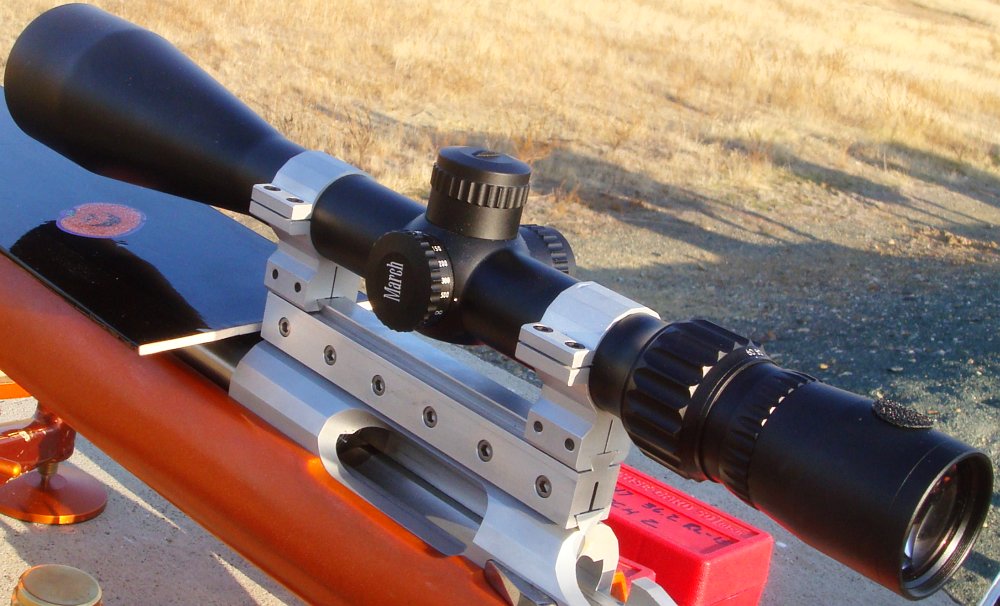
Here it is folks, the March 10-60x52mm, the most powerful premium zoom rifle-scope ever offered to the public. There are three prototypes now in the United States. One is on Don Nielson’s 6.5×47 Lapua Bench gun. He shot that rifle this weekend in Sacramento at a 600-yard match in Heavy Gun class (though the rifle is light enough to shoot in Light Class). Don’s results speak for themselves–Don finished first in HG Agg., LG Agg., HG Score (283-3X), 2-Gun Score (421-3X), and 2-Gun Aggregate (3.0xx”). The HG score, 2-Gun score, and 2-Gun Agg are all new NBRSA records for the new target with its tiny 1.2″ X-Ring.
Yep, that’s a pretty good showing for a scope in its first-ever match (and yes, you have to credit Don’s great shooting as well). The March showed itself to be very reliable and repeatable. The big question we had “can it resolve 6mm bullet holes at 600 yards?” was answered with a resounding “Yes!”. Don tells us that, with the 10-60x March “he could see bullet holes very well in the white.” In the light blue section of the target, holes were harder to see but Don could still clearly see where his group was forming up.
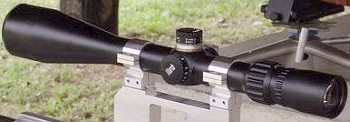
We’re pleased to see that the zoom March offers 60 MOA of elevation–good enough for 1000 yards. The scope has a 52mm objective, 30mm main tube, 40 MOA of windage, and weighs 24.8 ounces (704 grams). It has a side-focus parallax control, 1/8-MOA clicks, and focuses from 50 yards to infinity. Currently, the only reticle choice is a 1/16-MOA dot, but that could change with production models. Apart from its anticipated $2500-$2600 price, the only negative concern we have with the new March scope is the exit pupil. Even with a generous 52mm front objective, the exit pupil is under 1mm at 60-power. That’s very small and will make head/eye position very critical when using the March at full magnification. The top photo below shows the March on Don’s trademark orange rifle.
CLICK HERE FOR LARGE PHOTO.


October 16th, 2007
People have already started asking about the U.S. Optics scope on Rob Hunter’s “BriTactical” rifle featured as the current Gun of the Week. This is no ordinary optic. It is a special “supersized” version of U.S. Optics SN3 T-PAL series, custom-built for Robert. The SN3 is offered with 30mm, 34mm, or 35mm main tubes. This is the big boy, 35mm, with matching U.S. Optics anodized rings. The front objective is upsized from the standard 44mm to a whopping 58mm. This provides enhanced low-light and twilight performance. The reticle is U.S. Optics’ own Mil Scale, allowing Robert to range-find targets reliably to 1000 yards and beyond. This is very critical because Robert will be using the scope in a Police/Military competition where he must engage multiple targets at unknown distances–and no laser rangefinders are allowed.

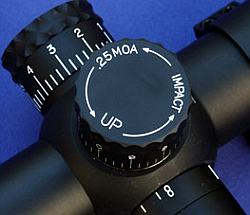
The big knob on top is one of U.S. Optics’ signature features. This is the EREK elevation turret. It allows Robert to run through his entire range of 1/4-MOA clicks in just two turns. If that’s not handy enough, a one-turn EREK knob is also available, but with wider click values. Like most U.S. Optics scopes, this unit is ruggedized and highly weatherproof. It features an illuminated reticle, handy side-focus parallax adjustment, and beefy metal construction. How much does one of these 5-25 power SN3 T-PALs cost? Well if you have to ask, you probably can’t afford it. Complete, with all the upgrades, the scope costs over $2800.00.
October 7th, 2007
Natchez Shooters Supply, is now offering a wide selection of quality Zeiss Conquest scopes at deeply discounted prices. The Zeiss Conquest 6-20×50 scope is one of our favorite 1″-diameter optics for target shooting and varminting. Natchez is now selling the 6.5-20 Conquest with lower (hunting) turrets at $669.99. That’s a great deal–over $200.00 less than most retailers charge. Zeiss Conquests have clear, sharp optics and very positive windage and elevation adjustments. Contact Natchez soon — availability of discounted scopes is limited.

September 26th, 2007
We heard from our friends at SWFA.com that Leica’s current 62mm and 77mm Televid spotting scopes are being discontinued. Now we know why. Bigger and better models will be available in early 2008. These are completely re-designed, with larger objectives, more advanced glass, and special new AquaDura™ coatings that shed raindrops.

A new, very compact 65mm Televid will replace the current 62mm model. Leica’s top-of-the-line unit has jumped up to 82mm from 77mm. Even with their bigger objectives, Leica claims both new scopes will be the most compact premium spotting scopes in their respective classes. The new Televid 65 and 82 also now sport full rubber armor.

The big news is the glass. Both the new 65mm and the 82mm will come with flouride glass, with optional (extra cost) APO (apochromatic) lenses for reduced chromatic distortion. Leica claims the optical performance of the new spotting scopes is significantly better than the preceding models. The use of specialty fluoride glass yields improved contrast without altering natural color tones. The Leica Televid 82 and Televid 65 spotting scopes are both available with straight or angled eyepiece housing, with either HD or APO glass. The new APO versions feature redesigned apochromatic lenses for high contrast viewing free of color aberrations. The High Definition (HD) versions use specialized glass in a newly designed lens arrangement for improved clarity and contrast.

The new Televid spotting scopes come complete with quality Leica zoom eye-pieces. Televid HD versions come with a Leica VARIO 20-60x eyepiece, while the Leica APO-Televid versions sport the new high performance wide-angle Leica VARIO 25-50x WW ASPH eyepiece. Leica claims this is the first premium zoom eyepiece to offer a field of view comparable to wide-angle fixed-power eyepieces.

As noted above, the new Televid 65 and Televid 82 both feature AquaDura™ lens coatings. This is a Leica proprietary coating technology used on all exterior glass surfaces. This AquaDura coating repels moisture, causing raindrops to cleanly drip off from the lens surface. Additionally, fingerprints and dirt can be easily removed.
For more information, visit www.leica-camera.com.
82 mm APO Brochure (.pdf) | 65 mm APO Brochure (.pdf)
September 16th, 2007
There’s a new high-magnification zoom scope in development that will offer precision shooters “more power” than ever before. Lou Murdica, who has been working directly with Deon Optical/Koto Precision in Japan, makers of the March 40x BR scope, is getting a new prototype variable-power March that tops out at 60-power. That’s some serious magnification ladies and gentleman.
In addition to the 60X magnification, the new March promises best-in-class resolution and, importantly, ultra-reliable tracking. We’re pleased to see that the zoom March offers 60 MOA of elevation–good enough for 1000 yards. The scope has a 52mm objective, 30mm main tube, 40 MOA of windage, and weighs 24.8 ounces (704 grams). It has a side-focus parallax control, 1/8-MOA clicks, and focuses from 50 yards to infinity. Currently, the only reticle choice is a 1/16-MOA dot, but that could change with production models.

Lou hopes to use the March 10-60×52 at 200 yards next week in the NBRSA Nationals hosted at the Kelbly’s Range (Ohio). Here are the remaining specs for Lou’s new scope:
March 10-60×52 Zoom Riflescope
| Feature |
Minimum |
Maximum |
| Magnification |
10x |
60x |
| Exit Pupil |
0.86mm |
3.06mm |
| Eye Relief |
88-99mm 10x |
96-101mm 60x |
| Focus Range |
50 yards |
Infinity |
| Elevation Range |
– |
60 MOA |
| Windage Range |
– |
40 MOA |
| Length |
– |
418mm (16.46″) |
| Weight |
– |
24.8 ounces |
September 15th, 2007
Now through December 31, 2007, Weaver Optics is offering a “Upgrade” promotion on Weaver Grand Slam and Classic Extreme scopes. If you purchase one of these Weaver scopes, send in an old scope (any make or model, 1″ or 30mm), and fill out a form, Weaver will send you a $50 check. Or, you can still get a $25 rebate check if you mail in the redemption form with proof of purchase without sending in an old scope. Click HERE for more details and to obtain the mail-in Rebate Form.

August 29th, 2007
The March Scope–it’s pricey, exclusive, and more than ever is found on top of winning Benchrest Rifles. Made by Koto in Japan, the 40X March has set new standards for clarity and resolution among benchrest scopes. By most reports, this $2100.00 scope with ED (low-dispersion) glass has the most reliable tracking and best resolution ever offered in a scope with magnification of greater than 30X. The March can resolve bullet holes at long distance well enough that some owners dispense with expensive spotting scopes altogether. In North America, March scopes are sold exclusively by Kelbly’s, (330) 683-4674. Currently, the warranty on the March 40X scope is five years and limited to the original purchaser only–something to consider given the hefty cost of the unit.
Forum member B. Harvey of Patriot Arms in Atlanta reports: “Today was my first chance to shoot (long-range) since getting the March and it performed perfectly. At each distance, 600, 800, 900 (not 1K though) we shot steel targets that are sitting on top of 55 gallon drums. Before the mirage got really bad, and when I say really bad, I mean you could barely see the steel targets, the March was able to resolve bullet holes in the drums at 900 yds. You could actually count the holes! The holes in the 800 and 600 drums were even easier to see. The contrast and clarity of this scope is outstanding and I am now trying to figure out how to get another one.”
Lynn Dragoman reports: “I got a chance to compare the March to the [Nightforce] 12-42X Benchrest model at the NBRSA 600-yard nationals. I shot next to Lou Murdica who had the March and who also shoots 100-200 benchrest. He could tell me where every hit landed on the paper. I looked through it and, sure enough, you could see 6mm holes at 600 yards. With the Nightforce you could only see holes in the white when conditions were perfect.”

Lou Murdica, who worked with Koto on developing the 40x fixed-power March scope, is now involved in preliminary design “brain-storming” for a zoom March. Right now all the critical specs (max magnification, parallax adjustment, weight and price) remain to be determined. And it’s not at all certain that a variable-power (zoom) March will ever make it into production. In the meantime, Schmidt & Bender plans a North American release of its new 12-50×56 PMII Zoom scope in early 2008. The S&B 12-50 will probably cost about $2700-$2800, given current exchange rates.
August 18th, 2007
 Here’s something that can save you lots of time and aggravation on a varminting trip. This little $60 gizmo is great for varmint hunters and any one who needs to make a quick shot in shifty wind conditions. Kenton Industries’ Tuned Windage Compensator (TWC) has built-in windage marks for 10 mph cross-winds at 100-1000 yards. How do they do that? Well the knobs are calibrated either for specific calibers/loads, or they can make custom knobs using your observed field data. The knobs can compensate for various wind speeds (2-20 mph) and angles (15°- 90°), by applying some simple conversion ratios. For example, this is how you’d set the knob for a 5 mph wind or a quartering wind: 5 mph crosswind at 400 yards = dial in 200 yards; 10 mph, 45° crosswind at 400 yards = dial in 300 yards. Here’s something that can save you lots of time and aggravation on a varminting trip. This little $60 gizmo is great for varmint hunters and any one who needs to make a quick shot in shifty wind conditions. Kenton Industries’ Tuned Windage Compensator (TWC) has built-in windage marks for 10 mph cross-winds at 100-1000 yards. How do they do that? Well the knobs are calibrated either for specific calibers/loads, or they can make custom knobs using your observed field data. The knobs can compensate for various wind speeds (2-20 mph) and angles (15°- 90°), by applying some simple conversion ratios. For example, this is how you’d set the knob for a 5 mph wind or a quartering wind: 5 mph crosswind at 400 yards = dial in 200 yards; 10 mph, 45° crosswind at 400 yards = dial in 300 yards.
August 16th, 2007
Danny Reever recently researched the options for shooters who need corrective lenses. Danny writes: “My eyes were checked last week, and I needed a new prescription. After doing some online research, I received an email from a fellow shooter who happens to be an optician. He gave me sound advice and technical facts and figures. My local optician later concurred with everything the fellow shooter/optician suggested. Here are the key things I learned:
 CHOICE of MATERIALS CHOICE of MATERIALS
Shooting glasses need to be shatterproof. You basically have only two choices in shatterproof materials: Polycarbonate, or Trivex™ made by PPG. Most optical shops will favor Polycarbonate, because that’s what they sell the most of. However Poly is far from the best material in terms of optical properties. Glass is the best for optical clarity and lack of distortion, with an ABBE number of about 58 (the measurement of chromatic aberration, higher being better). Unfortunately glass lenses are heavy, (glass has a Specific Gravity number of about 2.50–the higher number the more weight). Worse yet, glass shatters. With conventional glass lenses, if a cartridge lets go at 60,000 PSI, you could lose an eye, or worse.
Polycarbonate is very strong and shatter resistant. Unfortunately it only has an ABBE number of 30. This is not great optically, especially when you are looking off-axis. Poly, however, is much lighter than glass. Poly has a Specific Gravity number of about 1.20.
So that leaves PPG Trivex™. Trivex is very strong AND very light, and rates well optically. Trivex™ is nearly as strong as Polycarbonate, yet is even lighter (with a Specific Gravity of 1.11). With an ABBE number of about 45, Trivex™ is much better optically than Polycarbonate. In addition, Trivex™ is chemically resistant to cleaning solutions, oil, and skin care products. Trivex™ can be drilled, grooved and notched very easy, so it is well-suited for rimless glasses and sport glasses. Click for TriVex Lens Report.
LENS COATINGS and FEATURES
I was told to go with a very high-quality, anti-reflective coating. I also ordered ‘Transitions’ photochromatic coating to eliminate the need for extra sunglasses. (However, a ‘Transitions’ coating may not work well as driving glasses since most automobile windshields are tinted to block the UV rays that trigger the transitions effect.)
I ordered a no-line bifocal. This was a compromise in itself since having a single focal plane for shooting might be a better bet, but then you may be forced to buy two pairs of glasses. Your lens prescription can also be optimized for scope-viewing by having the viewing axis ground off-center. But then again you may need a second pair for everyday use.
CONCLUSION
The experts told me that, as far as eyeglasses are concerned, ‘Everything in optics is a trade-off…there is NO perfect answer’. Pick a good licensed optician that is familiar with ALL the options available to you. Do not deal with a ‘frame stylist’ unless being trendy or pretty is your only goal. The fellow shooter/optician gave me this advice: ‘Good opticians, like good gunsmiths, are not cheap in the short run, but always cheaper long term’. Remember, you only have one pair of eyes, so protecting them must be the first priority (remember the trade offs), otherwise you are playing ‘Russian Roulette’ every time you pull the trigger.”
August 13th, 2007
Let’s say you’ve purchased a new scope, and the spec-sheet indicates it is calibrated for quarter-MOA clicks. One MOA is 1.047″ inches at 100 yards, so you figure that’s how far your point of impact (POI) will move with four clicks. Well, unfortunately, you may be wrong. You can’t necessarily rely on what the manufacturer says. Production tolerances being what they are, you should test your scope to determine how much movement it actually delivers with each click of the turret. It may move a quarter-MOA, or maybe a quarter-inch, or maybe something else entirely. (Likewise scopes advertised as having 1/8-MOA clicks may deliver more or less than 1 actual MOA for 8 clicks.)
 Reader Lindy explains how to check your clicks: “First, make sure the rifle is not loaded. Take a 40″ or longer carpenter’s ruler, and put a very visible mark (such as the center of an orange Shoot’N’C dot), at 37.7 inches. (On mine, I placed two dots side by side every 5 inches, so I could quickly count the dots.) Mount the ruler vertically (zero at top) exactly 100 yards away, carefully measured. Reader Lindy explains how to check your clicks: “First, make sure the rifle is not loaded. Take a 40″ or longer carpenter’s ruler, and put a very visible mark (such as the center of an orange Shoot’N’C dot), at 37.7 inches. (On mine, I placed two dots side by side every 5 inches, so I could quickly count the dots.) Mount the ruler vertically (zero at top) exactly 100 yards away, carefully measured.
Place the rifle in a good hold on sandbags or other rest. With your hundred-yard zero on the rifle, using max magnification, carefully aim your center crosshairs at the top of the ruler (zero end-point). Have an assistant crank on 36 (indicated) MOA (i.e. 144 clicks), being careful not to move the rifle. (You really do need a helper, it’s very difficult to keep the rifle motionless if you crank the knobs yourself.) With each click, the reticle will move a bit down toward the bottom of the ruler. Note where the center crosshairs rest when your helper is done clicking. If the scope is accurately calibrated, it should be right at that 37.7 inch mark. If not, record where 144 clicks puts you on the ruler, to figure out what your actual click value is. (Repeat this several times as necessary, to get a “rock-solid”, repeatable value.) You now know, for that scope, how much each click actually moves the reticle at 100 yards–and, of course, that will scale proportionally at longer distances. This optical method is better than shooting, because you don’t have the uncertainly associated with determining a group center.
Using this method, I discovered that my Leupold 6.5-20X50 M1 has click values that are calibrated in what I called ‘Shooter’s MOA’, rather than true MOA. That is to say, 4 clicks moved POI 1.000″, rather than 1.047″ (true MOA). That’s about a 5% error.
I’ve tested bunches of scopes, and lots have click values which are significantly off what the manufacturer has advertised. You can’t rely on printed specifications–each scope is different. Until you check your particular scope, you can’t be sure how much it really moves with each click.
I’ve found the true click value varies not only by manufacturer, but by model and individual unit. My Leupold 3.5-10 M3LR was dead on. So was my U.S.O. SN-3 with an H25 reticle, but other SN-3s have been off, and so is my Leupold 6.5-20X50M1. So, check ‘em all, is my policy.”
|