|
|
November 10th, 2018

Moly — yay or nay? Moly bullet-coating was all the rage in 1998 yet is all but dead in 2018. Glen Zediker, who has considerable experience with moly, provides some reasons why moly coating has fallen from favor.
The Pros and Cons of Moly Coating for Bullets
by Glen Zediker
In a way, I guess nothing really happened to molybdenum-disulfide-coated bullets (“moly-coated”). They’re still for sale, as are means to make up your own. What I mean is why didn’t they attain the sustained popularity they started with about 20 years ago, back when many forecasted they would virtually replace bare bullets? Here’s my take, from my experience, on “what happened.”
I don’t know any shooter who tried them and wasn’t excited about results. I sure was!
Performance-wise, moly has a lot of benefits. A lot. The first and most: take two bullets, one coated and one bare, put the same load behind them, then shoot and chronograph. The coated bullet goes slower. How is that a help? The reason it goes slower is because moly drops chamber pressure (into and through the bore easier). And! That velocity loss (at least 50 fps, usually more) is not, proportionately, nearly as much as the accompanying drop in pressure (usually ballpark 4000+ psi). (These figures vary with the cartridge, but all show similar universal influence.) So. The moly-load can be increased beyond previous “maximum” velocity: the idea is to take the coated load up to normal chamber pressure. It works! It’s common to need at the least 1+ grain more propellant to level the coated load with the original bare-bullet load.
Other advantages: Most see improved velocity consistency, evidently resulting from the coating alone. The coated bullets seem to have no limit to the number of rounds that can be fired with no change in accuracy or impact location. Of course there is a limit, but I knew many going beyond 500 rounds between cleanings. And when I say “many,” I’m talking about serious competitive shooters. Another benefit is increased barrel life (less rapid throat erosion), and this is, I think, due to a faster-accelerating bullet getting into and through the throat more quickly (less intense flame). Moly bullets also release easier from the case neck (additional “tension” is recommended).
I “switched.” (The motivation to write this came from a weekend shop-cleaning where I restacked many boxes of coated bullets, and wondered if I’d ever shoot them…)
I got more bullet speed and zero loss of zero — big benefits to an NRA High Power Service Rifle shooter. 88 rounds per day, and 80gr bullets through a 20-inch barrel trying their best to get to 600 yards in close proximity of one another.

Here was my solution to cleaning up after moly: Kroil penetrating oil and abrasive-type bore paste. This combination worked, and my zero didn’t change in the process.
Cleaning Barrels Used for Moly-Coated Bullets
What is bad, then, about moly-coated bullets? Moly itself! It coats the bore with a layer of residue. This layer traps moisture and will, not can, corrode the steel underneath it. More: molybdenum disulfide outgases (outgas is the release of an occluded gas vapor that was part of the compound; a state change, pretty much) at lower than firing temperatures. That creates a chemical that, when mixed with water (including post-firing condensation), becomes, pretty much, sulfuric acid. That meant that the whole “zillion rounds between cleanings” didn’t really work. I know many who “lost” barrels, expensive barrels.
If the barrel is cleaned (correctly) after each use, no problems. But then another advantage is lost because starting with a clean barrel it takes quite a few rounds to return to zero. The layer has to be recreated.
The residue is difficult to remove from the bore. It doesn’t respond to routine means for bore maintenance, mostly meaning brush-and-solvent. The only way I found to get it gone was using micro-penetrating oil in conjunction with an abrasive paste-type cleaner, such as USP Bore Paste or JB Bore Compound.

Hexagonal Boron Nitride (HBN) bullet coating is an alternative that functions, in my experience, well but with fewer drawbacks. First, BN is “clear”, not as messy. Bullet on the left is HBN coated. Still, though, I think that shooting coated bullets is an “all or nothing” proposition. Good groups are not likely to come “mixing” bare and coated bullets through the same barrel.
Using Coated Bullets Requires Commitment
I no longer use coated bullets. There are other coatings that have fewer disadvantages, such as Hexagonal Boron Nitride (doesn’t outgas). Some of the proprietary baked-on coatings a few major makers (such as Barnes and Winchester) use don’t exhibit the post-firing issues that “conventional” moly-coating creates (which usually was moly powder, followed by wax, which added to the tenacity of the residue).
However, another issue is that accuracy tends to suffer running bare bullets though a residue-coated bore (which results after only a few coated rounds, that are coated with anything). All that means, in short, is that running coated bullets is something that really has to be bought into. It’s a commitment, as I see it, and, as with many such things, pushing the limits on performance requires more attention to detail, more effort. It’s a matter of value.
 Here’s an easy way to get bullets coated: Lyman’s Super Moly Kit. Just add a tumbler. The two bowls contain the media, moly, and bullets and then go into a vibratory-type tumbler. The 6 ounces worth of moly powder will coat thousands of bullets. It works well.
Deciding Whether to Use Coated Bullets
Weigh the pros and cons. I honestly cannot, and will not, tell anyone not to use coated bullets. Coating can provide a serious performance increase. I don’t use moly-coating anymore, but that’s because my shooting needs are not so “serious” as they once were. I, yes, have gotten a tad amount lazy. I want to go to the range and enjoy my rifles and not lose sleep over the possibility of creeping corrosion if I didn’t clean up. I also want to be able to shoot different loads, including factory ammo, and maintain accuracy.
CONCLUSION: IF you choose moly, take steps to protect the barrel bore against the potential for damage. At the least, run some petroleum-based oil through the bore after shooting if you can’t clean it soon.
See what Midsouth offers HERE.
This article is adapted from Glen’s books, Handloading For Competition and Top-Grade Ammo, available at Midsouth. For more information about other books by Glen, visit ZedikerPublishing.com.
Read more informative articles in the Midsouth BLOG

November 10th, 2018

It’s the holiday season — there’s no better time to sit in front of a fire and read a good gun book. Midsouth Shooters Supply now carries the full line of shooting and reloading books from Krause Publications at very attractive prices. Looking for reliable reference works on reloading, or a gift for a shooting buddy? You’ll find something worthwhile among the Krause library of gun books, which includes the respected Gun Digest Shooter’s Guides. Match directors also take note — books make great match prizes. Paperback books cost no more than wood plaques but they will provide valuable information for years instead of just gathering dust in a closet. If your club offers training programs, Krause offers many titles that will help new shooters improve their skills.
Midsouth carries Glen Zediker’s excellent books, including Handloading For Competition, the recent Top-Grade Ammo and other titles.
Here Are Some of Our favorite Krause Shooting and Reloading Titles:
November 8th, 2018
One side of this gauge is the “go” side which quickly tells you the depth of a primer pocket, whether any crimp is properly removed, and whether the primer pocket is loose. If it feels loose on the “go” side, use the other end of the tool, the “no go” side, to test to see if the primer pocket is too loose to hold a primer. If the no-go slides into the pocket, then you know to junk that brass.
Primer Pocket Growth and Useful Case Life
Repeated firings at stout pressures can cause primer pockets to grow in diameter. This can create an unsafe condition if your primers are not seating properly. Are your primer pockets “good to go”, or have they been pushed to the point of no return? Do you really know? Many guys try to gauge primer pocket tightness by “feel”, as they seat the primer. But that method isn’t precise. Now there’s a better way…
 The folks at Ballistictools.com have created a handy set of precision-machined gauges that let you quickly and accurately check your primer pockets. These gauges (aka “gages”) are offered in two sizes — for large and small primer pockets. A two-piece set of both large and small gauges costs just $19.99. These gauges let you quickly measure the depth of a primer pocket, and check if the crimp has been removed properly. Most importantly, the gauge tells you if the primer pocket has opened up too much. One side of the gauge has an enlarged diameter plug. If that “No-Go” side fits in the primer pocket, you should ditch the case — it’s toast. The folks at Ballistictools.com have created a handy set of precision-machined gauges that let you quickly and accurately check your primer pockets. These gauges (aka “gages”) are offered in two sizes — for large and small primer pockets. A two-piece set of both large and small gauges costs just $19.99. These gauges let you quickly measure the depth of a primer pocket, and check if the crimp has been removed properly. Most importantly, the gauge tells you if the primer pocket has opened up too much. One side of the gauge has an enlarged diameter plug. If that “No-Go” side fits in the primer pocket, you should ditch the case — it’s toast.
CLICK HERE to order Small and Large Primer Pocket Swage Gage™ Set from Ballistictools.com.
Precision ground from O-1 tool steel, The Ballistic Tools primer pocket gauges serve multiple functions. The inventor of these tools explains: “I created the prototype of this tool for my own use in brass processing. I needed a way to quickly and easily measure primer pockets that was reliable and did not require wasting a primer. This tool has been indispensable for me and I would never go back to the old method of uncertainty and guessing.”
Product tip from Boyd Allen. We welcome reader submissions.
November 6th, 2018

 Readers who have just recently discovered the Daily Bulletin may not realize that AccurateShooter.com has hundreds of reference articles in our archives. These authoritative articles are divided into mutiple categories, so you can easily view stories by topic (such as competition, tactical, rimfire, optics, shooting skills etc.). One of the most popular categories is our Technical Articles Collection. On a handy index page (with thumbnails for every story), you’ll find over 120 articles covering technical and gunsmithing topics. These articles can help you with major projects (such as stock painting), and they can also help you build more accurate ammo. Here are five popular selections from our Technical Articles archive. Readers who have just recently discovered the Daily Bulletin may not realize that AccurateShooter.com has hundreds of reference articles in our archives. These authoritative articles are divided into mutiple categories, so you can easily view stories by topic (such as competition, tactical, rimfire, optics, shooting skills etc.). One of the most popular categories is our Technical Articles Collection. On a handy index page (with thumbnails for every story), you’ll find over 120 articles covering technical and gunsmithing topics. These articles can help you with major projects (such as stock painting), and they can also help you build more accurate ammo. Here are five popular selections from our Technical Articles archive.
 |
Stress-Free Pillar Bedding. Richard Franklin explains how to do a top-quality bedding job, start to finish.
|
 |
OnTarget Software Review. Our Editors test free software that measures shot groups with great precision. We explain how to use the program and configure advanced features.
|
 |
Savage Action Tuning. Top F-TR shooter Stan Pate explains how to enhance the performance of your Savage rifle by optimizing the torque settings of the action screws.
|
 |
Complete Precision Case Prep. Jake Gottfredson covers the complete case prep process, including brass weight sorting, case trimming, primer pocket uniforming, neck-sizing, and, case-neck turning.
|
 |
Stock Painting Instructions. Step-by-step guide for stock painting by expert Mike Ricklefs. Mike shows both simple coverage and fancy effects.
|
November 5th, 2018

At the request of our readers, we provide select “Deals of the Week”. Every Monday morning we offer our Best Bargain selections. Here are some of the best deals on firearms, hardware, reloading components, optics, and shooting accessories. Be aware that sale prices are subject to change, and once clearance inventory is sold, it’s gone for good. You snooze you lose.
1. RCBS — Save 25% on Select Dispenser/Scales, Progressive Presses, Prep Centers, and Ultrasonic Machines

RCBS wants you to “buy green” in November. Now through November 30, 2018 you can get 25% Instant Savings on a variety of RCBS’s most popular products, including the ChargeMaster Lite, ProChucker Progressive Presses, and both the Trim Mate and Universal Case Prep Centers. Ultrasonic cleaning machines are also discounted. This is easy-peasy — no forms to fill out and no waiting on rebates. Just shop at your favorite retailer, and you’ll find qualifying products 25% cheaper than last month.
Credit EdLongrange for finding this deal.
2. CDNN — Weatherby Vanguard Modular Chassis 6.5cm, $899.99

Looking for an out of the box sub-MOA rifle for under $1000? CDNN has the Weatherby Vanguard Chassis Rifle on sale for $899.99. This features a Vanguard action affixed to a CNC-machined, 6061 aluminum chassis with a black, hard-anodized finish in two great calibers for only $899.99. You can also pick up the .223 Rem version $899.99 as well. This price probably won’t last long so grab it while you can.
3. Natchez — Burris MTAC 4.5-14x42mm Scope, $219.99

Need a practical mid-power, milrad scope at 60% off? Here’s a deal you don’t want to pass up. Natchez has the Burris MTAC 4.5-14x42mm tactical scope for just $219.99. The scope’s Ballistic Milling Reticle is a milrad-based reticle with .5 mil and 1 mil hash marks on the horizontal crosshair and top half of the vertical crosshair. These hash marks allow for precise distance measurement, and assist in proper hold-off for wind. At a savings of nearly $330, this is a steller optics bargain for anyone looking for a milrad scope.
4. Amazon — RCBS Partner Press, $79.99

Wish you had a partner when you reload? Now you do when you pick up this RCBS Partner Press from Amazon for just $79.99. The Partner Press is easy to use and incredibly durable, yet is the most affordable press in the RCBS line. It’s perfect as a second press for different operations or a portable press for use at the range. You can also pick up an entire RCBS Master Reloading Kit on Amazon for $319.49
5. Bruno’s — CCI BR-4 Small Rifle Benchrest Primers, $47.95

Screaming deal? Well, no. But when you need them you’ll wish you had stocked up at this price. Bruno’s has the hard-to-find CCI BR-4 small rifle primers marked down to $47.95. An independent researcher identified the use of CCI Benchrest primers as one of two factors that were the most significant contributors to tiny groups. If you’re not using these already and are looking to tighten your groups this just might be the answer. While not on sale you can also find the CCI BR-2 Large Rifle Primers for $54.60.
6. EuroOptic — Leica CRF 2000-B, $399.00

This may be the best deal we’ve seen on the vaunted Leica 2000-B Laser Rangefinder (LRF) with 7-power optic. This unit is rated out to 2000 yards on reflective objects (in real-world use it will laze a deer well past 800 if you can hold steady). The Leica 2000-B features air pressure and temperature sensors, plus on-board inclinometer. Angle correction works out to 1200 horizontal yards equivalent, with the true hold-over displayed in both MILs and MOA. The compact Leica CRF 2000-B weighs just 6.5 ounces and measures 4.5″ L x 2.25″ H x 1.25″ W. It has a waterproof outer shell.
7. Brownells — RCBS Trim Mate Case Prep Center, $93.99

Case prep can take forever, so why not save time and your hands with the Trim Mate Case Prep Center. Five gear-driven rotating heads turn the tasks of chamfering, deburring, primer pocket cleaning, military crimp removal, and flash hole deburring into a much easier job. Brownells now has the Trim Mate Case Prep Center on sale for just $93.99 marked down from $124.99, a 25% savings. A power case prep center speeds up tedious tasks dramatically, and your brass will probably come out more consistent. IMPORTANT: This savings is part of an RCBS November Promotion.
8. Midsouth — SALE on Nosler Bullets and Brass

We like Nosler products. The brass is good, the hunting bullets are legendary, and Nosler match bullets display impressive performance for the price. Right now at Midsouth there are substantial discounts on a wide variety of Nosler brass and bullets. Hey 6.5 Creedmoor shooters — take note: 6.5 Creedmoor brass and the excellent 130gr and 140gr 6.5mm RDF HPBT bullets are on sale now.
9. Amazon — Neiko Digital Calipers, $17.85

Even if you have a good set of calipers, you may want to get one of these Neiko 01407A Digital Calipers. The #1 best-selling digital caliper on Amazon.com, this Neiko tool features a large LCD Screen and measures up to 6.0 inches. With over 3000 customer reviews, this product has earned an overall rating of 4.4 out of 5 stars. It’s hard to go wrong for $17.85, even if you just use these as a spare set for measuring group sizes and case trim lengths.
10. Midsouth — 250 Adhesive Precision Targets on Roll, $12.49

Midsouth offers 250 self-adhesive Benchrest Targets on a convenient roll. These stick-on targets work great for load development. The aiming diamond helps align the cross hairs of your scope for consistent shot placement. If you set your Point of Impact to the 1/4″ grid pattern at the top it’s easy to eyeball your group size. At the bottom are fields for your load info. Each Target sticker measures 6″ x 4″ with a 4.5″ x 2.5″ printed area. Midsouth sells the 250-target roll for $12.49, discounted this week from $14.99.
Credit our Bargain Hunter, Forum member F-Class John, who found most of the deals this week.
November 4th, 2018

In the wintertime, it’s common to encounter problems with static electricity when throwing your powder charges. The static can cause powder kernels to cling to the surface of reloading components, and can cause powder clumping. Clumped or sticky powder may make your measure bind or grab in the middle of the cycle, which can throw off your charge weight. Here are a couple simple ways you can minimize the effects of static electricity and improve the consistency of your powder measuring.
Ground Your Powder Measure — If you’re throwing powder charges in the fall or winter and have problems with bridging or sticking powder, use a ground wire. Bullet-smith Victor Johnson (Johnson Precision Bullets) tells us: “I have a 25-foot piece of real small wire with alligator clips on each end. It’s that long so I can run it down the hall to a water pipe. Use the wire tie from a bread bag to hold it in a small roll to put in the range box. When using it at the range use a 6″ nail from the co-op or Lowe’s / Home Depot and just push it into the ground.”
Use Bounce Dryer Sheets — A quick pass with the thin sheets used in dryers will eliminate “static cling” on your plastic reloading parts like powder throwers, powder funnels, and reloading press guides. Thanks to Doc76251 for this tip.
Reduce Electronic Scales’ Drift with Anti-Static Spray
Reloading Tip by GS Arizona from Riflemans Journal
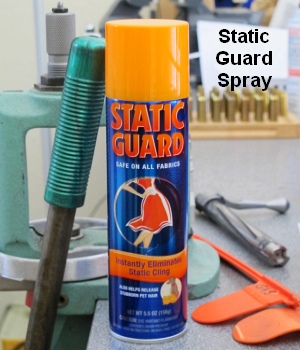 Apparently reducing static charges on and around electronic scales can reduce their propensity to drift, lessening the problem of “wandering zero”. Just how and why static charges interfere with scale performance is unclear, but many shooters have noticed that static electricity can cause electronic scales to behave strangely. So how do you reduce static charges around your digital balance? GS Arizona has found a very simple solution — an anti-static aerosol spray — that, by all indications, actually works. When this “spray-can solution” was suggested by a fellow shooter, GS was skeptical. However, he tried the stuff and he says that it really does help the scale maintain zero over time, with much less observed drift. Apparently reducing static charges on and around electronic scales can reduce their propensity to drift, lessening the problem of “wandering zero”. Just how and why static charges interfere with scale performance is unclear, but many shooters have noticed that static electricity can cause electronic scales to behave strangely. So how do you reduce static charges around your digital balance? GS Arizona has found a very simple solution — an anti-static aerosol spray — that, by all indications, actually works. When this “spray-can solution” was suggested by a fellow shooter, GS was skeptical. However, he tried the stuff and he says that it really does help the scale maintain zero over time, with much less observed drift.
GS explains that the use of “Static Guard” spray helped mitigate the problem of a drifting zero on his Ohaus electronic scale: “My electronic scale… suffers from drifting zero (as they all seem to). I’ve read dozens of forum posts about drift and how to minimize its occurrence, so I know this problem isn’t limited to my scale or my workshop. Sometime last year, John Lowther mentioned the use of anti-static spray as a solution to the drift problem. John stated that the spray had virtually eliminated drift for him.”

GS found that the Static Guard actually worked: “The spray works great, just as John said it would. I spray all surfaces that I touch with my hands and arms as well as the pan (top and bottom), the metal tray on which the pan rests and the table under the scale. In six months or so of using the spray I’ve re-applied it about two or three times; it certainly isn’t something that you need to do each time you sit down to load. Before using the spray, it was not uncommon for me to re-zero the scale 10 times in the course of loading 72 rounds; now it might need it once during a session.”
November 3rd, 2018

Here’a useful article by Sierra Bullets Media Relations Manager Carroll Pilant. This story, which originally appeared in the Sierra Blog, covers some of the more common ammo problems that afflict hand-loaders. Some of those issues are: excessive OAL, high primers, and improperly sized cases. Here Mr. Pilant explains how to avoid these common problems that lead to “headaches at the range.
I had some gentlemen at my house last fall getting rifle zeros for an upcoming elk hunt. One was using one of the .300 short mags and every 3rd or 4th round would not chamber. Examination of the case showed a bulge right at the body/shoulder junction. These were new cases he had loaded for this trip. The seating die had been screwed down until it just touched the shoulder and then backed up just slightly. Some of the cases were apparently slightly longer from the base to the datum line and the shoulder was hitting inside the seating die and putting the bulge on the shoulder. I got to thinking about all the gun malfunctions that I see each week at matches and the biggest percentage stem from improper handloading techniques.
One: Utilize a Chamber Gage
Since I shoot a lot of 3-gun matches, I see a lot of AR problems which result in the shooter banging the butt stock on the ground or nearest solid object while pulling on the charging handle at the same time. I like my rifles too well to treat them that way (I cringe every time I see someone doing that). When I ask them if they ran the ammo through a chamber gage, I usually get the answer, “No, but I need to get one” or “I didn’t have time to do it” or other excuses. The few minutes it takes to check your ammo can mean the difference between a nightmare and a smooth running firearm.
A Chamber Gauge Quickly Reveals Long or Short Cases

Size Your Cases Properly
Another problem is caused sizing the case itself. If you will lube the inside of the neck, the expander ball will come out a lot easier. If you hear a squeak as the expander ball comes out of a case neck, that expander ball is trying to pull the case neck/shoulder up (sometimes several thousandths). That is enough that if you don’t put a bulge on the shoulder when seating the bullet, like we talked about above, it can still jam into the chamber like a big cork. If the rifle is set up correctly, the gun will not go into battery and won’t fire but the round is jammed into the chamber where it won’t extract and they are back to banging it on the ground again (with a loaded round stuck in the chamber). A chamber gage would have caught this also.
 Oversizing cases also causes problems because the firing pin doesn’t have the length to reach the primer solid enough to ignite it 100% of the time. When you have one that is oversized, you usually have a bunch, since you usually do several cases at a time on that die setting. If the die isn’t readjusted, the problem will continue on the next batch of cases also. They will either not fire at all or you will have a lot of misfires. In a bolt action, a lot of time the extractor will hold the case against the face of the breech enough that it will fire. The case gets driven forward and the thinner part of the brass expands, holding to the chamber wall and the thicker part of the case doesn’t expand as much and stretches back to the bolt face. If it doesn’t separate that time, it will the next time. When it does separate, it leaves the front portion of the case in the chamber and pulls the case head off. Then when it tries to chamber the next round, you have a nasty jam. Quite often range brass is the culprit of this because you never know how many times it has been fired/sized and in what firearm.’Back to beating it on the ground again till you figure out that you have to get the forward part of the case out. Oversizing cases also causes problems because the firing pin doesn’t have the length to reach the primer solid enough to ignite it 100% of the time. When you have one that is oversized, you usually have a bunch, since you usually do several cases at a time on that die setting. If the die isn’t readjusted, the problem will continue on the next batch of cases also. They will either not fire at all or you will have a lot of misfires. In a bolt action, a lot of time the extractor will hold the case against the face of the breech enough that it will fire. The case gets driven forward and the thinner part of the brass expands, holding to the chamber wall and the thicker part of the case doesn’t expand as much and stretches back to the bolt face. If it doesn’t separate that time, it will the next time. When it does separate, it leaves the front portion of the case in the chamber and pulls the case head off. Then when it tries to chamber the next round, you have a nasty jam. Quite often range brass is the culprit of this because you never know how many times it has been fired/sized and in what firearm.’Back to beating it on the ground again till you figure out that you have to get the forward part of the case out.
Just a quick tip — To extract the partial case, an oversized brush on a cleaning rod [inserted] and then pulled backward will often remove the case. The bristles when pushed forward and then pulled back act like barbs inside the case. If you have a bunch of oversized case that have been fired, I would dispose of them to keep from having future problems. There are a few tricks you can use to salvage them if they haven’t been fired though. Once again, a case gage would have helped.
Two: Double Check Your Primers

Another thing I see fairly often is a high primer, backwards primer, or no primer at all. The high primers are bad because you can have either a slam fire or a misfire from the firing pin seating the primer but using up its energy doing so. So, as a precaution to make sure my rifle ammo will work 100% of the time, I check it in a case gage, then put it in an ammo box with the primer up and when the box is full, I run my finger across all the primers to make sure they are all seated to the correct depth and you can visually check to make sure none are in backwards or missing.

Three: Check Your Overall Cartridge Length
Trying to load the ammo as long as possible can cause problems also. Be sure to leave yourself enough clearance between the tip of the bullet and the front of the magazine where the rounds will feed up 100%. Several times over the years, I have heard of hunters getting their rifle ready for a hunt. When they would go to the range to sight in, they loaded each round single shot without putting any ammo in the magazine. On getting to elk or deer camp, they find out the ammo is to long to fit in the magazine. At least they have a single shot, it could be worse. I have had hunters that their buddies loaded the ammo for them and then met them in hunting camp only to find out the ammo wouldn’t chamber from either the bullet seated to long or the case sized improperly, then they just have a club.
Four: Confirm All Cases Contain Powder
No powder in the case doesn’t seem to happen as much in rifle cartridges as in handgun cartridges. This is probably due to more handgun ammo being loaded on progressive presses and usually in larger quantities. There are probably more rifle cartridges that don’t have powder in them than you realize though. Since the pistol case is so much smaller internal capacity, when you try to fire it without powder, it usually dislodges the bullet just enough to stick in the barrel. On a rifle, you have more internal capacity and usually a better grip on the bullet, since it is smaller diameter and longer bearing surface. Like on a .223, often a case without powder won’t dislodge the bullet out of the case and just gets ejected from the rifle, thinking it was a bad primer or some little quirk. For rifle cases loaded on a single stage press, I put them in a reloading block and always dump my powder in a certain order. Then I do a visual inspection and any case that the powder doesn’t look the same level as the rest, I pull it and the one I charged before and the one I charged after it. I inspect the one case to see if there is anything visual inside. Then I recharge all 3 cases. That way if a case had powder hang up and dump in the next case, you have corrected the problem.
On progressive presses, I try to use a powder that fills the case up to about the base of the bullet. That way you can usually see the powder as the shell rotates and if you might have dumped a partial or double charge, you will notice as you start to seat the bullet if not before. On a progressive, if I don’t load a cartridge in one smooth stroke (say a bullet tipped over sideways and I raised the ram slightly to reset it) Some presses actually back the charge back adding more powder if it has already dumped some so you have a full charge plus a partial charge. When I don’t complete the procedure with one stroke, I pull the case that just had powder dumped into it and check the powder charge or just dump the powder back into the measure and run the case thru later.
I could go on and on but hopefully this will help some of you that are having these problems cure them. A case gage really can do wonders. Stay tuned for Easy Easy Ways to Save Yourself Headaches at the Range Part 2!
November 1st, 2018

Q: What is the most popular gun book ever published?
A: That distinction goes to the Shooter’s Bible, which has sold over 7 MILLION copies since it was first published over 80 years ago.
Released last month (October 2018), the 110th Edition of this respected resource is bigger and better than ever. This latest Shooter’s Bible boasts 608 pages with 275 color photos and more than 1000 black-and-white photos. The new 110th Edition features many new firearms as well as new optics.
Published annually for more than eighty years, the Shooter’s Bible is perhaps the most comprehensive reference guide for firearms and their specifications. The publishers claim that “nearly every firearms manufacturer in the world” is included. The 110th Edition also contains new and/or enhanced sections on ammunition, optics, and accessories, along with updated handgun and rifle ballistic tables. There are also extensive charts of currently available hunting and match bullets for hand-loaders.
|
While many shooters are now using the internet to get reloading data and equipment specifications, the Shooter’s Bible remains a valuable resource with a great legacy. As one recent Shooter’s Bible purchaser explains: “While it’s true that much of the information contained in the Shooter’s Bible can be found on the Internet, there are many of us who would first rather relax in our easy chair and page through the book at our leisure. If you find an item that catches your fancy, you can then follow up by going to their Web site.”
Another buyer observed: “This latest edition is proof that, even with all the attacks on our 2nd Amendment right over the years, the industry has persevered and grown. I hope the day never comes when there will no longer be a reason to publish the Shooter’s Bible.” |
|
November 1st, 2018

The U.S. Army Marksmanship Unit (USAMU) regularly releases a reloading “how-to” article on the USAMU Facebook page. Here’s a helpful USAMU guide on removing military primer pocket crimps. If you ever use surplus military brass, you really should this article. It contains vital information “learned the hard way”. The writer has tried many different options for removing/swaging out crimps. He weighs the pros and cons of various methods and provides some advice that will save you time and headaches. This article was the second in a 3-part series. Visit the USAMU Facebook page regularly for other informative articles on reloading methods.

 A common question, and important issue with US GI surplus 5.56 brass is “what to do with the primer crimp?” Our Handloading Shop does not prime/re-prime GI 5.56 brass, as we receive it in virgin state (primed) and don’t reload it. However, our staff has extensive private experience handloading GI brass in our own competitive shooting careers, and have several tips to offer. A common question, and important issue with US GI surplus 5.56 brass is “what to do with the primer crimp?” Our Handloading Shop does not prime/re-prime GI 5.56 brass, as we receive it in virgin state (primed) and don’t reload it. However, our staff has extensive private experience handloading GI brass in our own competitive shooting careers, and have several tips to offer.
Once the brass is full-length sized and decapped, the staked-in ring of displaced metal from the primer crimp remains, and hinders re-priming. Some swaging tools exist to swage out this ring, allowing free access to the primer pocket. Some are stand-alone products, and some are reloading-press mounted. Early in this writer’s High Power career, he used the common press-mounted kit several times, with less than stellar results.
Setting Up Swaging Tools
Surplus brass tends to come from mixed lots, and primer crimp varies from very mild to strong. Also, primer pocket dimensions vary. So, setting up this “one size fits most” tool involves trying to find a happy medium for a selection of different types of brass in your particular lot. Some are over-swaged, some under-swaged, and some are “Just Right.” Overall, it was a time-consuming and sub-optimal process, in this writer’s experience.
Cutting Out the Crimp Ring with a Chamfer Tool
[After trying swaging tools] this writer evolved to using the ubiquitous Wilson/RCBS/Other brands chamfer and deburring tool to cut out only the displaced crimp ring at the top of the primer pocket. One caution: DON’T OVER-DO IT! Just a little practice will let the handloader develop a “feel” for the right degree of chamfer that permits easy re-priming without removing so much metal that primer edges start to flow under pressure. For this writer, it was three half-turns of the tool in the primer pocket, with medium pressure.
Here, as with all bulk reloading operations, mechanization is our friend. A popular reloading supply house has developed an inexpensive adaptor that houses the chamfer/deburr tool (retained by an allen screw) and allows mounting in a hand drill or drill press. This speeds the operation significantly, as does use of one of the popular Case Preparation Stations that feature multiple powered operations. (Say good-bye to carpal tunnel syndrome and arthritis!)

One advantage of chamfering the primer pockets lightly to remove remnants of primer crimp, vs. swaging, is that primer pockets are not loosened in this process. US GI (usually LC) NATO 5.56 brass has a great reputation for longevity due to the superior hardness of the case head vs. some softer brands of commercial brass. This means the brass will stand up well to multiple full-pressure loads without loosening primer pockets, and the chamfering method helps support this benefit.
Powered Case Prep Centers — What to Look For
A word of advice (often learned the hard way) — think carefully before jumping on the “latest/greatest” case prep center. One with a proven, long-time track record of durability and excellent customer support has a lot going for it, vs. the flashy “new kid on the block.” Analyze the functions each case prep center can support simultaneously — i.e., can it chamfer, deburr and clean primer pockets all at the same time, without having to re-configure?
Do the tool-heads that come with it look truly functional and durable? If not, can they be easily replaced with proven or more-needed versions, such as a VLD chamfer tool, or a solid/textured primer pocket cleaner rather than a less-durable wire-brush type?
 Tips for Priming with Progressive Presses Tips for Priming with Progressive Presses
When re-priming, a couple of factors are worth noting. When re-priming using either single-stage presses, hand tools, or bench-mounted tools (such as the RCBS bench-mounted priming tool), precise alignment of the primer pocket entrance with the primer is easily achieved, and priming goes very smoothly. When using certain progressive presses, due to the tolerances involved in shell-heads, etc., one may occasionally encounter a primer that isn’t quite perfectly aligned with the primer pocket.
If resistance is felt when attempting to re-prime, DO NOT attempt to force the primer in — doing so can be dangerous! Rather, just exert SLIGHT upward pressure to keep the primer in contact with the case-head, and with the support hand, move the case back/forth a trifle. The primer will drop into alignment with the primer pocket, and then prime as usual. After priming, check each seated primer by feel. Ensure it is below flush with the case head (cleaning primer pockets helps here), and that there are no snags, burrs or deformed primers.
More Info on Primer Pocket Swaging
For more information about removing military crimps in primer pockets, we recommend you read Get the Crimp Out on the Squibloads Gun Thoughts Blog. This is a detailed, well-illustrated article that shows how to use various primer pocket reamers/cutters. It also has a very extensive discussion of swaging using CH4D, RCBS, and Dillon tools. The Squibloads author had much better luck with swaging tools than did the USAMU’s writer — so if you are considering swaging, definitely read the Squibloads article.
The illustration of primer pocket types is from the Squibloads Blog Article, Get the Crimp Out.
October 30th, 2018

Along with these popular cartridge types, DJ’s Brass can hydro-form 6 PPC, 30 PPC, 6 BRA, 30 BR, .260 AI, .284 Shehane and other wildcats.
Do you shoot a popular wildcat (such as the 6 BRA), but hate the hassle of fire-forming all your own cartridge brass? That takes time, costs money (in bullets and powder), and consumes precious barrel life. Well there IS a better solution — you can have your new brass hydro-formed to your exact specifications for a reasonable cost.
DJ’s Brass Service now offers custom case hydro-forming to your exact specs. Darrell Jones offers this service for a variety of popular cartridges: 6 PPC, 30 PPC, 30 BR, 6 BRA (BR Ackley), 6mm Grinch, 6 BRDX, 6 BRX, .260 Ackley, .284 Shehane and of course the very popular 6mm Dasher. After hydro-forming your brass, Darrell can also neck-up or neck-down the cases to meet your needs. For example, if you shoot a 22 Dasher, Darrell can hydro-form the cases to a 6 Dasher and then neck them down to .22 caliber. He can also turn the necks to your specs (for an additional charge).
 Darrell is a hydro-forming wizard who has perfected the process over the last couple of years. He has learned a few special techniques along the way to ensure uniform case-forming. Darrell is a hydro-forming wizard who has perfected the process over the last couple of years. He has learned a few special techniques along the way to ensure uniform case-forming.
Without revealing any trade secrets, we can say the Darrell has very special dies and Darrell doesn’t use a mallet or hammer — he has a system that is much more consistent. Darrell tells us: “Many of my customers take this brass and load it ‘as is’ and go straight to a match and shoot some very nice groups.”
Hydro-forming by Darrell costs $0.60 (sixty cents) per case with a minimum order of $60. Neck-turning is an additional $0.50 (fifty cents) per case plus actual return shipping. The turnaround is usually less than five days.
With Darrell’s hydro-forming service you don’t have to buy any special dies or other equipment. Darrell says: “Simply send me the brass you need or have it dropped-shipped to me along with a fired case that has not been sized. If you need formed brass for a new build (gun not yet fired), let me know and I will size the brass to fit within .001 of a PT&G GO gauge.”
For more information, visit DJsBrass.com, or call Darrell at (205) 461-4680. IMPORTANT: Contact Darrell for shipping instructions BEFORE sending brass for processing. In a hurry, don’t have time? Just call Darrell and he’ll make something work for you.

Hydro-Forming Customer Reports
Here are testimonials from recent customers.
“Recently had Darrell Jones of DJ’s Brass Service hydro-form 6 BRX brass for me. The turn around time was very fast and the brass was to the exact specification I ask for. I actually shot the hydro-formed brass in a match [without further fire-forming]. It shot a 3.597″ — pretty amazing. Let DJ do the work for you!” — Mike Wilson (3 Time IBS Record Holder; 2013 and 2014 1000-yard IBS Shooter of the Year.)
“Darrell Jones of DJ’s Brass Service went far beyond the call of duty, to assist me in preparation to shoot for my first time in an IBS match. I have had an interest in 1000-yard competition for many years and finally got the opportunity to try it. After researching the winning competitors, rifles, and rounds I ordered a Panda action with Krieger barrel in 6mm Dasher from Kelby’s. It was one week before the match and I had a rifle and no rounds. I contacted Darrell to hydraulically form 6mm dasher from Lapua 6mm BR brass. He formed the brass and had it in the mail the next day[.] Since I have only reloaded for hunting or magazine fed rifles I was not familiar with proper seating to allow land engagement of the bullets for 1000-yard accuracy. Darrell took the time to advised me every step of the way to allow me to shoot a 3.158″ (5) shot group to win my first round of my first competitive match ever.” — Mike Youngblood
|