Editor: Many new barrels will deliver higher velocities with the same load after 100-150 rounds through the bore. The exact reasons for this speed-up are not 100% certain, and velocity increases (if any) will vary from one barrel to the next. But this “speeding up” phenomenon is common, so be prepared if this happens with your next barrel. If you do experience a significant velocity increase you should probably re-tune your load AFTER the velocity stabilizes at the higher level.
From the Sierra Bullets Blog Article by Mark Walker, Sierra New Product Development Director
In a previous post, I discussed a couple of methods to tune a load to your barrel to help achieve the best accuracy possible. People most often work on load tuning if they get a new rifle or have a different barrel installed. In both instances, the barrel is new and has not been fired very much. According to most competitive shooters, this is the most accurate your barrel will ever be, so getting it tuned and shooting accurately is a priority.
The Speed Up Phenomenon After 100-150 Rounds
Even though after you work up a load and your new barrel is shooting great, a lot of shooters notice that at around 100 to 150 rounds their rifle may stop shooting as accurately. I had this happen to a rifle and I was confused as to why something that worked so well to begin with would all of a sudden quit shooting. I decided to break out the chronograph to do another load work up to see what was going on. To my surprise, the velocity had increased around 80 fps over the original velocity! After performing another ladder test and adjusting the seating depth, the rifle was once again shooting well.
There are several thoughts on why this may happen, however, you can rest assured that it does happen. One thought is that as the barrel breaks in, the tooling marks in the throat of the chamber smooth out and allow less resistance to the bullet as it exits the bore thereby increasing speed. Another idea is that the throat area starts to get a little rough which in turn causes more resistance which increases pressure and therefore more velocity. I’m sure there are some out there who have a better understanding as to why this happens, but it can definitely affect the accuracy of your rifle. So be aware and never be afraid to rework a load to keep your rifle in tune.
Experts Confirm That Barrel Speed-Up Is Common Two respected shooters have observed an increase in velocity with new barrels, typically after 100 rounds. Gunsmith and Hall-of-Fame benchrest shooter Thomas “Speedy” Gonzalez has documented barrel speed-up with testing. Moreover, Speedy’s bore-scope barrel inspections revealed a smoothing of the barrel lands. Jim See, a top PRS competitor, has encountered barrel speed-up many times. Accordingly, he re-tunes his load at 150 rounds.
“Alex Lipworth and I documented this phenomenon about four years ago and I have told all my customers about this. My son Mikee would shoot 100 rounds through all new barrels we planned on shooting before we would begin to do load development. We had a shooting snail that caught all the bullets set up in front of an indoor bench. We called it a wear-in process because upon careful examination of the bore when the ‘Speed Up’ takes place the cut-rifled bore resembles that more of a button-rifled barrels with the lands taking on more the softer look of a buttoned bore.” — Speedy Gonzalez
“Seen it [barrel velocity increase] too many times to count. All my match barrels get a ‘generic round’ loaded for them, which has worked well in barrels historically. After I hit 150 rounds I fine-tune the load and never look back, until the tube starts to slow down at it’s life end.” — Jim See
The question of barrel break-in is controversial. Some folks advocate an elaborate, lengthy cycle of shooting and brushing, repeated many times — one shot and clean, two shots and clean and so on. This, it is argued, helps barrels foul less and shoot more accurately. Others say minimal break-in, with patching and brushing after 10-15 rounds, is all you need. Still others contend that break-in procedures are a total waste of time and ammo — you should just load and shoot, and clean as you would normally.
We doubt if there will ever be real agreement among shooters concerning barrel break-in procedures. And one must remember that the appropriate break-in procedure might be quite different for a factory barrel vs. a custom hand-lapped barrel. This Editor has found that his very best custom barrels shot great right from the start, with no special break-in, other than wet patches at 5, 10, and 15 rounds. That said, I’ve seen some factory barrels that seemed to benefit from more elaborate break-in rituals.
What’s the best barrel break-in procedure? Eric Mayer of Varminter.com decided to ask the experts. Eric interviewed representatives of three leading barrel manufacturers: Krieger, Lothar-Walther, and Shilen. He recorded their responses on this video. In order of appearance, the three experts are:
Shilen, Krieger, and Walther Experts Talk about Barrel Break-in
Do I Need to Break-In a New Rifle Barrel?
Eric Mayer of Varminter.com says: “That is a simple question, [but it] does not necessarily have a simple answer. Instead of me repeating my own beliefs, and practices, on breaking-in a new rifle barrel, I decided to answer this one a bit differently. While we were at the 2016 SHOT Show, we tracked down three of the biggest, and most popular, custom barrel makers in the world, and asked them what they recommend to anyone buying their barrels, and why they recommend those procedures. We asked the question, and let the camera run!” Launch the video above to hear the answers — some of which may surprise you.
Barrel Break-in — Initial Inspection and Cleaning
This video explains that you should always inspect and clean the bore of your barrel before sending rounds through it. There may be remnants of the production process, such as lapping residues, that you’ll want to get out of the bore. We’ve even seen a few tiny metal pieces in some factory barrels. And it’s always wise to borescope a new barrel to see if there are visible defects in the rifling such as lands that have flawed edges — we’ve seen that on some cheaper barrels.
Barrel Break-In — Ian Klemm’s Surprising Observations
Here’s a 10-minute Vortex Nation interview with Ian Klemm. Ian, a 4-Time F-TR National Champion is one of America’s best long-range shooters. In this video, Ian explains his approach to barrel break-in, which may surprise you. Does barrel break-in even matter? Conventional wisdom says “Yes” and perhaps there’s some truth to that, but Ian argues that break-in is NOT nearly as important as the internet wants you to believe. Ian believes that you don’t need to waste a ton of time/ammo to get your barrel ready to shoot extremely accurately. This may be particularly true with premium hand-lapped custom barrels.
Barrel Break-In Procedures with Keith Glasscock
Keith Glasscock is also one of America’s greatest F-Class shooters who has finished second at the Nationals multiple times. Keith is also a highly-respected wind coach who has a popular YouTube video channel, Winning in the Wind. In this video, Keith explains his procedure for breaking-in his match barrels. He starts by bore-scoping the barrel and cleaning it. If he finds some burrs he may use some JB Bore Paste, a patch, and a worn brush and “give that throat a little scrub” (See 1:30 time-mark). He used different stroke lengths to avoid putting a “step” in the throat. When he’s satisfied he goes to the range. He fires the first five rounds, then cleans. He then fires quite a few rounds before cleaning the barrel again and beginning load development (See 8:25 time-mark).
General Barrel Break-in Procedures Recommended by Brownells
Brownells Gun Techs Steve Ostrem and Caleb Savant tackle a thorny topic: breaking in a new barrel. What IS breaking-in a barrel? And WHY do it? The rifling of a freshly machined barrel has microscopic burrs and sharp edges. “Breaking-in” is the process of putting bullets down the bore to smooth out those rough spots. The goal is to round down the sharp edges so they’re not stripping copper off a bullet as it travels the bore, which leads to fouling that leads to reduced accuracy and inconsistent groups. In a very minor way, you’re actually lapping the barrel. The breaking-in process works best on cut-rifled and button-rifled barrels. Cold hammer-forged, chrome-lined, or nitrided barrels — such as commonly found on AR-15s — may not benefit much from the process. Pistol barrels really don’t need to be broken in because larger-diameter bullets are not so much affected by tiny variations in the bore. Likewise, break-in is more helpful for a .17, .20, or .22 caliber rifle than a .45 caliber rifle.
George Gardner of G.A. Precision Talks About Barrel Break-In
G.A. Precision’s George Gardner is a leading figure in the PRS/NRL world. In this video, George makes the valid point that not all barrels require the same amount of break-in. George says some barrels require very little break-in, while others benefit from a more elaborate break-in process that helps reduce future copper and powder fouling. He calls this “seasoning” the barrel so it fouls less. For a typical barrel, George’s recommended process (4:25 time-mark) starts with one shot, then clean for three one-round cycles. This is followed by three shots then clean, with repeat 3-shot cycles if need. For cleaning George prefers nylon brushes (5:50 time-mark). NOTE: George also makes a very important point — you MUST swab the chamber and get it dry between cleaning cycles (5:30 time-mark).
The question of barrel break-in is controversial. Some folks advocate an elaborate, lengthy cycle of shooting and brushing, repeated many times — one shot and clean, two shots and clean and so on. This, it is argued, helps barrels foul less and shoot more accurately. Others say minimal break-in, with patching and brushing after 10-15 rounds, is all you need. Still others contend that break-in procedures are a total waste of time and ammo — you should just load and shoot, and clean as you would normally.
We doubt if there will ever be real agreement among shooters concerning barrel break-in procedures. And one must remember that the appropriate break-in procedure might be quite different for a factory barrel vs. a custom hand-lapped barrel. This Editor has found that his very best custom barrels shot great right from the start, with no special break-in, other than wet patches at 5, 10, and 15 rounds. That said, I’ve seen some factory barrels that seemed to benefit from more elaborate break-in rituals.
What’s the best barrel break-in procedure? Well our friend Eric Mayer of Varminter.com decided to ask the experts. A while back Eric interviewed representatives of three leading barrel manufacturers: Krieger, Lothar-Walther, and Shilen. He recorded their responses on video. In order of appearance in the video, the three experts are:
Do I Need to Break-In a New Rifle Barrel?
Eric Mayer of Varminter.com says: “That is a simple question, [but it] does not necessarily have a simple answer. Instead of me repeating my own beliefs, and practices, on breaking-in a new rifle barrel, I decided to answer this one a bit differently. While we were at the 2016 SHOT Show, we tracked down three of the biggest, and most popular, custom barrel makers in the world, and asked them what they recommend to anyone buying their barrels, and why they recommend those procedures. We asked the question, and let the camera run!” Launch the video above to hear the answers — some of which may surprise you.
Long-Term Barrel Care — More Experts Offer Opinions
Apart from the debate about barrel break-in, there is the bigger question of how should you clean and maintain a barrel during its useful life. Some folks like aggressive brushing, other shooters have had success with less invasive methods, using bore foam and wet patches for the most part. Different strokes for different folks, as they say. In reality, there may not be one solution for every barrel. Different fouling problems demand different solutions. For example, solvents that work well for copper may not be the best for hard carbon (and vice-versa).
“Why worry about a little barrel fouling when the throat is subjected to a brutal 5,600° F volcano at 55,000 PSI? To investigate these and other questions about taking care of a match barrel, we spoke with a dozen experts and share their knowledge in this first of a series of articles.
After listening to folks who shoot, build barrels or manufacture cleaning solvents for a living, we concluded that even the experts each have their own unique recommendations on how to care for a match barrel. But they all agree on one thing — the gun will tell you what it likes best. Because the life expectancy of a match barrel is about 1,500 to 2,500 rounds, the objectives of cleaning one should include: preserve accuracy, slow the erosion, and remove fouling — all without damaging the gun. This article doesn’t claim that one cleaning method is better than the next. Rather, we set out to interject a little science into the discussion and to share some lessons learned from experts in the field.” — Chip Lohman
Editor: Many new barrels will deliver higher velocities with the same load after 100-150 rounds through the bore. The exact reasons for this speed-up are not 100% certain, and velocity increases (if any) will vary from one barrel to the next. But this “speeding up” phenomenon is common, so be prepared if this happens with your next barrel. If you do experience a significant velocity increase you should probably re-tune your load AFTER the velocity stabilizes at the higher level.
From the Sierra Bullets Blog Article by Mark Walker, Sierra New Product Development Director
In a previous post, I discussed a couple of methods to tune a load to your barrel to help achieve the best accuracy possible. People most often work on load tuning if they get a new rifle or have a different barrel installed. In both instances, the barrel is new and has not been fired very much. According to most competitive shooters, this is the most accurate your barrel will ever be, so getting it tuned and shooting accurately is a priority.
The Speed Up Phenomenon After 100-150 Rounds
Even though after you work up a load and your new barrel is shooting great, a lot of shooters notice that at around 100 to 150 rounds their rifle may stop shooting as accurately. I had this happen to a rifle and I was confused as to why something that worked so well to begin with would all of a sudden quit shooting. I decided to break out the chronograph to do another load work up to see what was going on. To my surprise, the velocity had increased around 80 fps over the original velocity! After performing another ladder test and adjusting the seating depth, the rifle was once again shooting well.
There are several thoughts on why this may happen, however, you can rest assured that it does happen. One thought is that as the barrel breaks in, the tooling marks in the throat of the chamber smooth out and allow less resistance to the bullet as it exits the bore thereby increasing speed. Another idea is that the throat area starts to get a little rough which in turn causes more resistance which increases pressure and therefore more velocity. I’m sure there are some out there who have a better understanding as to why this happens, but it can definitely affect the accuracy of your rifle. So be aware and never be afraid to rework a load to keep your rifle in tune.
Experts Confirm That Barrel Speed-Up Is Common Two respected shooters have observed an increase in velocity with new barrels, typically after 100 rounds. Gunsmith and Hall-of-Fame benchrest shooter Thomas “Speedy” Gonzalez has documented barrel speed-up with testing. Moreover, Speedy’s bore-scope barrel inspections revealed a smoothing of the barrel lands. Jim See, a top PRS competitor, has encountered barrel speed-up many times. Accordingly, he re-tunes his load at 150 rounds.
“Alex Lipworth and I documented this phenomenon about four years ago and I have told all my customers about this. My son Mikee would shoot 100 rounds through all new barrels we planned on shooting before we would begin to do load development. We had a shooting snail that caught all the bullets set up in front of an indoor bench. We called it a wear-in process because upon careful examination of the bore when the ‘Speed Up’ takes place the cut-rifled bore resembles that more of a button-rifled barrels with the lands taking on more the softer look of a buttoned bore.” — Speedy Gonzalez
“Seen it [barrel velocity increase] too many times to count. All my match barrels get a ‘generic round’ loaded for them, which has worked well in barrels historically. After I hit 150 rounds I fine-tune the load and never look back, until the tube starts to slow down at it’s life end.” — Jim See
The question of barrel break-in is controversial. Some folks advocate an elaborate, lengthy cycle of shooting and brushing, repeated many times — one shot and clean, two shots and clean and so on. This, it is argued, helps barrels foul less and shoot more accurately. Others say minimal break-in, with patching and brushing after 10-15 rounds, is all you need. Still others contend that break-in procedures are a total waste of time and ammo — you should just load and shoot, and clean as you would normally.
We doubt if there will ever be real agreement among shooters concerning barrel break-in procedures. And one must remember that the appropriate break-in procedure might be quite different for a factory barrel vs. a custom hand-lapped barrel. This Editor has found that his very best custom barrels shot great right from the start, with no special break-in, other than wet patches at 5, 10, and 15 rounds. That said, I’ve seen some factory barrels that seemed to benefit from more elaborate break-in rituals.
What’s the best barrel break-in procedure? Well our friend Eric Mayer of Varminter.com decided to ask the experts. A while back Eric interviewed representatives of three leading barrel manufacturers: Krieger, Lothar-Walther, and Shilen. He recorded their responses on video. In order of appearance in the video, the three experts are:
Do I Need to Break-In a New Rifle Barrel?
Eric Mayer of Varminter.com says: “That is a simple question, [but it] does not necessarily have a simple answer. Instead of me repeating my own beliefs, and practices, on breaking-in a new rifle barrel, I decided to answer this one a bit differently. While we were at the 2016 SHOT Show, we tracked down three of the biggest, and most popular, custom barrel makers in the world, and asked them what they recommend to anyone buying their barrels, and why they recommend those procedures. We asked the question, and let the camera run!” Launch the video above to hear the answers — some of which may surprise you.
Long-Term Barrel Care — More Experts Offer Opinions
Apart from the debate about barrel break-in, there is the bigger question of how should you clean and maintain a barrel during its useful life. Some folks like aggressive brushing, other shooters have had success with less invasive methods, using bore foam and wet patches for the most part. Different strokes for different folks, as they say. In reality, there may not be one solution for every barrel. Different fouling problems demand different solutions. For example, solvents that work well for copper may not be the best for hard carbon (and vice-versa).
“Why worry about a little barrel fouling when the throat is subjected to a brutal 5,600° F volcano at 55,000 PSI? To investigate these and other questions about taking care of a match barrel, we spoke with a dozen experts and share their knowledge in this first of a series of articles.
After listening to folks who shoot, build barrels or manufacture cleaning solvents for a living, we concluded that even the experts each have their own unique recommendations on how to care for a match barrel. But they all agree on one thing — the gun will tell you what it likes best. Because the life expectancy of a match barrel is about 1,500 to 2,500 rounds, the objectives of cleaning one should include: preserve accuracy, slow the erosion, and remove fouling — all without damaging the gun. This article doesn’t claim that one cleaning method is better than the next. Rather, we set out to interject a little science into the discussion and to share some lessons learned from experts in the field.” — Chip Lohman
NRA publication Shooting Sports USA (SSUSA) has thousands of articles online, all free for the reading. Many of these stories have been written by top competitors, including National and Olympic Champions. You will find SSUSA articles spotlighted every week on the NRA Competitive Shooting Facebook page. We recommend you bookmark that page as a valuable resource. Here are four notable SSUSA articles that have been featured on Facebook this month. Go to SSUSA.org to see even more current articles, with new content every day.
Here is an insightful, fairly lengthy 1850-word article about the phenomenon we call mirage. The article explains how and why mirage appears, how it can best be monitored, and how mirage can indicate both wind velocity and direction. Top competitors follow the adage “Mirage is your friend”, because mirage can often be the most important indicator of wind variables — sometimes even more important than wind flags. “The mirage is more sensitive than the flags since it has less inertia and momentum”, wrote Desmond T. Burke, in his book, Canadian Bisley Shooting, an Art and a Science.
Well worth reading, this SSUSA article talks about the properties of mirage. Here is a sample:
“Mirage — can make all the difference between a shot landing squarely in the X-ring or being victimized by an undetected downrange breeze. The true power of mirage is found in its ability to betray the subtlest of breezes downrange. Its fluid movement… can not only provide wind direction, but speed as well.
Typically, the ability to detect mirage is maximized on warm, sunny and sultry days. Expect mirage to be most pronounced in mid-morning or early afternoon, although it ignores these rules with regularity[.]
Mirage is extremely powerful at identifying winds of less than 12 mph, particularly those gentle breezes subtle enough to not even bother moving the flags.
When there is no wind, or a gentle head or tail wind, mirage will appear to be ‘bubbling’ directly up from the ground. Many call this ‘boiling’, and it is probably the easiest of all to detect.
As a general rule of thumb, when wind speed increases, overall height of the waves produced by the mirage is reduced. Large peaks and valleys in the waves mean that particular mirage is being driven by a very slight breeze. Conversely, crest size is reduced with wind speed, making it harder and harder to detect, until the mirage disappears entirely at somewhere around 12 miles per hour. In other words, the taller mirage’s waves appear, the slower the breeze.”
Authored by the late Glen Zediker, this article covers barrel break-in procedures. It is particularly useful for dealing with factory barrels. We CAUTION readers — with outstanding, hand-lapped custom barrels from top barrel-makers, you may want to do very little break-in — clean sparingly and keep barrel heat low. Do NOT use abrasives aggressively. On our Krieger and Brux barrels, we simply wet-patched every 2-3 rounds for 20 rounds and the barrels shot superbly from the start with minimal fouling. But for factory barrels, a moderate break-in process may prove beneficial.
Zediker explains: “Lesser, lower-cost barrels are going to have more pronounced … imperfections within the bore[.] These imperfections are largely tool marks resulting from the drilling and rifling processes. And if it’s a semi-automatic, like an AR-15, there might be a burr where the gas port was drilled. The goal of break-in is to knock down these imperfections, thereby smoothing the interior surface.”
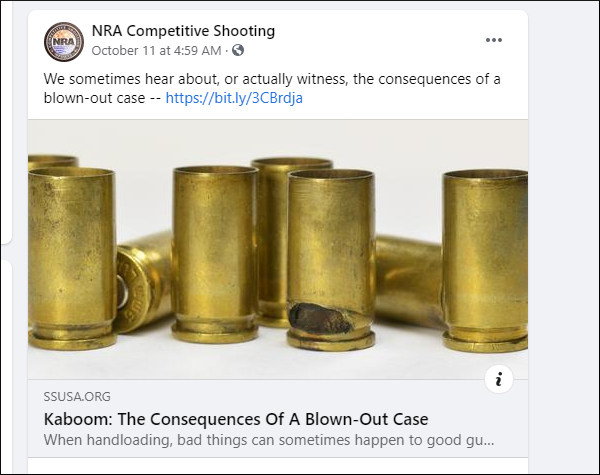
As one who has experienced a cartridge case-head blow-out with a 9mm pistol, this Editor is very conscious of the risks involved and the damage a blow-out can do to the pistol, to the magazine, and (worst of all) to the shooter. Even with new brass, the possibility of a case failure is always present. And even if the case remains intact, we’ve seen primer failures that create a dangerous jet back towards the pistol shooter. That’s why shooters should always employ protective eyewear whenever they shoot.
We love our wheelguns, but there’s no doubt that forcing cone damage can occur, particularly with hot loads and if your cylinder-to-barrel gap is excessive. This article explains how to inspect your revolvers, and how to mitigate the likelihood of forcing cone damage. The article also explains how to clean your revolvers properly. This is very important to avoid build-up of lead and powder residues.
AccurateShooter.com will offer a new FREE service for Forum members and readers — Barrel Break-In. Knowledgeable shooters know that it can take 150 rounds or more for a barrel to achieve peak accuracy during Phase I of break-in. Then you want to do a lengthy Phase II break-in process to smooth the lands and grooves for reduced bullet drag and maximum velocity potential. Overall, the optimal barrel break-in schedule encompasses 500 to 700 rounds of careful firing under match conditions with a precise, cleaning regimen between each shooting cycle.
Very few gun owners have the time (or money) to do a full 500-round barrel break-in. The cost in bullets and powder is significant, not to mention time spent at the range. Thankfully AccurateShooter.com’s talented team of shooters will take that burden off you. You send us those brand new high-dollar match barrels — we do the work, using those barrels in our matches and varmint shoots, all the while carrying out the critical Phase I and II barrel break-in processes start to finish.
Barrel Break-In Carried Out By Champion Shooters
Our barrel break-in procedure is done by some of the nation’s top shooters. Here is AccurateShooter System Admin Jay Christopherson performing barrel break-in on a customer’s barrel during a competition. Jay won the F-Open Division at the 2020 Berger SW Nationals. Put your brand new match barrel in the hands of champions, to have it broken in the right way!
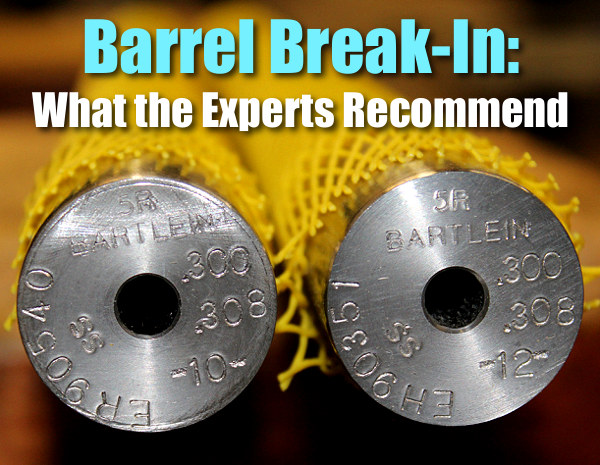
To participate in the Accurate Shooter Barrel Break-In Program (ASBBIP), just send us your chambered Krieger, Bartlein, Brux, Lilja, Douglas or other custom barrel and our testers will shoot it for six months, dutifully logging how the accuracy improves as the careful break-in process takes place over time. We guarantee that when you get your barrel barrel back, it will be thoroughly broken-in and ready to use. Enjoy peak accuracy for many hundreds of rounds! Then you can send us a new chambered barrel and we can do the tedious barrel break-in process for you again. Just pay for the shipping — we do the rest!
NOTE: Program limited to premium match barrels of approved calibers/chamberings and contours. Barrels must be chambered for one of the BAT, Borden, Kelbly, Defiance, and Barnard custom actions used by our shooting team. We reserve the right to retain the barrels for use in Nationals-level shooting matches.
The question of barrel break-in is controversial. Some folks advocate an elaborate, lengthy cycle of shooting and brushing, repeated many times — one shot and clean, two shots and clean and so on. This, it is argued, helps barrels foul less and shoot more accurately. Others say minimal break-in, with patching and brushing after 10-15 rounds, is all you need. Still others contend that break-in procedures are a total waste of time and ammo — you should just load and shoot, and clean as you would normally.
We doubt if there will ever be real agreement among shooters concerning barrel break-in procedures. And one must remember that the appropriate break-in procedure might be quite different for a factory barrel vs. a custom hand-lapped barrel. This Editor has found that his very best custom barrels shot great right from the start, with no special break-in, other than wet patches at 5, 10, and 15 rounds. That said, I’ve seen some factory barrels that seemed to benefit from more elaborate break-in rituals.
What’s the best barrel break-in procedure? Well our friend Eric Mayer of Varminter.com decided to ask the experts. A while back Eric interviewed representatives of three leading barrel manufacturers: Krieger, Lothar-Walther, and Shilen. He recorded their responses on video. In order of appearance in the video, the three experts are:
Do I Need to Break-In a New Rifle Barrel?
Eric Mayer of Varminter.com says: “That is a simple question, [but it] does not necessarily have a simple answer. Instead of me repeating my own beliefs, and practices, on breaking-in a new rifle barrel, I decided to answer this one a bit differently. While we were at the 2016 SHOT Show, we tracked down three of the biggest, and most popular, custom barrel makers in the world, and asked them what they recommend to anyone buying their barrels, and why they recommend those procedures. We asked the question, and let the camera run!” Launch the video above to hear the answers — some of which may surprise you.
Long-Term Barrel Care — More Experts Offer Opinions
Apart from the debate about barrel break-in, there is the bigger question of how should you clean and maintain a barrel during its useful life. Some folks like aggressive brushing, other shooters have had success with less invasive methods, using bore foam and wet patches for the most part. Different strokes for different folks, as they say. In reality, there may not be one solution for every barrel. Different fouling problems demand different solutions. For example, solvents that work well for copper may not be the best for hard carbon (and vice-versa).
“Why worry about a little barrel fouling when the throat is subjected to a brutal 5,600° F volcano at 55,000 PSI? To investigate these and other questions about taking care of a match barrel, we spoke with a dozen experts and share their knowledge in this first of a series of articles.
After listening to folks who shoot, build barrels or manufacture cleaning solvents for a living, we concluded that even the experts each have their own unique recommendations on how to care for a match barrel. But they all agree on one thing — the gun will tell you what it likes best. Because the life expectancy of a match barrel is about 1,500 to 2,500 rounds, the objectives of cleaning one should include: preserve accuracy, slow the erosion, and remove fouling — all without damaging the gun. This article doesn’t claim that one cleaning method is better than the next. Rather, we set out to interject a little science into the discussion and to share some lessons learned from experts in the field.” — Chip Lohman
Turn a Rough Factory Rifle into an Accurate Hunting Rig
Kiwi Nathan Foster has produced a good video for hunters with “under-performing” Remington Model 700 rifles. In this video, Nathan helps a client turn a badly-behaving Rem 700 into a reliable tack-driver. A customer had sent Nathan this rifle to rectify stubborn copper fouling. After bedding the rifle, the customer discovered that the rifle produced terrible groups due to the stubborn bore.
Nathan told us: “This was a grand opportunity to study what can go wrong with the M700 rifle with regards to both do-it-yourself work and flaws within rifle production. To help structure the video, we used the chapters of our Accurizing Book as reference steps for the video. This footage also works in conjunction with our free Remington bedding tutorials on YouTube.
Those who have watched the full M700 Troubleshooting video say this is one of the most helpful videos yet released on problem-solving with a factory hunting rifle. This video is especially helpful for those just getting into the accuracy game, as it walks the viewer through the basics of rifle tuning, then proceeds to more advanced methods of improving a badly-behaving rifle.
This video focuses on the Remington M700 and Rem clones, such as the Bergara rifle. However the lessons and techniques in the video can apply to any type of bolt-action rifle suffering heavy copper fouling. The video features detailed footage of barrel break-in and barrel-lapping procedures. These procedures may be beneficial for rough factory barrels. IMPORTANT! AccurateShooter.com recommends different break-in and maintenance regimes for custom, hand-lapped premium barrels — be conservative with fine custom barrels. Our best custom barrels have all shot superbly with minimal break-in and zero use of abrasives during break-in.
Troubleshooting the Remington 700 Rifle with Nathan Foster
NOTE: This is a free 70-second trailer video. The FULL Remington Troubleshooting Video is 1 hour, 16 minutes long and can be streamed through Vimeo-on-Demand for $12.00. Access Full Video HERE.
Nathan Foster of Terminal Ballistics Research in New Zealand, is a expert hunter and highly-respected author of a series of hunting and long range shooting books. Nathan’s first book, The Practical Guide to Long Range Hunting Rifles, is a classic — one of the best treatises ever written on choosing and using a hunting rifle.
The Remington 700 is the most popular bolt-action rifle in America, according to Gunbroker.com sales figures for new and “previously-owned” rifles. So, chances are that you (or a family member) have a Rem 700 of some vintage sitting in the gunsafe. Click the link above for a PDF version of the Remington 700 Owner’s Manual (also covers models Seven, and 673).
The question of barrel break-in is controversial. Some folks advocate an elaborate, lengthy cycle of shooting and brushing, repeated many times — one shot and clean, two shots and clean and so on. This, it is argued, helps barrels foul less and shoot more accurately. Others say minimal break-in, with patching and brushing after 10-15 rounds, is all you need. Still others contend that break-in procedures are a total waste of time and ammo — you should just load and shoot, and clean as you would normally.
We doubt if there will ever be real agreement among shooters concerning barrel break-in procedures. And one must remember that the appropriate break-in procedure might be quite different for a factory barrel vs. a custom hand-lapped barrel. This Editor has found that his very best custom barrels shot great right from the start, with no special break-in, other than wet patches at 5, 10, and 15 rounds. That said, I’ve seen some factory barrels that seemed to benefit from more elaborate break-in rituals.
What’s the best barrel break-in procedure? Well our friend Eric Mayer of Varminter.com decided to ask the experts. A while back Eric interviewed representatives of three leading barrel manufacturers: Krieger, Lothar-Walther, and Shilen. He recorded their responses on video. In order of appearance in the video, the three experts are:
Do I Need to Break-In a New Rifle Barrel?
Eric Mayer of Varminter.com says: “That is a simple question, [but it] does not necessarily have a simple answer. Instead of me repeating my own beliefs, and practices, on breaking-in a new rifle barrel, I decided to answer this one a bit differently. While we were at the 2016 SHOT Show, we tracked down three of the biggest, and most popular, custom barrel makers in the world, and asked them what they recommend to anyone buying their barrels, and why they recommend those procedures. We asked the question, and let the camera run!” Launch the video above to hear the answers — some of which may surprise you.
Long-Term Barrel Care — More Experts Offer Opinions
Apart from the debate about barrel break-in, there is the bigger question of how should you clean and maintain a barrel during its useful life. Some folks like aggressive brushing, other shooters have had success with less invasive methods, using bore foam and wet patches for the most part. Different strokes for different folks, as they say. In reality, there may not be one solution for every barrel. Different fouling problems demand different solutions. For example, solvents that work well for copper may not be the best for hard carbon (and vice-versa).
“Why worry about a little barrel fouling when the throat is subjected to a brutal 5,600° F volcano at 55,000 PSI? To investigate these and other questions about taking care of a match barrel, we spoke with a dozen experts and share their knowledge in this first of a series of articles.
After listening to folks who shoot, build barrels or manufacture cleaning solvents for a living, we concluded that even the experts each have their own unique recommendations on how to care for a match barrel. But they all agree on one thing — the gun will tell you what it likes best. Because the life expectancy of a match barrel is about 1,500 to 2,500 rounds, the objectives of cleaning one should include: preserve accuracy, slow the erosion, and remove fouling — all without damaging the gun. This article doesn’t claim that one cleaning method is better than the next. Rather, we set out to interject a little science into the discussion and to share some lessons learned from experts in the field.” — Chip Lohman


 Two respected shooters have observed an increase in velocity with new barrels, typically after 100 rounds. Gunsmith and Hall-of-Fame benchrest shooter Thomas “Speedy” Gonzalez has documented barrel speed-up with testing. Moreover, Speedy’s bore-scope barrel inspections revealed a smoothing of the barrel lands. Jim See, a top PRS competitor, has encountered barrel speed-up many times. Accordingly, he re-tunes his load at 150 rounds.
 We doubt if there will ever be real agreement among shooters concerning barrel break-in procedures. And one must remember that the appropriate break-in procedure might be quite different for a factory barrel vs. a custom hand-lapped barrel. This Editor has found that his very best custom barrels shot great right from the start, with no special break-in, other than wet patches at 5, 10, and 15 rounds. That said, I’ve seen some factory barrels that seemed to benefit from more elaborate break-in rituals.
 Do I Need to Break-In a New Rifle Barrel?

 Two respected shooters have observed an increase in velocity with new barrels, typically after 100 rounds. Gunsmith and Hall-of-Fame benchrest shooter Thomas “Speedy” Gonzalez has documented barrel speed-up with testing. Moreover, Speedy’s bore-scope barrel inspections revealed a smoothing of the barrel lands. Jim See, a top PRS competitor, has encountered barrel speed-up many times. Accordingly, he re-tunes his load at 150 rounds.