I have seen it time and time again, shooters on the line wrestling with their rifle trying to get the bolt closed while the wind is switching. They were too focused trying to get their bolt to close and getting their rifle settled back on the bags that they missed the wind switch. Bang… Eight! The straw that broke the camel’s back for me was at the 2017 Canadian Nationals. I was paired up with a young girl and she would try really hard to close the bolt on her rifle. The majority of the time she would get it to close, but often times she could not even get the round to chamber. She was focused on her rifle the entire time rather than on the conditions. When we completed our strings, she had five rounds that did not chamber out of 15! That is way too many! I told her she needed to think about full-length sizing with 0.002″ shoulder bump, or Controlled Full-length Sizing like I call it. I told her not to worry about losing accuracy. I told her that I full-length size all my rounds and asked if she noticed how smooth my bolt was and noticed my score. She said yes, they were both great!
Controlled Full-length Sizing Does NOT Harm Accuracy
I have found that Controlled Full-length Sizing does NOT hurt accuracy or shorten brass life. I find that I can focus much more on the conditions when I don’t have to think about chambering a round nor extracting it. It has become second nature. After firing, I keep my head welded to the stock, I open the bolt by placing my thumb on top of stock and rotating hand upwards. I reach in and retrieve spent case, place it back in ammo box, and pick up another loaded round and put in chamber. I verify conditions and when ready, I push the bolt in and close it with my index and middle finger.
With Controlled Full-length Sizing you “bump” the shoulder around .002″ for bolt guns.* Image courtesy Sinclair International which carries a variety of Full-length dies.
Whidden Full-Length Sizing Dies by AccurateShooter.com Editor
For proper Full-length sizing, you want a quality die that’s a very good match to your chamber. For our project rifles we usually turn to Whidden Gunworks which offers both bushing and non-bushing FL dies. And if you want the hot new option, check out Whidden’s patent-pending, click-adjustable FL-sizing die. This gives instant, precise control over shoulder bump. It works great.
*With gas guns, such as the AR10, you may want to increase shoulder bump to .003″ or more. With some benchrest cartridges, .0015″ bump may prove optimal. But .002″ is a good starting point.
Sinclair International has a helpful, three-part video series on Full-Length Sizing. The full-length sizing die performs multiple important functions: it resizes the case body, resizes the neck, and adjusts the headspace relative to the chamber (it can also eject the spent primer if that was not done previously).
While neck-sizing-only can work with moderate loads (for a couple firings), after repeated firings the case can stretch, becoming too tight to chamber easily. If you shoot cases with high-pressure, near-max loads, you will probably benefit from full-length sizing your cases each reloading cycle. When full-length sizing, you will want to move the shoulder back (i.e. “bump” the shoulder) to provide proper clearance in the chamber. A case that has grown too much will exhibit stiff bolt lift after firing and be hard to chamber if it is not FL-sized during the reloading process.
Sinclair recommends bumping cases .001-.002″ (one to two thousandths) for cases used in bolt-action target-shooting rifles, or .003-.005″ (three to five thousandths) for hunting rifles or semi-auto rifles. To move the shoulder back you screw the FL-sizing die downwards in the press once you’ve determined “just touching” on the shoulder. You don’t have to screw the die down very far! With a normal 14-pitch die, 1/8th turn (45° rotation) yields approximately 0.009″ of downward movement. So it doesn’t take much to add a few thousandths of bump.
Case Sizing Part One — Why We Full-Length Resize
Case Sizing Part Two — How to Set Up Your Sizing Die
Case Sizing Part Three — How to Use a Bump Gauge
NOTE: These FLASH videos may not display on some mobile devices.
This article is part of Sinclair Int’l Step-By-Step Reloading Series. Most of the products mentioned in this article are sold through Sinclair’s webstore.
by Roy Hill, Brownells/Sinclair Copywriter
Making your own precision handloads is a meticulous journey with many steps, many important matters to consider, and many sets of measurements to calculate. For those who pursue the perfect group, the highest score, the really long accurate shot, the rewards more than outweigh the effort. Choosing the right cases, deburring the flash holes, making the primer pockets uniform, trimming the cases, and lubricating them are all familiar – and critical – steps along the journey. And now that your brass preparation is complete, you are at last ready to start running the cases through your press and fill them with primers, powder, and bullets. The very first die the brass encounters is the sizing die. You insert the case, work the press’s lever to return the case to its correct pre-fired dimensions – and the journey continues.
Lapua brass is so good that you’ll be tempted to just load and shoot, if you have a “no-turn” chamber. However, some minimal case prep will ensure more uniform neck tension. Keeping your neck tension very uniform allows more consistent bullet seating. That, in turn, usually yields better accuracy, and lower Extreme Spread and Standard Deviation (ES/SD). Lapua brass, particularly 6BR, 6.5×47, .243 Win and .308 Win comes from the factory with tighter-than-optimal necks. Before you seat bullets, at a minimum, you should inside chamfer the case mouths, after running an expander mandrel down the necks. The expander mandrels from both Sinclair Int’l and K&M will both leave the necks with enough neck tension (more than .001″) so you can then seat bullets without another operation. Put a bit of lube on the mandrel before running it down the necks — but remove any lube that gets inside the necks before seating bullets.
Both Sinclair and K&M Tools make a die body specifically to hold expander mandrels. The Sinclair version, is shown above. This $24.99 unit fits caliber-specific expander mandrels ($9.95) which measure approximately .001″ less than bullet diameter for each caliber. This is an updated “Gen II” design that completely captures the mandrel within the die so the mandrel cannot pull out. It also has an O-ring in the die cap that allows the mandrel to self-center within the case neck. Sinclair now offers three sizes of die bodies for expander mandrels: .17 -.310 Caliber (#849-011-715WS); .357 – .50 caliber (#749-008-843WS), and a special .50 Cal die body for large-diameter 50 BMG presses (#749-009-163WS, $49.99). All Generation II dies are machined from stainless steel and the standard diameter 7/8-14 dies include the Sinclair Stainless Steel Split Lock Ring.
Once you run the Sinclair expander mandrel down the necks of Lapua brass, after you account for brass spring-back, you’ll have about .002″ neck tension. This will make the process of seating bullets go much more smoothly, and you will also iron out any dents in the case mouths. Once the case mouths are all expanded, and uniformly round, then do your inside neck chamfering/deburring. The same expander mandrels can be used to “neck-up” smaller diameter brass, or prepare brass for neck-turning.
Forum member Mike Crawford adds: “These expanders can also reduce runout from offset seating. Prior to bullet seating, expand the sized necks to force thickness variance outward. With the Sinclair system, the necks will springback fine, and will not be pulled out of center. This leaves plenty of tension, and bullets seated more centered. I do this, even with turned necks, to get improved seating.”
Mandrels vs. Expander Balls on Decapping Rods
If you haven’t acquired an appropriate expander mandrel for your brass, but you DO have a full-length sizing die with an expander ball, this will also function to “iron out” the necks and reduce tension. However, using a die with an expander ball will work the necks more — since you first size them down, then the ball expands them up again. Typically (but not always), run-out is worse when using an expander ball vs. an expander mandrel.
Do you use bushings to size your case-necks? Are you assuming that your bushings are actually round on the inside, with a hole that’s centered-up properly? Well you may be in for an unpleasant surprise, based on what our friend Jim de Kort recently discovered. Jim was concerned about the run-out on his brass. His cases went into his bushing-equipped FL die pretty straight, but came out of the die with up to .004″ run-out. “What gives?”, Jim wondered. “Could the problem be the bushings themselves?”
To answer that question, Jim decided to examine his bushings. Using an Accuracy One Wheel-drive concentricity gauge, Jim checked out some of his neck bushings. What he discovered may surprise you…
Neck Bushing Flaws Revealed
Trust no one… — Jim de Kort
Jim writes: “I measured the concentricity of my 6BR rounds today. I noticed they went into the neck-bushing equipped full-length sizing die with <.001" deviation but came out with .003-.004". The culprit, it appears, was the bushing itself. Without it the cases stayed within .0005" to .001" deviation, so something was happening with the bushing.
One bushing had .00025" deviation on the outside, yet almost .003" on the inside, so it is crooked. But even when using a bushing that is within .001" I still get .003" runout after sizing. I repeated the same procedure for my 6x47 and got the same results. When using the bushing, concentricity suffers a lot."
Before we bash the bushing-makers, we must acknowledge that many different things can contribute to excessive run-out and/or mis-alignment of case-necks. We don’t have all the answers here, and Jim would be the first to say that some mysteries remain. Still, these are interesting results that give all precision hand-loaders something to think about.
Jim Borden also offers this tip: “Check the trueness of the face of the die cap. That has more to do with trueness than the bushing. Also check perpendicularity of hole in bushing to top surface. When I was making dies, the cap was made by threading and facing the threaded tenon in same setup.”
Editor’s Comment: Many people have great results with neck-bushing dies, but Jim isn’t the only fellow who has seen some very odd results. I personally employ honed, non-bushing dies for many of my chamberings. These non-bushing dies (with the necks honed for .002-.003″ neck tension) produce extremely straight ammo, with run-out consistently under .0015″.
The 6.5×47 Lapua necked down to 6mm is a popular wildcat. However, we’ve learned that, when necking down a 6.5×47 Lapua case to 6mm, simply running the brass into a 6-6.5×47 full-length sizer won’t give the best results. Reader “Fireball”, who has worked with both a 6-6.5×47 and a 22-6.5×47, offers this tip: “You don’t want to bring the 6.5mm case all the way down to 6mm in one step — it’s too big of a jump. First, to smooth entry, run a 6.5mm expander in the case mouth, and chamfer the outside of the case mouth — be sure to remove all burrs. Apply some lube to the neck. Then, if you have a .257 bushing, put that in a 6BR bushing neck die, and run the case up [for initial reduction].” Then, use your 6mm die for the final step.
Alternatively, you can use a Redding 6BR body die initially. The body die will funnel the neck down about half way. Body dies are pretty inexpensive ($29.99 at Grafs.com, Item #RED75317). After running the brass through the 6BR body die, then you can run the case into the Forster 6-6.5×47 Full-length sizing die. The Forster die is excellent — it sizes a no-turn neck just about perfectly, so long as you do an intermediate step first.”
Some of our readers have questioned how to set up their body dies or full-length sizing dies. Specifically, AFTER sizing, they wonder how much resistance they should feel when closing their bolt.
Forum member Preacher explains:
“A little resistance is a good, when it’s time for a big hammer it’s bad…. Keep your full-length die set up to just bump the shoulder back when they get a little too tight going into the chamber, and you’ll be good to go.”
To quantify what Preacher says, for starters, we suggest setting your body die, or full-length sizing die, to have .0015″ of “bump”. NOTE: This assumes that your die is a good match to your chamber. If your sizing or body die is too big at the base you could push the shoulder back .003″ and still have “sticky case” syndrome. Also, the .0015″ spec is for bolt guns. For AR15s you need to bump the shoulder of your cases .003″ – .005″, for enhanced reliability. For those who have never worked with a body die, bump die, or Full-length sizing die, to increase bump, you loosen lock-ring and screw the die in further (move die down relative to shell-holder). A small amount (just a few degrees) of die rotation can make a difference. To reduce bump you screw the die out (move die up). Re-set lock-ring to match changes in die up/down position.
That .0015″ is a good starting point, but some shooters prefer to refine this by feel. Forum member Chuckhunter notes: “To get a better feel, remove the firing pin from your bolt. This will give you the actual feel of the case without the resistance of the firing pin spring. I always do this when setting up my FL dies by feel. I lock the die in when there is just the very slightest resistance on the bolt and I mean very slight.” Chino69 concurs: “Remove the firing pin to get the proper feel. With no brass in the chamber, the bolt handle should drop down into its recess from the full-open position. Now insert a piece of fire-formed brass with the primer removed. The bolt handle should go to the mid-closed position, requiring an assist to cam home. Do this several times to familiarize yourself with the feel. This is how you want your dies to size your brass, to achieve minimal headspace and a nearly glove-like fit in your chamber.”
We caution that, no matter how well you have developed a “feel” for bolt-closing resistance, once you’ve worked out your die setting, you should always measure the actual amount of shoulder bump to ensure that you are not pushing the shoulder too far back. This is an important safety check. You can measure this using a comparator that attaches to your caliper jaws, or alternatively, use a sized pistol case with the primer removed. See Poor Man’s Headspace Gauge.
Gear Review by Boyd Allen
Just about everyone knows that Wilson and Redding make neck-sizing bushings. But few shooters seem to be aware that RCBS produces bushings. In fact, RCBS does make quality neck-sizing bushings, including very nice Tungsten Disulfide-coated bushings.
As a companion product for their Gold Medal bushing-style dies, RCBS produces its own line of sizing bushings, that have a couple of notable features. First, along with plain steel bushings, RCBS offers bushings with a distinctive, dark gray Tungsten Disulfide (WS2) anti-friction coating. Redding offers bushings in bare “white” steel or with a gold-colored Titanium-Nitride anti-friction coating. Wilson bushings are plain steel with a shiny silver finish. Though the Redding and Wilson plain steel bushings may look like stainless, remember that these un-coated bushings need to be kept oiled or they WILL rust. In normal use, you shouldn’t have to worry about rust on the Tungsten Disulfide-coated RCBS bushings.
Comparing coated bushings, Redding’s gold TiN-coated bushings look pretty, but the WS2 anti-friction coating on RCBS bushings seems to work as well. Tungsten Disulfide (WS2) has an extremely low coefficient of friction — 0.03 compared to 0.6 for Titanium Nitride. Accordingly, the RCBS WS2-coated bushings can work with minimal neck lubrication. When I actually sized necks with the RCBS WS2-coated bushings, the “smoothness” of the neck-sizing operation seemed on a par with other quality, coated bushings.
Another notable difference with the RCBS bushings (compared to other brands) is that RCBS stamps the bushing size onto the outside of the bushing, rather than on the top. RCBS puts the bushing diameter on a reduced-diameter band that runs around the circumference of each RCBS bushing. I think that this is a good idea because it eliminates the possibility that raised edges from the stamping itself might interfere with proper bushing alignment*. (Remember that the top of the bushing — where size marks are stamped by other bushing-makers — contacts the retaining cap in the die during sizing.) Putting the size marks on the outside also makes it easy to distinguish RCBS bushings from other bushing brands.
The other feature that I like is the shape of the entry chamfer on the bottom of the RCBS bushing. This chamfer is large and angular, rather than curved. This is only a guess, but I think that it may do a better job of letting the bushing align itself with the case as it is inserted into the die, and do a better job on brass from chambers that allow more neck expansion. (The picture shows the smaller chamfer at the top of the bushing.)
That about wraps it up, with the exception of one small point. While MidwayUSA has a wide selection of RCBS bushings, other retailers need to do a better job of stocking these bushings. I got mine from RCBS, but you may have trouble finding them in many online catalogs, or on dealers’ shelves. Hopefully this small review will help to increase awareness of RCBS bushings, and more retailers will carry them.
*As you probably know, stamping displaces metal, some of which is raised above the level of the surface that was stamped. Although it can be argued that shooters have gotten some pretty spectacular results in spite of any cocking of neck bushings caused by their being stamped on top, I am sure that a lot of us would prefer to have things as straight as they can be, and moving the stamping to a recessed band that runs around the outside of the bushing helps accomplish this.


 Whidden Full-Length Sizing Dies


 The 6.5×47 Lapua necked down to 6mm is a popular wildcat. However, we’ve learned that, when necking down a 6.5×47 Lapua case to 6mm, simply running the brass into a 6-6.5×47 full-length sizer won’t give the best results. Reader “Fireball”, who has worked with both a 6-6.5×47 and a 22-6.5×47, offers this tip: “You don’t want to bring the 6.5mm case all the way down to 6mm in one step — it’s too big of a jump. First, to smooth entry, run a 6.5mm expander in the case mouth, and chamfer the outside of the case mouth — be sure to remove all burrs. Apply some lube to the neck. Then, if you have a .257 bushing, put that in a 6BR bushing neck die, and run the case up [for initial reduction].” Then, use your 6mm die for the final step.
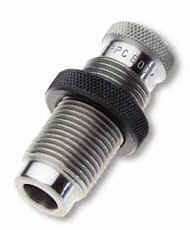 To quantify what Preacher says, for starters, we suggest setting your body die, or full-length sizing die, to have .0015″ of “bump”. NOTE: This assumes that your die is a good match to your chamber. If your sizing or body die is too big at the base you could push the shoulder back .003″ and still have “sticky case” syndrome. Also, the .0015″ spec is for bolt guns. For AR15s you need to bump the shoulder of your cases .003″ – .005″, for enhanced reliability. For those who have never worked with a body die, bump die, or Full-length sizing die, to increase bump, you loosen lock-ring and screw the die in further (move die down relative to shell-holder). A small amount (just a few degrees) of die rotation can make a difference. To reduce bump you screw the die out (move die up). Re-set lock-ring to match changes in die up/down position.
 Gear Review by Boyd Allen


