Eurooptic vortex burris nightforce sale


teslong borescope digital camera barrel monitor


As an Amazon Associate, this site earns a commission from Amazon sales.


April 3rd, 2022

Sunday GunDay: The Art of Stress-Free Pillar Bedding

richard franklin pillar bedding stress rifle mounting
Richard Franklin’s Step-by-Step Guide to Pillar Bedding

The Art of Stress-Free Stock Bedding

by Richard Franklin
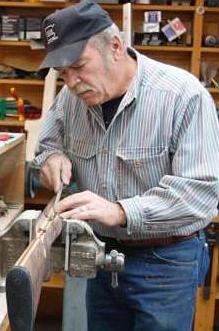
Richard Franklin prepared this article for our readers. Richard tells us: “I’m happy to do pillar-bedding work, but this is a job which many shooters can do themselves, with some practice and the right components. I do suggest you practice first on an old ‘beater stock’. When done right, you end up with a perfect fit of receiver to action, with no twisting, stretching, or compression forces being applied to the receiver through mis-alignment. That’s what I mean by ‘stress-free’.”

This article covers all the steps in the process. If you want to see more, Richard has a 200-minute DVD, Stress-Free Pillar Bedding, that shows the entire job–from start to finish–and contains many tips to help you achieve perfect results. Richard shows how to properly relieve the bedding area, how to make pillars, how to set up the barreled action, and how to test your work to ensure it is truly “stress-free”. In the DVD, Richard does a complete pillar bedding job on both a finished custom stock and a Remington stock. You can order the Pillar Bedding DVD by visiting the Instructional Video page on RichardsCustomRifles.com.

[Editor’s Note: This article was first published a decade ago. So, some of the listed bedding materials may have been enhanced slightly, or the product names may have changed. But the procedures described by Richard are still valid and still achieve great results.]

Before You Begin — Some Comments About Inletting
Richard told us: “You can’t do a great bedding job unless you start with really good inletting. Unfortunately, many ‘inletted stocks’ really require quite a lot of work to get the inletting right. You cannot inlet a stock 100% correctly just using a stock duplicator. That’s one reason I do bedding jobs only on the stocks I make. If the inletting isn’t right, you can have a myriad of problems–such as the holes for the action bolts being in the wrong place, or the stock not having enough clearance for the barrel or the trigger hanger. So, BEFORE you start your bedding job, make sure the inletting is really right. Don’t assume the inletting is really complete (and correct) just because the manufacturer claims that to be the case. This applies to both wood and fiberglass stocks.”

Pillars For Bedding
The BAT action featured in this article has three pillars, with the middle pillar sitting under the front of the trigger guard, and the third pillar at the rear of the guard. More typical installations will use two pillars. For either system, the installation procedures are the same.

In Photo 1, you will see part A, the bottom part of the front pillar which we call the “escutcheon”. Part B, which is a 1/4″ X 28 action bolt that is slightly longer than part C which is the top part of the front pillar. The two parts of the front pillar were machined as one piece and then the escutcheon was cut off just below the shoulder that is inside. This shoulder is for the head of the action bolt to tighten up against. I’ve found that a two-piece pillar has many advantages, particularly for hunting stocks where the underside of the stock is angled (i.e. not parallel with bore axis). I make the pillars I use, machining them from cut-off stainless barrel stubs.

Part D is a 1/4″ X 28 hex-head bolt with the head turned down to 1/4″ which permits the insertion of a hex-head driver to tighten and remove the bolt. This headless bolt will be inserted in the rear tang hole of the action and part E, the rear pillar will be placed on it.

STEP ONE — Getting Started
Photo 2 shows tape on recoil lug, pillars bolted in place and putty in voids. Release agent is polished to a very thin layer. The top half of the front pillar (part C) is placed on the action receiver ring and the bolt (part B) is inserted thru the pillar and tightened against the action. This bolt must have a tapered head on the underside so that, when it is tightened, it will center the top half of the front pillar around the action bolt hole. (This is also true for the middle pillar if the action has a middle bolt.)

PHOTO 2
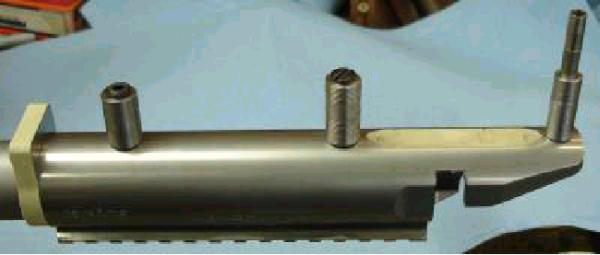
The headless bolt is inserted into the rear tang hole of the action and the rear pillar is slipped down on it. You will notice in Photo 3, below, that the pillars have the hole drilled oversize so that a 1/4″ bolt has a little space around it. (I like to drill the pillars with a .260″ bit inside.)

The above scenario is the placement of the pillars prior to applying the bedding compound, which I call “Mud”. Devcon 10110 is my bedding compound of choice (and the only product I use) as the mud must set up as hard as concrete and most other epoxies will not do this. Also Devcon shrinks very little if at all. My comments on other bedding compounds are in the sidebar below.

STEP TWO — Relieving the Stock Before Bedding
Relieving the right amount of wood in the area to be bedded–not too much, not too little–is very important to achieving the best results. You need to create some space for the mud to fill around the action, but you don’t want to alter the inletting too much.

PHOTO 3
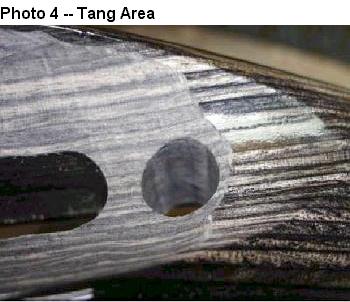
Photo 3 shows the wood removed from the inside of the stock bedding area. Remove enough wood everywhere except along the top sides of the stock to allow at least 1/8″ to 3/16″ of room for the mud. Remove 1/4″ of wood behind the recoil lug. I like about .012″ clearance on the top inside edges.

NOTE: Leave a small area of original wood just behind the rear tang bolt hole as this wood will determine the elevation of the bedded action in the stock.

Photo 4 shows the tang area of the stock. Note the elevation wood left at tang. Be sure to leave some original wood for the action tang to sit on. This is very important.

STEP THREE — Wrapping Tape on the Barrel
Photo 5 shows the barreled action in the vise. It also shows black electrical tape wrapped around the barrel just behind the front of the stock forearm. Wrap enough tape to hold the front of the barreled action at the proper elevation in the stock.

The idea is that the barreled action does not touch anything except the bit of original “elevation” wood left at the rear tang (behind the pillar) and the forearm resting on the electrical tape. This is very important to obtain 100% stress-free bedding. You want the bore of the barrel to be parallel with the top edge of the stock so wrap just the right amount of tape to ensure this. The tape also centers the barrel in the fore-arm. Done right, the barreled action will be contacting just at two points (tape in front, tang in rear) and the barrel’s bore will be parallel with the top of the fore-arm’s sidewalls.

Comments on Alternative Components and Methods

Bedding Compounds
There are at least a dozen popular products used for rifle bedding. At one time or another, Richard has tried most of them. Devcon 10110 “Plastic Steel® Putty” is the only compound he currently uses and the only product he endorses whole-heartedly. “The Devcon 10110 is expensive, but it is the best bedding product I’ve found. First, it sets up extremely hard. That is very important to the performance and longevity of the bedding job. You want it to get it as hard as concrete. You need it really hard so when you tension the action screws it doesn’t squish down or migrate. Some of the brown stuff other folks use is way too soft. Marine Tex is also too soft. Many products will shrink. Any compound that shrinks is useless in my book. Devcon has absolutely near-zero shrinkage. Acra-Glass I keep in my shop, as it is useful for stock repairs. However I would never bed with Acra-Glass.

Devcon also has just the right consistency — about that of peanut butter. So, it is easy to apply but not runny. It stays in place when I turn the stock upside-down. Devcon is also relatively forgiving to mix–the proportions of the two elements are not super-critical like some other products. I know Marine-Tex can give real problems if you don’t use just the right amount of catalyst. Overall, Devcon does everything you need it to do, and does it exceptionally well. Some other smiths think it’s too expensive–and yes I’ll use $10-$15 worth of Devcon in doing a typical bedding job. But I think the customer deserves the best possible, longest-lasting bedding, and that means Devcon. Among the products I’ve used, Bisonite is my second choice, but I think Devcon will last longer.”

Release Compounds
Richard tells us: “People use all sorts of release compounds and I’ve tried many. I strongly prefer Kiwi shoe polish (neutral color). With the Kiwi, I’ve never had an action stick in the stock. It goes on easy, and you can use a paper towel to polish it very thin and that’s a big benefit. If you have a thin layer of release compound the finished bedding is that much closer to the exact dimensions of the action. I’ve heard of guys using PAM spray. I don’t trust that stuff. The Brownells release compound goes on too thick. Car wax is not a great choice either because it can separate and it gets dusty as it dries. Go with the Kiwi stuff–a little can will last for years. But be sure to use the clear (neutral) kind so you don’t stain your stock or action.”

Clamping and Tension Materials
Read a few articles on pillar bedding and you’ll see many different systems for holding the barreled action to the stock when the bedding compound cures. We’ve seen surgical tubing used, or strips of bicycle inner tube. Some writers have even advocated using mechanical clamps (a bad idea). Richard has tried various tensioning set-ups over the years, and electrical tape is his strong recommendation: “First, let me say it’s crazy to use a C-Clamp or something like that. The clamp will cause a point-load where it attaches and that is just the opposite of what you want.”

Richard has tried many materials: “Surgical tubing I’ve found to be cumbersome to use, and it tends to loosen up during the curing time. Same thing with strips of inner tube. That’s bad news because any loosening or stretching will allow the action to shift. It’s absolutely critical that the action not move one bit while the bedding cures. Once you’ve bedded the action if it dries the wrong way you’ve screwed everything up. Using the electrical tape that isn’t an issue. The tape goes on very tight, doesn’t stretch (if you use enough turns) and I have no fears that the action will shift while curing. Just follow my advice and put a strip of paper towel under the electrical tape so you don’t mar the finish of the barrel or stock.”

Contoured vs. Straight (Flat-top) Pillars
Many factory rifles come with contoured (radiused) pillars, and many gunsmiths prefer to use these. The idea is that the contour provides a better fit with the bottom of round actions. Richard has tried contoured pillars and doesn’t recommend them. He explains: “Most of the contoured pillars don’t really match the contour of the action anyway. And every action is slightly different. Even some of the most favored custom actions aren’t exactly the same from one unit to another. What happens when the contour or curve of the pillar is too narrow is that the action touches just the extended top edges of the pillar (left and right of center). That is not as solid as when the action contacts the center of the pillar where the action screw runs. (And those sharp sides of curved pillars tend to point-load and dig into your action.) Also I feel you get a better match of the Devcon to the action with flat-top pillars. What you want is the bedding compound to cradle the action all the way around. I’ve found this works best with flat-top pillars and a very strong, hard compound like Devcon that doesn’t squish down or shrink.”

STEP FOUR–Applying Release Agent and Plumbers Putty
Failure to apply release agent (and putty) properly is a recipe for disaster. One of the most common mistakes novices make when doing bedding jobs is locking in the action. This happens by not covering enough of the action with release agent, not taping off the lug correctly, and not adding putty to plug any slots or spaces into which the mud can migrate. Remember, you are doing a bedding job, not a glue-in job! When you’ve completed the process, you want to be able to pop the action loose without difficulty.

PHOTO 6 — Showing putty and release agent before polishing, tape on lug.

First, remove the trigger, bolt release and spring, and anything else from the bottom of the action. Then, clean the action and recoil lug area with brake cleaner or parts degreaser. Apply plumbers’ putty to any hole or crevice that you don’t want the mud to get into. Wrap two layers of masking tape on the outside edges of the lug and trim with a razor blade. Do not apply tape to the front or back of the lug. (Apply tape to the front of the lug only if you do not have a way to remove the hardened mud). Let this tape go right around to the top of the action. Wipe the putty smooth with the brake parts cleaner. I highly recommend neutral Kiwi shoe polish as release agent. Apply liberally to the entire action using a Q-tip to get in around the lug (including front and rear of lug), bolt handle slot and loading port edges. Let the shoe polish dry for 10 minutes and then use a paper towel and buff and polish the release agent as thin as possible. You want any release agent to be as thin as possible so as to let the action set as close as possible to your bedding. You also want to apply release agent to the rear (headless) bolt.

STEP FIVE — Installing the Pillars
Now is the time to place the pillars. Screw the top half of the front pillar and middle pillar (if the action has a middle bolt) to the action with the tapered head bolt. Screw in the headless bolt and slip the pillar down around it. Apply release agent to the area of the guard around the rear bolt hole (and to the rear headless bolt). Apply top and bottom and from the inside out. We don’t want the guard stuck to the bedding. (This guard sits on the bolt head that is secures the middle pillar to the action. We need the guard in place to align the action in the stock.)

Install the trigger guard back in place on the stock as the guard is used to align the barreled action in the stock. Now is the time to make a trial run to ensure that everything fits properly. Slip the upside-down stock down over the pillars with the headless bolt coming up through the rear bolt hole in the guard. See Photo 7. Ensure that the stock is resting on two spots only–the tape you’ve wrapped around the barrel, and the little bit of wood you left behind the tang bolt. Ensure there is room everywhere around the action to accept the mud. The barreled action cannot be touching anywhere except the tape and the tang. Not even on the top edges of the stock.

STEP SIX — Applying the Mud
Mix up a generous portion of the Devcon 10110 Mud and apply to the pillars as shown in Photo 8. Do not get mud on top of the bolt head and front pillar(s). Do apply a little mud on top of the rear pillar and if a little gets on the headless bolt that is OK as you should have applied release agent to this bolt. This will properly bed the guard to the rear pillar. The front bolt that holds the front pillar need not have release agent applied to it. Note, as shown in Photo 8, each pillar has a bolt inserted.

PHOTO 8 — Showing mud on the pillars.

You cannot use too much mud as the hydraulic action of pressing the stock down on the barreled action is going to squeeze the mud everywhere it need to go and the excess will be forced out (falling on the floor for you to step in).

PHOTO 9 — Showing mud applied to stock.

Now apply the mud very generously to the stock as shown in Photo 9 above. If I am not bedding any portion of the barrel shank I will only apply a little mud behind the recoil lug area.

STEP SEVEN — Assembly and Compression
Now slip the upside-down stock down over the pillars as you did in the trial run. Ensure the stock is bottomed-out on the tape at the front end. Squeeze slowly, pressing the rear of the stock down and squeeze out the excess mud. After pressing the stock down, the action area should appear as in Photo 10. During the compression stage, stop a few times and use Q-tips to clean off the excess mud that is squeezing out between action and stock.

PHOTO 10 — Rifle right side up, with the mud squeezed out.
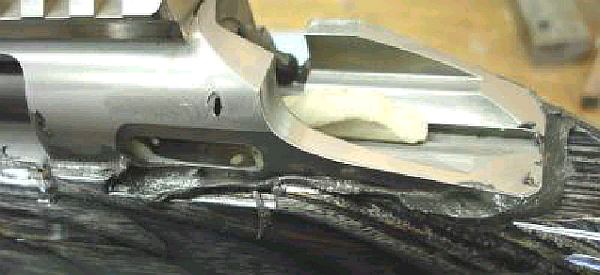
Cut a piece of paper towel about two inches wide by the length of the towel. Lay this on the stock 1.5″ in front of the action. Wrap black electrical tape around the stock and barrel, running the tape over the strip of paper towel. (The towel is to protect the stock finish.) Squeeze the stock and action together while taking wraps with the tape. If you have a skinny, pencil-thin barrel don’t apply too much pressure with the tape as the weak barrel can be curved slightly. That can cause the barrel to touch the stock when everything is done (not good). If you have a big, fat barrel don’t worry about deflection. With a heavy contour tube, whatever bend you put in the barrel will spring back when the tape is removed.

STEP EIGHT — Mud Removal and Curing Time
Using Q-tips, clean up very thoroughly around the front pillar and the bolt head. You need to be able to unscrew the bolt to separate the stock from the rifle and you do not want the bedding protruding above the pillar. (The escutcheon still has to have room to fit in there without touching the end of the pillar.) Before turning the rifle right-side-up, reach under with a few Q-tips and clean off the mud hanging there as it may get inside the action.

Turn the rifle right side up in the vise and, using lots of Q-tips, clean all of the mud off of everything. Remove the excess mud every place you can see it. Use a paper towel to wipe the stock as there could be some invisible mud hiding somewhere on the stock or action. After using Q-tips, I sometimes use Butch’s Bore Shine solvent. It does a good job of removing the mud residue (other solvents with ammonia would work well also).

When you’ve cleaned off all the excess mud. It’s time to let the bedding cure. Lie the rifle upside down with the weight on the rear of the action and about where the tape is on the barrel. Let the gun sit for about 8 to 10 hours or overnight. IMPORTANT, you should remove ALL the excess mud around the action before you let the rifle cure for this time period. Photo 11 shows the rifle upside down, but you want to have the excess mud cleaned off before curing.

PHOTO 11 — Position for curing the mud–but excess should be removed first.

IMPORTANT: Avoiding Mechanical Lock During Bedding
One major problem that can arise when novices bed their own stocks is mechanical lock. This occurs when some part of the action or barrel is trapped below the bedding. Effectively, the barreled action becomes anchored in the stock and can be very difficult to remove. Richard says avoiding mechanical lock is not that difficult, but you must be careful: “Locks usually occur because the bedding is applied too far up. Never, and I repeat, never, bed above the centerline of the action (bore axis), or the widest point of the action (whichever is lower). You need to leave the edge of the bedding at least 1/16″ below the centerline of the action and centerline of the bore axis. I normally leave about 1/8th of vertical clearance. If the widest point of the action is BELOW the bore axis, you have to keep the bedding below that. The other thing to watch out for are projections and holes in the sides of the action. All holes must be filled with plumbers’ putty. All projections–anything that sticks out–need to be removed. If some little part or fixture sticks out, even if you tape it over, and it is below the top of the bedding, it can lock the action in.”

STEP NINE — Popping the Barreled Action Loose
After the required curing time, you need to remove the barreled action to check the beading and fit the pillar escutcheons. If you cleaned away all the excess mud and there are no mechanical locks in the bedding, it should not be difficult to pop the stock loose. You can see how this is done in the short Video Clip from my DVD (Right-Click and “Save As” to download). Here is the procedure.

After the mud has set up and hardened, clamp the barrel in a vise with the gun upside down. The vise should camp just ahead of the forearm. Remove the bolt in the front pillar (and middle pillar) and the headless bolt. Remove the trigger guard.
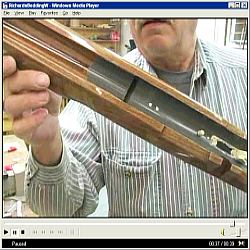
With the left hand, apply upward pressure to the forearm and then with the right hand slap upward on the forearm. You will hear a crack like you might have busted the stock. Not to worry, that is just the bedding popping free. Now wiggle the stock up off the recoil lug as it is the only thing holding the stock down. [Editors Note: Here’s an older video clip that shows Richard “popping” the stock loose from the barreled action. CLICK HERE to download a 6 Meg Windows media file, or click these links for MPEG (2.3 megs), and Real Media (2.3 megs) versions.]

Remove the tape from the barrel and recoil lug and clean up the putty. Wipe the action down with brake parts cleaner. On the stock, remove the squeezed mud that went into the trigger and bolt release area. Relieve the lug area on both sides and the front. Lay the stock back on the barreled action. Be sure to check under the trigger guard to see if any cleanup of mud is required there. Then re-install the guard and insert the rear action bolt just snug (not tight).

STEP TEN — Installing the Pillar Escutcheons
Pillar escutcheons are a nice extra feature I add to my custom rifles. These are stainless, made from barrel stubs. The two-part front pillar is originally machined as one piece. I believe front pillars with the escutcheons (or outer ring) offer advantages over conventional pillars in terms of strength and alignment.

Before you actually install the escutcheons, you need to do some fit testing. Have a trial run at setting the front bolt to the proper length by placing the escutcheon in the hole and screwing in the bolt. Loosen off the back bolt to see if the bolt that is thru the escutcheon is holding the stock firmly in place. Retighten the rear bolt a wee bit.

Apply release agent to the front bolt, being careful to not get it on the escutcheon. Insert an Allen wrench into the head of the bolt so you can hold it easily. Slip the escutcheon over the bolt. Apply mud to the escutcheon and around the bolt. Photo 12 shows how much mud to put on the escutcheon. You want enough so when you tighten the bolt it will force the mud everywhere it needs to go, even though a bit will be squeezed in around the bolt. Photo 13 shows how the escutcheon should look installed, with the bolt tightened. Photo 14 (below right) shows the escutcheon after the mud has been removed–be sure to remove the excess while the Devcon is still soft.

PHOTOS 13 and 14 — Showing escutcheon before (left) and after mud clean-up (right).

Clean up the excess mud with Q-tips and paper towels. You need to do this before the mud hardens. I used Butch’s Bore Shine as a solvent, once I have removed the excess mud with Q-tips and towels. When the escutcheons are cleaned up, you’ve finished working with the mud. Now let the stock lay for another 8 hours or so to allow the escutcheons to become.

After the mud has hardened around the escutcheon clamp the rifle back in the vise. Remove the back tang bolt first then the front bolt that is through the escutcheon. The bolt will be tight in the hole and sometimes may need to be punched out with a punch unless it has threads right to the head in which case it will screw out. Go in the hole with a .260” bit and clean the mud out of the front pillar. Let the bedding harden for a day or two and then torque the bolts with about 35 inch-lbs of torque on the front bolt and maybe 25 on the tang bolt.

The finished result is an even coat of Devcon with no voids, air pockets, fissures, and perfect stress-free support for the action, as shown in Photo 15.

PHOTO 15 — Completed pillar-bedding job

Photos and text Copyright © 2010 Richard Franklin and AccurateShooter.com, All Rights Reserved.
No reproduction without advanced permission in writing.

Topics: Gunstock, stocks, stocking, laminated stock, wood, pillar bedding, piller, pillars, aluminum pillar, Devcon, putty, stockmaking, Richard Franklin, Richards custom rifles, 10110 Devcon, Acra glass, Brownells, glass bedding, fiberglass, stock bedding, bed, escutcheon, Butch’s Bore Shine.

Permalink - Videos, Gunsmithing, Hot Deals No Comments »
May 22nd, 2021

Stunning, Custom Wood Stocks — Works of Art from Poland

Polish Łukasz Pietruszka rifle stock video

There’s a chap in Poland named Łukasz Pietruszka, who is a bonafide “Wizard of Wood”. Lukasz handcrafts unique custom stocks, selling them through his LP Gunstocks company. Many of his most eye-catching stocks are for airguns (particularly Field Target rifles), but he also produces fine stocks for rimfire and centerfire hunting rifles. Lukasz is a master carver who includes exquisite details on many of his stocks. Some of these designs, crafted from exotic hardwoods, raise stock-crafting to an art form.

Łukasz Pietruszka rifle stock wood turkish walnut
Check out the figure on this Turkish Walnut stock by Łukasz Pietruszka.

You can see a variety of Lukasz’s stocks in a video sampler. If you’re a fan of fine wood, you’ll love this video. So pull up a chair, grab your favorite beverage, and enjoy this 16-minute video interlude.

Polish rifle stock videoWatch Video in High Definition
We recommend you view this video in high definition, in wide screen format. This will let you seen the rich details of the wood. To view HIGH-DEF, start the video, then click on the gear-shaped icon at the lower right-hand corner of the video frame (located just to the right of the clock icon). Then select 720P or 1080P from the pop-up menu. (1080P is the highest resolution.) Now select theater mode or full-screen mode using the small icons on the lower right of the frame.

Radical ‘Shockwave’ from LP Gunstocks
Here is a truly amazing bit of craftmanship. The images below show a one-of-a-kind Shockwave stock created by Łukasz for a Steyr Field Target air rifle. Over the top? Perhaps… but you have to admire the imaginative design and exquisite worksmanship.

Polish Łukasz Pietruszka rifle stock video

Polish Łukasz Pietruszka rifle stock video

Polish Łukasz Pietruszka rifle stock video

Łukasz Pietruszka rifle stock wood turkish walnut laminate

Current Production with Laminated Wood, Many Colors
Łukasz Pietruszka also creates more affordable gunstocks with laminated, colored woods. See recent creations on the LP Gunstocks Facebook page. CLICK HERE for video on Facebook showing many stocks.

Łukasz Pietruszka rifle stock wood turkish walnut laminate

Permalink - Videos, Gear Review, Gunsmithing No Comments »
December 19th, 2015

Hands of a Master Craftsman — Doan Trevor

Doan Trevor

Doan Trevor is a master gunsmith and stock-maker who works in the old style. He still hand-crafts stocks from start to finish, and does all the metal-work on the custom rifles he builds. Starting with highly-figured woods, Doan carves and shapes his stocks largely by hand, with meticulous attention to detail. Each rifle he builds is optimized for its intended discipline, and custom-fitted for the customer.

Doan Trevor Customer Gunsmithing

With the help of his talented wife Sue (who does the photography and builds the web pages), Doan has created a wonderful website, DoanTrevor.com, that is a feast for the eyes. You can see beautiful wood-stocked rifles being hand-crafted. Doan also illustrates how he creates custom metal parts, and how he beds barreled actions into the finished stocks.

Doan Trevor Customer Gunsmithing

Doan Trevor Customer Gunsmithing

Set aside a few minutes and visit Doan’s website. Be sure to click on the site’s secondary pages: Rifle Building, Woodworking, and Metalworking. You’ll find dozens of high-quality photos and fascinating information on gun-building.

Doan Trevor Customer Gunsmithing

For more information, visit DoanTrevor.com, or call (505) 890-0368, 10am-5pm M-F.

Doan Trevor RifleBuilding
4119 Lanceleaf Ct NW
Albuquerque, NM 87114
505-890-0368

Permalink - Articles, Gunsmithing 2 Comments »
December 12th, 2015

Polish Master Creates Amazing Wood Stocks

Polish Łukasz Pietruszka rifle stock video

There’s a chap in Poland named Łukasz Pietruszka, who is a bonafide “Wizard of Wood”. Lukasz handcrafts unique custom stocks, selling them through his LP Gunstocks company. Many of his most eye-catching stocks are for airguns (particularly Field Target rifles), but he also produces fine stocks for rimfire and centerfire hunting rifles. Lukasz is a master carver who includes exquisite details on many of his stocks. Some of these designs, crafted from exotic hardwoods, raise stock-crafting to an art form.

Łukasz Pietruszka rifle stock wood turkish walnut
Check out the figure on this Turkish Walnut stock by Łukasz Pietruszka.

You can see a variety of Lukasz’s stocks in a video sampler. If you’re a fan of fine wood, you’ll love this video. So pull up a chair, grab your favorite beverage, and enjoy this 16-minute video interlude.

Polish rifle stock videoWatch Video in High Definition
NOTE: We recommend you view this video in high definition, in wide screen format. To do this, start the video, then click on the gear-shaped icon at the lower right-hand corner of the video frame (it’s located just to the right of the clock icon). If you have a fast internet connection, select 720P or 1080P from the pop-up menu. (1080P is the highest resolution.) Now select theater mode or full-screen mode using the small icons on the lower right of the frame.

Radical ‘Shockwave’ from LP Gunstocks
Here is a truly amazing bit of craftmanship. The images below show a one-of-a-kind Shockwave stock created by Łukasz for a Steyr Field Target air rifle. Over the top? Perhaps… but you have to admire the imaginative design and exquisite worksmanship.

Polish Łukasz Pietruszka rifle stock video

Polish Łukasz Pietruszka rifle stock video

Polish Łukasz Pietruszka rifle stock video

Video find by Boyd Allen. We welcome reader submissions.
Permalink - Videos, Gunsmithing No Comments »
November 6th, 2015

New Speedy-Designed Competition Stocks from Shurley Brothers

Shurley Brothers ARK Speedy Gonzalez stock competition F-Class Benchrest

Benchrest Hall-of-Famer Thomas “Speedy” Gonzalez has teamed up with the Shurley Brothers on a new ARK series of wood laminate competition stocks. Speedy has combined the best features of various popular F-Class and Long-range Benchrest stocks into new designs to be produced by Shurley Brothers Custom in Austin, Texas. These stocks should be very straight and geometrically correct as they will be crafted on the Shurley Brothers’ new CNC mills. These stocks will be made with new-generation precision technology, not old school duplicating machines.

Initially two models will be offered: the “Hand of God” (HOG) and the “Spear of Destiny” (SOD). Both are designed for multiple shooting disciplines, so they should work well both for benchrest and for prone F-Open shooting. (FWIW, John Myers used a Speedy-crafted stock to win the 2015 Mid-Range National Championship). The forearm is 76mm (2.99″) to comply with F-Open limits. A wide variety of options will be available including adjustable Cheek Piece, adjustable length of pull, carbon fiber inserts, and exotic woods.

Shurley Brothers ARK Speedy Gonzalez stock competition F-Class Benchrest

We like many aspects of the new stocks. First, the front of the stock is low profile, placing the barrel close to the bags for better tracking (and less hop). However, a deeper (top to bottom) section extends forward of the action — this is important. We have seen some low-profile stocks that suffer from forearm flex/hinging because they don’t leave enough wood under the action area. Speedy’s design eliminates this problem. Another nice feature of this stock is the subtle curve from the back of the action to the buttpad mount. Speedy calls this the “scooped cheek”. This allows the “driver” to shoot without face contact if he prefers, but it also allows for a higher buttpad position — which is useful when shooting heavy recoiling chamberings such as the .300 WSM.

Note how the comb area has a curve to provide clearance. For those shooters who prefer to have face contact on the gun, an adjustable Cheek Piece is offered.
Shurley Brothers ARK Speedy Gonzalez stock competition F-Class Benchrest

Shurley Brothers Custom says these new ARK stocks are fully customizable for competition shooters with optional carbon fiber, adjustable R.A.D. systems, and many other features. The stocks, uninletted, will run $750.00. CNC-inletting (for action of your choice) is an additional $100.00. Here are some of the many available options:

— Pillar Bed and Inlet: $425.00
— Custom Wood Upgrade (Price Dependent On Wood): $100.00 – $500.00
— Full-length Carbon Fiber Stringers: $200.00
— Cheek Piece Addition: $100.00
— Cooling Ports (Buick Vents): $60.00
— R.A.D. System #2A: $335.00 (plus $100.00 to install)
— 3-Way Butt Plate: Call for Price
— Adjustable Neodymium Magnetic Cheek Piece: Call for Price
— Install Neodymium Magnetic Cheek Piece: $150.00
— Stock Finish & Clear Coat: $350.00
— Carbon Fiber Forearm Tunnel: $300.00

The underside of the forearm is relieved in the center, leaving twin outboard rails. This helps stabilize the rifle and aids tracking. (A conventional, flat forearm without rails tends to rock if there is any hump in the middle of the sandbag). Between the rails is a carbon-fiber stiffening insert.

Shurley Brothers ARK Speedy Gonzalez stock competition F-Class Benchrest

Permalink Gear Review, New Product 4 Comments »
June 17th, 2015

Custom Oak Cartridge Caddies with Timer from Nando

Ammo Ammunition Caddy WSM 6mmBR Oak ammo holder custom timer

Retired engineer Alexander Müller (aka Nando-AS on our Forum) produces handsome oak ammo caddies in his home workshop. Cartridge-specific, the caddy’s holes are sized for specific casehead diameters, so your cartridges go in and out easily. There are also through-holes, allowing loaded cartridges to be placed nose-down if you wish.

To order, visit this Forum Page: http://forum.accurateshooter.com/index.php?topic=3875396

(more…)

Permalink Gear Review, Reloading 2 Comments »
December 24th, 2014

Labors of Love — Doan Trevor, Master Gun-Builder

We recently featured the “Hornady Number One”, a showcase rifle featureing a CAD-designed, machine-cut stock. While many viewers liked that one-of-a-kind Hornady rifle, others lamented the absence of hand-shaped curves on the Hornady’s angular stock. So, for fans of curvy, hand-crafted rifles, we’re presenting this homage to a truly great stock-maker, Doan Trevor, an artist in the old style.

Doan Trevor is a master gunsmith and stock-maker who works in the old style. He still hand-crafts stocks from start to finish, and does all the metal-work on the custom rifles he builds. Starting with highly-figured woods, Doan carves and shapes his stocks largely by hand, with meticulous attention to detail. Each rifle he builds is optimized for its intended discipline, and custom-fitted for the customer.

Doan Trevor

Doan Trevor Customer Gunsmithing

With the help of his talented wife Sue (who does the photography and builds the web pages), Doan has created a wonderful website, DoanTrevor.com, that is a feast for the eyes. You can see beautiful wood-stocked rifles being hand-crafted. Doan also illustrates how he creates custom metal parts, and how he beds barreled actions into the finished stocks.

Doan Trevor Customer Gunsmithing

Doan Trevor Customer Gunsmithing

Set aside a few minutes and visit Doan’s website. Be sure to click on the site’s secondary pages: Rifle Building, Woodworking, and Metalworking. You’ll find dozens of high-quality photos and fascinating information on gun-building.

Doan Trevor Customer Gunsmithing

For more information, visit DoanTrevor.com, or call (505) 890-0368, 10am-5pm M-F.

Doan Trevor RifleBuilding
4119 Lanceleaf Ct NW
Albuquerque, NM 87114
505-890-0368

Permalink Gunsmithing, News 3 Comments »
June 28th, 2014

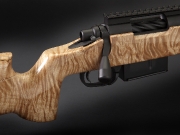
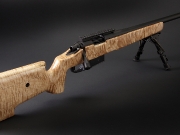
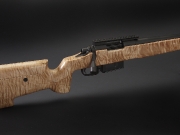
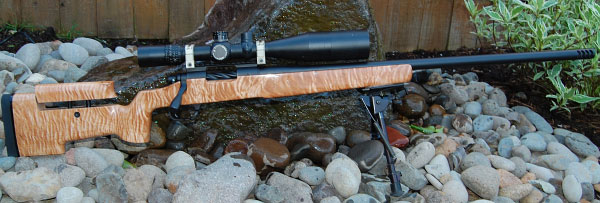
Cody’s ‘Glam-Tactical’ Curly Maple Precision Field Rifle by Russo

Forum member Cody H. (aka “Willys46″) provided this report on his new Russo-stocked 6-6.5×47 Rifle.

Joel Russo out of Harrisburg, PA is taking modern technology and new stock designs and mating them with Old World materials and craftsmanship. The result: rifles that shoot true and look seriously sharp. Russo got his start making laminated wood stocks for budget-minded tactical rifle shooters with his popular A5-L design. Motivated by his passion for woodworking and a mindset for detail, Russo has shifted his focus from the run-of-the-mill laminates to create shootable works of art in some of the most highly figured, beautiful, exotic and domestic woods. Russo has come to feel that if he as a craftsman is going to spend precious time creating something out of wood, it should be for something worthy of his personal investment.

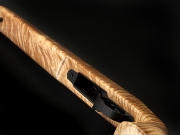
Take, for example, a recent Russo stock that started its life as a highly figured piece of Curly Maple harvested in the Pacific Northwest. After CNC inletting, profiling, pillar- and glass-bedding, the stock was meticulously finished to showcase the wood’s beauty. This stunning stock was commissioned for my new 6-6.5×47 Precision Field Rifle [Editor: it’s just too pretty to be labeled ‘tactical’]. Have a look….


Rifle Specifications: Remington 700 short action with R&D Precision bottom metal. Bartlein Barrel (Sendero Contour). Joel Russo Stock in A3-5 pattern (A5 buttstock with A3 fore-end). Barrel chambering/fitting (6-6.5X47 Lapua) by Steve Kostanich.

How does it shoot? Cody reports: “I’ve had the rifle two weeks, and sent about 200 rounds down range so far. I could not be happier with the performance of the whole package. The 6-6.5×47 Lapua chambering really makes it a pleasure to shoot with its low recoil and accuracy potential. With the fitted muzzle brake, recoil is minimal. The ballistics of 105gr Berger hybrids at 3100 fps make the wind at 600 yards very manageable. As for the stock, the slimmer fore-end holds the bipod much nicer than my old A5L. The lighter weight also makes it more maneuverable in different shooting positions.”


NOTE: Hi-Rez Gallery images may take some time to load. Be patient — it’s worth the wait.


Cody Talks About His Rifle
and Joel Russo’s Work

Click Play Button to Hear Audio


Like any artist, Russo carefully considers where to begin. Deciding where the stock will be cut out of the wood blank can take days. He must determine where the forend and pistol grip will lay to be sure the true beauty of the wood will transfer to the stock design. After Russo cuts the rough pattern out of the blank, it’s off to the CNC mill for barrel and action inletting. The stock is almost completely inletted but still in the rough; enough material remains for Russo to hand-blend the wood and metal for that all-important fit and finish. Then it’s off to the duplicator, which cuts out the stock in the specified pattern.

With inletting completed, the action is pillar- and glass-bedded, then readied for final shaping. The tang/pistol grip area demands careful work for a perfect look and feel. It takes hours with files and rasps to get everything just right. Once material is removed it’s a done deal so patience with the tools is a must. Russo is a very painstaking woodworker, and as an artisan and champion shooter himself, he wants the tang to melt into the pistol grip for the perfect look and feel.

Once the major wood removal is complete, Russo begins surface sanding. To make the finish come out smooth and flat, a sanding block is a must. With the density change in figured wood, some sections will be softer and so material is removed more quickly, making for a very wavy finish. When Russo is satisfied with the final sanding he starts the finishing process.

Russo generally does a hand-rubbed TUNG Oil finish. Since this stock is for a tactical competition rifle, and I wanted to preserve the natural blond color of the Maple, a clear coat finish was in order. In all fairness the maple would look even better with a darker oil finish, which allows the deep grain and figure to come out, creating an almost 3-D effect. A hand rubbed oil finish can take months to be applied properly. The shorter application time was another advantage for this particular build.

Clear coat maintains the original color of the wood while being comparatively easy to apply with basic paint-spraying tools. If you scratch the surface, it’s a simple matter to buff it out just like you would a car door ding. After a numerous coats are applied then it is wet-sanded just like the finish on a classic hot rod. The finer the sandpaper grit, the shiner the finish. For the maple stock project, a higher-than-typical gloss finish was selected because the wood kept looking better the shiner it got. Want it shinier? All you have to do is invest a little more time in sanding and polishing. Sometimes Russo works his way to 6000 grit sandpaper.

Walk-Around Video Showing Beautiful Wood

After final wet-sanding of the clear-coat, the finished stock is one even a millionaire would be proud to shoot. With the advent of fiberglass composite materials and assembly-line production methods, there are fewer true craftsmen like Joel who can start with a block of wood and some metal and create a complete rifle. So it’s refreshing that wood artisans like Russo are keeping alive the craftsman tradition. To see more examples of Joel Russo’s work, visit www.RussoRifleStocks.com.

Permalink - Videos, Gear Review 3 Comments »
August 6th, 2013

High-Tech Beauty: Seb’s Wood and Aluminum F-Class Stock

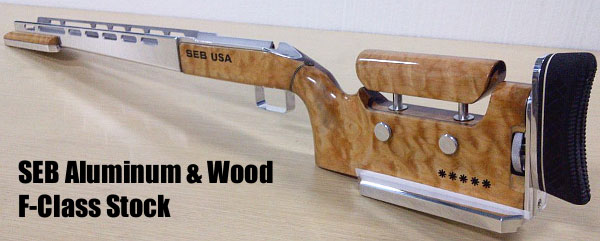
Sebastian (“Seb”) Lambang, creator of the SEB Coaxial Rests and new Coaxial Joystick Bipod, has engineered an impressive new wood and aluminum F-Class stock. The stock features a long, box-section aluminum fore-end with a wood rear section and wood-trimmed “wings” on the front bag-rider. The aluminum fore-arm has “buick vents” for weight reduction. From the end of the action rearward, the stock is mostly wood, with light and dark fancy wood laminates on opposite sides (left and right).

Accurateshooter.com Seb Lambang F-Class wood aluminum stock bag rider

Accurateshooter.com Seb Lambang F-Class wood aluminum stock bag rider

The foot of the buttstock has a very wide aluminum rear bag-rider with rails. The rear wood section appears to be two solid pieces of wood — but that is deceiving. Seb explains: “To save weight, the buttstock is hollow (using thin-walled wood)”. To strengthen the construction, Seb added carbon fiber inside the buttstock. So what you see is a wood outer shell with carbon fiber layers on the inside. The stock sports vertically-adjustable cheek-piece and buttplate. The thick, rubber buttpad should diminish felt recoil even when shooting big cartridges with heavy bullets.

Accurateshooter.com Seb Lambang F-Class wood aluminum stock bag rider

Accurateshooter.com Seb Lambang F-Class wood aluminum stock bag rider

Accurateshooter.com Seb Lambang F-Class wood aluminum stock bag rider

This is an interesting, innovative stock design. And as with everything Seb produces, the craftsmanship, fit and finish are superb. We may get a chance to see how well this new stock shoots at the F-Class World Championships later this month in Raton, New Mexico.

Seb also crafted a handsome set of angled scope rails with beautifully-machined scope rings. Imagine being able to custom-make one-off products of this quality in your own machine shop!

Accurateshooter.com Seb Lambang F-Class wood aluminum stock bag rider

Permalink Gunsmithing, New Product 6 Comments »
November 8th, 2011

New .22 LR Rimfire Version of Classic M1 Carbine

Here’s a new product that would be a great starter rifle for kids and a perfect training rifle for CMP M1 Carbine matches. Legacy Sports recently announced their new Citadel M-1.22 rifle, a .22 LR rimfire clone of the legendary M1 Carbine (which was chambered in .30 Carbine, essentially a rimless version of the .32 Winchester Self-Loading cartridge). Size, weight, and balance of the Citadel M-1.22 are very similar to the real thing. Legacy’s new rendition is set up to shoot the popular, inexpensive .22 LR round. The new Citadel M-1.22 rifle is made in Italy by Chiappa Firearms (Armi Sport). The rimfire M-1.22 features a blow-back action, an 18″-long, 1:16″ twist barrel, fixed front sight and adjustable rear sight. It will come with 10-round magazines, in either a wood stock version at $391.00 (item #CIR22M1W) or synthetic stock version at $331.00 (item #CIR22M1S).

M-1.22 M-1 Rimfire Carbine Citadel

We think the M-1.22 will be a popular Christmas gift item and, as noted already, it is an ideal “cross-training” firearm for CMP Carbine Match competitors. Learn more about the new Citadel M-1.22 at the LegacySports website. In the near future, M-1.22 rifles can be purchased through GalleryofGuns.com.

CMP M-1 Rimfire Carbine Citadel

CMP M1 Carbine Matches — Growing in Popularity
The CMP M1 Carbine Match is part of the CMP Games program that already includes Garand, Springfield and Vintage Military Rifle Matches. “As-issued” U. S. Military M1 Carbines are fired over a 45-shot course of fire at 100 yards on either the old military “A” target (or the SR target, if A targets prove to be too difficult to obtain). The course includes 5 sighters and 10 shots for record prone slow fire in 15 minutes, a 10-shot rapid fire prone series in 60 seconds, a 10-shot rapid fire sitting series in 60 seconds and 10 shots slow fire standing in 10 minutes. An M1 Carbine Match was fired during the National Matches in the early 1950s, and now is back. As a CMP Games event, it also can now be conducted as a CMP-sanctioned competition.

Permalink Gear Review, New Product 7 Comments »
July 29th, 2010

New Ballard-Designed F-TR Stock from Precision Rifle & Tool

F-TR lowboy gunstockCharles Ballard, two-time U.S. F-class Open Champion, has been working with Precision Rifle & Tool on a new F-TR (Target Rifle) stock. Charles designed the stock to combine the adjustability of the better F-Open designs with a nice rigid fore-end for bipod use. Charles has shot the new stock in competition and he says it tracks really well. When fitted with a wide-base bipod, the stock is super-stable, with minimal hop on recoil.

The new stock is officially called the “Ballard LowBoy F-Class Target Rifle (F-TR) Stock”. This new design is available immediately, in a variety of laminated colors, starting at $325.00 (without hardware). The stock can be inletted for Rem 700 actions, Rem 700 clones, the Savage Target Action, and most custom actions.

Key Features of the new Ballard F-TR stock are:

  • Extended front to provide proper balance with long barrels.
  • Low profile design for a lower, more stable center of gravity.
  • Buttstock has a 1/2″ machined flat on the bottom and angled sides to provide superior tracking in the rear bag.
  • Buttstock has a slight angle to allow minor elevation adjustments.
  • Optional adjustable buttplate and optional adjustable cheekpiece.

F-TR lowboy gunstock

Stock Delivery Options Dictate the Price
Precision Rifle & Tool can deliver the Ballard LowBoy F-TR in any state of completion the customer desires. The basic stock costs $325, inletted for your action, but unfinished and without hardware. Complete with removable/adjustable cheekpiece, and adjustable buttplate, the stock costs $900.00 ready to be bedded and finished. Clear-coating or oil finish is available at extra cost.

YouTube Preview Image

In the video, Charles Ballard gives you a “walk-around” of the stock and explains the stock’s design features. The high-tech, carbon fiber bipod is made by Center Shot Engineering in Oregon. For more info, or to order a Ballard LowBoy F-TR stock, visit PrecisionRifleSales.com, or call (336) 516-5132. Charles Ballard himself can talk you through the options.

Permalink Gunsmithing, New Product 2 Comments »
September 14th, 2008

Stocks by Umberger — A Tradition Continues

We recently followed an auction for a Cooper 17 HMR. Such a rifle (in normal trim) might typically sell for $1300.00 on Gunbroker.com. But the bids on this particular rifle soared, eventually closing at $3126.00! What made this Cooper so desireable? Well it did have a case-colored receiver, but the main attraction was custom-crafted stock from Stocks by Umberger. Shown below is a centerfire stock produced by Brent Umberger.

Brent Umberger custom stocks

Brent Umberger custom stocksArtisan’s Legacy Lives On
Brent Umberger practiced his trade as a master stockmaker for four decades. Sadly, he passed away a couple of years ago. However, the company he started, and the legacy of fine craftsmanship he created, are being carried on. In recent years, Brent worked with Adam Fraley and Jason Basham, training them in the fine arts of gunsmithing and stockmaking and sharing his expertise. After Brent’s passing, Adam and Jason purchased the business from Brent’s widow. Adam and Jason are now continuing the tradition of fine-crafted, hand-checkered wood stocks built from the finest woods available. Stocks by Umberger products are showcased on the website, StocksByUmberger.com.

Brent Umberger custom stocks

Umberger rifles and shotguns have been featured in many publications including American Shotgunner, Gun Week, Peterson’s Shotguns, Sporting Clays, American Walnut Industry and Trap and Field magazines. Umberger guns have graced the cover of The Shooters’ Bible, and a fabulous Purdy sidelock shotgun stocked by Brent is on display at the ATA Hall of Fame.

Brent Umberger custom stocks

Permalink Gunsmithing 2 Comments »