You’d like to protect your hearing, and maybe you’re a little curious about how your rifle might shoot suppressed. So you’re thinking of buying a suppressor (aka “can”, “moderator”, “silencer”). The good news is that suppressor ownership is now legal in 42 of the 50 American states — that’s 84%! And 41 states allow their use for hunting. So for most American adults, getting a suppressor is legal, provided the owner passes required background checks. But you can’t just get one off the shelf at Walmart. Acquiring a suppressor still requires filling out ATF paperwork. Plus there is typically a pretty long wait. But, thankfully, you no longer have to pay for a $200 Federal Tax Stamp (thanks to recent Federal legislation).
States Where Suppressors Are Allowed
Currently, these 42 states allow private ownership of suppressors/silencers: AL, AK, AZ, AR, CO, CT, FL, GA, ID, IN, IA, KS, KY, LA, ME, MD, MI, MN, MS, MO, MT, NE, NV, NH, NM, NC, ND, OH, OK, OR, PA, SC, SD, TN, TX, UT, VT, VA, WA, WV, WI, WY.
Note: Even if you live in one of the states listed, you should still verify that owning a suppressor is legal in your area. Some states may have municipal- or county-based restrictions.
States Where Suppressor Ownership is Prohibited
Unfortunately, there are still eight (8) States that forbid private ownership of suppressors. The eight No-Go States are: California, Delaware, Hawaii, Illinois, Massachusetts, New Jersey, New York, Rhode Island. In these eight states, private ownership of suppressors (aka “silencers”) is forbidden. Hopefully some of those eight hold-out states will change their laws in the months ahead.
How to Acquire a Suppressor/Silencer
As of January 1, 2026, the federal transfer and manufacturing tax for silencers, short-barreled rifles, and short-barreled shotguns was reduced to $0. While the previous $200 ATF fee is gone, all the underlying regulatory requirements remain fully active.
Still Required When Buying a Suppressor:
— Paperwork: You must still submit an ATF eForm or Form 4 through a licensed dealer.
— Background Check: ATF background check and approval are mandatory before taking possession.
— Identification: Fingerprints and passport-style photos must still be provided with your application.
Looking Inside a Suppressor in Action
Popular YouTube Channel Smarter Every Day recently released a cool video featuring rifle suppressors with see-through acrylic sleeves. The team filmed shots through the suppressors using ultra-high-speed (110,000 frame per second) cameras. When played back in super-slow-motion, you can see the flame propagate through the suppressor and the bullet move through each baffle before it exists the muzzle. Watch the results in the video below — it’s mesmerizing:
See Through Suppressor in Super Slow Motion (110,000 fps) — Click Arrow to Watch:
Suppressors, On Average, Reduce Noise Levels about 30 Decibels
In an article for Ammoland, gunwriter Sam Hoober says that you can expect about 30 decibels (dB) of noise reduction from the average suppressor: “Looking at a few different products, SilencerCo attests their suppressors reduce the sound pressure of a 9mm gunshot to anywhere from 125.7 dB to 131.5 dB, depending on the model. Advanced Armament Co, another popular supplier, attests a 23 dB to 33 dB reduction or down to 127 dB. Liberty Suppressors, another manufacturer, attests a reduction of 24 dB to 38 dB, depending on model and other factors. In short, we can presume something on the order of 30 dB of attenuation as an average.”
Using that 30 dB number you can quickly discern that you’ll still need hearing protection — good hearing protection — when shooting any suppressed firearm (even a .22 LR). “Spikes of 130 dB and more can result in permanent hearing damage instantly”. Source: NRA Blog.
Here’a useful article by Sierra Bullets Media Relations Manager Carroll Pilant. This story, which originally appeared in the Sierra Bullets Blog, covers some of the more common ammo problems that afflict hand-loaders. Some of those issues are: excessive OAL, high primers, and improperly-sized cases. Here Mr. Pilant explains how to avoid these common problems that lead to “headaches at the range.
I had some gentlemen at my house last fall getting rifle zeros for an upcoming elk hunt. One was using one of the .300 short mags and every 3rd or 4th round would not chamber. Examination of the case showed a bulge right at the body/shoulder junction. These were new cases he had loaded for this trip. The seating die had been screwed down until it just touched the shoulder and then backed up just slightly. Some of the cases were apparently slightly longer from the base to the datum line and the shoulder was hitting inside the seating die and putting the bulge on the shoulder. I got to thinking about all the gun malfunctions that I see each week at matches and the biggest percentage stem from improper handloading techniques.
One: Check Your Cases with a Chamber Gage
Since I shoot a lot of 3-gun matches, I see a lot of AR problems which result in the shooter banging the butt stock on the ground or nearest solid object while pulling on the charging handle at the same time. I like my rifles too well to treat them that way (I cringe every time I see someone doing that). When I ask them if they ran the ammo through a chamber gage, I usually get the answer, “No, but I need to get one” or “I didn’t have time to do it” or other excuses. The few minutes it takes to check your ammo can mean the difference between a nightmare and a smooth running firearm.
A Chamber Gauge Quickly Reveals Long or Short Cases
Size Your Cases Properly
Another problem is caused sizing the case itself. If you will lube the inside of the neck, the expander ball will come out a lot easier. If you hear a squeak as the expander ball comes out of a case neck, that expander ball is trying to pull the case neck/shoulder up (sometimes several thousandths). That is enough that if you don’t put a bulge on the shoulder when seating the bullet … it can still jam into the chamber like a big cork. If the rifle is set up correctly, the gun will not go into battery and won’t fire but the round is jammed into the chamber where it won’t extract and they are back to banging it on the ground again (with a loaded round stuck in the chamber). A chamber gage would have caught this also.
Oversizing cases also causes problems because the firing pin doesn’t have the length to reach the primer solid enough to ignite it 100% of the time. When you have one that is oversized, you usually have a bunch, since you usually do several cases at a time on that die setting. If the die isn’t readjusted, the problem will continue on the next batch of cases also. They will either not fire at all or you will have a lot of misfires. In a bolt action, a lot of time the extractor will hold the case against the face of the breech enough that it will fire. The case gets driven forward and the thinner part of the brass expands, holding to the chamber wall and the thicker part of the case doesn’t expand as much and stretches back to the bolt face. If it doesn’t separate that time, it will the next time. When it does separate, it leaves the front portion of the case in the chamber and pulls the case head off. Then when it tries to chamber the next round, you have a nasty jam. Quite often range brass is the culprit of this because you never know how many times it has been fired/sized and in what firearm. Back to beating it on the ground again till you figure out that you have to get the forward part of the case out.
Just a quick tip — To extract the partial case, an oversized brush on a cleaning rod [inserted] and then pulled backward will often remove the case. The bristles when pushed forward and then pulled back act like barbs inside the case. If you have a bunch of oversized case that have been fired, I would dispose of them to keep from having future problems. There are a few tricks you can use to salvage them if they haven’t been fired though. Once again, a case gage would have helped.
Two: Double Check Your Primers
Another thing I see fairly often is a high primer, backwards primer, or no primer at all. The high primers are bad because you can have either a slam fire or a misfire from the firing pin seating the primer but using up its energy doing so. So, as a precaution to make sure my rifle ammo will work 100% of the time, I check it in a case gage, then put it in an ammo box with the primer up and when the box is full, I run my finger across all the primers to make sure they are all seated to the correct depth and you can visually check to make sure none are in backwards or missing.
Three: Check Your Overall Cartridge Length
Trying to load the ammo as long as possible can cause problems also. Be sure to leave yourself enough clearance between the tip of the bullet and the front of the magazine where the rounds will feed up 100%. Several times over the years, I have heard of hunters getting their rifle ready for a hunt. When they would go to the range to sight in, they loaded each round single shot without putting any ammo in the magazine. On getting to elk or deer camp, they find out the ammo is to long to fit in the magazine. At least they have a single shot, it could be worse. I have had hunters that their buddies loaded the ammo for them and then met them in hunting camp only to find out the ammo wouldn’t chamber from either the bullet seated to long or the case sized improperly, then they just have a club.
Four: Confirm All Cases Contain Powder
No powder in the case doesn’t seem to happen as much in rifle cartridges as in handgun cartridges. This is probably due to more handgun ammo being loaded on progressive presses and usually in larger quantities. There are probably more rifle cartridges that don’t have powder in them than you realize though. Since the pistol case is so much smaller internal capacity, when you try to fire it without powder, it usually dislodges the bullet just enough to stick in the barrel. On a rifle, you have more internal capacity and usually a better grip on the bullet, since it is smaller diameter and longer bearing surface. Like on a .223, often a case without powder won’t dislodge the bullet out of the case and just gets ejected from the rifle, thinking it was a bad primer or some little quirk.
For rifle cases loaded on a single stage press, I put them in a reloading block and always dump my powder in a certain order. Then I do a visual inspection and any case that the powder doesn’t look the same level as the rest, I pull it and the one I charged before and the one I charged after it. I inspect the one case to see if there is anything visual inside. Then I recharge all 3 cases. That way if a case had powder hang up and dump in the next case, you have corrected the problem.
On progressive presses, I try to use a powder that fills the case up to about the base of the bullet. That way you can usually see the powder as the shell rotates and if you might have dumped a partial or double charge, you will notice as you start to seat the bullet if not before. On a progressive, if I don’t load a cartridge in one smooth stroke (say a bullet tipped over sideways and I raised the ram slightly to reset it) Some presses actually back the charge back adding more powder if it has already dumped some so you have a full charge plus a partial charge. When I don’t complete the procedure with one stroke, I pull the case that just had powder dumped into it and check the powder charge or just dump the powder back into the measure and run the case through later.
Here’s a helpful, time-saving tool for handgun owners. MidwayUSA’s online Holster Finder lets you quickly find the right holsters for virtually all popular makes and models of pistols and revolvers. The wide variety of carry styles, materials, and features can make finding the right holster difficult or confusing. Drawing on a database of over 125,000 gun/holster combinations, the MidwayUSA Holster Finder turns that complex task into an easy three-step process.
The selection process is simple: 1. Choose Pistol or Revolver; 2. Select Make and Model of Handgun (and barrel type/length); 3. Click to view results. Just choose your gun type, select your make, model and barrel, then view the results. All major holster types are included: Ankle, Belly Band, Belt (outside waistband), Chest, Competition, Drop Leg, Inside Waistband (IWB), Paddle, Pocket, and Shoulder. Check out the MidwayUSA Holster Finder at MidwayUSA.com/holster-finder.


 You’d like to protect your hearing, and maybe you’re a little curious about how your rifle might shoot suppressed. So you’re thinking of buying a suppressor (aka “can”, “moderator”, “silencer”). The good news is that suppressor ownership is now legal in 42 of the 50 American states — that’s 84%! And 41 states allow their use for hunting. So for most American adults, getting a suppressor is legal, provided the owner passes required background checks. But you can’t just get one off the shelf at Walmart. Acquiring a suppressor still requires filling out ATF paperwork. Plus there is typically a pretty long wait. But, thankfully, you no longer have to pay for a $200 Federal Tax Stamp (thanks to recent Federal legislation).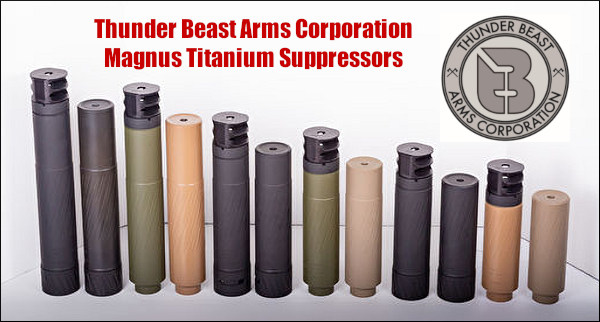


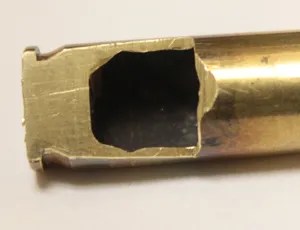 Oversizing cases also causes problems because the firing pin doesn’t have the length to reach the primer solid enough to ignite it 100% of the time. When you have one that is oversized, you usually have a bunch, since you usually do several cases at a time on that die setting. If the die isn’t readjusted, the problem will continue on the next batch of cases also. They will either not fire at all or you will have a lot of misfires. In a bolt action, a lot of time the extractor will hold the case against the face of the breech enough that it will fire. The case gets driven forward and the thinner part of the brass expands, holding to the chamber wall and the thicker part of the case doesn’t expand as much and stretches back to the bolt face. If it doesn’t separate that time, it will the next time. When it does separate, it leaves the front portion of the case in the chamber and pulls the case head off. Then when it tries to chamber the next round, you have a nasty jam. Quite often range brass is the culprit of this because you never know how many times it has been fired/sized and in what firearm. Back to beating it on the ground again till you figure out that you have to get the forward part of the case out.


