This popular video, viewed nearly 1.9 million times on YouTube, provides a clear explanation of Minute of Angle (MOA) and how that angular measurement is used. Among novice shooters, there is much confusion over this term. In this NSSF Video, Ryan Cleckner, a former Sniper Instructor for the 1st Ranger Battalion, defines the term, “Minute of Angle” (MOA) and explains how you can adjust for windage and elevation using 1/4 or 1/8 MOA clicks on your scope. This allows you to sight-in precisely and compensate for bullet drop at various distances.
For starters, Ryan explains that, when talking about angular degrees, a “minute” is simply 1/60th. So a “Minute of Angle” is simply 1/60th of one degree of a central angle, measured either up and down (for elevation) or side to side (for windage). At 100 yards, 1 MOA equals 1.047″ on the target. This is often rounded to one inch for simplicity. Say, for example, you click up 1 MOA. That is roughly 1 inch at 100 yards, or roughly 4 inches at 400 yards, since the target area measured by 1 MOA increases in linear fashion with the distance.
More Minute of Angle (MOA) Explanatory Videos
This Gunwerks video explains that Minute of Angle subtends approximately 1″ for each 100 yards (well, 1.047″ to be exact). That means a Minute of Angle increases in actual measured size the greater the distance of the target from the shooter.
This lengthy (24-minute) video defines Minute of Angle, and uses multiple diagrams to illustrate how MOA angular measurements works. The video also how MOA-based click values translate to point-of-impact changes at various distances.
Every shooter should have a good rimfire rifle, both for fun shooting and for training. The .22 LR is very affordable to shoot, and the more potent .17 HMR and .22 WMR rounds also are great for small varmints out to 200 yards or so. Among the rimfire rifle makers, the Czech manufacturer CZ (Česká Zbrojovka) has been a world leader for many decades. In today’s Video round-up we feature a variety of CZ rimfire rifles including the the all-new CZ 457, the versatile CZ 455 VPT, and the classic CZ 452. We also include one semi-auto, the CZ 512 in .22 Winchester Magnum Rimfire (WMR).
CZ 455 Varmint Precision Trainer in Manners Stock
Rimfire cross-training allows PRS competitors to build their skill sets without breaking the bank (or burning out barrels). One great .22 LR option for cross-training is offered by CZ, the Czech arms-maker. The TFBTV video below spotlights the CZ 455 Varmint Precision Trainer (VPT), a smooth-running .22 LR bolt action. This factory rifle was designed specifically as a training tool for precision long-range competition. It boasts a Manners composite stock and 20.5 or 24-inch heavy barrel. The 0.866″-diameter tube is threaded and suppressor-ready. The model 455 VPT is mag-fed and comes with a crisp trigger that adjusts to two pounds. Street price is around $860. That’s pricey for a rimfire — but you’re getting a premium Manners stock that would cost $534 by itself.
Field Testing the CZ 455 Varmint Precision Trainer
New Generation CZ 457 with Upgrades
The CZ 457 may be the most modular precision rimfire on the market. You can swap barrels and magazines easily. The interchangeable barrel feature is by far the best feature of the CZ 457. Want to shoot .22 WMR for varmint hunts then transition to a .22 LR for precision shooting? No problem — five minutes and four screws are all you need. The CZ 457 is also an excellent value — it’s WAY better than a 10/22 but a fraction of the cost of high-end custom rimfire rigs. In the second video below, the CZ 457 goes head to head
In this video, Josh of Pursuit of Accuracy drives nails at 100 yards with his CZ 457:
And here Josh comparison-tests his Lilja-barreled CZ 457 head-to-head with the much more expensive Vudoo V22. The results may surprise you.
CZ 457 MTR Varmint — Product Showcase and Review
We really like the relatively new CZ 457 Varmint MTR .22 LR rifle. Along with other CZ 457 models, the MTR (“Match Target Rifle) Varmint features a completely new action that runs very smoothly with shorter bolt throw. The new 457s also have an American-style, push-to-fire safety. The new-generation actions have been trimmed back nearly one-inch in length, and slab-sided to reduce the footprint and weight of the actions. CZ ditched the 90º bolt rotation of the past in favor of 60º rotation. This change provides more room between bolt handle and scope for easier cycling of rounds. It also allows for the use of scopes with larger ocular bell diameters and lower ring heights.
The well-designed MTR stock has good ergonomics and nice stippling on the grip and fore-end. We were pleased to note that, with the 457 series, CZ is once again offering steel magazines that are interchangeable with older 452/455 magazines.
Here our friends at Area 419 offer a side-by-side comparison between a $2300+ rifle with Vudoo V-22 action in Manners stock and the $752.00 CZ 457. On a bang-for-the-buck basis, the CZ wins hands down. However, the Vudoo V-22 does offer centerfire-style action cycle, which helps with training. It also can run Rem 700-compatible triggers.
CZ 452 — Classic Bolt-Action Rimfire Rifle
The CZ 452 is an affordable classic. It is ultra-reliable, easy to clean and maintain, and you’ll find very good examples on the used market for under $400. This is an excellent first rifle for a young family member. In this video, The TFB TV team tests a CZ 452-2E fitted with a suppressor. As the 452 series is being replaced, if you want to buy a new 2019 CZ 452, you’ll need to spend big bucks on the Grand Finale model: “Produced in limited quantity, the 452 Grand Finale (MSRP $1189.00) is a last hurrah to the venerable CZ 452. Built using the last 452 actions ever produced, on the original manual barrelling equipment and at the Brno workshop, the Grand Finale [features] hand-engraved scroll-work on the action, barrel, bottom metal and scope rings. The upgraded American walnut is trimmed with an ebony fore-end and grip cap.”
Semi-Auto CZ — Model 512 American in .22 Magnum Rimfire
The folks at Varminter.com are avid varmint hunters, who test varmint rigs in the real world, seeing how they perform in the varmint fields. Varminter.com was quite impressed with the CZ Model 512 American semi-auto .22 WMR (Winchester Magnum Rimfire) rifle. The testers found the Model 512 to be accurate, extremely reliable, and fun to shoot. Watch the video to field tests conducted in California. This self-loading rifle performed ultra-effective on California ground squirrels. Erik Mayer, Varminter.com’s publisher says: “The 22 Magnum (.22 WMR) is beginning to see a resurgence of sorts, as the rimfire ammunition becomes more readily available. Because of this, rifles like the CZ Model 512 have also begun to see a rise in interest again”. CLICK HERE for FULL REPORT with accuracy findings for multiple ammo types.
One of our Forum members asked: “Are there any good books on pistol marksmanship? I’m looking for a book that covers techniques and concepts….” Here are six recommended titles that can make you a better pistol shooter. These books run the gamut from basic handgun training to Olympic-level bullseye shooting.
Good Guidebooks for Pistol Shooters
There are actually many good books which can help both novice and experienced pistol shooters improve their skills and accuracy. For new pistol shooters, we recommend the NRA Guide to the Basics of Pistol Shooting. This full-color publication is the designated student “textbook” for the NRA Basic Pistol Shooting Course.
Serious competitive pistol shooters should definitely read Pistol Shooters Treasury a compilation of articles from World and National Champions published by Gil Hebard. You could work your way through the ranks with that book alone even though it is very small. It is an excellent resource.
If you’re interested in bullseye shooting, you should get the USAMU’s The Advanced Pistol Marksmanship Manual. This USAMU pistol marksmanship guide has been a trusted resource since the 1960s. Action Shooters should read Practical Shooting: Beyond Fundamentals by Brian Enos, and Practical Pistol by Ben Stoeger. Brian Enos is a well-known pistol competitor with many titles. Ben Stoeger is a two-time U.S. Practical Pistol shooting champion. Last but not least, Julie Golob’s popular SHOOT book covers pistol marksmanship, along with 3-Gun competition. Julie holds multiple national pistol shooting titles.
Jessie Harrison is one of the greatest female pistol shooters on the planet. In the video below, Jessie offers smart tips on purchasing a handgun, and getting started in competition. Jessie covers caliber choice, handgun fit/ergonomics, concealability, holster options, and other key factors.
Fans of PRS/NRL competition should watch Shooting USA today March 16, 2022. This action-packed episode features the 2021 Armageddon Gear (AG) Cup Invitational, a major PRS event with $75,000 in cash prize awards. The show airs today, Wednesday 5/18/22 at 9:00 PM Eastern/Pacific (8:00 PM Central) on the Outdoor Channel. You can also stream the show anytime on Vimeo for $0.99.
$75,000 in cash prizes makes the AG Cup the biggest cash money match in Precision Rifle Competition. It’s an elimination format shot over three days of challenging stages of fire at K & M Precision’s ranges in West Tennessee. In this episode, match organizer Tom Fuller joins John Scoutten to narrate the action and the award of the cash in extended coverage of the match. The 2020 AG Cup showcased an all-star line-up of tactical talent with the nation’s top PRS/NRL marksmen invited to the three-day match in TN.
Highlights of 2020 Armageddon Gear Cup Tactical Match:
Armageddon Gear Founder Tom Fuller competes in PRS and supervised the latest AG Cup.
SHOOTING USA TV Air Times
View Shooting USA on the Outdoor Channel Wednesdays 9:00 PM (Eastern and Pacific) + 8:00 PM Central.
NOTE: If you miss today’s 5/18/22 broadcast, you can still view the show on Vimeo for a small 99-cent fee, or just $1.99 per month unlimited. LINK HERE: Shooting USA on Vimeo.
Shooting USA is available On Demand via Vimeo.com. Watch a single episode for $0.99, or get a full-month subscription for $1.99 and watch as many shows as you like with limited commercial interruptions.
One of our favorite cartridges for small varmints is the 17 HMR. Yes, the newer 17 WSM rimfire has better ballistics, but 17 HMR ammunition is considerably less expensive, and you have a much larger selection of rifles and pre-chambered aftermarket barrels. And out to 150 yards or so the 17 HMR is great on ground squirrels and prairie dogs.
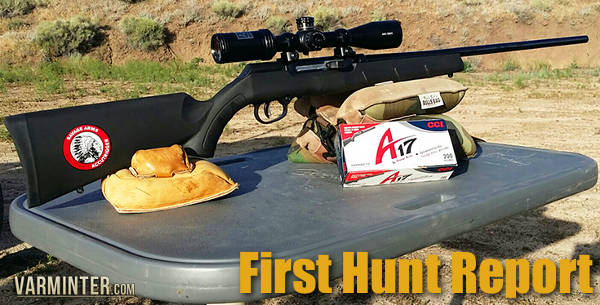
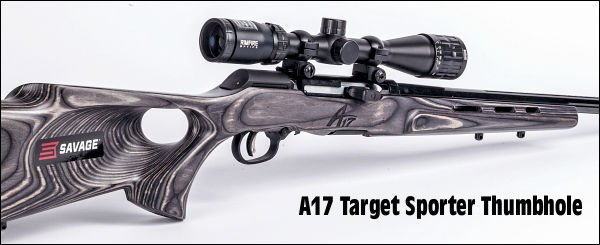
If you are looking for a 17 HMR varmint rifle, one rig you should definitely consider is the Savage A17. Now that this model is offered with laminated stock options, you can get a fine little 17 HMR rifle for about $475.00. We do prefer the laminated stock A17s (both standard and thumbhole models) over the basic polymer-stocked version, priced at $440.00.
How does an A17 shoot? That question was answered a couple seasons back by Varminter.com in a First Hunt Report. Accurate and affordable, the Savage A17 is also the first .17 HMR to feature a delayed blow-back action. Eric Mayer, Editor of Varminter.com, put the semi-auto Savage A17 through its paces.
Mayer wanted to see how the new Savage would perform, accuracy-wise, and he also wanted to see how the A17 fared in the field. Mayer achieved one-MOA accuracy with the Savage A17 using the latest CCI-brand ammo, and he demonstrated the A17 is wickedly effective on ground squirrels. Below we’ve provided highlights from Varminter.com’s Savage A17 First Hunt Report.
“I [collected] as many versions of the currently available .17 HMR ammunition as I could get my hands on. I had already picked-up and tested the new CCI A17 ammunition, so I filled up my ammo safe with other CCI ammunition, as well as Hornady and Winchester, including the lead free 15.5 grain NTX versions, also from Hornady and Winchester. After spending some time at the bench, I saw that this rifle shot the CCI A17 ammunition best, with most groups hovering right around 1″ to 1.20″ at one hundred yards, and some of the other ammo choices in the 1.25″ to 1.50″ range. This was with a warm barrel and in-between cleanings during the break-in process.”
Mayer found the A17 was easy to maintain: “I was very impressed by the ease of pulling the rifle apart for cleaning out in the field. Even with the scope mounted, I was able to quickly and easily remove the parts needed to give me complete access to the barrel through the breach, so cleaning was a breeze.”
A17 Reliability Lessons — Seat Those Rotary Magazines Correctly Folks
Some early A17 purchasers have noted occasional failures to feed. We believe this is because the magazine was not fully seated (and locked in place) in the firearm. The experience of Varminter.com’s Editor seems to confirm this. Mayer reports “As I began to shoot the rifle, I experienced what a few others have reported, with the magazine falling out while shooting. I quickly realized that I was not snapping the magazine into place every time. I found that popping in the magazine while the bolt was pulled, or locked back, resolved the issue. I did have a few failures to feed, but only on some of the older ammunition I was shooting, namely the first year Hornady ammo and the lead free ammo (which is about 3-4 years old). The newer ammo did not have any issues and functioned well, even while shooting some 10-round ‘mag-dumps’. The trigger is on the heavy side.”
A17 Reliability Shown in Video
The Savage A17 went through a very thorough manufacturer’s testing process before it was released to the market. In fact Savage put over 500,000 test rounds through A17 prototypes. When AccurateShooter.com tested the A17 at Media Day — it worked flawlessly, so long as you make sure the magazine is fully seated. We had zero issues, making us think that reported issues may be related to “driver error”; specifically not seating the magazine properly. Watch AccurateShooter.com video with rapid fire sequence.
Today’s Saturday Showcase covers gun safes. Every firearms owner should have a secure, quality gun safe with ample capacity. There are numerous choices in gun safes — but we have one key bit of advice — buy BIGGER than you think you need, because your gun collection will likely grow over time. Also you should consider the fire rating of your safe. There are other key factors to consider, such as wall thickness, lock type, shelf and storage layout, and humidity control. We recommend that all Bulletin readers read our detailed, Gun Safe Buyers Guide. This in-depth 9400-word article covers ALL these topics:
Anti-Corrosion
Budget Safes
Bolt Layout
Door Seals
Fire Proofing
Handgun Storage
Hinges
Humidity Control
Installation Tips
Interior Layout
Interior Lighting
Locks–Dial vs. Digital
Modular Safes
Rotary Racks
Size and Weight
Temperature Control
Wall Thickness
Water Proofing
Technical Features of Gun Safes — What You Need to Know
This is a very sensible, informative video that examines the technical features of gun safes. You’ll learn about the steel “gauge” or thickness, the different types of hinges, lock controls, and fire-proofing options. We think anyone contemplating purchase of a large home safe should watch this video, prepared by a respected safe retailer in Las Vegas.
Assembly of SnapSafe Titan XXL Double Door Modular Safe
In this video Gavin Gear of UltimateReloader.com shows the unpacking and assembly of a large, twin-door SnapSafe modular safe. This video shows how individual panels are assembled one by one, and how the twin doors are attached. Gavin also shows the process of installing the interior insulation panels which provide basic fire protection. Remarkably, this entire XXL modular safe can be put together with simple tools in less than an hour. SEE Full Article HERE.
Features of a Quality Safe under $1000
Even if you already have a safe, this video is well worth watching. The host shows a variety of accessories and upgrades that all gun safe owners should consider. The host explains why you should have a dehumidifier or Golden Rod. He also shows how to install handy interior lights that activate automatically when the door is opened.
The Gun Vault — The Next Step Beyond a Jumbo Gun Safe
If you have a very large gun collection and are building a new custom home, you may want to consider a Gun Vault. This is essentially a large, secure room, with a very heavy door and thick walls. In this interesting video, Atlas builds a large walk-in gun vault using the Gallow Tech Shelving System and a Fort Knox Gun Vault door.
After the Fire — What Actually Happens in a Burned Safe
In this video, the hosts open a “fireproof” gun safe that went through an actual house fire. See what happens when a gun safe that is supposed to be fireproof actually is exposed to a major fire. The results are surprising to say the least. This video shows that you need to do your homework before buying a “fireproof” safe. Understand how the fire rating systems work, and learn how the interior materials and construction make a big different in real world fire protection.
Mechanical Locks vs. Electronic Locks — What You Need to Know
One important decision when buying a gun safe is the choice of locking mechanism. Should you go with a mechanical lock or an electronic lock? There are pros and cons to both dial locks and e-locks, and as long as you get a quality lock, neither is a bad choice. To help you make your decision, This video explains the differences between the two, and reasons why you might choose one over the other.
How to Assemble a Modular Safe with Simple Tools
For gun owners who move frequently, or who may live in an upstairs apartment or condo, a modular safe makes sense. Steelhead Outdoors, based in Minnesota, offers three different safes: Nomad 26, 32, and Nomad 38. The video below shows how to assemble a Steelhead Outdoors Nomad series safe. If you have basic skills, these safes can be assembled easily in 60-90 minutes. Steelhead recommends having two people to do the job. The entire safe ships in four (4) boxes. Wrenches are included with the safe.
This time-lapse video shows the entire process of assembling the safe, start to finish.
Guide to Quick Access Handgun Safes
A quick access safe can keep your pistol secure, but also readily accessible. But not all of these devices are created equal. This video explains the features you need in a small pistol safe. The video also examines the pros and cons of seven different handgun safes. We recommend that you do NOT keep your handgun safe in plain view, such as on a bedside table. There are other locations where you still have quick access, without tempting home intruders.
Wireless Hygrometer Reports Temperature and Humidity Inside Safes
The Hornady Security® Wireless Hygrometer monitors temperature and humidity in real-time, all without opening the gun safe. The wireless hygrometer employs a remote sensor inside your safe, which measures temperature and humidity data. This data is then sent to an external base display. Wireless technology eliminates the need to open the safe and check the storage environment, preventing temperature and humidity spikes from the outside air.
The display features a large touchscreen that shows current high/low data from both the base and remote units in Fahrenheit or Celsius. The hygrometer pairs with Hornady Security’s in-safe dehumidifiers to combat oxidation-causing moisture.
Gun Safe Installation Recommendations
Every safe, when possible, should be anchored in place with heavy-duty fasteners. Ideally, use multiple bolts in the bottom of the safe, anchored to concrete or solid foundation. Choose the appropriate lag bolts or anchors for the material below your safe. If you can’t mount to the floor, bolt the safe to wall studs. You can locate the position of the studs with an inexpensive electronic “Stud Sensor” available at home supply stores.
Check the thickness of your safe floor. If the steel on the bottom of your safe is fairly thin, place a steel backing strip between the bolt heads and the safe bottom. (Large washers will work, but a backing strip is better.) Without such reinforcement, the bolt heads may pull right through thin-gauge steel if the safe is rocked, or levered from the bottom with a pry-bar.
Locate your safe in the corner of a room or in a recess that blocks access to one or more sides of the safe. On many gun safes, the steel on the top, sides, and rear is thinner than on the door. Blocking access to the sides makes it much more difficult to use power tools on the sides, where the safe is most vulnerable. It’s also wise to place the safe in a relatively tight space with limited room to maneuver. Anything that makes the safe harder to move helps deter would-be thieves.
Many people place their safe in a garage or basement. That’s not necessarily a bad idea, but people also tend to store their tools in the same locations. Don’t store your power tools next to the safe. One safe-maker told us how a customer’s safe was defeated using the owners’ own cutting torch which was stored right next to the safe!
Inspect the area around the safe. Avoid locations where there are a lot of wood beams, paint cans, or other combustible material nearby. In the event of a serious house-fire, these items will fuel the flames, increasing the likelihood that items inside your safe will be heat-damaged. Chris Luchini, co-author of Rec.Gun’s Guide to Gun Safes, offers some practical advice: “Get an alarm system. If the burglars hear an alarm go off, they are less likely to stick round to finish the job. Alarms on both the house and the safe area are a good idea.”
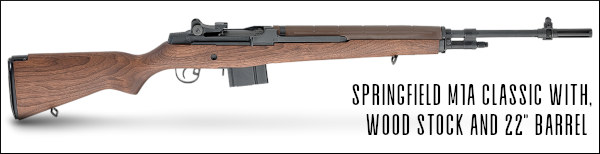
Do you own a Springfield M1A (or wish you did)? Then you should watch this 5-minute video from the American Gunsmithing Institute (AGI). This video shows the basics of the operation of the popular M1A rifle, the civilian version of the military M14. In this video, gunsmith John Bush field-strips the M1A and shows how the bolt, op rod, and trigger group fits together and operates. This video contains excerpts from the M1A Rifle Armorer’s Course, AGI Course #1584. The full Armorer’s Course is available on DVD from www.AmericanGunsmith.com.
Watch Highlights of AGI M1A Rifle Armorer’s Course:
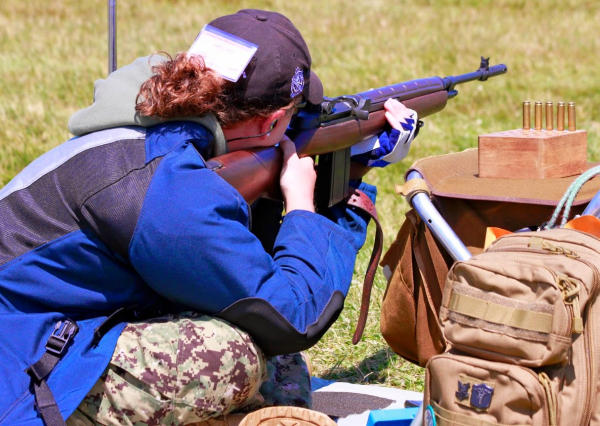
2022 CMP Springfield M1A Match at Camp Perry
The 15th annual Springfield Armory M1A Match will take place during the 2022 CMP National Rifle Matches. The CMP will host the event on Sunday, August 7, 2022, the same weekend as the Garand/Springfield/Vintage Military matches. Competitors of all experience levels are encouraged to bring their M1A rifles to Camp Perry and compete. CLICK HERE for Online REGISTRATION. The match is open to all individuals ages 12 and above. For more information contact the CMP at competitions@thecmp.org or call 419-635-2141 ext. 724 or 714.
The Springfield Armory M1A match began with one man’s idea and passion. Springfield Armory’s Mike Doy witnessed the waning of classic M1 Garand and M1A rifles from the competitive High Power firing lines. “I really wanted to get those M1A rifles out of safes and closets and back out onto the field. So 11 years ago, I promoted the idea of running an M1A-specific match at Camp Perry. That first year we had over 600 competitors and spectators.” Now the match offers some of the biggest pay-outs at Camp Perry. In recent years, Springfield Armory has donated over $25,000 worth of cash and prizes, including a $2,000 cash award to the overall winner.
SIG Freedom Days — one of the biggest shooting events in America — was a huge success last weekend. Over 4000 firearms fans attended the first-ever SIG Freedom Days fun shoot/gear demo at the Ben Avery Shooting Facility in Phoenix, Arizona.
Over the weekend of May 6-8, 2022, 4000+ guests participated in the inaugural SIG Freedom Days — a unique, consumer-focused shooting experience. Attendees had the opportunity to shoot a wide variety of SIG Sauer firearms including the new SPECTRE series guns, the P320/P320-M17/P320-M18, the EDC P365 series, and the MCX rifle in multiple configurations. Participants also enjoyed an exclusive first look at the soon-to-be-released CROSS PRS and P320 X10. Additionally, many attendees were able to shoot the SIG SAUER Next Generation Squad Weapons: the MCX-SPEAR (XM5) and the SIG-LMG (XM250).
The event included live daily demonstrations from Team SIG’s pro shooters: Max Michel, Dan Horner, Lena Miculek, and Jerry Miculek. There were also machine gun demonstrations, K9 demonstrations and more. But the big attraction was being able to shoot a variety of SIG Sauer firearms. The $75/day fee included ammunition for pistols, rifles, and shotguns.
SIG FREEDOM DAYS Participants Were Able to:
— Shoot nearly 50 new and existing SIG SAUER firearms
— Learn from world-class SIG SAUER Academy Instructors
— Shoot Mossberg Shotguns and Xpedition Archery Crossbows
— Shoot the SIG SAUER “Next Generation” Machine Gun (additional fee)
— See stage presentations by pro shooters, industry leaders, and personalities
— Watch live demos by Team SIG pros Max Michel, Dan Horner, Lena Miculek, and Jerry Miculek.
“As a company we challenged ourselves to… bring our brand right to the consumer outside of the typical tradeshow and retail environment and offer enthusiasts, second amendment advocates, [and] SIG lovers an authentic hands-on total SIG experience. SIG Freedom Days connected the consumer with the product in a first-of-its-kind range event…”, stated Tom Taylor, SIG SAUER Chief Marketing Officer & Executive VP, Commercial Sales.
SIG Freedom Days major sponsors included USCCA,, Mossberg Shotguns, XPEDITION Archery, 5.11 Tactical, Guns.com, Fieldcraft Survival, and Black Rifle Coffee Company. Additional sponsors included Arizona Fish & Game, Hogue Knives, Silencer Shop, Tactacam, and Timney Triggers. Non-profit partners included the Best Defense Foundation and the Firearms Policy Coalition.
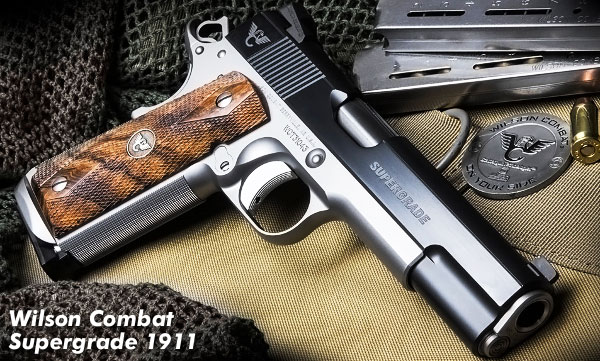
Todd Jarrett is one of the world’s best handgun shooters. A multi-time World Champion, Todd knows a thing or two about semi-auto pistols, particularly 1911s and 1911-based raceguns. Jarrett holds four World titles, nine National titles and has won more than 50 Area championships, as well as many other action shooting events. Jarrett is the only USPSA Triple Crown Winner and he holds four USPSA National titles: Open, Limited, Production, and Limited-10. Jarrett revealed in an interview that between 1988 and 2001 he shot about 1.7 million rounds during practice: “I had a gun in my hand for two hours every day for 10 years to develop my skill level”.
In the video below, Todd explains how to get the proper grip on your handgun, and how to employ a proper stance. We’ve watched many videos on pistol shooting. This is one of the best handgun instructional videos we’ve seen. Todd explains, in easy-to-understand terms, the key elements of grip and stance. One very important point he demonstrates is how to align the grip in your hand so that the gun points naturally — something very important when rapid aiming is required. If you watch this video, you’ll learn valuable lessons — whether you shoot competitively or just want to have better control and accuracy when using your handgun defensively.
Related Article: Thumbs-Forward Shooting Grip for 1911s
“Shooting semiautomatic pistols using the thumbs-forward method really becomes useful … where speed and accuracy are both needed. By positioning the thumbs-forward along the slide (or slightly off of the slide) you are in essence creating a second sighting device: wherever your shooting thumb is pointing is where the pistol is pointing. This makes it incredibly fast to draw the pistol, get your proper grip, and press forward to the target without needing to hunt around for the front sight.” — Cheaper Than Dirt Blog.
Do you have a friend who is getting started in hand-loading? Or would you like a refresher course in some of the more important aspects of reloading? Today’s video showcase provides a wealth of information. In these videos, Philip Massaro, Editor-in-Chief of the Gun Digest Annual, explains the techniques handloaders should employ to create safe and accurate pistol and rifle ammunition. These videos are part of an 11-Video Reloading Series from Gun Digest.
After the intro video, there is a video on case resizing, with a focus on full-length sizing. Next Massaro explains how primers work and he demonstrates how to seat primers. There is a video dedicated to bullet choice, followed by a video on bullet seating, both with and without crimping. Today’s video showcase concludes with a helpful video on troubleshooting, showing how to check your ammo and disassemble rounds when something isn’t right.
Basics Of Reloading
What goes into reloading ammo? Here are the five basic handloading steps — removing the primer, resizing the case, inserting a new primer, adding powder, and seating a new bullet. Gun Digest also has a related video on Reloading Tools, explaining the basic tools you’ll need: dies, press, scale, powder measure or powder-dispensing machine, and measuring tools.
Case Prep and Resizing
The reloading process starts with your cartridge brass. You need to remove carbon from the case exterior, check for case damage and signs of incipient separation. And it often makes sense to clean the primer pockets. It’s also wise to check case length, and chamfer/debur the case necks (as needed). Then the cases should be resized before loading. We recommend full-length resizing for rifle rounds.
Primer Types Explained
What is the difference between a large rifle primer and a magnum large rifle primer? Can you use magnum primers in standard cartridges and vice versa? These are among the topics discussed in this video.
Priming Procedures — Using Press or Hand Tool — and Powder Throwing
In this video, Philip Massaro tackles primer installation, the first process of assembly in reloading and case charging. Learn the differences between large and small primers, and how to use a primer cup accessory on a single stage press. Then Massaro shows various methods to dispense the correct powder charge.
Bullets — How to Select the Right Projectile for your Application
Not every bullet is appropriate for every job. Find out what projectile you’ll need to win a shooting match or put meat on the table. Not all bullets are created equal — hunting bullets are different than match bullets and varmint bullets are different than big game projectiles. With this in mind, Phil Massaro examines different bullet designs — including a look at Nosler’s line of projectiles.
Cartridge Completion — Bullet Seating
In this installment, Philip Massaro covers the final step in cartridge assembly, bullet seating. He covers how to use a micrometer seating die for reloading, as well as various ways to crimp handgun bullets. Massaro demonstrates seating bullets for the .357 Mag, .45 ACP, .30-06 Springfield, and .458 Win Magnum cartridges. The video also covers using a roll-crimp and taper crimp.
Reloading Troubleshooting
This is a very important video, that shows how to troubleshoot potential problems with handload ammunition. The host shows how to check for potential case head separation and other brass problems. He shows how to get stuck cases out of dies using the drill and tap procedure. Also covered are collet bullet pullers and inertia hammers for removing seated bullets from cases. This is necessary if you mistakenly seat too deeply or forget to charge the case with powder.


 Rimfire cross-training allows PRS competitors to build their skill sets without breaking the bank (or burning out barrels). One great .22 LR option for cross-training is offered by CZ, the Czech arms-maker. The TFBTV video below spotlights the


 Good Guidebooks for Pistol Shooters


 Every safe, when possible, should be anchored in place with heavy-duty fasteners. Ideally, use multiple bolts in the bottom of the safe, anchored to concrete or solid foundation. Choose the appropriate lag bolts or anchors for the material below your safe. If you can’t mount to the floor, bolt the safe to wall studs. You can locate the position of the studs with an inexpensive electronic “Stud Sensor” available at home supply stores.
 Locate your safe in the corner of a room or in a recess that blocks access to one or more sides of the safe. On many gun safes, the steel on the top, sides, and rear is thinner than on the door. Blocking access to the sides makes it much more difficult to use power tools on the sides, where the safe is most vulnerable. It’s also wise to place the safe in a relatively tight space with limited room to maneuver. Anything that makes the safe harder to move helps deter would-be thieves.