Here is a great winter project for readers with some wood-working skills. This is a wood rack that can hold a huge collection of sizing and seating dies. This was created by our old friend John Adams, one of our Forum’s very first members. Sadly, John passed away a decade ago. But we know he’d be pleased to see folks create a die rack like this.
John, a founder of IHMSA and a former owner of SAECO Tool Company, had a vast collection of dies and reloading tools. He had rifles of many different calibers so he needed a large selection of dies. While visiting John’s workshop, we were impressed with the wooden die rack he has constructed above his main reloading bench. This would be a great do-it-yourself project for your reloading room.
John’s Loading Die Rack is a simple flat plank of wood, about 3/4″ thick. It is mounted with wood side brackets to stand at eye-level above a tool chest. The Rack is set at about a 45° angle from vertical. This holds the dies securely, but they are still easy to move in and out of the rack. At the top rear is a flat section with a single row of dies mounted upright.
You can see that all the dies for a particular cartridge are arranged in a column, one above the other. The die sets’ respective cartridge types (e.g. 6 PPC, 6×47 Lapua, and 6XC) are marked with highly visible labels made with a label-printing machine. John also placed labels on many of the dies themselves.
Vintage RCBS Die Rack
Below is an older, metal die rack. These were once manufactured by RCBS, but they are no longer sold. John Adams managed to snag a couple from RCBS years ago. The design is handy, but you can achieve the same results with a home-made wood block (perhaps that’s why RCBS discontinued its metal rack).
Quick Access vs. the Rust Factor
WARNING: While it is handy to keep your dies in a rack, this leaves them exposed to the elements. If you reload in a basement or garage where it gets cold and damp, your dies will rust much more quickly out in the air than if they are kept enclosed in their original boxes, with a small desiccant pack. Always keep a thin layer of oil or corrosion blocker on your dies. We recommend Eezox or Corrosion-X for that task.
Forum member Erik Cortina has produced a series of YouTube videos about reloading hardware and precision hand-loading. Here we feature Erik’s video review of the Forster Co-Ax® reloading press. The red-framed Co-Ax is unique in both design and operation. It boasts dual guide rods and a central handle. You don’t screw in dies — you slide the die lock ring into a slot. This allows dies to float during operation.
Erik does a good job of demonstrating the Co-Ax’s unique features. At 1:00 he shows how to slide the dies into the press. It’s slick and easy. At the two-minute mark, Erik shows how sliding jaws clasp the case rim (rather than a conventional shell-holder). The jaws close as the ram is raised, then open as it is lowered. This makes it easy to place and remove your cases.
At the 5:20 mark, Erik shows how spent primers run straight down into a capture cup. This smart system helps keep your press and bench area clean of primer debris and residues.
While many Co-Ax users prime their cases by hand, the Co-Ax can prime cases very reliably. The priming station is on top of the press. Erik demonstrates the priming operation starting at 4:20.
Smart Accessories for the Co-Ax from Inline Fabrications
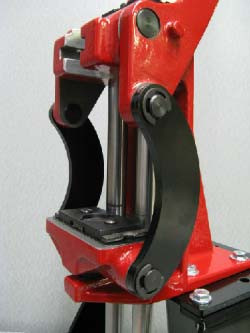
Forum member Kevin Thomas also owns a Co-Ax press, which he has hot-rodded with accessories from Inline Fabrication. Kevin tells us: “Check out the add-ons available from Inline Fabrication for the Co-Ax. I recently picked up a riser mount and a set of linkages for mine and love the results. The linkages are curved. When you replace the original straight links with these, the work area opens up substantially and the the press becomes much easier to feed.” CLICK HERE for Co-Ax Accessories.
Inline Fabrications Forster Co-Ax Accessories
Forster Co-Ax Curved Side Linkage (For Better Access)
L.E. Wilson Case Gage Depth Micrometer Tool Hands-On Tool Review by F-Class John
Are you looking for a better way to measure shoulder bump when sizing brass? When it comes to measuring your shoulder bump there has traditionally been just one way to do it and that’s with a set of calipers and some type of tool attached to a calipers jaw which contacts the case shoulder. While this method has worked well for decades there’s always been some inherent lack of consistency and repeatability. While a minor issue, the inability to get the exact number in completely dependent on the user’s pressure applied and the angle at which the jaws push on the brass.
Enter the L.E. Wilson Case Gage Depth Micrometer with its simple but effective use of Wilson case gauges to ensure a perfect measure of shoulder bump every time. The unit comes with the micrometer top as well as a check gauge which allows you to easily calibrate the micrometer whenever needed. On top of the micrometer unit, you’ll also need to purchase the appropriate case gauges for each of your cartridge types and then you’re ready to go. No other measuring instruments are needed (yep, no calipers are required).
Using the Wilson Depth Micrometer (perhaps a better name is Shoulder Bump Micrometer) is a straightforward process. Simply take your fired brass and insert it into the case gauge and place the micrometer top onto the primer side of the gauge. While holding the micrometer top firmly against the case gauge in one hand, slowly turn the micrometer until you feel it stop. You can back off and turn it again to verify the stop point and once you have it, look at the measurement on the micrometer. Now insert a sized piece of brass and repeat the procedure. Take note of the new number and subtract it from the fired brass number and you now have an exact amount of shoulder bump. Continue to adjust your sizing die until you have the correct amount of shoulder bump and you’re ready to size all your brass.
Watch Video to See how Shoulder-Bump Measuring Micrometer Tool Works
Guys, in this case a VIDEO is worth more than a thousand words. In may not be obvious from the photos how this system works. In fact, it is fast and easy. Drop brass into cartridge-specific case gauge, then put the Micrometer unit on top, and dial to touch. The video shows how this works.
SUMMARY — Tool is Fast, Precise, Repeatable, and Easy to Use — We Like It
The beauty of this tool is the simplicity with which it works. It uses a very accurate micrometer to simply measure how much further your brass is sitting forward inside the case gauge. After a couple uses, you’ll find that this tool is fast, accurate and incredibly repeatable. That gives you confidence that your brass is being sized properly. Ultimately, I found that using the micrometer top really became a joy as I set up a new set of dies and as I sized my brass, I could easily check the consistency as brass came off my press. If you’re looking to improve your sizing game, give the L.E. Wilson Case Gage Depth Micrometer a try. MSRP is $140.00.
New .300 WSM F-Class rifle, with stock finished by Forum member Cigar Cop.
One of the most popular features of our Shooters’ Forum is the ongoing Pride and Joy Rifle thread. Since 2009, Forum members have posted photos and descriptions of their most prized firearms. Here are some of our favorite “Pride and Joy” rifles recently showcased in our Forum. Do you have a gun you’d like to see featured there? Register for the Forum and you can add your favorite gun to the list.
We hope these “Pride and Joy” rifles may provide inspiration for our readers, whetting their appetite for their next competition, varminting, or hunting rifle project.
Ultra-Low Profile 6 PPC for Short-Range Benchrest
This handsome rifle, which belongs to Forum member J.J.Coe, represents the state-of-the-art for 100/200-yard benchrest rifles. It is chambered (no surprise) for the 6 PPC cartridge, which dominates the short-range game. In features a super-low profile carbon composite stock. Note how the vertical centerline of the stock is very close to the barrel. This keeps the center of gravity low and helps the rifle recoil smoothly with less hop in the bags. Note also the tuner on the barrel.
22 BR Savage Varminter — Accuracy on a Budget
This 22 BR Savage, with upgrades from Sharpshooter Supply, is the “pride and joy” of Forum member Maynard. Note the heavy-contour custom barrel with brake. That 22 BR cartridge is a very effective choice for varmint work, as the ground hog in the photo proves. The 22 BR and 22 Dasher are capable of outstanding accuracy with a large variety of bullets and powders. A 22 Dasher can rival the ballistics of a 6mmBR out to 500+ yards, but with reduced recoil.
Eliseo Tubegun in 7mm SAUM with Pierce Action, Bartlein Barrel
Here is a striking camo-finished Elesio (Competition Machine) Tubegun chambered for 7mm SAUM. Note the block fitted to the tubular fore-end so the rifle rides smooth and steady on the Rodzilla T-Rex joystick front rest. The proud owner, Forum member Aeon, tells us: “This is a Gary Eliseo RTM chassis with pickle forks. It has a custom Ceracoat paint job to match my sling gun.” Key components are: Pierce Engineering long action tube receiver, Bartlein 1:8.5″-twist barrel, Jewell trigger set at 2 oz., and Vortex Golden Eagle scope in Vortex rings. Aeon adds: “The chamber was cut by Mark Chesesbro of Chesebro Rifles. Mark throated it very long so the the 180gr and 184gr Bergers would sit where they belong.”
Tuning the 7mm SAUM and Recoil Reduction
Owner Aeon tells us: “The 7 SAUM was as easy a gun as I have ever shot to find a good load for — H1000 gave great consistency and tuning was not hard. However, the challenge in shooting this rifle was recoil management. The 7 SAUM has a punch to it and I found myself having trouble finishing three relays without form problems in the last relay. I considered getting a RAD Pad but that would have required expensive machine work. I stumbled on a recoil pad that is uniquely effective, the Falcon Strike. Sent the pad to Gary Eliseo and he sent it back with the butt plate machined to fit. Complete game changer! The rifle is a dream to shoot now with a big reduction in felt recoil.”
This gray and blue beauty belongs to Forum member Farmer Dave. He posted: “Got this 6.5×47 Lapua back from my smith about six months ago. It’s the most accurate rifle I have ever owned.” This rifle features: AG Composites CF stock, Stiller TAC 30 action, Bartlein 5R barrel, TriggerTech Diamond trigger. On top is a Trijicon Accupower riflescope.
Henry .45-70 with Modern Buttstock and M-LOK Handguard
Here is member Quest45’s handsome lever-action Henry .45-70 Gov and Glock 40 10mm. About his two guns he posted: “All I need is a can of bear spray”. The rifle is fitted with a red dot sight, ammo caddies, Ranger Point M-LOK handguard, and a modernized modular buttstock. These upgrades make it a thoroughly-modern Henry lever gun for the 21st Century.
A .243 Winchester Hunting Rig that Nailed Scottish Roe Buck
Forum member John V. from Scotland showcased a successful hunt with his .243 Winchester rifle. This sports a suppressed, 26″ MTU 1:7.5″-twist barrel. He loaded Sierra 100gr Pro-Hunter bullets, and took this nice Roe Buck at 240 yards through a gap in the foliage.
Mauser M96 with Quilted Maple Stock — for the Wife
We like this handsome quilted Maple-stocked Mauser belonging to Forum member Steel Mover. He posted: “Some like synthetic and some like wood — I have both. Here is the wife’s quilted Maple 96 Mauser 6.5×55. I was working in the shop, wife walked through and said ‘You are building that for me aren’t you?’ Well ‘Yes, dear’ I said of course … so I Lost my rifle.”
Patriotic .284 Shehane F-Open Rig
Forum member 1shot is proud of this new F-Classer: “Just got my first F-Open rifle finished chambered in .284 Shehane. It features a Kelbly stock w/RAD system, Shilen 1:8″-twist ratchet-rifled barrel with EC Tuner, and X-treme 2-stage trigger — all mated up to a Kelbly Panda action. I think this dog will hunt!”
Bill Goad’s 6PPC Hunter “Ranch Rifle”
Forum member Grimstod tells us: “This is the personal rifle of Bill Goad. He has been experimenting with it on several levels. It is shooting great and has several matches on it now. Please enjoy these photos. More can be found on the website www.PremierAccuracy.com. We like the subtle barbed wire effect on the stock.
Do-it-Yourself Paint Job, Done in the Bathroom at Home
Many eye-catching rifles start with a great paint job. Forum member JHN did this job himself. He posted: “Went to local paint shops, some cost a two-month work income, some said guns were a ‘no-no’. So I did it myself — my first Candy Apple red. Base collar is gold metallic, followed by the red. I didn’t have a good paintwork place so I had to improvise. Our bathroom has nice concealing in the summer — a perfect paint booth. So I only have to apologize about some red flakes in our bathroom.”
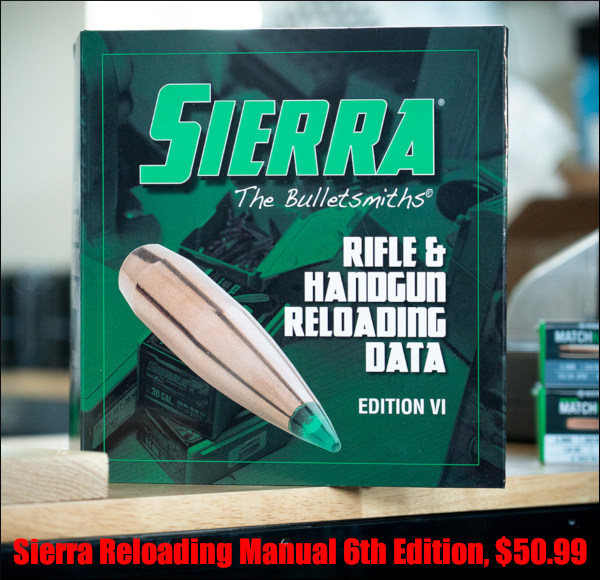
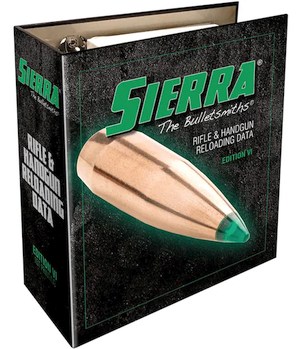
The highly respected Sierra Rifle & Handgun Reloading Data Book VI (6th edition) is back in stock at multiple online vendors. This handy binder-style resource covers hundreds of popular cartridges with data from a huge variety of powder types. This manual provides proven loads, ballistic data, and detailed cartridge specifications.
More Printed Resources
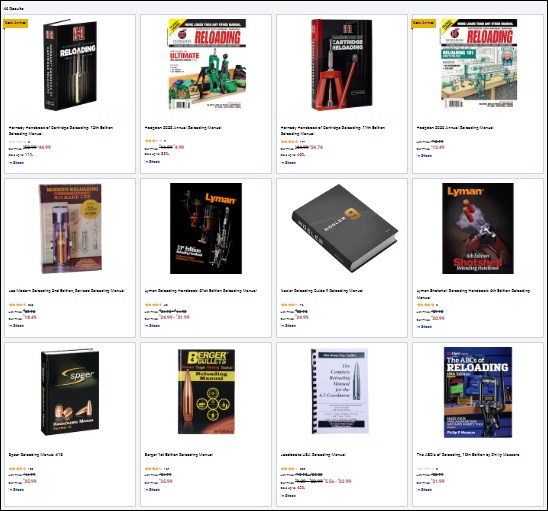
Good reloading data is available in online databases (e.g. HodgdonReloading.com) and in printed book formats. If you prefer print format reloading resources, along with the excellent Sierra Guide, consider these six (6) printed manuals:
If you want the best (and safest) results when loading rifle and pistol ammo, this helpful video explains why you may want to reference multiple reloading guides and/or online load databases.
CLICK HERE for full selection of Reloading Manuals, Cartridge Load Guides, and DVD kits (over 30 reloading resources).
Seating primers is a key part of the reloading process. You need to seat primers consistently to achieve best accuracy. There are many different tools offered for seating primers, both hand-held and bench-mounted. Deluxe premium hand-held seaters may hold just a single primer, while a variety of handheld units employ trays to hold more primers. With bench-mounted primer seaters there are a variety of feeding systems — vertical tubes, angled trays, and even a strip feeder — the APS system pioneered by RCBS.
Today’s Saturday at the Movies feature covers a variety of primer seater options, from low-cost hand tools to the $600.00 Primal Rights unit. We also cover the innovative Lee Automated Case Primer (ACP) system which even feeds your brass, increasing your processing rate.
Forster Co-Ax Bench-Mounted Priming Tool
The Forster Co-Ax® Primer Seater is a trusted bench-mounted priming tool that works very well. Set the jaws for a particular rim size, load the tube, and you’re ready to seat primers. The tool has good “feel” plus plenty of leverage. Forster says that the tool’s “unique design allows the operator to eliminate all slop when working with a specific cartridge, translating into perfect seating, reliable ignition, and reduced misfires.” This Forster tool requires no separate shell holders. The spring-loaded jaws close to securely grip most modern rifle and pistol cases with a rim thickness of .045″ to .072″. And Forster provides a primer flipper tray that makes it easy to load the provided small and large tubes. If you shoot a large variety of cartridge types with various rim sizes, this Forster Co-Ax primer seater is a good choice.
Primal Rights Competition Priming Seater (CPS) Review
If there is a Ferrari of priming tools, it has to be the Primal Rights Competition Primer Seater (CPS). This impressive bench-mounted tool allows very precise control over primer seating depth. A vertical tube holds primers ready for insertion. The action is smooth and precise. Seating depth control is as good as you can get. That precise, repeatable control, and the tool’s smooth operation, are the tool’s major selling points. Video reviewer F-Class John believes that Primal Rights machine is definitely the best priming tool on the market, though it may not be for everyone given its premium $600.00 price.
Frankford Arsenal Perfect Priming Tool
Our friend Jim See of Elite Accuracy LLC has tested the depth-adjustable hand priming tool from Frankford Arsenal. This product, called the Platinum Series Perfect Seat Hand Primer, has some unique features. Primer seating depth can be adjusted with a handy wheel in the tool’s center handgrip. Each “click” of the wheel moves the primer post .001″ (one one-thousandth of an inch). Additionally, the design of the case-holder allows quick and easy removal of a primed case. The unit ships with a full set of shell-holders to match all types of cases. Like many other hand priming units, the primers are loaded into a flip tray that attaches to the head of the tool.
Accuracy Variances and Priming Tool Types
The above video compares the performance of the Frankford Arsensal adjustable priming tool with a Sinclair Int’l hand priming tool — a unit used for many years by top benchrest shooters.
LEE Auto Bench Priming Tool
Gavin Gear of UltimateReloader.com has reviewed Lee Precision’s new lever-operated, bench-mounted priming tool. The Lee Auto Bench Prime features a hopper-style primer feeder set at an angle. Gavin likes the tool, reporting that primers feed well and seat fully with very little effort. And switching from large to small primer size (or vice-versa) is quick and easy. Overall, Gavin says the Lee Auto Bench Prime has earned a place in his reloading room: “The Lee Auto Bench Prime is easier to use than a hand priming tool, and more efficient.”
How the Lee Auto Bench Prime Performs
Gavin had three important “take-aways” from his initial loading sessions with the Lee Auto Bench Prime:
1. I was surprised by the low effort needed to prime cases — it’s pretty amazing.
2. You can quickly and easily install shellholders and change primer sizes.
3. The folding primer tray works very well. It’s a great setup from my testing so far.
Are there any negatives with the tool? Gavin noted that, in the course of loading 100+ rounds, once or twice he had to tap the triangular tray to get the primer to feed: “That’s not a big deal, and may smooth out with time”.
RCBS APS Strip Priming System — Bench Tool and Strip Loader
RCBS pioneered an innovative priming system that held primers in handy horizontal strips. This video shows primers being placed in strips, and then cases being primed using an RCBS bench-mounted APS strip-priming system. Many years ago, this Editor acquired an RCBS Pro 2000 progressive press, which employed the APS strip priming system. Primers were held in strips which could be easily connected for continuous feeding — no tubes to load! I liked the system so much I then acquired an APS hand priming tool (photo right), an APS bench-mounted tool, and an APS strip priming tool that fits on a single stage press. I loaded many thousands of rounds successfully with the APS system with not one inverted primer ever. I still use the APS hand primer tool to prime most of my rifle rounds.
Unfortunately, RCBS has discontinued sales of most APS priming tools, but you can still get primers pre-packaged in APS strips, and you can still buy the Strip Loader tool for placing primers into strips.
BONUS Video — K&M Primer Pocket Correction Tool
K&M offers a handy tool for optimizing primer pocket depth. K&M’s Primer Pocket Correction Tool uses a carbide cutter with a preset depth, allowing consistent depth squaring of the primer pocket bottom. Designed with a drive shank to be used with your cordless screwdriver and/or a K&M handle, these tools are available in four types: Small Rifle/Pistol; Large Pistol; Large Rifle; and .50 BMG.
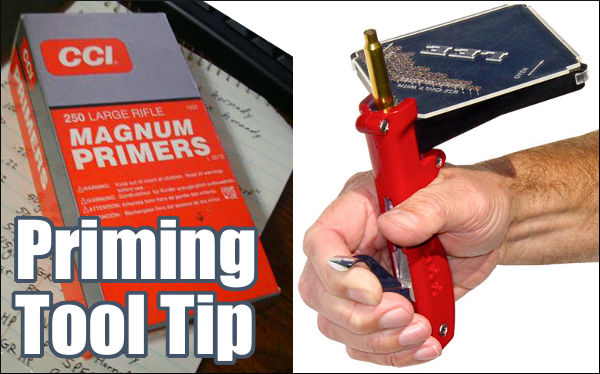
Priming Tool Tip — Check Your Primer Seater for Wear
From time to time, we all encounter a primer that doesn’t go off. It’s normal to attribute the problem to a bad primer. But sometimes there are other explanations. George S., one of our Forum members, experienced a couple failures to fire, but he learned that the issue was his priming TOOL, not his primers. Here’s what George told us. There’s a lesson to be learned:
“I had issues with CCI 450s when I had my first 6BR barreled. I had probably three or four out of 20 rounds that failed to fire. the primers were dented but didn’t fire. I called CCI since I had bought a case of them. The tech was decent enough but had the audacity to tell me I was not seating the primers all the way in the pocket. I proceeded to let him know I had been reloading longer than he had been alive and I knew how to seat a primer.
Turns out that I did and I didn’t! I was using the RCBS primer tool I had used for years and the primers felt just fine to me. I finally decided to check the tool and since I had a new one I took the seating pins out and measured them. The seating pin on the tool I had been using for years was shorter by a few thousandths! I then used the pin from the new primer tool and darned if the primers that didn’t seat down to the bottom of the cup.
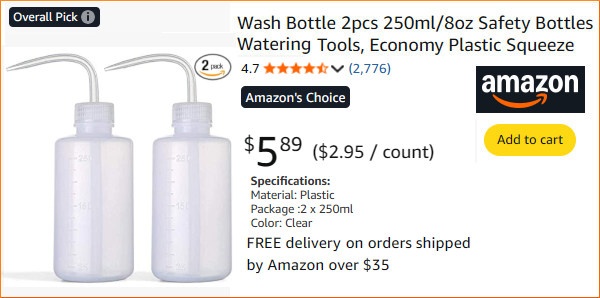
Small patches are not very efficient at distributing bore cleaning liquids inside your bore. The problem with a tight-fitting patch is that the solvent gets squeezed off in the first few inches. You can switch to a smaller jag, or a bore mop, but there is an even better way to get an ample amount of solvent in your bore. Just spray directly into the bore with a wash bottle, an inexpensive plastic bottle with an L-shaped dispensing neck, tapered at the end.
When using the wash bottle, you can either just plug the breech and spray from the muzzle end (where most copper fouling is), or, alternately, put the wash bottle neck directly in the chamber and spray forward. When spraying from the chamber forward, you may need to use a rubber O-Ring to seal off the action… depending on the bore size and the particular wash bottle’s neck spout diameter. We prefer to plug the breech and squirt from the muzzle.
Bottle Solvent Application Method Works Great for Smaller Bores
Using wet patches or wet brushes is an inefficient way to really saturate the tight bores of 17s, 20s, and 22s. Even with a cotton bore mop, most of the solvent will be squeezed out before it gets to the end of the bore, where most copper fouling occurs. For these smaller 17, 20, and 22-caliber bores, you can just take the wash bottle and stick the tapered nozzle right in the chamber. The tapered end will press fit in the throat, sealing off the chamber. With the barrel slightly nose-down, give the bottle a couple good squirts until the solvent mists out the muzzle. In just a few seconds, this will put more solvent in the bore than a half-dozen wet patches.
A solvent-filled wash bottle is also handy for wetting your brushes. It’s much easier to saturate a bore brush (without spilling solvent on your stock), by using the wash bottle. You can get wash bottles from USPlastic.com, Amazon.com, or lab supply stores. CLICK HERE to get a pair of wash bottles for just $5.99.
NOTE: Some deals may disappear at 11:59 PM EST on Monday 12/1/2025.
At the request of our readers, we provide select “Deals of the Week”. Every Sunday afternoon or Monday morning we offer our Best Bargain selections. Here are some of the best deals on firearms, hardware, reloading components, optics, and shooting accessories. Be aware that sale prices are subject to change, and once clearance inventory is sold, it’s gone for good. You snooze you lose.
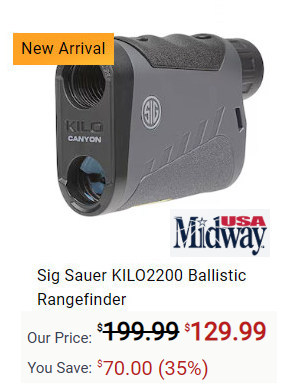
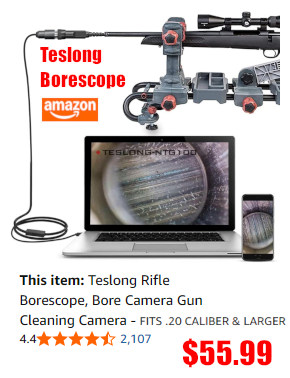
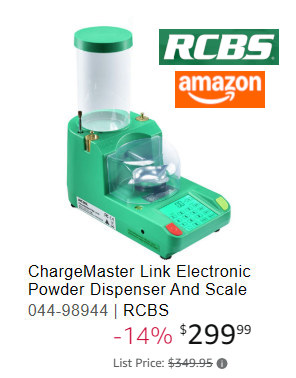
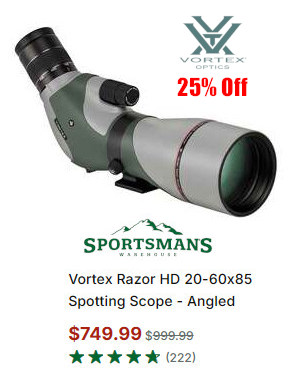
Tomorrow, December 1, 2025, is officially “Cyber Monday” following Black Friday, a great time for gun gear discounts. Today we showcase notable Cyber Monday sales, and we spotlight 15 products — great deals that are available right now.
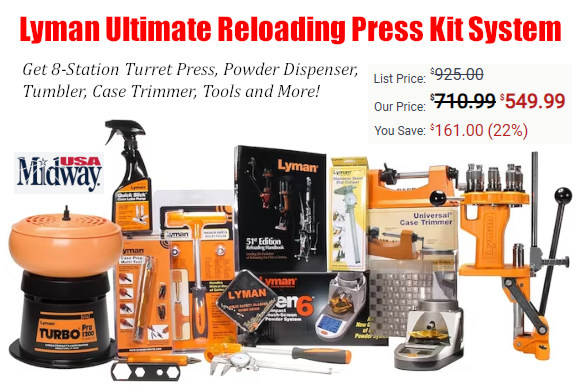
MidwayUSA is running a major Cyber Monday Week Sale, with significant discounts on a wide range of products including optics, gun parts, reloading equipment, hunting gear, ammunition, camping gear, and more. CLICK HERE for Midway USA Cyber Sale deals.
If you’re looking for a new handgun, rifle, or shotgun, definitely check out the Cyber Monday deals at Guns.com. This site has a vast selection of firearms from nearly all popular gun-makers. Some pistols and rifles are discounted $300 or more.
Cyber Monday is a huge event at Amazon, with big discounts on a vast selection of merchandise. Shooting sports enthusiasts can get big savings on optics, reloading tools, gun cases, gun vises, ultrasonic cleaners, priming tools and more. Shown above are notable Cyber Monday Deals now offered on Amazon, with discounts up to 41%.
CYBER MONDAY Specials — Fifteen Hot Bargains
For our previous Black Friday feature stories last week we listed multiple websites that offered a variety of discounts. For this 2025 Cyber Monday + Deals of the Week, we feature 15 select items — all great deals. Click on each to get the current deal on the seller’s site, and then you can shop other Cyber Monday bargains at that vendor.
NOTE: All listed products are for sale to persons 18 years of age or older. No products are intended for use by minors. As an Amazon affiliate, this site can earn revenues through sales commissions.
Shown above is David Tubb, the legendary 11-time National High Power Champion, posing with a very serious rifle used in the Extreme Long Range (ELR) game. David has jumped into the Extreme Long Range discipline in a very big way, producing a .375-caliber, long-barreled ELR version of his famous Tubb rifle, called the Adaptive Target Rifle (ATR). A version of this rifle, piloted by David’s son-in-law Nate Stallter, set an ELR World Record in January 2018. See video below for a full report.
This video shows Team TUBB setting a new ELR World Record of 2011 Yards using the Tubb Adaptive Target Rifle in .375 CheyTac. Nate Stallter nailed three shots at over one mile — 1768 yards. Then Nate broke his own record, going 3 for 3 at 2011 yards. ELR Central hosted this match, held at the Front Sight gun range, Pahrump, Nevada on January 21, 2018.
David Tubb Shoots ELR Adaptive Target Rifle at KO2M
For the Extreme Long Range (ELR) discipline, David Tubb developed a .375-caliber, long-barreled ELR version of his famous Tubb rifle, called the Adaptive Target Rifle (ATR). A version of this rifle, piloted by David’s son-in-law Nate Stallter, set an ELR World Record in January 2018.
David Tubb Talks about KO2M and Extreme Long Range Shooting
David Tubb’s long-range rifles have performed well in Extreme Long Range shooting. AT the 2019 NRA Extreme Long Range Championship, David Tubb won the Heavy Gun Division. In this video, created during the King of 2 Miles (K02M) competition at the Whittington Center in New Mexico, David talks about the challenges of ELR shooting, and cartridge selection. Big, heavy, large-caliber bullets with ultra-high BCs are favored for the ELR game, but recoil and cost must also be considered.
About the .375 CheyTac Cartridge
Some of the most successful ELR cartridges are based on the CheyTac family, including the .375 CheyTac (9.5×77) and .408 CheyTac (10.36 x 77). This .375 Cheytac cartridge has proven to be tough and accurate. And it is capable of winning — our friend Derek Rodgers won the 2017 King of 2 Miles (K02M) event shooting a .375 CheyTac (9.5×77).
Derek Rodgers was the 2017 King of 2 Miles. Derek is also the first-ever human to ever hit the maximum distance target target at 3368 yards (1.91 miles). His cartridge choice? The .375 CheyTac. Derek ran Cutting Edge Bullets in Peterson brass with Hodgdon H50BMG powder.
Q: Why did you choose the .375 CheyTac cartridge?
Derek: When I was asked to join the Applied Ballistics Team, I needed to get an ELR rifle built in a short period of time. I was under a very tight time schedule to get the project complete. In an effort to eliminate variables, I decided to keep things standard and as simple as possible. I chose the .375 CheyTac for the ease of getting components. The larger rifles are more difficult to get components quickly and I felt like the .375 CheyTac had enough attributes to be competitive at ELR distances.
This deluxe, roll-out Rush Creek Creations 42-0000 69″ x 16″ gun cleaning mat (with pockets), is available from Amazon for $69.99 (#ad).
We normally use a gun cradle when cleaning or adjusting our rifles. But there are situations, such as when working on a barreled action, when it’s nice to use a pad that lies flat. Many work pads are too small — they’re nothing more than oversize mouse pads. Here are three gun pads that are big enough to work well with rifles and/or barreled actions.
DryMate Gun Cleaning Pad
The Drymate Gun Cleaning Pad is a full 59″ x 16″. That’s nearly five FEET from end to end — longer than most rifles, so you have plenty of surface area for working. Conveniently, this product can be washed with soap and water. It is offered in Green and Charcoal Gray colors. We prefer the Green version because the color makes it a bit easier to see small black and gray parts such as screws and springs.
Boyt Harness Counter Pad
The 48″ x 12″ Boyt Harness Counter Pad was originally designed more for display purposes than for serious work sessions, but we like this product. It is useful if you want to lay your gun on a bench to make small adjustments. The Boyt Counter Pad, $28.99 at MidwayUSA, is nice and big, a full four feet from end to end. The back side is canvas while the top-size is a quilted cotton fabric. This product has received high praise from buyers. Here are actual owner reviews:
Worth every penny. I bought three of them because I want to have at least one always around. I use one for a shooting bench or tailgate mat and another for my primary gun cleaning workbench mat. Awesome for both purposes. This one was perfect for my array of needs. — Joe D.
This mat is great for cleaning guns and keeping your surfaces clear of oil or solvent. The mat has plenty of space for a rifle or handgun and the padding is thick enough[.] I would definitely buy again and have recommended this to my friends and family. — Safety Guy
I bring this to the rifle range with me every time, to rest my rifle on the table without worrying about scratches. It fits nicely in my soft rifle case. One side is a tough canvas material that doesn’t show scratches, and the other side is a soft fleece material that protects the finish of your gun. — MACPSU
Hoppes Gun Cleaning Pad
The Hoppes Gun Cleaning Pad is 36″ wide x 12″. That’s big enough for many barreled actions (unless you have a really long barrel). This pad has a non-slip nylon backing, and Hoppes claims that the “Soft acrylic material absorbs 8 times its weight in fluids.” This Hoppes Cleaning Pad costs just $9.46 at Amazon this week, a 44% discount (#ad).






 RCBS pioneered an innovative priming system that held primers in handy horizontal strips. This video shows primers being placed in strips, and then cases being primed using an RCBS bench-mounted APS strip-priming system. Many years ago, this Editor acquired an RCBS Pro 2000 progressive press, which employed the APS strip priming system. Primers were held in strips which could be easily connected for continuous feeding — no tubes to load! I liked the system so much I then acquired an APS hand priming tool (photo right), an APS bench-mounted tool, and an APS strip priming tool that fits on a single stage press. I loaded many thousands of rounds successfully with the APS system with not one inverted primer ever. I still use the APS hand primer tool to prime most of my rifle rounds.


 Small patches are not very efficient at distributing bore cleaning liquids inside your bore. The problem with a tight-fitting patch is that the solvent gets squeezed off in the first few inches. You can switch to a smaller jag, or a bore mop, but there is an even better way to get an ample amount of solvent in your bore. Just spray directly into the bore with a










 The


 The


