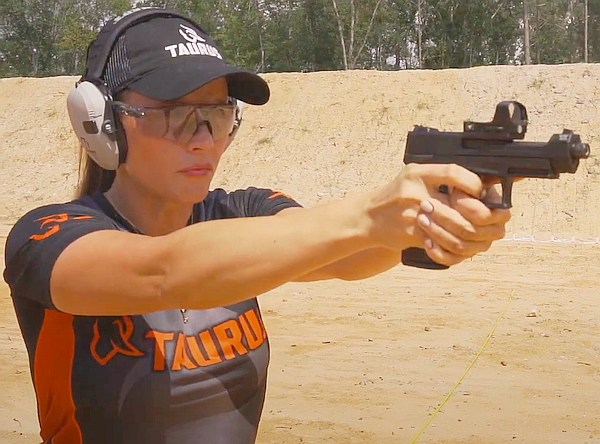
In addition to the basic, budget-priced TX 22 pistol, Taurus offers an impressive Comp model set up for optics. The Taurus TX 22 Competition model is built on the same full-size polymer receiver as the basic Taurus TX 22 but has a newly engineered slide and barrel assembly designed to work with red dot optics.
The Taurus TX 22 Competition features a “skeletonized” slide with a cutout between the ejection port to just behind the front sight. The mounting system allows the use of the following (but not limited to) sight models: Trijicon RMR, C-More STS 2, Vortex Venom, Doctor Noblex, Burris Fast Fire, Sightmark Mini, Holosun HS507C, Leupold Delta Point Pro.
Talented Jessie Harrison Demonstrates TX22 Competition
In this video, Jessie Harrison, the world’s best female action pistol competitor, shoots the TX 22 on steel, starting at 0:14 time-mark. She shows how the pistol’s low recoil allows amazingly quick follow-up shots.
There is an additional model, the Taurus TX 22 SCR (Steel Competition Ready) which offers a forward compensator. This TX 22 SCR was designed for steel plate competition and action pistol games. We like the balance and ergonomics of this pistol, and the integrated forward compensator does reduce muzzle flip, allowing faster follow-up shots and better split times.
Many shooters prefer to deprime their brass before resizing. That way they can tumble cases or keep primer debris off their main press. To deprime cases before sizing or cleaning you can use a Decapping Die. This pushes out the spent primer without changing the neck or body of a case. Such decapping dies work fine, but they do require the use of a press. Here is a handy alternative — a cool tool that allows you to deprime brass anywhere — no press needed.
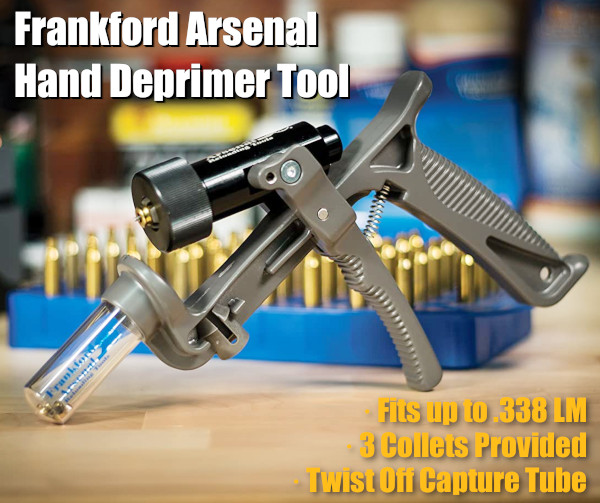
Handheld Primer Removal Tool From Frankford Arsenal
This cleverly-designed Hand Deprimer Tool allows you to deprime cartridge cases without a press. This hand-tool from Frankford Arsenal will deprime brass and capture primers conveniently. You can deprime your cases while watching TV or relaxing in your favorite chair.
This device lets you remove spent primers anywhere — no press needed and all the mess (cups/anvils/residue) stays in the capture chamber. This tool comes works with nearly all common case types up to .338 Lapua Magnum. With good leverage, this tool does the job quickly and efficiently. Forum members have praised this handy tool, but recommend wearing a thick glove if doing more than 100 cases in a session.
How to Adapt Tool for Small Flash Hole Brass
The Frankford Arsenal Deprimer Tool was designed for LARGE flash-hole brass. To deprime brass with small (1.5mm/0.59″) small flash-holes, as found on Lapua .220 Russian and 6mmBR cases, you will need to reduce the pin diameter. Frankford Arsenal currently recommends purchasing a replacement pin and “sanding it down” to the smaller diameter. NOTE: This is NOT difficult — simply spin the stock pin in some sandpaper.
This handy depriming tool is very versatile. With a universal, cylinder-style cartridge-holder, the tool can deprime a wide variety of cartridge types from .20 caliber up to .338 caliber. Three different plastic collets are provided to handle for different diameter cases. Spent primers are captured in a removable spent primer catch tube. Simply twist off the clear catch tube to dump the spent primers. With die-cast metal construction, this tool should last through many thousands of depriming cycles. MSRP is $54.99. Right now it is $52.00 on Amazon with 81% 5-star ratings.
User Modifications — Grip Padding and High-Volume Capture
Many users recommended putting some kind of padding on the grip and front lever to reduce pressure on the fingers. This can be done with a wrap or a rubber covering. In addition, users have adapted the unit with an attached hose and large primer capture jug. If you depriming hundreds of cases at a time, this hose conversion may make sense.
Review from actual owner: “I have owned one of these for about eight years and deprimed over 10,000 cases with this tool. I have never had to replace a single part on it. You will have to adjust the return spring every so often, but that is a very easy task. If you are depriming a LOT of brass, the handle can tear up your hand a bit. Solution: Wear a Mechanics Glove. Easy Peasy! You will NOT regret this purchase.”
Are you looking to get started in PRS and NRL practical precision rifle competition? Or perhaps you’d like to advance your skill set so you can place higher in big matches (and get your hands on those prize table items)? Of course there is no substitute for trigger time in the field, but there ARE some great print resources. These four books can help you select the right equipment, improve your shooting skills, make better wind calls, increase your fitness, and develop a more efficient between-match training program.
1. Precision Rifle Marksmanship: The Fundamentals
Frank Galli, $21.13 Paperback, $20.07 Kindle
Frank Galli (aka “LowLight”) is the founder/head honcho of SnipersHide.com, the most active tactical community on the internet. Galli is also a retired USMC scout-sniper. Practical Precision Rifle shooting is one of the hottest trends in competitive shooting today. PRS and NRL matches draw big turn-outs and boast impressive prize tables. Galli’s Precision Rifle Marksmanship (#ad) book covers the fundamentals of precision marksmanship with easy-to-understand methodology. The book uses the same instruction process that Galli uses in his live marksmanship classes.
As Sniper’s Hide guru Frank Galli explains, there is no voodoo when it comes to precision rifle marksmanship, but there are techniques that, when practiced, make the difference between good marksmanship and great marksmanship. Understanding the reasons that a bullet hits or doesn’t hit its intended target at ultra-long distances is a crucial element to learning. Galli’s explanations of how to understand and compensate for wind speed and direction are excellent — great wind-reading advice.
Published in 2020, this 272-page well-illustrated book covers the latest equipment (scopes, LRFs, chassis systems, mags, bags, bipods, tripods) favored by tactical competitors in PRS/NRL type matches.
2. Long Range Shooting Handbook
Ryan Cleckner, $24.95 Paperback, $9.99 Kindle
Ryan Cleckner’s Long Range Shooting Handbook (#ad) is the best-selling modern book on practical rifle skills. A former U.S. Army sniper instructor, Cleckner is knowledgeable, and his text is well-organized and chock full of good information. You can view Sample Chapters on Amazon.com.
Ryan Cleckner’s highly-regarded Long Range Shooting Handbook is designed as an intro to important fundamental concepts such as MOA vs. Mils, External Ballistics, and Environmental Effects. Included are personal tips and advice based on Cleckner’s years of experience as a sniper instructor.
The Long Range Shooting Handbook is divided into three main categories: What It Is/How It Works, Fundamentals, and How to Use It. “What It Is/How It Works” covers equipment, terminology, and basic principles. “Fundamentals” covers the theory of long range shooting. “How to Use It” gives practical advice on implementing what you’ve learned, so you can progress as a skilled, long range shooter. This book will benefit any long-range shooter, not just PRS/NRL competitors.
3. IMPACT! — Training and Preparing for Precision Rifle Matches
Rodney Maze, $14.99 Paperback, $4.99 Kindle
Impact!, by PRS competitor Rodney Maze, is an entry/intermediate level guide to preparing yourself and your equipment to compete in precision rifle type matches. It will also benefit anyone looking to learn about practical-style long range and precision shooting. We recommend you check it out for yourself — there are 20 Pages of free sample content (#ad) on Amazon. Topics covered include:
— Rifle, optic, and equipment selection
— Setting up your rifle, bags, tripods for PRS/NRL matches
— Understanding ballistics and how to record and use ballistic data
— Techniques for using holdovers for multi-target stages
— Gun skills, rapid fire techniques, clearing malfunctions
— Shooting off of barricades, and specialty stages
— Effects of wind and how to improve your wind calls
— Tips for live fire and dry fire practice
— Preparing yourself and your equipment for a match
— Mental strategies and techniques
Impact! is illustrated with plenty of photographs. Topics are divided logically, and concepts are explained in clear language. Also included is an extensive glossary of terms used in precision shooting and a list of additional resources you can use to further pursue your precision shooting knowledge. This book also includes a handy Appendix with formatted pages for recording data about your rifle, scope, and ammunition. There is also a Wind table for recording your rifle “dope” and wind hold-offs. Lastly, Impact! has a useful table of unit conversions.
4. Practical Shooter’s Guide
Marcus Blanchard, $19.98 Paperback, $9.99 Kindle
Thinking of getting started in the Practical/Tactical shooting game? Looking for ways to be more stable when shooting from unconventional positions? Then you may want to read Marcus Blanchard’s Practical Shooter’s Guide (A How-To Approach for Unconventional Firing Positions and Training) (#ad). Unlike almost every “how to shoot” book on the market, Blanchard’s work focuses on the shooting skills and positions you need to succeed in PRS matches and similar tactical competitions. Blanchard provides clear advice on shooting from barricades, from roof-tops, from steep angles. Blanchard says you need to train for these types of challenges: “I believe the largest factor in the improvement of the average shooter isn’t necessarily the gear; it’s the way the shooter approaches obstacles and how they properly train for them.”
As an Amazon affiliate, this site can earn revenues through sales commissions.
Here’s a very useful product that should please shooters who wet-tumble their brass with stainless media, or use ultrasonic cleaning machines to clean cartridge brass (and gun parts). Employing forced hot air circulation, the Lyman Cyclone Case Dryer will dry a large quantity of brass in under two hours. Internal racks provide five drying levels. With “street price” under $80.00, the Cyclone Case Dryer is an affordable and effective addition to an ultrasonic or rotary-tumbler cleaning system.
The Lyman Cyclone Case Dryer works fast. No need to wait overnight (or longer) to air-dry your brass. Lyman states that “The forced heated air circulation of the Cyclone will dry your brass inside and out within an hour or two, with no unsightly water spots.” The handy individual trays keep different types of brass separate. The dryer can also be used for gun parts that have been ultrasonically cleaned.
Lyman Cyclone Case Dryer Features:
• Holds up to 1000 .223 Rem cases or 2000 9x19mm Luger cases
• Works with cartridge brass cases or gun parts
• Fast drying time — Typically 1 to 2 hours
• Timer control can be set up to 3 hours
• Durable ABS trays with recessed handles
Watch How Cyclone Case Dryer Functions with both Cartridge Brass and Gun Parts
Cyclone Case Dryer 115V (Part #7631560) MSRP: $94.95
Cyclone Case Dryer 220V (Part #7631561) MSRP: $112.00
There is a good article on gun safes in SHOT Business, a publication for the NSSF SHOT Show audience. Written by Christopher Cogley, this Safe Spaces Article offers some very important things to consider when purchasing a gun safe. Here are key points from that article:
Safe Security — The security of a gun safe comes down to two main factors: the thickness of the steel and the construction of the safe. When it comes to construction, look for a safe that has continuous welded construction instead of bolts or spot-welding, which are easier for trained gun thieves to cut through with torches or high-power saws.
Lock Options — Traditional combination locks are arguably the simplest choice. The downside, though, is they don’t provide quick access to firearms in an emergency. Electronic and biometric keypads provide quicker access — but be sure to replace the batteries every year.
Fireproof Rating — Aside from theft, the biggest threat to your firearms is fire. Unfortunately, the fireproof rating on gun safes can be confusing because there is no single, “standard” fireproof rating. As a general rule, the fireproof rating states how long a safe can be exposed to a fire of a particular temperature and maintain a temperature inside the safe of no more than 350 degrees F. To put this in context, the average house fire creates temperatures between 800 and 1,200 degrees F.
Where to Place a Gun Safe in Your Home
The Safe Spaces article includes advice from Stephen Hall, CEO of Lock It Up Safes. Hall addressed the question: “Where should I put my safe?”
Hall states: “Ease of installation should NOT be the foremost consideration when making this decision. Putting a safe in the garage has both pros and cons. We see some retailers recommend the garage solely because they don’t have the right team on board to install safes in other locations, and wheeling one into the garage is the easy way out.
Putting a safe in the garage is fine if that is the only place you an put it, but most want the safe in the home, where they can get to it quickly. Temperature and humidity are important considerations as well, and both are more easily controlled in a house rather than in the garage.
One advantage to garage installation is the concrete floor provides a solid base for safe installation. Houses built on concrete slabs also offer a solid anchor on the first level. If the safe needs to go to an upper floor, the weight of the safe and its contents need to be factored in.”
Place Safe Against Outside Wall
Hall recommends placing your gun safe against an outside wall: “In case of fire, the safe will typically last longer as there is not a lot that can burn on one side of the safe, thus keeping it cooler.”
Don’t Make the Mistake of Buying an Undersized Safe
The most common mistake people make when buying a gun safe is getting a safe that’s too small. This video explains why you should probably invest in a bigger safe. First, the rated gun capacity is exaggerated — rifles with mounted optics, long barrels, wide forearms and/or pistol grips take up considerably more space than a small rimfire rifle or a lever gun with iron sights. Second, your gun collection will likely grow in years to come. Third, you may want to store other valuables in the safe — such as vital documents, jewelry, watches, and pricey electronics. In this video the host notes: “Get a much larger safe than you think you’ll need at first. This will guarantee that you will have enough room for future purchases and all the guns and equipment you currently have.”
Recommended Safe Features for Long-Gun Storage
Editor’s Recommendation:
Budget $1200-1500 for a safe from a major maker, with external hinges, and an interior at least 58″ high. That gives you room for 30″-barreled rifles with a top shelf for handguns and other valuables. A rotary rack and slide-out drawers are great additions.
Keypad or Dial? We favor rotary dial locks. With minimal maintenance they will function flawlessly for decades. But the digital locks offer quick-access and convenience. If you go digital, get a commercial-grade unit.
Fire-lining is worth getting, but a thin layer of sheet-rock doesn’t make a safe truly “fire-proof”.
Interior at least 58″ High and 30″ wide Overall Weight 750+ Pounds 8 Gauge or Heavier Wall Thickness Double-Wall, Composite Door with Relockers Minimum UL RSC Rated. TL-15 or TL-30 Rating is Desirable External Hinges
Mechanical UL Group II (or better) Lock with Standard Dial Or UL Type 1 Commercial-Grade Electronic Lock
Custom Interior Suitable for Scoped Guns with Long Barrels On-Door Storage System for Non-scoped Long Guns OR Rotary Gun Rack for Scoped Rifles and ARs
Internal (sandwiched) Insulator, Reinforced if Sheet-rock Palusol? Heat-Activated Expanding Door Seals
Slide-out Drawers for Handguns Fire-lined Inner Safe for Paper and Media
Low Gloss, Rust-resistant External Finish Pre-Drilled holes for Lag Bolts and in Rear for Electric Cord Overhead Fluorescent Lamp and/or LED Mini-lights on Strings
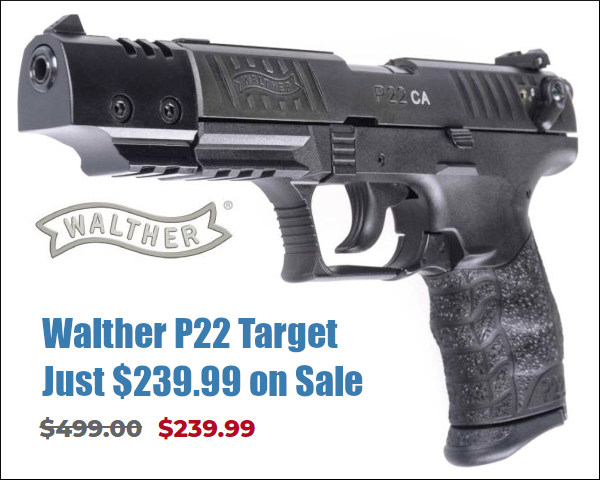
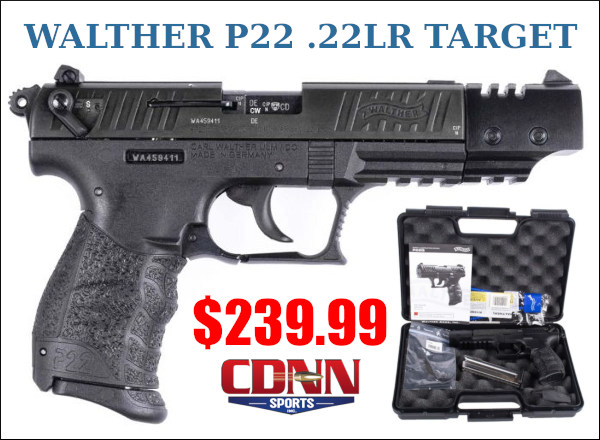
We think all shooters should have a quality .22 LR rimfire pistol — something with a good trigger, ergonomic grip, and excellent accuracy out of the box. Right now, with the Walther P22 Target Model, you can get all those things for just $239.99 at CDNN Sports. We that that’s one of the best mag-fed rimfire handgun deals you’ll currently find anywhere.
This pistol has a good trigger and ergonomic grip. Accuracy is very good and the forward ported compensator reduces muzzle flip dramatically, allowing very rapid follow-up shots — good for gun games. The K22 ships with two (2) 10-round magazines. This pistol does not have an integral plate for fitting a red dot optic, but the adjustable iron sights are quite good.
The P22 is a very nice rimfire handgun with a 5″ barrel plus a forward ported compensator. The ergonomic grip boasts an interchangeable backstrap. Walther states: “Best-in-class ergonomics, supported by interchangeable backstraps, establishes the P22 as one of the most comfortable handguns available today.” Compared to most other rimfire pistols in this class, the trigger is very good right out of the box with a light, crisp pull. We also like the ambidextrous controls. A rare feature for a rimfire, the P22 is covered by the Walther Legendary Lifetime Limited Warranty.
More and more folks are using Burris Signature Rings these days. These unique rings feature polymer inserts. That allows you to pre-load some elevation in your scope set-up, or you can center-up the windage. Additionally, the polymer inserts hold your scope securely without leaving marks on the tube. Lastly, some folks believe that Signature rings may offer advantages for benchrest competition. Rodney Wagner shot a world-record 600-yard group using Burris Signature Zee Rings (“Zee” denotes the Weaver-rail model). James O’Hara set multiple IBS 1000-yard records using Burris Signature Zee Rings. James will tell you he thinks “all his guns seem to shoot best with these rings”.
IBS World Record Set with Signature Zee Rings
Are Signature Zees good enough for competition? Absolutely. Some folks scoff at these Burris rings, given their modest price. A set of 1″-diameter Sig Zees cost $40.89 at Midsouth. But consider this, in 2013 Rodney Wagner shot the then-smallest 600-yard group in history, a 0.336″ 5-shot stunner, using Signature Zee Rings on his IBS Light Gun. It took five years for a smaller 600-yard group to be shot, a 0.311″ by bullet-maker Bart Sauter, using his IBS Heavy Gun. (See IBS 600-yard Records.) Here’s Rodney with his record-setting rifle, fitted with affordable Signature Zee 30mm rings.
Vendors Have Burris Signature Rings in Stock Now
Various models of Burris Signature Rings are available from many online vendors. NOTE: You may have to check with more than one seller to get the exact size, height, and model you prefer. But right now these vendors have pretty good selections of Signature Zees in stock now, including the popular 30mm High and 30mm Extra High models (each currently $56.36 at Midsouth). If you check all three sellers, you’ll probably find what you need.
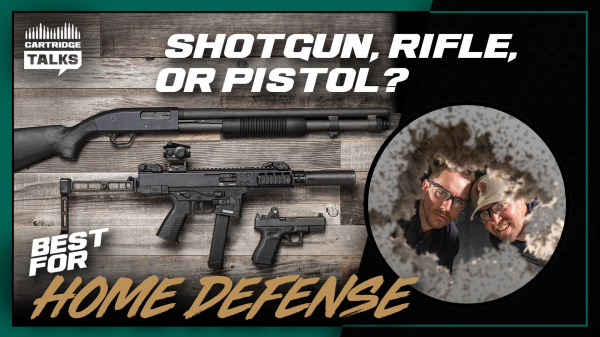
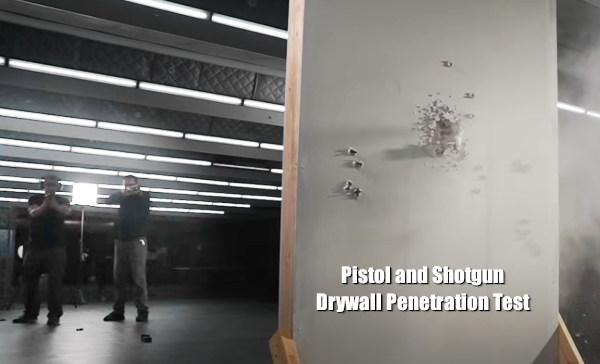
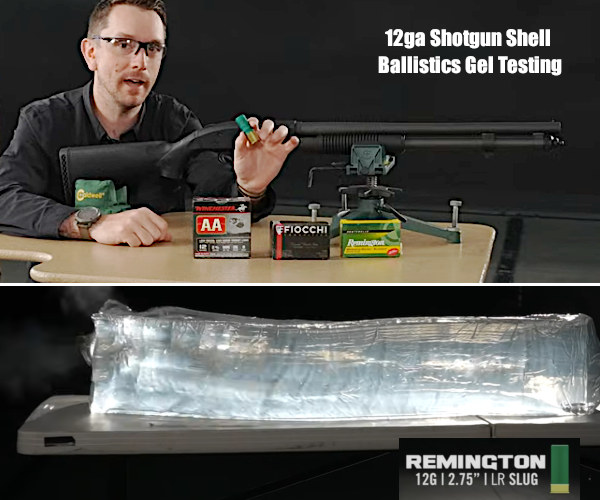
Mark and Ryan, co-hosts of the Vortex Nation Podcast, have released an informative video about gun choice for home defense. Mark and Ryan examine the performance of pistols, rifles, and shotguns in home defense scenarios. The podcast looks at the practical side of ballistics, comparing the pros and cons of these three gun types. The hosts assess the effectiveness (and penetration power) of these weapon types via field tests with cardboard silhouette targets, ballistics gel, and drywall. The eye-opening tests show how pistols, rifles, and shotguns perform in terms of accuracy, penetration power, and likely lethality.
At an indoor range, the Vortex team tests these three gun types (rifle, pistol, and shotgun) used for protection of home and family. They run a simulated home defense scenario, aerate some dry wall for science, and hit the ballistics gel to give you the real-world testing and fun you expect with plenty of surprises along the way. Click HERE for video.
Vortex invites viewers to share their thoughts in the YouTube comments section. You can access other interesting Cartridge Talks episodes by subscribing to the Vortex Nation YouTube Channel. To see more from Vortex visit VortexOptics.com or follow Vortex on Instagram and/or Facebook.
The CMP’s hugely popular Rimfire Sporter event runs Sunday, July 20, 2025 at Camp Perry, Ohio. Prior to the Sunday match, on Saturday, July 19th, the CMP will host the Rimfire Check-In and a CMP Rimfire Clinic.
New Range Location Will Have E-Targets
Unlike past years, the 2025 National Rimfire Sporter match will be held on Camp Perry’s Petrarca Range — equipped with CMP eTargets. This should please the hundreds of Rimfire Sporter competitors. The Petrarca range features more conveniences, such as a covered firing line and adjacent parking. Moreover, the eTargets should improve the experience for competitors. Brian Williams, CMP Highpower Manager, explained: “The matches should run faster, without the need to hang targets and do the scoring.”
E-Targets for Rimfire Sporter Match This Year
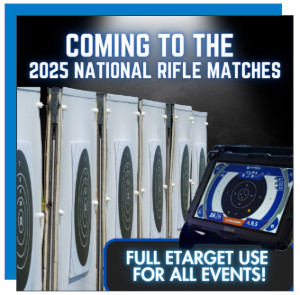
For the first time, this summer the CMP will utilize the electronic targets of Petrarca Range for the National Rimfire Sporter Match. Featuring Kongsberg Target System (KTS) technology, the system includes monitors at each firing point.
The eTargets will permit the Rimfire Sporter Match to run more smoothly and efficiently. Competitors won’t have to walk down-range between relays to change targets, and scores will be tracked and recorded instantly. Monitors placed alongside each competitor will instantly show shot placements during the match, while suspended displays above the firing line will allow spectators to follow along with each shot in real time.
Popular Match for Junior and Adult Competitors
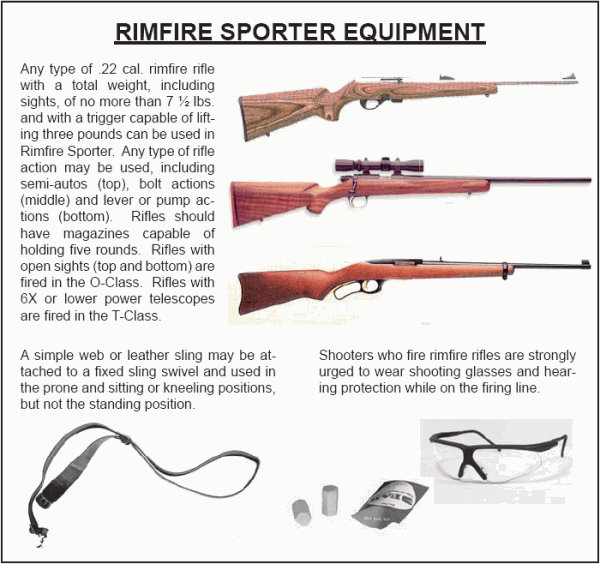
The National Rimfire Sporter Match, one of the most well-attended events of the annual National Matches, is open to both adults and juniors of all experience levels. Using .22 caliber rifles at 25 and 50 yards, participants in the match traditionally chose from three separate classes: Open Sight (O), Telescope Sight (T) and Tactical Unlimited (TU). Due to high demand, the CMP has added an “M-class” for 2025 to give competitors the option to use U.S. military rimfire training rifles during competition. Competitors may enter in Single or Double Entry options and then select the rifle class(es) in which they will fire.
Firing is done at 25 and 50 yards in prone, sitting, and standing positions, in slow and rapid-fire modes. For each Class, awards are offered to High Juniors, High Seniors, and High Women as well as Overall Winners.
If there is a single CMP event at Camp Perry every summer that offers the highest level of shooter satisfaction, the most diverse group of competitors, and the lowest cost of entry, that would have to be the annual Rimfire Sporter Match. Shooters range in age from young juniors to seniors in their 70s and 80s. And persons with disabilities can compete as well, with Adaptive Shooting Programs for physically-challenged competitors.
Each year, the Rimfire Sporter Match attracts hundreds of shooters to Camp Perry. National Rimfire Sporter competitors can use affordable sporter rifles with either scopes or iron sights. All you need are a .22 LR rifle, a simple sling, and ammo. Rifles may be manually operated or semi-automatic, in four classes: the standard “O Class” for open-sighted rifles, “T-Class” for telescope-sighted rifles, the “TU Class” for Tactical and unlimited rifles, and the new “M-Class” for Military Rimfire Training Rifles.
Rimfire Sporter Course of Fire
Competitors will complete slow fire prone, rapid fire prone, slow fire sitting or kneeling, rapid fire sitting or kneeling, slow fire standing, and rapid fire standing shot sequences. To learn more about the National Rimfire Sporter Match, CLICK HERE.
Learn more about the National Rimfire Sporter Match at TheCMP.org website.
Adam Scepaniak, of The Guns and Gear Store, has written an interesting story about Prairie Dog Hunting in North Dakota. If a P-Dog safari is on your “bucket list”, you’ll want to read the full story in the Sierra Bullets Blog. Adam provides many tips that can help you plan a successful prairie dog adventure.
Prairie Dog Hunting in North Dakota with Sierra Bullets
It’s that time of year where lots of men and women point their vehicles westward and try to push the limits of their rifles on prairie dogs. [A few seasons back] I was a part of this group of people… while in northwestern North Dakota. CLICK HERE to Read Full Story.
Little Missouri National Grassland
Once my hunting party arrived at the Little Missouri National Grassland in North Dakota we immediately began scouting for prime prairie dog towns. There is a certain amount of strategy involved in choosing a prairie dog town … for several reasons. For one, you should try to always stay “above” the prairie dogs.
Small objects like rocks, cactuses, and prairie vegetation can easily obstruct your view if you’re shooting prone on a level plane. We encountered this in the first small prairie dog town we stopped and shot at. The prairie dog town was very visible while walking and standing, but once we laid down with our rifles on bipods the two-foot prairie grass became a severe obstruction. We shortly moved on because the small town became quick-studies to our shooting.
The second prairie dog town we hunted was at the base of a small ridge with a dried, cattle creek at the bottom. This area offered better shooting opportunities because we were above most of the prairie dog holes, and if we were not above them, a deep ravine separated us from the prairie dogs removing any obstructions from our rifle scopes which was our previous problem. This area had its own disadvantage though because of some other wildlife present. There were approximately fifty head of cattle in our close vicinity grazing, which was to no surprise because many ranchers utilize the National Grassland for grazing. We had to wait for the cattle to leave our area as to not have an incidental hit due to a rare ricochet. As the sun passed over the horizon we decided to return to this spot the next morning, but would change our shooting position to increase our advantage.
This Location Offered a Nice Overlook.
Zoomed Image Shows Individual Prairie Dog Mounds.
My previous varminting best was a 275-yard shot near Mobridge, South Dakota on a separate prairie dog hunting trip. With more experience and better reloading, Here in North Dakota I was able to make a solid hit on a prairie dog just over 400 yards which made me ecstatic! For a central Minnesota, shotgun-raised guy, I was pretty happy that my bullet selection and hand-loading ability produced a 125-yard improvement.
Once we cleaned and cased our rifles for the journey home we had shot a little over 200 rounds of my Sierra® reloads. This was a lot less than previous prairie dog trips I have been a part of, but our hit percentage was substantially higher as well. Traveling into a new area meant a lot more scouting and experimentation for us as a group. In future trips or hunts of your own, it can be very beneficial to schedule an extra day just for scouting[.]
Little Missouri National Grassland is a National Grassland located in western North Dakota. At 1,033,271 acres, it is the largest grassland in the country. Within its borders is Theodore Roosevelt National Park. The Little Missouri National Grasslands was once a part of the Custer National Forest, but is now a part of the Dakota Prairie Grasslands, a National Forest unit consisting entirely of National Grasslands. A predominant feature of the grassland is colorful and beautiful badlands, a rugged terrain extensively eroded by wind and water. It is a mixed grass prairie, meaning it has both long and short grass.
The boundaries of the grasslands on certain maps can be misleading. Within the boundaries of the national grassland are significant portions of state-owned and privately-owned land, much of it leased by cattle ranchers for grazing.
The grassland is administered by the Forest Service as part of the Dakota Prairie Grasslands from offices in Bismarck, ND. There are ranger district offices in Dickinson and Watford City.







 More and more folks are using Burris Signature Rings these days. These unique rings feature polymer inserts. That allows you to pre-load some elevation in your scope set-up, or you can center-up the windage. Additionally, the polymer inserts hold your scope securely without leaving marks on the tube. Lastly, some folks believe that Signature rings may offer advantages for benchrest competition. Rodney Wagner shot a world-record 600-yard group using Burris Signature Zee Rings (“Zee” denotes the Weaver-rail model). James O’Hara set multiple IBS 1000-yard records using Burris Signature Zee Rings. James will tell you he thinks “all his guns seem to shoot best with these rings”.



 E-Targets for Rimfire Sporter Match This Year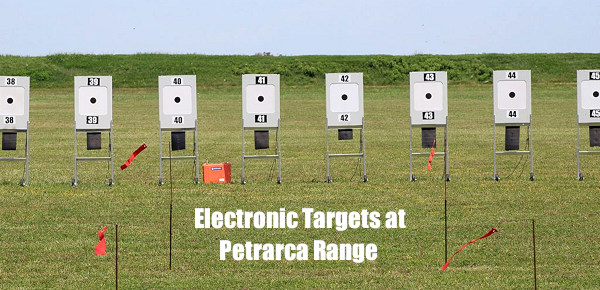



 Little Missouri National Grassland


