Are you tired of making a mess in your gun room and picking up patches off the floor? If you clean at the range, would you like to make life much easier (no hunting for patches on dirty ground)? Then consider the MTM Gun Cleaning Patch Catcher. It is currently just $9.19 on Grafs.com and $9.89 on Amazon.
This handy see-through green container fits on the end of your rifle or shotgun barrel. It works with all patch types and bore sizes and fits virtually all barrel diameters, large and small. Simply slip the MTM Gun Cleaning Patch Catcher over your barrel to contain all the patches pushed out the muzzle. No more mess and stains on your bench/table. When cleaning tasks are done, simply remove the Patch Catcher and dump the contents into the trash. Watch the video to see how the MTM Patch Catcher works. Note how it also retains the solvent spray and/or drips.
One owner explains: “This box straps over the muzzle end of a barrel and keeps the mess completely contained. Excess cleaning solvents collect in the bottom. Patches fall off the jag and are captured as well when the cleaning rod is withdrawn. It also completely contains the splatter burst when a bore brush exits the muzzle of whatever firearm is being cleaned.” (D.J. Bradley)
Here are actual user reviews from verified customers:
“It’s been a long time since I bought something that is just WOW brilliant but this patch catcher is just that. It is so simple, so neat, so clean and so effective. It fits perfectly on all my rifle barrels and catches patches, brush spray and most importantly most of the smells of solvents. I can now clean my rifles in the house without inviting the wrath of my darling wife.” — Emmitt P. (Amazon)
“The MTM Patch Catcher works great! It is easy to adjust to different size barrels, and … all the gunk stays in the trap! Now, no more cleaning up the work bench/floor area after gun cleaning. This trap is a must have! I never knew I needed one of these until I got the MTM one from Graf’s. My buddy had a different brand, and it was hard to use. On his, the trap that holds the dirty patches and ‘juice’ would not stay in place, and some times most of the gunk ended up on the floor.” — Michael T (Grafs.com)
“This little device is more than a patch catcher. It also contains that dirty, smelly spray when a bore bristle exits the barrel. With the [MTM Patch Catcher] top open, it will also catch spray cleaners and lubes when used on small parts.” — TwoBoxer (Amazon)
Most competitive shooters are pretty good about bore cleaning (some may even clean their bores too aggressively). However, we’ve found that many shooters neglect the chamber area and the bolt lug recesses. It’s too easy to clean the bore, slip out the guide rod and say “I’m done.” Sinclair Int’l explains why it’s important to clean the action interior: “Shooters use a lot of grease and oil on their bolts to reduce friction and to prevent wear[.] Unfortunately, both of these compounds attract grit, powder and primer residues. Cleaning your receiver is especially critical [with] custom actions where the fit between the action and bolt is held to very tight tolerances. Routine cleaning of the action will prevent unnecessary wear on the bolt body, locking lugs, and the action raceways/guide rails. Frequent action cleaning is also essential to keeping the trigger area free of debris which can cause trigger hang-ups and failures.”
Cleaning the Chamber
Combustion by-products, lubricants, and solvent residues can collect in your chamber. Severe build-up of grease and carbon can interfere with chambering. Also some solvents will promote corrosion. You need to keep your chambers clean.
1) Install a clean cotton mop of the correct size on the end of a chamber rod and insert the mop into the chamber. Rotate the mop several times to remove any brush bristles left behind and any excess solvent that was between the rod guide snout and the end of the chamber. Make sure the chamber is dry. Prior to storing a rifle you can oil the chamber but make sure the oil is removed prior to firing the rifle.
2) Alternatively, install an old bore brush on a chamber rod, overlap a couple of patches on the brush bristles, and wrap them around the brush completely. Then insert the patch-covered brush into the chamber while rotating it to remove the excess solvent and debris. Push it firmly into the neck area of the chamber. A similar method is to pierce a large patch on the end of the brush loop and insert it into the action, again rotating the brush as you push the patch up against the breech.
Cleaning the Lug Recess Area
The action lug recess area is one of the dirtiest places on a bolt-action rifle. To properly clean this area, always use a tool designed for the task, such as the $26.99 Sinclair Action Cleaning Tool (part # ACT1) which is part of the full Sinclair Action Cleaning Tool Kit ($45.99, part #ACT2).
1) Insert a cotton roll or cleaning felt into your lug recess cleaning tool and wet both ends and the face of the cotton roll/felt with solvent.
2) Insert the tool into the action and push it forward until it is positioned fully in the lug recess area and rotate the tool head several times. Then reverse the rotation for another few turns. While rotating the tool move it slightly in and out to cover the entire recess area and to also clean the breech face.
3) Remove the tool from the action and inspect the surface of the felt or cotton roll. If there is quite a bit of residue on both sides of the felt/roll, then repeat with another wet felt/roll.
4) When you feel the recess area is completely clean, insert a dry cotton roll into the tool and rotate the tool head to remove any remaining solvent and debris. If necessary, use a second dry cotton roll.
5) You can follow this step up with another pass of a mop or patches into the chamber to get any debris or solvent that pushed forward out of the lug recess area.
Product innovation is all about “building a better mousetrap”, or in this case, building a better bore-cleaning patch. A real smart guy, Shane Smith, has invented a triangular patch that earned a patent. The U.S. Patent Office has awarded a utility patent for BoreSmith’s Triangle Patch™. This unique cleaning patch was designed by Shane Smith, a mathematician/physicist who employed his scientific and firearms knowledge to create innovative bore-cleaning products.
BoreSmith’s clever Triangle Patch™ (aka Pyramid Patch) presents more cleaning surface area to the bore wall than does a conventional square or round patch (of equivalent size). At the same time, the unique geometry makes Triangle Patches much less likely to jam in the barrel. This is because the notches in the sides of the triangle allow the patch to sit more uniformly on the jag (without bunching up). In addition, the Pyramid patch is must less likely to jam due to pleating. One reason conventional patches get stuck is unwanted 5-layer pleating. The special notches in the Pyramid patch remove all or most 5-layer pleating. As a result the patch does not bunch up and this also reduces rod bowing. SEE Triangle Patches HERE.
Triangle Patch Function and Geometry Explained (See 1:18 time-mark):
NOTE: Despite what you may see in this video, you should ALWAYS insert brushes and patches from the chamber end first, using a fitted cleaning rod bore guide. With bolt-action rifles, NEVER insert a cleaning rod (with brush or jag) in through the muzzle. This may damage the delicate crown of your barrel.
The Triangle Patches work great with Boresmith’s patented dual-diameter bore brushes:
Product innovation is all about “building a better mousetrap”, or in this case, building a better bore-cleaning patch. A real smart guy, Shane Smith, has invented a triangular patch that earned a patent. The U.S. Patent Office has awarded a utility patent for BoreSmith’s triangular Pyramid Patch™. This unique cleaning patch was designed by Shane Smith, a mathematician/physicist who employed his scientific and firearms knowledge to create innovative bore-cleaning products.
BoreSmith’s clever Triangle Patch™ (aka Pyramid Patch) presents more cleaning surface area to the bore wall than does a conventional square or round patch (of equivalent size). At the same time, the unique geometry makes Triangle Patches much less likely to jam in the barrel. This is because the notches in the sides of the triangle allow the patch to sit more uniformly on the jag (without bunching up). In addition, the Pyramid patch is must less likely to jam due to pleating. One reason conventional patches get stuck is unwanted 5-layer pleating. The special notches in the Pyramid patch remove all or most 5-layer pleating. As a result the patch does not bunch up and this also reduces rod bowing.
Triangle Patch Function and Geometry Explained (See 1:18 time-mark):
NOTE: Despite what you may see in this video, you should ALWAYS insert brushes and patches from the chamber end first, using a fitted cleaning rod bore guide. With bolt-action rifles, NEVER insert a cleaning rod (with brush or jag) in through the muzzle. This may damage the delicate crown of your barrel.
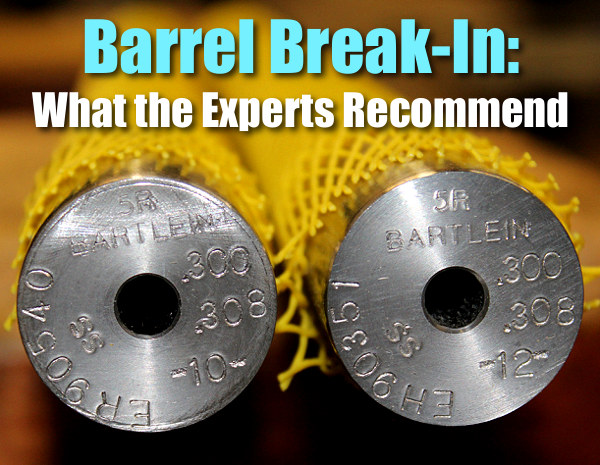
The question of barrel break-in is controversial. Some folks advocate an elaborate, lengthy cycle of shooting and brushing, repeated many times — one shot and clean, two shots and clean and so on. This, it is argued, helps barrels foul less and shoot more accurately. Others say minimal break-in, with patching and brushing after 10-15 rounds, is all you need. Still others contend that break-in procedures are a total waste of time and ammo — you should just load and shoot, and clean as you would normally.
We doubt if there will ever be real agreement among shooters concerning barrel break-in procedures. And one must remember that the appropriate break-in procedure might be quite different for a factory barrel vs. a custom hand-lapped barrel. This Editor has found that his very best custom barrels shot great right from the start, with no special break-in, other than wet patches at 5, 10, and 15 rounds. That said, I’ve seen some factory barrels that seemed to benefit from more elaborate break-in rituals.
What’s the best barrel break-in procedure? Well our friend Eric Mayer of Varminter.com decided to ask the experts. A while back Eric interviewed representatives of three leading barrel manufacturers: Krieger, Lothar-Walther, and Shilen. He recorded their responses on video. In order of appearance in the video, the three experts are:
Do I Need to Break-In a New Rifle Barrel?
Eric Mayer of Varminter.com says: “That is a simple question, [but it] does not necessarily have a simple answer. Instead of me repeating my own beliefs, and practices, on breaking-in a new rifle barrel, I decided to answer this one a bit differently. While we were at the 2016 SHOT Show, we tracked down three of the biggest, and most popular, custom barrel makers in the world, and asked them what they recommend to anyone buying their barrels, and why they recommend those procedures. We asked the question, and let the camera run!” Launch the video above to hear the answers — some of which may surprise you.
Long-Term Barrel Care — More Experts Offer Opinions
Apart from the debate about barrel break-in, there is the bigger question of how should you clean and maintain a barrel during its useful life. Some folks like aggressive brushing, other shooters have had success with less invasive methods, using bore foam and wet patches for the most part. Different strokes for different folks, as they say. In reality, there may not be one solution for every barrel. Different fouling problems demand different solutions. For example, solvents that work well for copper may not be the best for hard carbon (and vice-versa).
“Why worry about a little barrel fouling when the throat is subjected to a brutal 5,600° F volcano at 55,000 PSI? To investigate these and other questions about taking care of a match barrel, we spoke with a dozen experts and share their knowledge in this first of a series of articles.
After listening to folks who shoot, build barrels or manufacture cleaning solvents for a living, we concluded that even the experts each have their own unique recommendations on how to care for a match barrel. But they all agree on one thing — the gun will tell you what it likes best. Because the life expectancy of a match barrel is about 1,500 to 2,500 rounds, the objectives of cleaning one should include: preserve accuracy, slow the erosion, and remove fouling — all without damaging the gun. This article doesn’t claim that one cleaning method is better than the next. Rather, we set out to interject a little science into the discussion and to share some lessons learned from experts in the field.” — Chip Lohman
Put the short “J” end of the UV Bore Light in the chamber area. Always make sure your firearm is unloaded. Doubles as a chamber flag for most calibers.
Let there be light… Here’s a handy new device for pistol shooters. Birchwood Casey has come up with a large-diameter “J”-shaped fiber optic tube designed to illuminate pistol barrels without the need for batteries. The Birchwood Casey® UV Bore Light allows gun owners to quickly check the bore of their firearm for obstructions, dirt and fouling.
The UV Bore light is an innovative design that uses ambient light instead of batteries. Simply put the short “J” end of the bore light in the chamber area of your unloaded gun and it will provide enough illumination to check the bore.
The UV Bore Light also doubles as a safe-chamber flag for most guns. To use the UV Bore Light as a chamber flag, place the LONG end of the Bore Light in the CHAMBER end of the barrel — see photo.
The Birchwood Casey UV Bore Light is inexpensive. It’s sold by the pair in a two-pack priced at $5.40 MSRP.
Otis will introduce a number of new products at SHOT Show 2018. We were impressed by two new products, one that cleans bores, and a second that promises to protect the inside of your barrel from corrosion. As to the latter, we’re always looking for better ways to prevent the formation of rust in barrels during long term storage. You can certainly coat the bore using patches soaked with Eezox, Corrosion-X, or other good anti-corrosion product. But is there something that could work even better?
New Otis Metal Defense Bore Stick
Otis came up with a new idea that may hold promise. The new Otis Metal Defense Bore Stick™ is placed inside your barrel during storage. Perhaps better named the “Bore Cord”, this product has a long orange “tail” that runs down inside the barrel. The cord’s fibers release VCI, a very effective corrosion inhibitor. The top end has an orange rubber handle with a conical plug. That plug goes in the muzzle to block moisture and retain the rust-fighting VCI vapors. Available for rifles, shotguns, and pistols, Otis says this product “protects firearms from rust and corrosion for up to two years. It is inserted in the barrel of the gun, features a plug to cap the muzzle, and creates a protective barrier on the metal surface.” Single packs cost $4.99 and two-packs are $6.99.
New Foaming Bore Cleaner from Otis
Count us as Foam Fans. We have used Wipe-Out Foam Bore Cleaner on our own match rifles for years. Over that time, Wipe-Out has worked very well, greatly reducing the amount of brushing required. Chemist Terry Paul, inventor of Wipe-Out, created a great product that really works. Our procedure with Wipe-Out is to first patch out the barrel with 3-4 wet patches soaked with Carb-Out or other solvent. Then we apply Wipe-Out once to the bore (with an O-ring boreguide sealing off the chamber). We wait 20-30 minutes, then apply Wipe-out foam a second time. After 3-4 hours we patch out the bore, and normally the rifle is good to go. For long-term storage we may run an oil patch down the bore as a final step.
Otis now has its own proprietary Foaming Bore Cleaner. The expanding foam is formulated to clean the bore of any rifle, pistol, or shotgun. Available in a 3 ounce aerosol can, it retails for $9.99. The can ships with a handy tube for application, with a push-button control on top. We look forward to trying the Otis foam cleaner to see how it stacks up to Wipe-Out.
The above video shows how to apply Wipe-Out or other bore-cleaning foam. We use a slightly different method. First, we use 3-4 wet patches to remove loose carbon fouling. Then we apply the foam as shown, but usually from the muzzle end (with bore guide in chamber). Here’s the important point — after 20-30 minutes, once the bubbles have dissipated, we apply the foam a second time, getting more of the active ingredients into the barrel. We then patch out, as shown, after 3-4 hours.
Ask 10 shooters about barrel cleaning and you’ll get 10 different opinions. This reflects that fact that different fouling problems demand different solutions. For example, solvents that work well for copper may not be the best for hard carbon (and vice-versa). To come up with the right solution, first you must understand the nature of the fouling in your barrel.
John Krieger Interview with AccurateShooter at SHOT Show:
The debate about the proper care of a match barrel is a hot one, spiked with folklore and old wives’ tales, Lohman said. He and his staff set out to set the record straight: “We tried to interject some science into the discussion of cleaning a match barrel,” he explained. In his article, Lohman writes:
Why worry about a little barrel fouling when the throat is subjected to a brutal 5,600° F volcano at 55,000 PSI? To investigate these and other questions about taking care of a match barrel, we spoke with a dozen experts and share their knowledge in this first of a series of articles.
After listening to folks who shoot, build barrels or manufacture cleaning solvents for a living, we concluded that even the experts each have their own unique recommendations on how to care for a match barrel. But they all agree on one thing — the gun will tell you what it likes best. Because the life expectancy of a match barrel is about 1,500 to 2,500 rounds, the objectives of cleaning one should include: preserve accuracy, slow the erosion, and remove fouling — all without damaging the gun. This article doesn’t claim that one cleaning method is better than the next. Rather, we set out to interject a little science into the discussion and to share some lessons learned from experts in the field.
For more Shooting Sports USA articles, visit www.ssusa.org.
Here’s a new product we like — Creedmoor’s extra-long, fitted Cleaning Rod Guides (aka Bore Guides) that offer a port for adding solvent. We like the distinctive bright orange color. That helps you quickly identify your rifle on crowded cleaning bench.
Why a Rod Guide Is Needed for Proper Bore Cleaning
A good Cleaning Rod Guide ensures that your brushes and jags are centered in your bore, so you don’t get uneven wear in your throat. Moreover the guides protect the action raceways, blocking liquids and debris from entering the trigger group. The port helps you add solvent without making a mess or spilling on a fine stock finish.
The orange Creedmoor Cleaning Rod Guides have some nice features. They are long enough so that you can avoid removing larger optics and include a port to apply solvent. The O-ring at the front provides an additional seal for the chamber. These Rod Guides are designed for specific action types and chamberings for proper alignment. Creedmoor’s Bore guides cost $24.95. That’s quite a bit less than some other vendors’ fitted cleaning rod guides. Current offering are:
TIP: When using any cleaning rod guide, you should cover the rear of the stock with a towel to prevent any solvent from touching the stock. Solvents can harm find wood, painted, and hydro-dipped finishes.
Small patches are not very efficient at distributing bore cleaning liquids inside your bore. The problem with a tight-fitting patch is that the solvent gets squeezed off in the first few inches. You can switch to a smaller jag, or a bore mop, but there is an even better way to get an ample amount of solvent in your bore. Just spray directly into the bore with a wash bottle, an inexpensive plastic bottle with an L-shaped dispensing neck, tapered at the end.
When using the wash bottle, you can either just plug the breech and spray from the muzzle end (where most copper fouling is), or, alternately, put the wash bottle neck directly in the chamber and spray forward. When spraying from the chamber forward, you may need to use a rubber O-Ring to seal off the action… depending on the bore size and the particular wash bottle’s neck spout diameter. We prefer to plug the breech ans squirt from the muzzle.
Bottle Solvent Application Great for Smaller Bores
Using wet patches or wet brushes is an inefficient way to really saturate the tight bores of 17s, 20s, and 22s. Even with a cotton bore mop, most of the solvent will be squeezed out before it gets to the end of the bore, where most copper fouling occurs. For these smaller 17, 20, and 22-caliber bores, you can just take the wash bottle and stick the tapered nozzle right in the chamber. The tapered end will press fit in the throat, sealing off the chamber. With the barrel slightly nose-down, give the bottle a couple good squirts until the solvent mists out the muzzle. In just a few seconds, this will put more solvent in the bore than a half-dozen wet patches.
A solvent-filled wash bottle is also handy for wetting your brushes. It’s much easier to saturate a bore brush (without spilling solvent on your stock), by using the wash bottle. You can get wash bottles from USPlastic.com, Amazon.com, or lab supply stores.


 Do I Need to Break-In a New Rifle Barrel?

 The UV Bore light is an innovative design that uses ambient light instead of batteries. Simply put the short “J” end of the bore light in the chamber area of your unloaded gun and it will provide enough illumination to check the bore.
 New Foaming Bore Cleaner from Otis


