Hunting season has started in many parts of the country. And today, Saturday, September 27, 2025, is National Hunting and Fishing Day. Every year, this event is held on the 4th Saturday of September. First recognized by President Nixon in 1972, this is now the 52nd year the event has been celebrated across the USA. To help mark this day, we are offering six informative videos for hunters. These cover planning your hunt, selecting good optics, and optimizing your rifle.
This video and related article offer good basic advice for sighting-in a hunting rifle. There are a series of six points covered. Here’s Tip #1: “Find a safe place to shoot your rifle with a backstop. If possible, use a bench and a rock-solid shooting rest. Sighting-in is all about consistency, so the less human error you have, the better. For safety, be sure to also bring ear and eye protection.” READ FULL ARTICLE on NRAWomen.com.
Prepare For Your Hunt — Get Fit and Practice Positions
As part of the NRA’s Tips & Tactics video series, Kristy Titus explains how to prepare for a hunt. Titus, co-host of the Team Elk TV show has hunted around the globe. She grew up in the outdoors, running pack mules in Oregon with her father. In this video, Kristy discusses fitness training and demonstrates field positions that can be employed during a hunt.
Kristy explains: “Hunting can lead you into some steep, rough country. It’s really important that you train both your body and your mind to handle the elements and the rigors of hunting So, if you plan on going on a mountain hunt, get out and train your body. Train with your firearm. Get off the bench and have some fun with this. Do some positional shooting or, if you want to add a stress dynamic… have someone put you under a time parameter.”
Elk Hunting — Great North American Adventures
A North American elk hunt represents the adventure of a lifetime for many. Before heading out on an elk hunt, you want to maximize your chances of success by having the right equipment, and by doing your homework before the hunt. This National Shooting Sport Foundation (NSSF) video offers good advice on planning your first elk hunt.
Success! Elk hunt photo from West Canyon Ranch, a private hunting ranch in Utah.
Photo courtesy Rocky Mountain Elk Foundation (RMEF).
Deer Hunting in Norway’s Fjord Mountains
Here’s a video with some truly stunning scenery. Watching this video is like taking a virtual vacation to Norway, where you can explore the scenic mountains in the Fjord region. Forum member Kenneth Skorpen (aka “Sal”) has created a cool video of a deer-hunting trip he took in Norway. He didn’t bag a buck on this trip, but the walk in the Fjordland mountains took Kenneth through some spectacular scenery. (At the 11:25 time mark you’ll see an amazing sunset over the Fjord.)
Kenneth did encounter a doe that had fallen down the mountain, and apparently broken its neck (14:35 time mark). The terrain is very steep, and Kenneth observed that: “I feel fortunate to be able to do this, but I also feel very tired in my legs. Did you know that the hares around here have shorter left legs due to the steep hills?”
Load Development for .308 Win Hunting Rifle
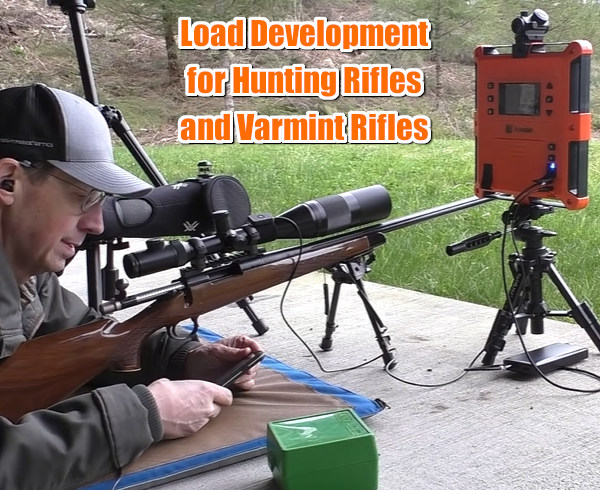
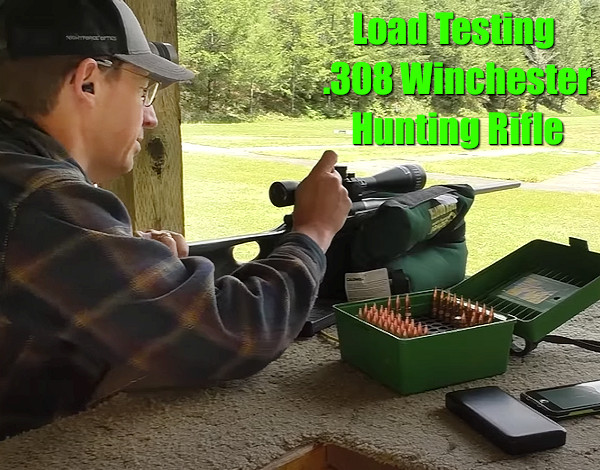
In this video, F-Class ace Keith Glasscock shows load development with a .308 Winchester hunting rifle. Here Keith uses a large X-type sandbag for a front support. He is shooting a Remington 700 bolt-action rifle, with Barnes TSX solid copper bullets, PPU Brass, Federal 210m primers, and AR Comp powder. Keith said the Barnes bullets were excellent — he commented that these bullets were “match quality in terms of precision”. Keith achieved some very small three-shot groups with AR Comp and the TSX projectiles. Keith did note that point-of-impact shifted up significantly with increases in charge weight (see 6:20-7:10). With thinner-contour hunting barrels, this is not unexpected. But POI change should be observed carefully during load development, as you may need to adjust your zero after completing testing.
Hunting season kicks off this month in many parts of the USA. If you have a new hunting rifle or need to develop a load for your rig with a new choice of bullets and/or powder, this article can help. Ace shooter Keith Glasscock explains how to develop a good load for a hunting rifle or varmint rifle.
Keith is an outstanding competitive shooter, who has finished second at the F-Class National Championships (F-Open) multiple times. Keith is also a skilled wind coach who runs the popular Winning in the Wind YouTube Channel. Along with his interest in mid-range and long-range F-Class competition, Keith also enjoys game hunting and varmint adventures.
Developing accurate hand-loaded ammo for hunting and varmint rifles involves procedures that may be a bit different than load testing for a match rifle. You want to be efficient, and use the types of brass and bullets you’ll be using on the hunts. In two recent videos, Keith shows how he developed good, accurate loads for a .223 Rem varmint rifle and a .308 Win hunting rifle.
.223 Rem Load Development — Powder Charge and Seating Depth
In the first video, Keith covers the load development process for a Remington 700 bolt-action varmint rifle chambered in .223 Remington. Keith starts by full-length sizing the brass. Then he experimented with powder charge weights, and came up with a promising load of 24.7 grains of Alliant AR Comp with Hornady 50gr A-Max bullets.
Next Keith experimented with seating depths (see 5:30-6:100) and found that accuracy improved as he changed OAL length in .005 increments. Keith ended up with 2.270″ with a 3-shot group in the twos! This video shows the importance of testing your bullet choice at various seating depths. Keith shoots this rig prone off bipod, which is similar to the bipod shooting he does in the varmint fields. Keith explains key factors to consider when optimizing the .223 Rem cartridge in a varmint rig. Velocity readings are made with a LabRadar unit.
Load Development for .308 Win Hunting Rifle
In a second video, Keith shows the process for load development with a .308 Winchester hunting rifle. Here Keith uses a large X-type sandbag for a front support. Again, he was shooting a Remington 700 bolt-action rifle, this time with Barnes TSX solid copper bullets, PPU Brass, Federal 210m primers, and AR Comp powder. Keith said the Barnes bullets were excellent — he commented that these bullets were “match quality in terms of precision”. Keith achieved some very small three-shot groups with AR Comp and the TSX projectiles. Keith did note that point-of-impact shifted up significantly with increases in charge weight (see 6:20-7:10). With thinner-contour hunting barrels, this is not unexpected. But POI change should be observed carefully during load development, as you may need to adjust your zero after completing testing.
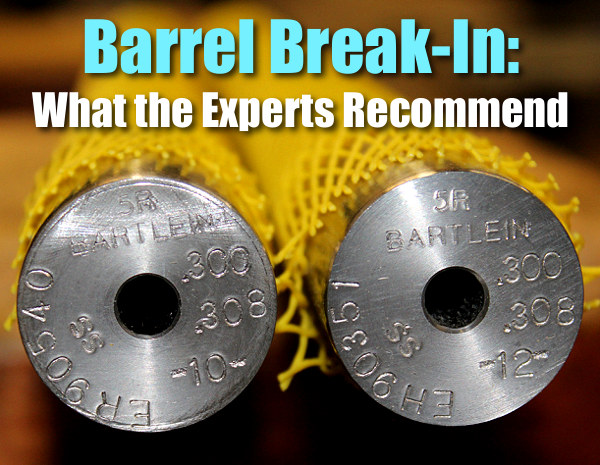
The question of barrel break-in is controversial. Some folks advocate an elaborate, lengthy cycle of shooting and brushing, repeated many times — one shot and clean, two shots and clean and so on. This, it is argued, helps barrels foul less and shoot more accurately. Others say minimal break-in, with patching and brushing after 10-15 rounds, is all you need. Still others contend that break-in procedures are a total waste of time and ammo — you should just load and shoot, and clean as you would normally.
We doubt if there will ever be real agreement among shooters concerning barrel break-in procedures. And one must remember that the appropriate break-in procedure might be quite different for a factory barrel vs. a custom hand-lapped barrel. This Editor has found that his very best custom barrels shot great right from the start, with no special break-in, other than wet patches at 5, 10, and 15 rounds. That said, I’ve seen some factory barrels that seemed to benefit from more elaborate break-in rituals.
What’s the best barrel break-in procedure? Eric Mayer of Varminter.com decided to ask the experts. Eric interviewed representatives of three leading barrel manufacturers: Krieger, Lothar-Walther, and Shilen. He recorded their responses on this video. In order of appearance, the three experts are:
Shilen, Krieger, and Walther Experts Talk about Barrel Break-in
Do I Need to Break-In a New Rifle Barrel?
Eric Mayer of Varminter.com says: “That is a simple question, [but it] does not necessarily have a simple answer. Instead of me repeating my own beliefs, and practices, on breaking-in a new rifle barrel, I decided to answer this one a bit differently. While we were at the 2016 SHOT Show, we tracked down three of the biggest, and most popular, custom barrel makers in the world, and asked them what they recommend to anyone buying their barrels, and why they recommend those procedures. We asked the question, and let the camera run!” Launch the video above to hear the answers — some of which may surprise you.
Barrel Break-in — Initial Inspection and Cleaning
This video explains that you should always inspect and clean the bore of your barrel before sending rounds through it. There may be remnants of the production process, such as lapping residues, that you’ll want to get out of the bore. We’ve even seen a few tiny metal pieces in some factory barrels. And it’s always wise to borescope a new barrel to see if there are visible defects in the rifling such as lands that have flawed edges — we’ve seen that on some cheaper barrels.
Barrel Break-In — Ian Klemm’s Surprising Observations
Here’s a 10-minute Vortex Nation interview with Ian Klemm. Ian, a 4-Time F-TR National Champion is one of America’s best long-range shooters. In this video, Ian explains his approach to barrel break-in, which may surprise you. Does barrel break-in even matter? Conventional wisdom says “Yes” and perhaps there’s some truth to that, but Ian argues that break-in is NOT nearly as important as the internet wants you to believe. Ian believes that you don’t need to waste a ton of time/ammo to get your barrel ready to shoot extremely accurately. This may be particularly true with premium hand-lapped custom barrels.
Barrel Break-In Procedures with Keith Glasscock
Keith Glasscock is also one of America’s greatest F-Class shooters who has finished second at the Nationals multiple times. Keith is also a highly-respected wind coach who has a popular YouTube video channel, Winning in the Wind. In this video, Keith explains his procedure for breaking-in his match barrels. He starts by bore-scoping the barrel and cleaning it. If he finds some burrs he may use some JB Bore Paste, a patch, and a worn brush and “give that throat a little scrub” (See 1:30 time-mark). He used different stroke lengths to avoid putting a “step” in the throat. When he’s satisfied he goes to the range. He fires the first five rounds, then cleans. He then fires quite a few rounds before cleaning the barrel again and beginning load development (See 8:25 time-mark).
General Barrel Break-in Procedures Recommended by Brownells
Brownells Gun Techs Steve Ostrem and Caleb Savant tackle a thorny topic: breaking in a new barrel. What IS breaking-in a barrel? And WHY do it? The rifling of a freshly machined barrel has microscopic burrs and sharp edges. “Breaking-in” is the process of putting bullets down the bore to smooth out those rough spots. The goal is to round down the sharp edges so they’re not stripping copper off a bullet as it travels the bore, which leads to fouling that leads to reduced accuracy and inconsistent groups. In a very minor way, you’re actually lapping the barrel. The breaking-in process works best on cut-rifled and button-rifled barrels. Cold hammer-forged, chrome-lined, or nitrided barrels — such as commonly found on AR-15s — may not benefit much from the process. Pistol barrels really don’t need to be broken in because larger-diameter bullets are not so much affected by tiny variations in the bore. Likewise, break-in is more helpful for a .17, .20, or .22 caliber rifle than a .45 caliber rifle.
George Gardner of G.A. Precision Talks About Barrel Break-In
G.A. Precision’s George Gardner is a leading figure in the PRS/NRL world. In this video, George makes the valid point that not all barrels require the same amount of break-in. George says some barrels require very little break-in, while others benefit from a more elaborate break-in process that helps reduce future copper and powder fouling. He calls this “seasoning” the barrel so it fouls less. For a typical barrel, George’s recommended process (4:25 time-mark) starts with one shot, then clean for three one-round cycles. This is followed by three shots then clean, with repeat 3-shot cycles if need. For cleaning George prefers nylon brushes (5:50 time-mark). NOTE: George also makes a very important point — you MUST swab the chamber and get it dry between cleaning cycles (5:30 time-mark).
Keith Glasscock is one of America’s greatest F-Class shooters, as well as a highly respected wind coach. A High Master, Keith finished second overall at the 2021 NRA F-Class Long Range Championship in F-Open division. He also finished second at the 2020 F-Open Nationals, and second at the 2019 F-Open Nationals. His consistency is unrivaled, which means he definitely knows the secrets of competition shooting and loading ultra-accurate ammo. Recently Keith has started PRS/NRL competition, bringing his shooting skills to those popular tactical disciplines.
Keith has a great YouTube Channel with new content every week. On Keith’s Winning in the Wind channel, Keith offers 235+ informative videos on a wide range of topics including wind reading, reloading, component selection, load development, and training.
For today’s Saturday Video Showcase, we offer eight of our favorite Keith Glasscock videos. These cover many key topics — ballistics, barrel care, gunsmithing, bullet sorting, reloading, maintenance and more. Each video has important points that can benefit any competitive rifle shooter, whether you shoot in local 100-yard fun matches or compete at the National Level in F-Class, LR Benchrest, Palma, High Power, or PRS/NRL.
For most disciplines, if you want to achieve maximum accuracy and consistency, you should have your action bedded. This provides an optimal “seating” for the action which quells shot-to-shot motion and helps reduce vibration. Gunsmiths say a good bedding job can produce immediate benefits. In this video Keith Glasscock explains how to check your stock bedding and discusses the realistic benefits you can expect in group size and consistency over long strings.
Keith Glasscock is one of the very few PRS/NRL competitors who has shot F-Class at the very highest level, finishing second three times in F-Class National Championships. PRS/NRL and F-Class are very different disciplines with different challenges. F-Class is shot prone with time between shots and target distances from 600 to 1000 yards. In PRS/NRL competition, you are shooting from multiple positions, at many distances from 100 yards on out, with fast follow-up shoots. For F-Open, you want an extremely accurate load that can deliver sub-quarter MOA groups at 200 yards. For PRS/NRL you don’t necessarily need that level of accuracy (though it helps). But you also need a load that is very consistent, has relatively low recoil, but can also provide sufficient impact energy to clearly show a hit on distant steel. In this video, Keith Glasscock explains his reloading objectives for the two disciplines.
Hard carbon is the bane of rifle shooters. Hard carbon build-up in the barrel can adversely affect accuracy, and in extreme cases, can lead to increased pressure. If possible, you should clean your barrel(s) soon after a match (or shooting session) before the carbon fully hardens. We’ve used Wipe-Out Foam right after a match (with an hour soak time) and that dramatically reduced the amount of brushing required. In this video Keith Glasscock explains the negatives of hard carbon in your barrel, and he discusses how to diagnose the problem and how to remove the carbon build-up efficiently.
Benchrest and F-Class shooters don’t worry about magazines, because their rifles typically employ single-shot actions. However, with PRS/NRL rifles you’ll be shooting from a magazine. Likewise many hunting rifles use magazines to enable quick follow-up shots. In selecting the best magazine(s) for your rifle and discipline you need to consider a variety of factors including fit, capacity, reliability, and, yes, cost. In this video Keith Glasscock examines a variety of magazines for bolt-action rifles used in PRS/NRL competition as well magazines for hunting rifles.
Barrel break-in is a controversial subject. With premium finish-lapped barrels from top manufacturers, some ace F-Class shooters get away with hardly no break-in — just shoot for score right from the get-go. On high-quality custom barrels, we’ve had success with minimalistic break-in with a few wet patches ever 3 rounds for the first 20 rounds. However, with relatively rough factory barrels, you may get better long-term results with a systematic break-in process, even using specialized products on your patches. In this video Keith Glasscock explains break-in procedures he’s found to work for various barrel types and applications.
In general, we have gotten the best match results with loads showing an Extreme Spread (ES) under 13 FPS and an extremely low Standard Deviation (SD). We know that F-Class and ELR shooters competing at 1000 yards and beyond definitely want an extremely low ES to minimize vertical dispersion at long range. That said, some short-range Benchrest competitors look at group size more than ES/SD. In this video, Keith Glasscock talks about the reloading process and methods for lowering ES and SD. Proper brass prep is important, as is precise powder measuring. And long range shooters may want to test 3 or 4 different powder types to find the one that offers the best combination of accuracy and low ES/SD.
Should you sort your bullets? If so, should you sort by weight, OAL, base-to-ogive, or max diameter? Which factor? Well the answer is “it depends”. You need to carefully examine a couple dozen bullets from each batch to see how consistent they are. We had some Lapua bullets that were ultra-consistent with 97 out of 100 within .0015″ base to ogive length. We used those bullets unsorted to set a local range record at 600 yards. On the other hand if you find significant differences in weights, diameters, or bearing surface lengths, you probably should sort. One tip — many shooters do not consider the width difference in bullets. We have seen 6mm bullet diameters vary from 0.2428″ to 0.2436″. We have one 3-groove 6BR barrel that likes the skinny bullets and another 6-groove barrel that definitely prefers the fatter bullets.
The Kestrel 5700 Elite Wind Meter boasts sophisticated ballistics capabilities and LiNK Bluetooth connectivity. With the Kestrel 5700 Elite, once you enter data about bullet type (and BC), velocity, zero, and rifle, the Kestrel can calculate come-ups and wind corrections. The Kestrel 5700 can “talk” to a mobile device that runs the Applied Ballistics APP that contains bullet databases and allows you to easily enter key information such as muzzle velocity, bullet BC, zero distance, velocity, wind, and environmental factors. In this video Keith Glasscock explains the Kestrel 5700’s features including the ability to program sectors for a PRS/NRL match.
Hunting season has started in many parts of the country. And today, Saturday, September 28, 2024, is National Hunting and Fishing Day. Every year, this event is held on the 4th Saturday of September. First recognized by President Nixon in 1972, this is now the 52nd year the event has been celebrated across the USA. To help mark this day, we are offering six informative videos for hunters. These cover planning your hunt, selecting good optics, and optimizing your rifle. There are also hunting stories from Africa and Norway.
How to Sight-In Your Hunting Rifle
This video and related article offer good basic advice for sighting-in a hunting rifle. There are a series of six points covered. Here’s Tip #1: “Find a safe place to shoot your rifle with a backstop. If possible, use a bench and a rock-solid shooting rest. Sighting-in is all about consistency, so the less human error you have, the better. For safety, be sure to also bring ear and eye protection.” READ FULL ARTICLE on NRAWomen.com.
Prepare For Your Hunt — Get Fit and Practice Positions
As part of the NRA’s Tips & Tactics video series, Kristy Titus explains how to prepare for a hunt. Titus, co-host of the Team Elk TV show has hunted around the globe. She grew up in the outdoors, running pack mules in Oregon with her father. In this video, Kristy discusses fitness training and demonstrates field positions that can be employed during a hunt.
Kristy explains: “Hunting can lead you into some steep, rough country. It’s really important that you train both your body and your mind to handle the elements and the rigors of hunting So, if you plan on going on a mountain hunt, get out and train your body. Train with your firearm. Get off the bench and have some fun with this. Do some positional shooting or, if you want to add a stress dynamic… have someone put you under a time parameter.”
Kudu Hunting in Africa
Pieter “Piet” Malan is a South African precision rifle shooter and hunter who has created an impressive YouTube Channel with over 300 videos. While Pieter’s Impact Shooting Channel focuses primarily on tactical PRS/NRL type disciplines, his channel also includes dozens of videos of interest to hunters. Here is Pieter’s excellent video about Kudu hunting — Kudu Hunting Paradise Part 2. After watching this, with the exotic game and stunning terrain, you’ll probably want to book an African Safari.
Deer Hunting in Norway’s Fjord Mountains
Here’s a video with some truly stunning scenery. Watching this video is like taking a virtual vacation to Norway, where you can explore the scenic mountains in the Fjord region. Forum member Kenneth Skorpen (aka “Sal”) has created a cool video of a deer-hunting trip he took in Norway. He didn’t bag a buck on this trip, but the walk in the Fjordland mountains took Kenneth through some spectacular scenery. (At the 11:25 time mark you’ll see an amazing sunset over the Fjord.)
Kenneth did encounter a doe that had fallen down the mountain, and apparently broken its neck (14:35 time mark). The terrain is very steep, and Kenneth observed that: “I feel fortunate to be able to do this, but I also feel very tired in my legs. Did you know that the hares around here have shorter left legs due to the steep hills?”
Load Development for .308 Win Hunting Rifle
In this video, F-Class ace Keith Glasscock shows load development with a .308 Winchester hunting rifle. Here Keith uses a large X-type sandbag for a front support. He is shooting a Remington 700 bolt-action rifle, with Barnes TSX solid copper bullets, PPU Brass, Federal 210m primers, and AR Comp powder. Keith said the Barnes bullets were excellent — he commented that these bullets were “match quality in terms of precision”. Keith achieved some very small three-shot groups with AR Comp and the TSX projectiles. Keith did note that point-of-impact shifted up significantly with increases in charge weight (see 6:20-7:10). With thinner-contour hunting barrels, this is not unexpected. But POI change should be observed carefully during load development, as you may need to adjust your zero after completing testing.
Are you looking to get started in tactical/practical competitions? Or perhaps you already have have some PRS/NRL experience but want to upgrade your equipment and enhance your match results. Here are eight videos that can help you improve your game. These videos feature top PRS/NRL competitors and knowledgeable manufacturers’ representatives. You’ll find other related videos on the Long Range Precision Shooters YouTube channel.
How Accurate Are the Top PRS Shooters?
In this video, MDT put three top centerfire PRS shooters to the test, running them through some of the most difficult stages. The goal? To showcase the level of accuracy and precision these top shooters can achieve. From shooting off barricades to hitting targets from rooftops and rocks, these shooters demonstrate why they are considered among the best in the world. Top-tier modern PRS/NRL rifles when shot prone from a bipod at 100 yards can do 1/3-MOA or better for three shots.
Building a Custom PRS/NRL Rig
Action, trigger, barrel, chassis, rails, and optics — this video from Burris covers all the key components of the modern PRS/NRL rifle. This video discusses the pros/cons of various configurations and the explains what to look for in a PRS/NRL riflescope.
PRS Tactical Division Explained
In this video MDT Shooter Matt Stiner explains the basics of competition in the PRS Tactical division. The video covers rifle, cartridge choice, optics, and key accessories. He also explains how to set up your PRS Tactical rig for best results. In addition Matt talks about bullet and brass options.
Shooting a PRS Match for the First Time
Here’s an amusing video from the land Down-Under — Australia. The video covers a club PRS match, showing various shooting positions. Around the world, the PRS discipline is growing rapidly, particularly with younger marksmen under 35. The matches are fun and fast-paced and the sport is much more dynamic and physically challenging than benchrest or F-Class competition.
Building Your Rig — Gear and Cartridge Selection for PRS/NRL
Part of a Firearms Depot PRS mini-series, this video covers gear and cartridge. Host Adam delves into the core elements that craft a winning setup. The video covers factors to consider when choosing a cartridge. The video also discusses chassis and barrel selection. Along with the gear talk, the video covers factors to consider when selecting a smith to help with chambering and rifle building.
Road to the PRS
This video from Kestrel offers good advice on getting started in PRS/NRL shooting. Experts demonstrate multiple shooting positions and offer advice on shooting from barricades. Topics covered include rate of fire, scope use, and equipment selection.
Savage 110 Elite Precision — Good Production Class Choice
This Alabama Arsenal video shows the Savage 110 Elite Precision on PRS Match stages using bags, tripods, and bipods, firing from stone barriers, field frames, and wood platform supports. If you are in the market for a PRS rifle, this video, which now has 355,000 views, is well worth watching. It covers specific features including trigger, chassis, magazines, and Atlas attachment. NOTE: The price limit for Production Class has risen significantly over the years, with a current MSRP max of $3000 for the rifle and $2500 for the optic.
PRS on a Budget — Converting a Basic Rifle for PRS Use
Top of the line rifles for competition are exceedingly expensive, but there is another option if you have a rifle in the safe that doesn’t get much use. Top F-Class shooter and wind coach Keith Glasscock notes: “I converted my .223 Remington varmint rifle into a Tactical class/PRS training rifle to save costs on ammunition and barrels so I can get better, faster.” Keith shows a very logical way to get started in the PRS/NRL game.
Keith Glasscock is one of America’s greatest F-Class shooters, as well as a highly respected wind coach. A High Master, Keith finished second overall at the 2021 NRA F-Class Long Range Championship in F-Open division. He also finished second at the 2020 F-Open Nationals, and second at the 2019 F-Open Nationals. His consistency is unrivaled, which means he definitely knows the secrets of competition shooting and loading ultra-accurate ammo. Recently Keith has started PRS/NRL competition, bringing his shooting skills to those popular tactical disciplines.
Keith has a great YouTube Channel with new content every week. On Keith’s Winning in the Wind channel, Keith offers 190+ informative videos on a wide range of topics including wind reading, reloading, component selection, load development, and training. For today’s Video Showcase, we offer four of our favorite Keith Glasscock videos. Each video has important points that can benefit any competitive rifle shooter, whether you shoot in local 100-yard fun matches or compete at the National Level in F-Class, LR Benchrest, Palma, or High Power.
How to Reduce Extreme Spread (ES) and Standard Deviation (SD)
Having minimal Extreme Spread (ES) does not necessarily guaranteed optimal accuracy. Some PPC shooters accept a relatively high ES for a load that shoots best at 100/200 yards. But very low ES — i.e. having bullets all exit the muzzle at virtually the same FPS speed — can definitely reduce vertical dispersion at long range (assuming consistent bullet BCs). In this video, Keith talks about various methods to reduce ES and SD. This can include seating depth, primer choice, powder charge weight, brass prep, bullet seating methods and more. Our tip is to have good smoothly-chamfered case mouths, use a quality arbor press with seating force measurement, measure powder loads very precisely, and use the highest-quality brass you can find.
Keith notes that, to achieve the lowest ES, you need to look at multiple processes, including precision powder weighing, careful seating, brass annealing, and primer selection. Another factor is bullet selection. Not all bullets of the same nominal caliber and weight class have exactly the same bullet diameter or shape. Sometimes you can get better accuracy AND lower ES by trying a different brand of bullet. We have found bullet diameters, of the same stated caliber, can vary by up to .0008″ (eight ten-thousandths). Some barrels like the fatter bullets, while other barrels may favor the skinny bullets.
Top 10 Methods to Improve Your Shooting Accuracy
To shoot top scores, you need great skills and great hardware. This video covers 10 things that can improve accuracy, starting with the most important. The #1 item, notes Keith, is rifle shooting skill — you need to be able to hold on target properly and run the rifle consistently shot after shot. The second most important thing is an accurate rifle — you need a rifle with an excellent barrel, quality components, and top-tier inherent accuracy. Third, you need very accurate ammo, and this means you need to perfect your reloading skills. You need precise powder measurement and good, consistent bullet seating. Fourth in the list is related to ammo — you need the ability to do effective load development to pick the best load for your particular barrel. Number 5 is the “right bullet”. You need a high-quality, ultra-consistent bullet that is a good match for your particular barrel and discipline. Watch the video for the other five items.
Balance Beam vs. Advanced Electronic Scale with AutoTricker
Here Keith evaluates the performance of ammo loaded with a conventional balance beam scale vs. ammo loaded with a precision, electronic force-restoration scale fitted with an AutoTrickler V4. It turns out that the balance-beam loaded ammo was actually quite accurate and consistent. Keith concluded that balance-beam ammo may well be good enough for PRS/NRL competition. However for other disciplines, such as benchrest and F-Class, Keith suggest it may be worth the investment. But the key factor is also time — with the precision scale and AutoTrickler Keith can load large quantities of competition-grade ammo much, much faster. Keith points out he puts value on his time, reminding us that, indeed, “time is money”.
Barrel Break-In Procedure for Match Barrels
In this video, Keith explains his procedure for breaking-in his match barrels. He starts by bore-scoping the barrel and cleaning it. If he finds some burrs he may use some JB Bore Paste, a patch, and a worn brush and “give that throat a little scrub” (See 1:30 time-mark). He used different stroke lengths to avoid putting a “step” in the throat. When he’s satisfied he goes to the range. He fires the first five rounds, then cleans. He then fires quite a few rounds before cleaning the barrel again and beginning load development (See 8:25 time-mark).
Bullet Sorting Methodology — Effective Methods
Bullet sorting can improve scores and accuracy, particularly for long-range competitions. There are various methods for sorting — weight, base-to-ogive measurement, bearing surface length, tip condition, and max diameter. In this video Keith explains the pros and cons of various methods. The best choice can also depend on the brand, design, and caliber of each bullet. Some bullets show significant base to ogive variance, other bullets (such as Lapua Scenars), have been extremely consistent. Overall, if you are a long-range competitor, is it probably useful to bullet sort, and you can use outliers for fouling shots.
Tripod Options for PRS/NRL Competition
Over the past two seasons, Keith has added PRS/NRL shooting to his competition resume. Along with his stellar F-Class skills, Keith now has considerable experience with tactical competitions. And he’s learned that having a good tripod will make a difference over the course of a match. In this video, Keith looks at various tripod options and explains the ways you can use a tripod for PRS/NRL centerfire and rimfire competition. While the tripod can obviously be used to support the rifle, it can also be used for various other functions, as shown in the video.
The question of barrel break-in is controversial. Some folks advocate an elaborate, lengthy cycle of shooting and brushing, repeated many times — one shot and clean, two shots and clean and so on. This, it is argued, helps barrels foul less and shoot more accurately. Others say minimal break-in, with patching and brushing after 10-15 rounds, is all you need. Still others contend that break-in procedures are a total waste of time and ammo — you should just load and shoot, and clean as you would normally.
We doubt if there will ever be real agreement among shooters concerning barrel break-in procedures. And one must remember that the appropriate break-in procedure might be quite different for a factory barrel vs. a custom hand-lapped barrel. This Editor has found that his very best custom barrels shot great right from the start, with no special break-in, other than wet patches at 5, 10, and 15 rounds. That said, I’ve seen some factory barrels that seemed to benefit from more elaborate break-in rituals.
What’s the best barrel break-in procedure? Eric Mayer of Varminter.com decided to ask the experts. Eric interviewed representatives of three leading barrel manufacturers: Krieger, Lothar-Walther, and Shilen. He recorded their responses on this video. In order of appearance, the three experts are:
Shilen, Krieger, and Walther Experts Talk about Barrel Break-in
Do I Need to Break-In a New Rifle Barrel?
Eric Mayer of Varminter.com says: “That is a simple question, [but it] does not necessarily have a simple answer. Instead of me repeating my own beliefs, and practices, on breaking-in a new rifle barrel, I decided to answer this one a bit differently. While we were at the 2016 SHOT Show, we tracked down three of the biggest, and most popular, custom barrel makers in the world, and asked them what they recommend to anyone buying their barrels, and why they recommend those procedures. We asked the question, and let the camera run!” Launch the video above to hear the answers — some of which may surprise you.
Barrel Break-in — Initial Inspection and Cleaning
This video explains that you should always inspect and clean the bore of your barrel before sending rounds through it. There may be remnants of the production process, such as lapping residues, that you’ll want to get out of the bore. We’ve even seen a few tiny metal pieces in some factory barrels. And it’s always wise to borescope a new barrel to see if there are visible defects in the rifling such as lands that have flawed edges — we’ve seen that on some cheaper barrels.
Barrel Break-In — Ian Klemm’s Surprising Observations
Here’s a 10-minute Vortex Nation interview with Ian Klemm. Ian, a 4-Time F-TR National Champion is one of America’s best long-range shooters. In this video, Ian explains his approach to barrel break-in, which may surprise you. Does barrel break-in even matter? Conventional wisdom says “Yes” and perhaps there’s some truth to that, but Ian argues that break-in is NOT nearly as important as the internet wants you to believe. Ian believes that you don’t need to waste a ton of time/ammo to get your barrel ready to shoot extremely accurately. This may be particularly true with premium hand-lapped custom barrels.
Barrel Break-In Procedures with Keith Glasscock
Keith Glasscock is also one of America’s greatest F-Class shooters who has finished second at the Nationals multiple times. Keith is also a highly-respected wind coach who has a popular YouTube video channel, Winning in the Wind. In this video, Keith explains his procedure for breaking-in his match barrels. He starts by bore-scoping the barrel and cleaning it. If he finds some burrs he may use some JB Bore Paste, a patch, and a worn brush and “give that throat a little scrub” (See 1:30 time-mark). He used different stroke lengths to avoid putting a “step” in the throat. When he’s satisfied he goes to the range. He fires the first five rounds, then cleans. He then fires quite a few rounds before cleaning the barrel again and beginning load development (See 8:25 time-mark).
General Barrel Break-in Procedures Recommended by Brownells
Brownells Gun Techs Steve Ostrem and Caleb Savant tackle a thorny topic: breaking in a new barrel. What IS breaking-in a barrel? And WHY do it? The rifling of a freshly machined barrel has microscopic burrs and sharp edges. “Breaking-in” is the process of putting bullets down the bore to smooth out those rough spots. The goal is to round down the sharp edges so they’re not stripping copper off a bullet as it travels the bore, which leads to fouling that leads to reduced accuracy and inconsistent groups. In a very minor way, you’re actually lapping the barrel. The breaking-in process works best on cut-rifled and button-rifled barrels. Cold hammer-forged, chrome-lined, or nitrided barrels — such as commonly found on AR-15s — may not benefit much from the process. Pistol barrels really don’t need to be broken in because larger-diameter bullets are not so much affected by tiny variations in the bore. Likewise, break-in is more helpful for a .17, .20, or .22 caliber rifle than a .45 caliber rifle.
George Gardner of G.A. Precision Talks About Barrel Break-In
G.A. Precision’s George Gardner is a leading figure in the PRS/NRL world. In this video, George makes the valid point that not all barrels require the same amount of break-in. George says some barrels require very little break-in, while others benefit from a more elaborate break-in process that helps reduce future copper and powder fouling. He calls this “seasoning” the barrel so it fouls less. For a typical barrel, George’s recommended process (4:25 time-mark) starts with one shot, then clean for three one-round cycles. This is followed by three shots then clean, with repeat 3-shot cycles if need. For cleaning George prefers nylon brushes (5:50 time-mark). NOTE: George also makes a very important point — you MUST swab the chamber and get it dry between cleaning cycles (5:30 time-mark).
Are you looking to get started in tactical/practical competitions? Or perhaps you already have have some PRS/NRL experience but want to upgrade your equipment and enhance your match results. Here are eight videos that can help you improve your game. These videos feature top tactical PRS/NRL competitors and George Gardner of G.A. Precision, considered one of the founding fathers of the PRS game. You’ll find other related videos on the Long Range Precision Shooters YouTube channel.
How Accurate Are The World’s Top PRS Shooters?
In this video, MDT put three top centerfire PRS shooters to the test, running them through some of the most difficult stages. The goal? To showcase the level of accuracy and precision these top shooters can achieve. From shooting off barricades to hitting targets from rooftops and rocks, these shooters demonstrate why they are considered among the best in the world.
Cartridge Choice for PRS and Tactical Competition
This video reviews many of the different cartridge options popular for PRS-style competition. The video examines pros and cons of various cartridge choices, focusing on accuracy, recoil, mag-feeding, and value for money. This segment features G.A. Precision owner/founder George Gardner.
Most top PRS shooters are using 6mm cartridges these days. These deliver excellent accuracy with lower recoil and cheaper bullet cost. Popular choices include 6 Dasher, 6 BRA, 6mm Creedmoor, 6XC, and the new 6GT cartridge, which is sort of a stretched version of a 6mmBR. It has a bit more case length for better feeding, and greater case capacity than a 6BR so you can shoot 105-108 grain bullets at 2950 fps with ease. That’s a popular Dasher accuracy node that the 6GT can achieve at somewhat lower pressures.
CLICK HERE for a full write-up on a 6GT rifle build by Mike McCasland (Texas Precision). This includes load development suggestions and a 6GT reamer print. The popular 0.120″ freebore chamber allows for the majority of high-BC 6mm projectiles. Mike had good luck with the pointed 107gr Sierra Match Kings (SMK), as well as the 110gr Hornady A-Tips in his rifle.
PRS Tactical Division — Rifle, Ammo, Optics, and Set-Up
In this video MDT Shooter Matt Stiner explains the basics of competition in the PRS Tactical division. The video covers rifle, cartridge choice, optics, and key accessories. He also explains how to set up your PRS Tactical rig for best results. In addition Matt talks about bullet and brass options.
PRS Ace Shows Skills Barricade Technique — with POV Video
This video features 2015 PRS Champion David Preston shooting the PRS Skills barricade. Dave Preston has been among the best in the nation running this PRS stage. Dave nearly always shoots 100% with the fastest recorded time. In this video you’ll see him successfully nail all eight shots in under 43 seconds. This includes a POV sequence (4:35 time-mark) showing the actual view through Dave’s scope.
The PRS Skills Barricade is an 8-round, 4-position stage featured at most PRS matches. It’s called a “Skills Stage” as it is run the same way at every national match and gives shooters the ability to compare skill levels based on hit percentage and speed. The target is a 10″ plate at 400 yards. There are four different positions, with two shots each. Most people run this stage in about 70 seconds, while Dave does it in the low 40s!
Know Your Limits PRS Stages — Pro Tips
This video showcases how 2018 Oklahoma PPS Champion Clay Blackketter approaches Know Your Limit Stages. With these particular type of stages you have to make judgment calls about your rifle’s accuracy and your ability to hold on target. You can boost your score by shooting the smallest target(s), but you risk losing points if you miss. Clay explains how best to manage a Know Your Limits stage.
PRS on a Budget — Converting a Basic Rifle for PRS Use
Top of the line rifles for competition are exceedingly expensive, but there is another option if you have a rifle in the safe that doesn’t get much use. Top F-Class shooter and wind coach Keith Glasscock notes: “I converted my .223 Remington varmint rifle into a Tactical class/PRS training rifle to save costs on ammunition and barrels so I can get better, faster.” Keith shows a very logical way to get started in the PRS/NRL game.
Bare Minimum: What You Need To PRS/NRL Competition
Like most shooting sports, PRS/NRL precision rifle competition can seem daunting once you start adding up the costs for the rifle, the optic, and all the important gear. We note the maximum price limit for “factory class” has risen steadily over the years, reaching $3000 currently. So even in the least expensive division, you can expect to put out a serious chunk of cash. This month, Dustin Sanchez talks with Brian Whalen about the minimum gear you need to start shooting long range and still be competitive.
1. Rifle (1 MOA capable)
2. Ammo
3. Bipod
4. Optic
5. Data Management (App, Kestrel, etc.)
“Road to the PRS” Episode One Presented by Kestrel Ballistics
Join Jeremy Flinn, the owner of Stone Road Media, as he begins Precision Rifle Series (PRS) shooting with the help of respected instructors and shooters. Follow along with Jeremy and Katie Godfrey of Kestrel Ballistics as they travel to eastern Pennsylvania to meet instructor Jordan Glassman, a renowned long-range shooting specialist and PRS beginners match instructor. He helps get Jeremy in preparation for an upcoming PRS Beginners Match.
This Saturday Video showcase was suggested by Boyd Allen.
If you ever shoot with electronic targets, ShotMarkers, or target cams, chances are you’ll spend lots of time looking at the screen of a tablet computer or iPad. These electronic devices are pretty amazing, but they have one major shortcoming when used outdoors — reflections from the highly-polished glass screen.
Well it turns out there is a simple, inexpensive solution to the problem of annoying tablet screen reflections. Just purchase a quality anti-reflective screen protector for your tablet, iPad, or smartphone and you will eliminate most annoying reflections and make your mobile device MUCH easier to use at the range.
Take a look at the two photos above. The first photo shows how annoying reflections can obscure the ShotMarker display on a tablet. The second shot shows how much easier it is to view the ShotMarker target image with an anti-reflective screen cover in place. BIG improvement!
Our friend Keith Glasscock recently added an anti-reflective screen protector to his iPad tablet and found that it works wonders. Keith recently reviewed the iCarez Matte Screen Protector for his Winning in the Wind YouTube Channel. These screen covers are available in a wide variety of sizes to fit most Apple iPhones and Apple iPads. These thin, matte screen protectors are quite affordable, with prices starting at just $9.95.
In addition, there are other brands of screen protectors for Android devices that work the same way. Again, you’ll find a variety of sizes. For example, Supershieldz now offers a 3-pack of matte screen covers for 10″ Samsung tablets for just $5.99 on Amazon
In the above video, Keith Glasscock explains the problem of screen reflections when using mobile devices for shot monitoring. Keith then describes his positive experience with the iCarez Matte screen cover installed on his personal iPad.
A good screen cover can eliminate this kind of harsh reflection on tablet screens:


 Hunting season has started in many parts of the country. And today, Saturday, September 27, 2025, is National Hunting and Fishing Day. Every year, this event is held on the 4th Saturday of September. First recognized by President Nixon in 1972, this is now the 52nd year the event has been celebrated across the USA. To help mark this day, we are offering six informative videos for hunters. These cover planning your hunt, selecting good optics, and optimizing your rifle.


 Here’s a video with some truly stunning scenery. Watching this video is like taking a virtual vacation to Norway, where you can explore the scenic mountains in the Fjord region. Forum member Kenneth Skorpen (aka “Sal”) has created a cool video of a deer-hunting trip he took in Norway. He didn’t bag a buck on this trip, but the walk in the Fjordland mountains took Kenneth through some spectacular scenery. (At the 11:25 time mark you’ll see an amazing sunset over the Fjord.)

 We doubt if there will ever be real agreement among shooters concerning barrel break-in procedures. And one must remember that the appropriate break-in procedure might be quite different for a factory barrel vs. a custom hand-lapped barrel. This Editor has found that his very best custom barrels shot great right from the start, with no special break-in, other than wet patches at 5, 10, and 15 rounds. That said, I’ve seen some factory barrels that seemed to benefit from more elaborate break-in rituals.
 Keith has a great


