|
|
May 5th, 2015
This article is part of Sinclair Int’l Step-By-Step Reloading Series. Most of the products mentioned in this article are sold through Sinclair’s webstore.
by Roy Hill, Brownells/Sinclair Copywriter
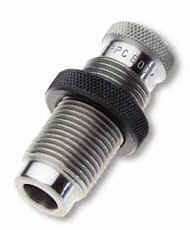
Making your own precision handloads is a meticulous journey with many steps, many important matters to consider, and many sets of measurements to calculate. For those who pursue the perfect group, the highest score, the really long accurate shot, the rewards more than outweigh the effort. Choosing the right cases, deburring the flash holes, making the primer pockets uniform, trimming the cases, and lubricating them are all familiar – and critical – steps along the journey. And now that your brass preparation is complete, you are at last ready to start running the cases through your press and fill them with primers, powder, and bullets. The very first die the brass encounters is the sizing die. You insert the case, work the press’s lever to return the case to its correct pre-fired dimensions – and the journey continues.

February 23rd, 2015
Some of our readers have questioned how to set up their body dies or full-length sizing dies. Specifically, AFTER sizing, they wonder how much resistance they should feel when closing their bolt.
Forum member Preacher explains:
“A little resistance is a good, when it’s time for a big hammer it’s bad…. Keep your full-length die set up to just bump the shoulder back when they get a little too tight going into the chamber, and you’ll be good to go.”
 To quantify what Preacher says, for starters, we suggest setting your body die, or full-length sizing die, to have .0015″ of “bump”. NOTE: This assumes that your die is a good match to your chamber. If your sizing or body die is too big at the base you could push the shoulder back .003″ and still have “sticky case” syndrome. Also, the .0015″ spec is for bolt guns. For AR15s you need to bump the shoulder of your cases .003″ – .005″, for enhanced reliability. For those who have never worked with a body die, bump die, or Full-length sizing die, to increase bump, you loosen lock-ring and screw the die in further (move die down relative to shell-holder). A small amount (just a few degrees) of die rotation can make a difference. To reduce bump you screw the die out (move die up). Re-set lock-ring to match changes in die up/down position. To quantify what Preacher says, for starters, we suggest setting your body die, or full-length sizing die, to have .0015″ of “bump”. NOTE: This assumes that your die is a good match to your chamber. If your sizing or body die is too big at the base you could push the shoulder back .003″ and still have “sticky case” syndrome. Also, the .0015″ spec is for bolt guns. For AR15s you need to bump the shoulder of your cases .003″ – .005″, for enhanced reliability. For those who have never worked with a body die, bump die, or Full-length sizing die, to increase bump, you loosen lock-ring and screw the die in further (move die down relative to shell-holder). A small amount (just a few degrees) of die rotation can make a difference. To reduce bump you screw the die out (move die up). Re-set lock-ring to match changes in die up/down position.
That .0015″ is a good starting point, but some shooters prefer to refine this by feel. Forum member Chuckhunter notes: “To get a better feel, remove the firing pin from your bolt. This will give you the actual feel of the case without the resistance of the firing pin spring. I always do this when setting up my FL dies by feel. I lock the die in when there is just the very slightest resistance on the bolt and I mean very slight.” Chino69 concurs: “Remove the firing pin to get the proper feel. With no brass in the chamber, the bolt handle should drop down into its recess from the full-open position. Now insert a piece of fire-formed brass with the primer removed. The bolt handle should go to the mid-closed position, requiring an assist to cam home. Do this several times to familiarize yourself with the feel. This is how you want your dies to size your brass, to achieve minimal headspace and a nearly glove-like fit in your chamber.”
We caution that, no matter how well you have developed a “feel” for bolt-closing resistance, once you’ve worked out your die setting, you should always measure the actual amount of shoulder bump to ensure that you are not pushing the shoulder too far back. This is an important safety check. You can measure this using a comparator that attaches to your caliper jaws, or alternatively, use a sized pistol case with the primer removed. See Poor Man’s Headspace Gauge.
October 17th, 2014
Natchez Shooters Supplies just announced a major 3-Day SALE on big name reloading gear. Prices on high-quality RCBS, Redding, Hornady, Lyman, and MEC products have been slashed. But this sale runs for three days only — the deals expire 10/19/2014. (NOTE: we are not sure if this means end of day 10/19 or if the deals expire at 11:59 pm on 10/18 — be forewarned).
If you are in need of a reloading press, electronic powder dispenser, or a vibratory tumbler, this is a great opportunity to save some serious coin. For example, the RCBS Chargemaster, which sells elsewhere for $340.00 – $375.00, is just $289.99. That price is way lower than we could find elsewhere. CLICK HERE for Natchez SALE
CLICK graphic below to see larger version with more products:
 Sale tip by EdLongrange. We welcome reader submissions.
May 27th, 2014
|
New handloaders often ask us for advice on reloading techniques and equipment selection. It’s always best for novice reloaders to work under the guidance of an experienced mentor. Nothing beats “learning the ropes” with an experienced reloader at ones side. In addition, new handloaders should acquire one or more good reloading manuals, such as the Hornady Reloading Handbook (9th Ed.). We recommend reading the introductory chapters of a reloading manual to get a good understanding of the basic principles involved.
Along with print manuals, instructional DVDs are available. RCBS sells a 32-minute, step-by-step Precisioneered Handloading DVD, narrated by Shooting USA’s Jim Scoutten. This $9.19 DVD covers the basics of metallic cartridge reloading and shotshell reloading.
|
|
For those who have already mastered the basics, Redding offers a 45-minute instructional DVD, appropriately named Advanced Handloading: Beyond The Basics ($17.52 at Amazon.com). The Redding DVD, produced with help from Sierra Bullets, is narrated by John Barsness, field editor of Rifle and Handloader magazines. The Redding DVD does go “Beyond the Basics” but it really is more an intermediate resource — it doesn’t reveal some of the most sophisticated methods of case prep and load tuning used by competitive benchrest shooters. Nonetheless it is a good resource for those getting started with rifle cartridge reloading.

January 12th, 2014
 Redding is now offering Micro-Adjusting Taper Crimp Dies for the .223 Remington (5.56×45) and .308 Winchester (7.62×51), the two most popular cartridges used in competitive rifle shooting. New for 2014, these top-adjusting, micrometer-style dies, you can adjust crimp precisely without having to back-out the die and reposition the lock ring. Redding is now offering Micro-Adjusting Taper Crimp Dies for the .223 Remington (5.56×45) and .308 Winchester (7.62×51), the two most popular cartridges used in competitive rifle shooting. New for 2014, these top-adjusting, micrometer-style dies, you can adjust crimp precisely without having to back-out the die and reposition the lock ring.
The process of traditional taper crimp die adjustment is generally both time consuming and imprecise due to the 1:14″ thread pitch coupled with the need to reposition the lock ring after each adjustment. The new Redding Micro-Adjusting Taper Crimp Dies for .223 Rem and .308 Win use a knurled, micrometer-type head situated to provide approximately +/- 0.100″ of adjustment after initial die set-up. The actual crimp is applied with a hardened steel “free floating” internal sleeve.
To Taper Crimp or Not to Crimp?
That Depends…
Do you actually need a taper crimp on .223 Rem or .308 Win cartridges? If you are shooting a precision bolt gun, the answer is “probably not”. However, if you are hand-loading ammo for a semi-automatic rifle, there are reasons you may want to apply a taper crimp on the cartridge. And high-volume .223 Rem shooters may want to apply a taper crimp, particularly when loading mixed headstamp brass using a progressive press. The new Redding dies allow you to control the amount of crimp easily and more efficiently. Redding claims that: “Down time and loss of production due to adjustment of the crimp are virtually eliminated, dramatically increasing the rounds per hour rates of all progressive and turret-style presses.”
High-volume hand-loaders often struggle with the realities of case variation and the resulting difficulties in obtaining a uniform crimp. Redding notes: “Case length is not the only variable, as case neck-wall thickness also impacts where the case intersects the die’s tapered crimping surface.”
October 1st, 2013
 The 6.5×47 Lapua necked down to 6mm is a popular wildcat. However, we’ve learned that, when necking down a 6.5×47 Lapua case to 6mm, simply running the brass into a 6-6.5×47 full-length sizer won’t give the best results. Reader “Fireball”, who has worked with both a 6-6.5×47 and a 22-6.5×47, offers this tip: “You don’t want to bring the 6.5mm case all the way down to 6mm in one step — it’s too big of a jump. First, to smooth entry, run a 6.5mm expander in the case mouth, and chamfer the outside of the case mouth — be sure to remove all burrs. Apply some lube to the neck. Then, if you have a .257 bushing, put that in a 6BR bushing neck die, and run the case up [for initial reduction].” Then, use your 6mm die for the final step. The 6.5×47 Lapua necked down to 6mm is a popular wildcat. However, we’ve learned that, when necking down a 6.5×47 Lapua case to 6mm, simply running the brass into a 6-6.5×47 full-length sizer won’t give the best results. Reader “Fireball”, who has worked with both a 6-6.5×47 and a 22-6.5×47, offers this tip: “You don’t want to bring the 6.5mm case all the way down to 6mm in one step — it’s too big of a jump. First, to smooth entry, run a 6.5mm expander in the case mouth, and chamfer the outside of the case mouth — be sure to remove all burrs. Apply some lube to the neck. Then, if you have a .257 bushing, put that in a 6BR bushing neck die, and run the case up [for initial reduction].” Then, use your 6mm die for the final step.
Alternatively, you can use a Redding 6BR body die initially. The body die will funnel the neck down about half way. Body dies are pretty inexpensive ($29.99 at Grafs.com, Item #RED75317). After running the brass through the 6BR body die, then you can run the case into the Forster 6-6.5×47 Full-length sizing die. The Forster die is excellent — it sizes a no-turn neck just about perfectly, so long as you do an intermediate step first.”
June 5th, 2013
 Precision Reloading is having a June SALE on big-name reloading presses and powder dispensers. You’ll find good values on Redding, RCBS, Lyman, and Hornady Products. This special sale ends June 30, 2013. Note: Sale pricing is limited to quantities on hand and the discount prices cannot be combined with any other offers or promotions. Precision Reloading is having a June SALE on big-name reloading presses and powder dispensers. You’ll find good values on Redding, RCBS, Lyman, and Hornady Products. This special sale ends June 30, 2013. Note: Sale pricing is limited to quantities on hand and the discount prices cannot be combined with any other offers or promotions.

 RCBS Cash-Back Rebate RCBS Cash-Back Rebate
In addition, RCBS is offering a Rebate for products purchased in 2013. If you buy $50 worth of RCBS hardware you can get $10 Cash Back. If you buy $300 worth of RCBS equipment you can get $50 Cash Back.
NOTE: Although the Rebate Form refers to an option of Speer Bullets (instead of cash money), due to shortages, ALL rebates will be issued in CASH. CLICK HERE for Rebate Form.
January 3rd, 2013
 In our Shooters’ Forum a reader recently asked: “How much neck tension should I use?” This prompted a Forum discussion in which other Forum members recommended a specific number based on their experience, such as .001″, .002″, or .003″. These numbers, as commonly used, correspond to the difference between case-neck OD after sizing and the neck OD of a loaded round, with bullet in place. In other words, the numbers refer to the nominal amount of interference fit (after sizing). In our Shooters’ Forum a reader recently asked: “How much neck tension should I use?” This prompted a Forum discussion in which other Forum members recommended a specific number based on their experience, such as .001″, .002″, or .003″. These numbers, as commonly used, correspond to the difference between case-neck OD after sizing and the neck OD of a loaded round, with bullet in place. In other words, the numbers refer to the nominal amount of interference fit (after sizing).
While these commonly-used “tension numbers” (of .001″, .002″ etc.) can be useful as starting points, neck tension is actually a fairly complex subject. The actual amount of “grip” on the bullet is a function of many factors, of which neck-OD reduction during sizing is just one. Understanding these many factors will help you maintain consistent neck tension as your brass “evolves” over the course of multiple reloadings.
Neck Tension (i.e. Grip on Bullets) Is a Complex Phenomenon
While we certainly have considerable control over neck tension by using tighter or looser bushings (with smaller or bigger Inside Diameters), bushing size is only one factor at work. It’s important to understand the multiple factors that can increase or decrease the resistance to bullet release. Think in terms of overall brass-on-bullet “grip” instead of just bushing size.
One needs to understand that bushing size isn’t the beginning and end of neck tension questions, because, even if bushing size is held constant, the amount of bullet “grip” can change dramatically as the condition of your brass changes. Bullet “grip” can also change if you alter your seating depth significantly, and it can even change if you ultrasonically clean your cases.
Bullet grip is affected by many things, such as:
- 1. Neck-wall thickness.
- 2. Amount of bearing surface (shank) in the neck.
- 3. Surface condition inside of neck (residual carbon can act as a lubricant; ultrasonic cleaning makes necks “grabby”).
- 4. Length of neck (e.g. 6BR neck vs. 6BRX).
- 5. Whether or not the bullets have an anti-friction coating.
- 6. The springiness of the brass (which is related to degree of work-hardening; number of firings etc.)
- 7. The bullet jacket material.
- 8. The outside diameter of the bullet and whether it has a pressure ridge.
- 9. The time duration between bullet seating and actual firing (necks can stiffen with time).
- 10. How often the brass is annealed
— and there are others…
Seating Depth Changes Can Increase or Decrease Grip on Bullet
You can do this simple experiment. Seat a boat-tail bullet in your sized neck with .150″ of bearing surface (shank) in the neck. Now remove the bullet with an impact hammer. Next, take another identical bullet and seat it with .300″ of bearing surface in another sized case (same bushing size/same nominal tension). You’ll find the deeper-seated bullet is gripped much harder.
 Neck-Wall Thickness is Important Too Neck-Wall Thickness is Important Too
I have also found that thinner necks, particularly the very thin necks used by many PPC shooters, require more sizing to give equivalent “grip”. Again, do your own experiment. Seat a bullet in a case turned to .008″ neckwall thickness and sized down .003″. Now compare that to a case with .014″ neckwall thickness and sized down .0015″. You may find that the bullet in the thin necks actually pulls out easier, though it supposedly has more “neck tension”, if one were to consider bushing size alone.
In practical terms, because thick necks are less elastic than very thin necks, when you turn necks you may need to run tighter bushings to maintain the same amount of actual grip on the bullets (as compared to no-turn brass). Consequently, I suspect the guys using .0015″ “tension” on no-turn brass may be a lot closer to the guys using .003″ “tension” on turned necks than either group may realize.
Toward a Better Definition of Neck Tension
As a convenient short-cut, we tend to describe neck tension by bushing size alone. When a guy says, “I run .002 neck tension”, that normally means he is using a die/bushing that sizes the necks .002″ smaller than a loaded round. Well we know something about his post-sizing neck OD, but do we really have a reliable idea about how much force is required to release his bullets? Maybe not… This use of the term “neck tension” when we are really only describing the amount of neck diameter reduction with a die/bushing is really kind of incomplete.
My point here is that it is overly simplistic to ask, “should I load with .001 tension or .003?” In reality, an .001″ reduction (after springback) on a thick neck might provide MORE “grip” on a deep-seated bullet than an .003″ reduction on a very thin-walled neck holding a bullet with minimal bearing surface in the neck. Bushing ID is something we can easily measure and verify. We use bushing size as a descriptor of neck tension because it is convenient and because the other important factors are hard to quantify. But those factors shouldn’t be ignored if you want to maintain consistent neck tension for optimal accuracy.
Consistency and accuracy — that’s really what this all about isn’t it? We want to find the best neck tension for accuracy, and then maintain that amount of grip-on-bullet over time. To do that you need to look not only at your bushing size, but also at how your brass has changed (work-hardened) with time, and whether other variables (such as the amount of carbon in the neck) have changed. Ultimately, optimal neck tension must be ascertained experimentally. You have to go out and test empirically to see what works, in YOUR rifle, with YOUR bullets and YOUR brass. And you may have to change the nominal tension setting (i.e. bushing size) as your brass work-hardens or IF YOU CHANGE SEATING DEPTHS.
Remember that bushing size alone does not tell us all we need to know about the neck’s true “holding power” on a bullet, or the energy required for bullet release. True bullet grip is a more complicated phenomenon, one that is affected by numerous factors, some of which are very hard to quantify.
December 17th, 2012
How to Set Up Your Full Length Sizing Die
by Ron Dague, Sinclair International Technician
From Sinclair’s Reloading Press Blog
At Sinclair International, we are often asked for a fool-proof method to set up a full-length sizing die, and begin reloading our fired cases. The method used by many target shooters today is to set up your full length die to closely match your rifle chamber and minimally full-length size your cases –as little as .001″ for bolt-action rifles. I prefer to use this method for all of my bolt-action cartridges.
STEP ONE
I like to de-prime five (5) cases (de-prime only, do not full length resize) and measure from the base of the case to the shoulder with our Sinclair Comparator Body (09-1000) and Bump Gage Insert(09-10200). We refer to this as our headspace measurement. Our Electronic Caliper (#MIC-14) works well and may be pre-set at .000” making this headspace measurement easy to capture. The Sinclair Comparator/Gauge Body and Bump Gage Inserts make this task fairly simple. L.E. Wilson Tools & Gages, Hornady Manufacturing, and RCBS all make similar units to achieve your headspace measurement.
 STEP TWO STEP TWO
With your full-length die threaded into your reloading press, loosen the lock ring and run the press ram up toward the full length die with a shell holder in place (with no case). Then, screw the die toward the shell holder until it stops. Back the die out of the press and away from the shell holder one full turn and set the lock ring finger tight.
STEP THREE
Lubricate each of the cases with your favorite sizing lube (my favorite is Imperial Sizing Die Wax) and resize a case. Again, take a headspace measurement from base to shoulder. [When running the case up into the die, be sure the press ram moves the full limit of its upward travel.] If there’s no change in the measurement from the fired dimension, loosen the die lock ring and turn the full length sizing die downward 1/8 of a turn. [Editor’s Note: You’ll need to use smaller turn amounts as you get close to the desired amount of bump. We suggest moving just a few degrees of die rotation at a time once you’ve reached the point where the die hits the shoulder without moving it back.] Now repeat the sizing process with a second lubricated case and take the measurement again. Keep rotating the die downward gradually (in small increments) and repeat the case sizing process until you see approx-imately .001”-.002” reduction to your fired headspace measurement. We prefer a headspace reduction of approximately .001″ – .002″ for bolt action rifles and .003″ – .005″ for semi-auto rifles. You can adjust to your rifle as to what works best. Don’t forget to load 10 rounds or so and try them from the rifle’s magazine to make sure they function properly.
Full-length Sizing vs. Neck-Sizing
Just a quick word on neck sizing…..I have personally never been a big fan of neck sizing. Often times when I put neck sized cases back in the rifle, the bolt would close with some drag, or it would be a bit “snug”. This was mostly recognized with factory rifles. I didn’t have any problems with accuracy, just with cycling the action for a follow up shot. If your rifle is custom chambered with the action straightened and trued, neck sizing will work well on 4-5 firing’s and then you will need to full length size or use a body die to set the shoulders back when the cases begin to “stick”. Hope these tips help make the use of a headspace gauge and full length die set up much easier.
Ron Dague
Sinclair Tech and Reloading Instructor
800-717-8211
rond@sinclairintl.com
Reloading Tip Courtesy Sinclair Int’l; Story Sourced by Edlongrange
May 30th, 2012
 Redding is releasing a dedicated small-case powder measure with a charge weight range of 1 to 25 grains. This specialized Model 10X powder measure should work well for small varmint cartridges such as the .221 Fireball, .20 Vartarg, and the 17 Hornet. The powder cavity and micrometer settings put the charge for a 17 Hornet right in the middle of the powder measure’s capacity — the most accurate part of its range. That’s good news for small rifle cartridge reloaders. Redding is releasing a dedicated small-case powder measure with a charge weight range of 1 to 25 grains. This specialized Model 10X powder measure should work well for small varmint cartridges such as the .221 Fireball, .20 Vartarg, and the 17 Hornet. The powder cavity and micrometer settings put the charge for a 17 Hornet right in the middle of the powder measure’s capacity — the most accurate part of its range. That’s good news for small rifle cartridge reloaders.
In addition, 17 Fireball and 17 Hornet shooters will be pleased to not that Redding has introduced a 17-caliber drop tube adapter that fits the small-diameter necks of these compact varmint cartridges. With this 17-cal adapter (Redding part #03817), you can throw charges directly into 17-caliber cartridge brass, without the need for separate small-neck funnels.
Features of New Redding 10x Powder Measure:
• Micrometer-controlled powder metering chamber
• Hemispherical Cup for smoother operation
• Cast iron and hard chrome construction
• Positive metering chamber lock
• Adjustable powder baffle
The 17 Hornet is based on the venerable rimmed .22 Hornet case. However, the case is not just necked-down from .22 caliber. The case designers reduced body taper, moved the shoulder, and changed the shoulder angle to 25°. This effectively modernized the old .22 Hornet case, improving efficiency while retaining the max OAL, so that the 17 Hornet can work in any action big enough for the .22 Hornet. Hornady’s “Superformance” 17 Hornet loaded ammo is designed to push a 20gr bullet at an impressive 3650 fps.

|


