We have used NO-LEAD Cleaner in rimfire benchrest rifles similar to this modified Suhl 150-1. It helped restore accuracy with minimal brushing.
Made by the same smart folks that created Wipe-Out™, and Carb-Out™, NO-LEAD Brushless Lead Remover™ really works. Honest. If you are an active rimfire shooter, or if you shoot cast lead-alloy bullets in centerfire rifles and pistols, you should try this product. We now use NO-LEAD in our rimfire benchrest rifles, and in some centerfire guns that receive a steady diet of soft-alloy cast bullets (90%+ lead). (With rimfire guns, you don’t need to use NO-LEAD very often — maybe every 300-400 rounds unless you have a real fouler of a barrel.)
If you’ve got stubborn lead fouling in a rimfire barrel, or on a pistol’s muzzle brake/compensator, you should definitely give this stuff a try. We don’t know how but it does soften lead deposits. The manufacturer says you don’t need brushes, but we found that a bit of brushing (after NO-LEAD application) can help remove more serious lead build-up.
Yes we were surprised to find a lead remover that really works. We tried a half-dozen other lead “cleaners” that promised to dissolve lead and most of them, we discovered, are nearly useless. There’s a reason for that, as the lead alloys used in bullets don’t react to typical petrochemical-based solvents. It took the Wipe-Out chemists over five years to perfect this water-based solution that really does dissolve lead.
NO-LEAD Cleaning Procedure — Read Carefully NO-LEAD Lead Remover is a clear, red gel that is easy to apply. Just swab it in your bore (or on muzzle brakes) with wet patches or bore mop and let it sit for a few minutes. (The manufacturer says you can leave the NO-LEAD for up to 20 minutes, but that long of a dwell time does not seem necessary with our rimfire barrels.) When it contacts lead it will start to foam and you’ll see that the NO-LEAD solvent turns a pastel pink when it dissolves lead. The pink comes from the formation of lead oxide. After the recommended dwell time, simply patch out the dissolved lead deposits (you can also use a nylon brush for stubborn lead build-up).
NOTE: After cleaning, it is very important that you get all the NO-LEAD out of your barrel, and neutralize it. We recommend following the application of NO-Lead with Wipe-out or Patch-Out to neutralize the NO-LEAD, clear the bore, and remove residual carbon and copper fouling. If you don’t have Wipe-Out or Patch-out, flush the barrel thoroughly with Rubbing Alcohol or even a solution of Dawn dish detergent — then re-oil the bore.
Be Sure to Neutralize NO-LEAD After Use
Remember that N0-LEAD is a strong, slightly acidic chemical that needs to be neutralized after use. If you leave it on a nice, blued barrel for too long, it can harm the bluing. NO-LEAD will remove all the surface oils from the barrel bore. For this reason it is recommended that you neutralize NO-LEAD with Wipe-Out, or Patch-Out, which both contain effective corrosion inhibitors. If you don’t have those products, once you’ve flushed the NO-LEAD with something like rubbing alcohol, then follow with a gun oil. Caution: A petroleum-based gun oil will NOT, by itself, neutralize NO-LEAD. You need to neutralize first, then apply the corrosion inhibitor (or do it all in one step with Wipe-Out or Patch-Out).
Where to Buy NO-LEAD Lead Remover
NO-LEAD Lead Remover costs $19.50 for an 8 oz. squeeze bottle with a flip-top spout. This product is sold directly by Sharp Shoot-R Precision Products through Sharpshootr.com, or you can purchase NO-LEAD through many other online vendors. For more information, send an email via the Sharp Shoot-R Contact Form or or contact SharpShoot-R at (785) 883-4444. You can ask for Terry Paul, Sharp Shoot-R’s owner and the master chemist who developed the NO-LEAD formula.
At the request of our readers, we provide select “Deals of the Week”. Every Sunday afternoon or Monday morning we offer our Best Bargain selections. Here are some of the best deals on firearms, hardware, reloading components, optics, and shooting accessories. Be aware that sale prices are subject to change, and once clearance inventory is sold, it’s gone for good. You snooze you lose.
NOTE: All listed products are for sale to persons 18 years of age or older. No products are intended for use by minors.
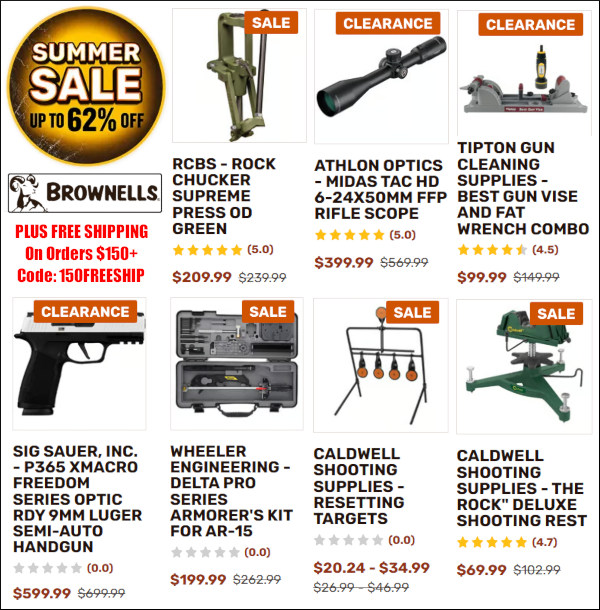
Brownells — Summer Sale (Optics, Tools, Ammo & More)
⏺️ » Save Up To 62% + FREE SHIPPING On Orders $150+
Right now Brownells is running a major Summer Sale with big discounts on a wide selection of products. You can save up to 62% on optics, reloading tools, ammo and more. Plus Brownells offers FREE Shipping on orders that total $150.00 or more. Use CODE 150FREESHIP to save $15 to $30+ on your order.
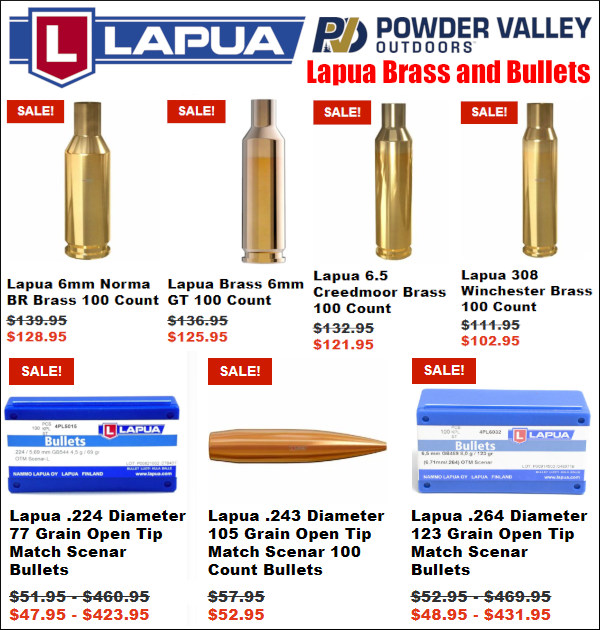
Powder Valley — Lapua Brass and Bullets SALE
⏺️ » Great savings on wide selection of Lapua Brass & Bullets
Lapua brass has won more matches and set more records than any other brand of brass. In addition, Lapua bullets deliver great accuracy with a huge selection of bullet calibers/weights. Right now Lapua brass cases and Lapua bullets are on sale at Powder Valley. Enjoy discounts for popular cartridge types from .22 up to .338 calibers. And yes .220 Russian, 6mmBR, 6GT, and 6mm Creedmoor are in stock along with numerous other .22, 6mm, 6.5mm, 7mm, and .30-Cal cartridge types. Enjoy savings on Lapua brass and bullets.
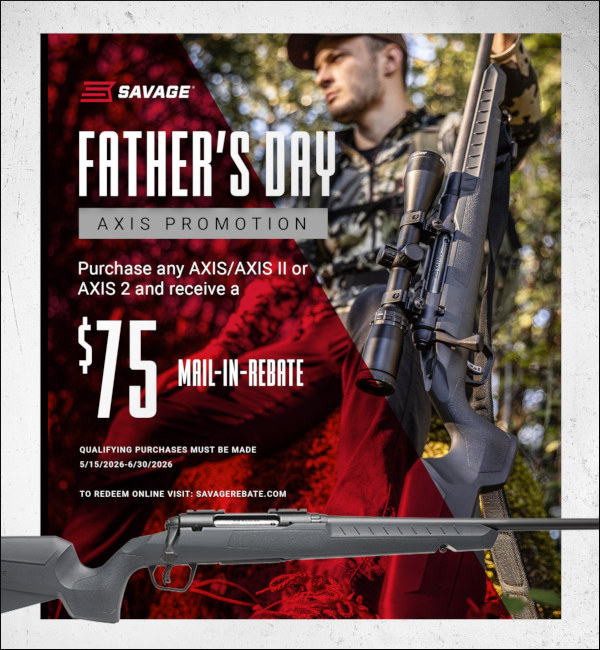
Bonus: Father’s Day SAVAGE Rifle REBATE Through 6/30/2026
As an Amazon affiliate, this site can earn revenues through sales commissions.
Splatterburst 1″ circles, 62 per sheet, 10-pk $9.99. These can be pasted on other paper backers.
We’ve all seen conventional splatter targets with a single large black bullseye. When a shot hits the target, a halo (usually neon yellow) appears around the bullet hole. This makes it easier to see your shot placements indoors, or at long range outdoors. Today we feature a variety of other targets that also offer the cool halo/splatter effect. We’ve found grids, multiple bull targets, sheets with 62 one-inch circle pasters, handgun training targets, and even white background splatter targets (that produce black halos). Try out some of these targets for fun (kids love plinking with splatter targets).
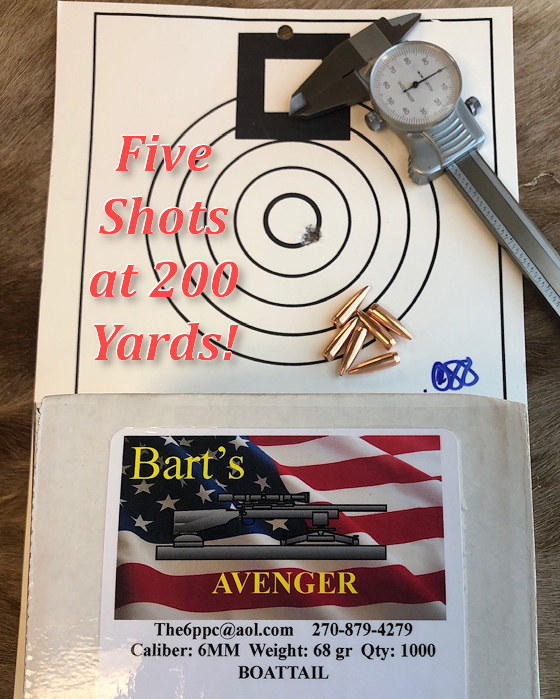
This would be an amazing group at 100 yards. But this 5-shot bughole was shot at TWO HUNDRED yards in competition by Bart Sauter of Bart’s Custom Bullets. And he did it with a borrowed barrel!
Be amazed. This five-shot group was shot at 200 yards in competition by bullet-maker Bart Sauter. Bart shot this astounding group with his 10.5-lb Light Varmint benchrest rifle at a East-West Match in St. Louis, Missouri. Had Bart been shooting an IBS match, this would have been a new IBS World Record, beating the .091″ by David Farrar in 2006. This .088″ group missed the NBRSA 200-yard 5-shot group record by a whisker — .013″ (thirteen thousandths). The listed NBRSA LV 200-yard Group record is 0.075″ shot by Johnnie Stewart in 2009.
New record or not, this is one remarkably impressive group, shot by one very talented shooter and bullet-maker. Bart tells us he initially “held center” for the first three shots in the group. Then, watching his wind flags he noticed slight increase in the left-to-right condition, so he held 0.200″ to the left on shot 4 and it worked. Before shot 5, Bart detected another slight change, so he held 0.300″ left for the fifth and final shot. He explained: “If I had not held off for those last two shots, this group would have been about a flat four (0.400″).” Well done Bart!
“First three … bang bang bang … all went in one hole. Then I held left on shot 4 and it worked. On the last shot I held a little more, got lucky and it went in.” — Bart Sauter
In our Shooter’s Forum, Bart posted “This is my personal best-ever 5-shot group at 200 yards. I knew it was small, but was shocked to see it was a Zero! This will be a range record and record for the East/West match. Last group of the day! A nice way to end the match!”
Here is the 6PPC LV rifle that shot the .088″ group. Yes that’s a concrete shooting bench inside a pretty nice cabin with hunting trophies on the walls. Bart explained: “We reload and shoot out of the Monkey Hut, especially during the winter. Most of the time we shoot outside at 100/200 from a a three-bench range.
Amazing Group Shot with Borrowed Krieger Barrel!
There’s a very interesting side-note to this story. You see Bart doesn’t even own the Krieger barrel that delivered this amazing .088″ 200-yard group. That’s right this superb barrel was a “loaner” — borrowed from Bart’s buddy Gary Sullivan. [Editor: Oh that we could all be so lucky with borrowed components.] With Sullivan’s blessing, Bart has since loaned the barrel yet again to ace Billy Stevens, who will be using it at the World Benchrest Championship in Canada, July 14-21, 2019.
This photo shots Bart on the right and his good friend Billy Stevens on the left. Bart notes: “Billy is a 2-time Super Shoot Winner and 3-time USA World Benchrest Team member!”
Bart Sauter’s LV 6PPC Rifle Specifications
Chambering/Caliber: 6PPC
Gunsmith: Stevens Accuracy
Action: BAT DS RBLP Right Eject
Trigger: Jewell
Stock: Scarborough Carbon Fiber over Wood Skeleton
Barrel: Krieger — and it was borrowed!
Tuner: Bukys TSI Tuner
Optic: 40x45mm IOR-Valdada 30mm tube
Rings: Benchsource Double Rings
Front Rest: Farley Joystick
Rear Bag: Edgewood Bunny Ear, very soft, gray leather — special order from Bruno’s.
Front Bag: Edgewood — same soft gray leather.
Here is Bart’s target with a bullet removed. Bart was shooting his own 6mm 68gr Avenger bullets, a double-radius ogive design. The Avengers were seated about .004″ away from the lands: “I tried going into the lands and that didn’t seem to work, then I backed it off four thousandths [from contact] and the rifle liked that.” Bart drove those 68gr Avengers with a stout load of Accurate LT30 powder running 3407 FPS.
Bart’s Comments on His Components and Accessories
OPTICS — Bart likes his new 40x45mm IOR-Valdada Benchrest Scope. He says that, so far, it has proved very reliable and holds zero exceptionally well. This new design features a worm drive side-focus, oversized ocular with true +/- diopter adjustment, long eye relief, and fast-focusing reticle. The 40X Valdada also boasts superb HD “double-compressed” Schott glass from Germany.
TUNER — Bart says the Bukys TSI Tuner definitely helps. He notes that once he finds the “sweet spot” for his barrel he can normally leave it alone: “With that type of tuner, I have to be in a very dire straight to move it. Normally I will set it for the lifetime of the barrel.”
REAR BAG — Bart’s rear bag is an unusual Edgewood with softer gray leather. He says this was a special order by Bruno Shooters Supply. Bart likes how the rear bag works with his carbon-stocked 10.5-lb rifle: “With PPCs we ‘ride on the ears’ — this older bag just seems to work really well for that style.”
SUPER FEET — Bart told us he uses Benchsource Super Feet for his front rest: “The bench tops at St Louis are very slick. Before I set up I’ll use a spray bottle with water and wet the bench where the Super feet and rear bag will go. This really helps to keep things from sliding around!”
Do you occasionally get completely unexplained flyers, or have a shot land straight down at 6 O’Clock, right below your point of aim? That could be caused by poor or inconsistent trigger technique. How you pull the trigger can and does affect your accuracy.
Many gun enthusiasts start with pistols. When they later start shooting rifles they may carry over some not-so-good practices acquired from shooting handguns with heavy 4 to 6-pound trigger pulls. You may want to “re-learn” your trigger techniques to get better rifle results.
Shooting Sports USA has a good article on trigger technique that offers many useful tips. That article also has many helpful illustrations, including the one shown above. Another illustration shows different types of trigger shoes (straight vs. curved) and explains how each makes a difference: “With a lightly curved trigger, the shooter’s finger can contact the trigger either high or low according to preference. Higher contact will increase the resistance.” READ ARTICLE HERE.
The article analyzes common errors, such as pulling the trigger with the very tip of the finger rather than the pad of the index finger: “Using the tip of the finger can lead to lateral pressure on the trigger, which throws off the shot.”
The article also explains that you should check your trigger regularly to make sure it is functioning properly and is not out of adjustment: “Just like any other moving part, the trigger can suffer from wear. In such a precise mechanism, tiny amounts of wear can cause major problems.”
The ergonomics of the Eliseo Tubegun allow a nice, straight trigger pull.
Trigger Tips
Six Suggestions for Making your Trigger Control More Consistent.
1. If your triggers are adjustable, set the pull weight appropriate to the discipline. For a hunting rifle, you don’t want an ultra-light trigger pull. For High Power, you may want a two-stage pull, while on a Benchrest rifle you may prefer a very light trigger.
2. If you have a two-stage trigger, experiment with different combinations of First Stage and Second Stage.
3. Have a friend watch you as you pull the trigger, and maybe even take a close-up video as you pull the trigger. This can reveal a variety of flaws.
4. Practice dry-firing to see if flaws in trigger technique are causing gun movement.
5. As an experiment, try pulling the trigger with your middle finger. Ergonomically, the middle finger has a more straight alignment with the tendons in your hand. This exercise can help you identify alignment issues with your index finger.
6. For stocks with adjustable Length of Pull you may want to set the LOP differently for bench shooting vs. prone or F-Class shooting.
When Only the Best Will Do…
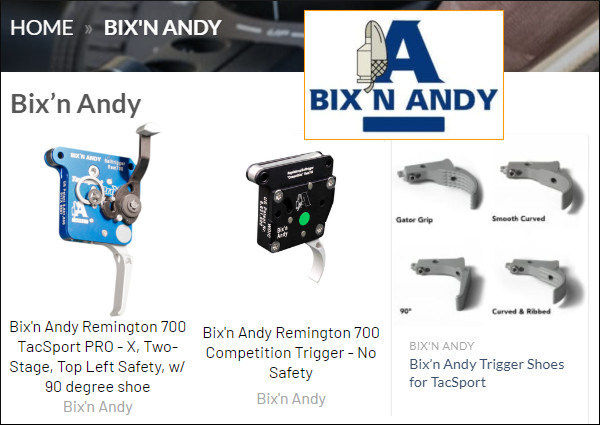
German-made Bix’N Andy triggers, available from BulletCentral.com, are among the very best you can buy. Available in both single-stage and two-stage, Bix’N Andy triggers are extremely precise, repeatable and smooth. The unique internal, friction-reducing roller ball system allows for extremely low reset force, yielding an ultra-crisp let-off. Bix’N Andy triggers can be fitted with a variety of trigger shoes according to shooter preference.
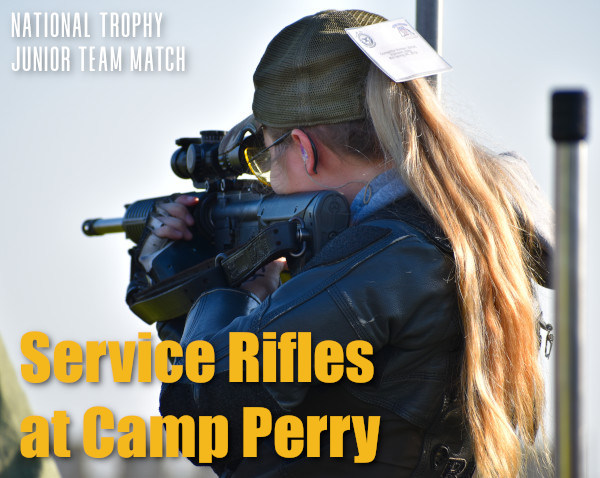
In Service Rifle competition in the United States, scopes are currently limited to a maximum magnification of 4.5 power (4.5X). Both the NRA and CMP rulebooks stipulate that variable and fixed scopes cannot exceed this power, and the objective lens diameter must not exceed 34mm.
Service Rifle Scope Configuration Rules
Maximum Magnification: 4.5x power is the max magnification allowed for Service Rifles.
Variable Power Limit: If using a variable scope, it can have any magnification range as long as it cannot be dialed higher than 4.5X.
Lens Size: 34mm is the maximum allowed objective lens diameter.
Sight Consistency: The same optical sight must be used for all stages of a course of fire. Changing optics between slow-fire and rapid-fire strings is prohibited.
Mount Height: The scope centerline must be no higher than 3.5 inches above the barrel bore centerline.
Popular Service Rifle Optics
Because of the 4.5X power limit and 34mm max objective size, Service Rifle competitors typically run purpose-built AR-optimized service rifle optics or tactical low-power variable optics (LPVOs). The most popular service rifle optics include:
Sightron S-TAC 1-4.5X24mm SR-1/AR-1 Scope
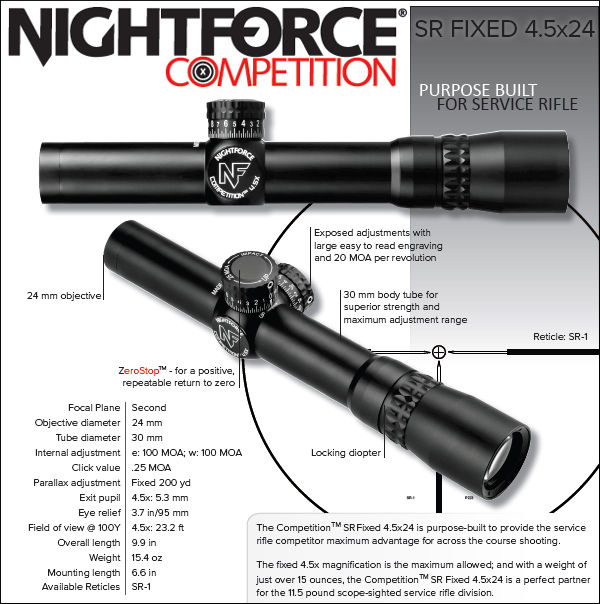
Nightforce Competition SR Fixed 4.5x24mm
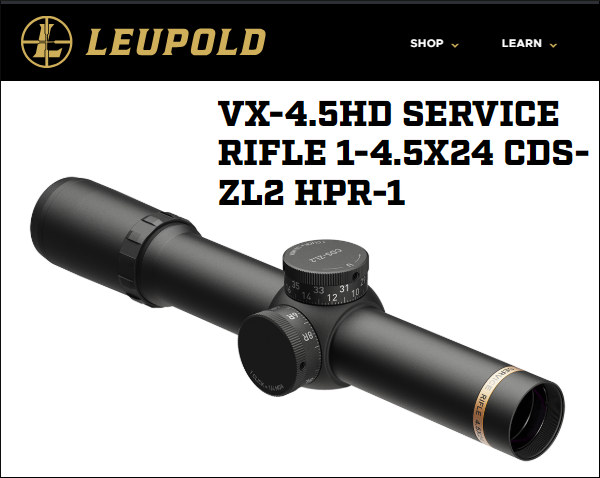
Leupold VX-4.5HD Service Rifle 1-4.5x24mm CDS-ZL2 HPR-1
Forest of Windflags at World Benchrest Championships in France in 2011
There’s a simple, inexpensive “miracle device” that can cut your groups in half. If you’re not using this device, you’re giving away accuracy. The “miracle device” to which we refer is a simple wind indicator aka “windflag”. Using windflags may actually improve your accuracy on target much more than weighing charges to the kernel, or spending your life savings on the “latest and greatest” hardware.
Remarkably, many shooters who spend $3000.00 or more on a precision rifle never bother to set up windflags, or even simple wood stakes with some ribbon to show the wind. Whether you’re a competitive shooter, a varminter, or someone who just likes to punch small groups, you should always take a set of windflags (or some kind of wind indicators) when you head to the range or the prairie dog fields. And yes, if you pay attention to your windflags, you can easily cut your group sizes in half. Here’s proof…
Which Windflag to buy? For starters, MTM makes a simple, inexpensive flag sold on Amazon for $17.99. For more sophisticated flags CLICK HERE for Benchrest Central windflag vendors.
Miss a 5 mph Shift and You Could DOUBLE Your Group Size
The table below records the effect of a 5 mph crosswind at 100, 200, and 300 yards. You may be thinking, “well, I’d never miss a 5 mph let-off.” Consider this — if a gentle 2.5 mph breeze switches from 3 o’clock (R to L) to 9 o’clock (L to R), you’ve just missed a 5 mph net change. What will that do to your group? Look at the table to find out.
Values from Point Blank Ballistics software for 500′ elevation and 70° temperature.
Imagine you have a 6mm rifle that shoots half-MOA consistently in no-wind conditions. What happens if you miss a 5 mph shift (the equivalent of a full reversal of a 2.5 mph crosswind)? Well, if you’re shooting a 68gr flatbase bullet, your shot is going to move about 0.49″ at 100 yards, nearly doubling your group size. With a 105gr VLD, the bullet moves 0.28″ … not as much to be sure, but still enough to ruin a nice small group. What about an AR15, shooting 55-grainers at 3300 fps? Well, if you miss that same 5 mph shift, your low-BC bullet moves 0.68″. That pushes a half-inch group well past an inch. If you had a half-MOA capable AR, now it’s shooting worse than 1 MOA. And, as you might expect, the wind effects at 200 and 300 yards are even more dramatic. If you miss a 5 mph, full-value wind change, your 300-yard group could easily expand by 2.5″ or more.
If you’ve already invested in an accurate rifle with a good barrel, you are “throwing away” accuracy if you shoot without wind flags. You can spend a ton of money on fancy shooting accessories (such as expensive front rests and spotting scopes) but, dollar for dollar, nothing will potentially improve your shooting as much as a good set of windflags, used religiously.
New Wind Reading App — High Power Wind Lab
There is an innovative new Wind-Reading App, the High Power Wind Lab, that can help you figure your hold-offs in all wind conditions. This is available now for iOS devices, and an Android version is coming soon. In this video, our friend F-Class John reviews this sophisticated new Wind App:
At the request of our readers, we provide select “Deals of the Week”. Every Sunday afternoon or Monday morning we offer our Best Bargain selections. Here are some of the best deals on firearms, hardware, reloading components, optics, and shooting accessories. Be aware that sale prices are subject to change, and once clearance inventory is sold, it’s gone for good. You snooze you lose.
NOTE: All listed products are for sale to persons 18 years of age or older. No products are intended for use by minors.
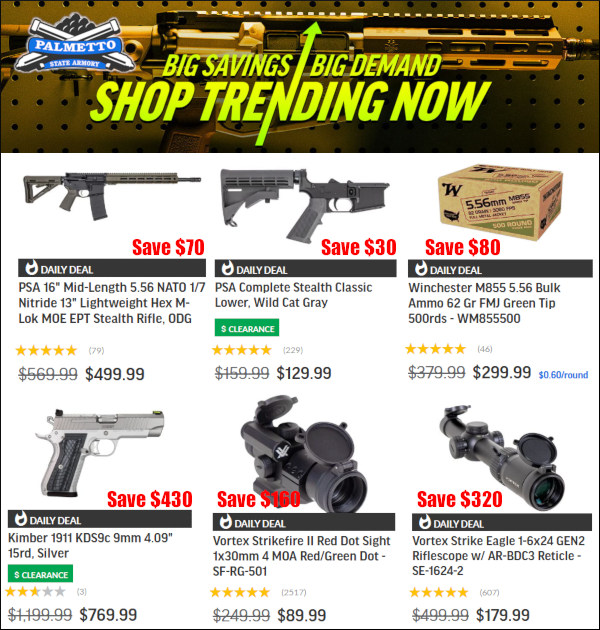
Palmetto SA — Hot Trending Sale on ARs, Optics, Ammo
⏺️ » Huge discounts on guns and optics
This week there is a Major Sale at Palmetto State Armory. You’ll find great deals on AR lowers, complete ARs, Vortex optics and more. If you are looking to build an AR-based service rifle or varmint rig, this is an excellent opportunity. And there are great deals on ammo also.
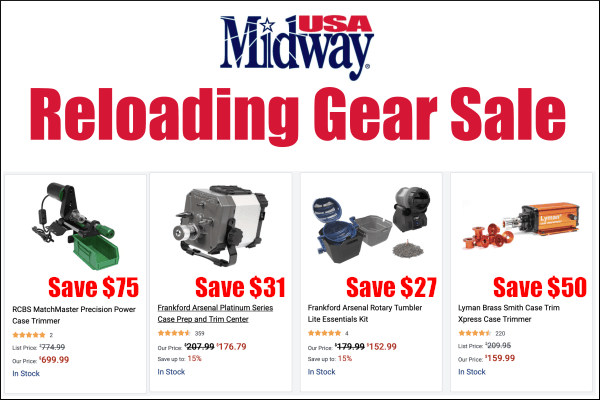
MidwayUSA — Case Cleaning & Preparation SALE
⏺️ » Big savings on case prep tools and products
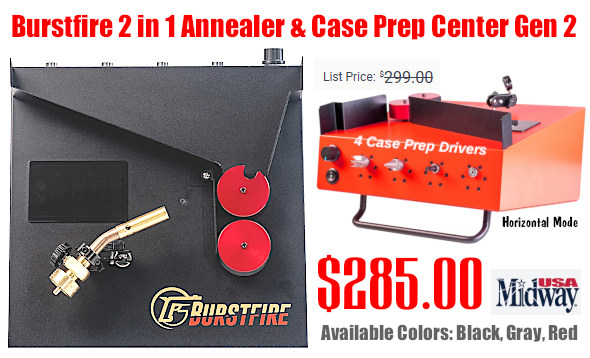
Brass prep is one of the most critical steps when it comes to reloading. If you need to step up your prep game, check out the Case Cleaning & Preparation Sale over at MidwayUSA. A wide variety of quality case prep products are on sale at significant savings — 15% to 30%. From tumblers to trimmers you’ll find everything you need to get your brass in tip-top shape.
As an Amazon affiliate, this site can earn revenues through sales commissions.
With the 6mm Dasher cartridge becoming popular with PRS/NRL competitors as well as the benchrest crowd, we thought it was time to re-visit a special rifle chambered for the 6mm Dasher wildcat. This gun has a great story behind it. Forum member Bob A. (aka “Killshot”) used his “Forum Classifieds Special” to beat all comers in the F-Class Division in the American-Canadian Match and the Long Range Regional Match in 2013 in Sacramento, CA.
Bob’s 6mm Dasher sports a blue-printed Rem 700 action. Who says you need a high-dollar custom action to run with the big dogs? In fact, this same gun, built with components sourced from AccurateShooter Forum Classified Ads, set a Sacramento F-Class range record of 200-17X a few years back. In this story, Bob talks about the build, and he explains his methods for loading ultra-accurate Dasher ammo.
Bob’s Budget-Build Dasher F-Classer
I wanted to build a proper rifle for F-Open but needed to keep it simple and, well, cheap. I found a solid “base” to build on in the form of a Dave Bruno-built, “pre-owned” 6-6.5×47 Lapua that I located in the AccurateShooter Forum classifieds in late 2011. The base action was a trued and blue-printed Remington 700 receiver circa 1971 with a spiral-fluted bolt. It was in a Shehane ST1000 stock painted sky blue and had a Jewell 1.5-oz BR trigger. I sent the bolt to Greg Tannel (Gretanrifles.com) to have the firing pin hole bushed and sleeved, the ejector removed and the hole filled and the face trued. I upgraded to Tannel’s Light Steel firing pin assembly while it was out.
Having the working bits completed, I needed a barrel. So I went to the AccurateShooter classifieds again and found a 1:8″-twist, 30″ x 1.25″ (diam.) Bartlein with a 0.236″-land bore. I called Dave Kiff and explained my pursuit and he recommended his PT&G “world record” 6 Dasher reamer (.2704″ no-turn neck and .104″ freebore). A month or so later the reamer and gauges arrived.
I had the barrel chambered by Marc Soulie of Spartan Precision Rifles (510-755-5293, Concord, CA). Marc is a great builder and I’m pleased to call him a friend.
The rifle got its good looks from a Pennsylvania artist named Kenny Prahl. His Prahl Designs shop (724-478-2538) added the white ghost-flames over the existing sky blue metallic paint.
Looks Great, Shoots Better
Fire-forming showed great promise — ten-shot groups of half an inch at 200 yards were typical. I lost only one case to a split neck and the “blow lengths” are good and consistent. This was followed up with load development which saw 100-yard, five-shot groups in the .1s and .2s as the rifle showed its preference for Reloder 15 over Varget powder, and for CCI 450s over all other primers. The bullet of choice was the ever-popular Berger 105gr Hybrid Target.
In February 2012 I began shooting the Dasher in monthly club matches at the Sacramento Valley Shooting Center, the home range of a number of excellent F-Class, Benchrest and High Power shooters. Using a Farley Coaxial rest up front (also picked up from a WTB ad on AccurateShooter’s Forum) and an Edgewood bag in the back, I gradually improved my gun-handling to the point where I could shoot a respectable score. This was very different from the bipod shooting I’d done in the past in F/TR.
Dasher Loading Tips
My chamber is set up for blue box Lapua 6mmBR brass. My case preparation is straight-forward. I fire-form with virgin cases right out of the box. I don’t size them but I will give the primer holes a good look and clean up the flash hole with a .058″ bit in a pin vise. To fire-form, I seat a Berger 108gr BT .030″ into the lands over a standard 6mmBR load of Varget.
For match loads, I use Alliant Reloder 15. While Varget is less sensitive to temp changes, RL15 has given me lower extreme spreads and better long range control. [Bob acknowledges that every barrel is unique, so a different powder, such as H4895 might work better for you.]
I clean my fired cases with stainless steel media in a Thumler’s rotary tumbler after every firing. I anneal after every other firing using a Bench-Source machine which is very well made and easy to operate. I use a Whidden full length bushing die with Redding bushings for sizing.
After sizing, I chamfer the inside of the neck with the K&M tool which has a pilot rod centered in the flash hole. Then I’ll give the neck and mouth a “once over” with some 0000 steel wool. I finish loading off with a Redding Competition Seating Die with the micrometer top.
I use a carbide ball on the expander rod of the full length sizing die. I use a .266″ TiN-coated bushing and the ball just kisses the inside walls of the sized neck. I get very consistent neck tension this way and have had no issue with split necks.
Seating Depth Considerations
With fire-formed brass, the junction of the bullet’s bearing surface and boat-tail is above the neck/shoulder junction of the case, so I have no issues with donuts. You can see how a loaded round looks in the photo at left. For occasional trimming, I use a very nice little Possum Hollow trimmer that indexes on the case shoulder.
Box to Bench Precision (B2B) has developed an oversize (23.5″ x 30″) precisely-scaled target designed for Load Development and Scope Testing. This waterproof target is very innovative. On the target you’ll find clusters of aim points for various tasks. Upper left are orange aiming spots for testing various powder charges. In the upper right quadrant are more red aim points to be used when testing bullet seating depth. Running down the center of the target is a vertical line with horizontal marks showing precise MOA and Mil heights at 100 yards — use this feature to verify your click values. ORDER HERE.
And there’s more. In the lower right quadrant (far right) are three black targets to be used for chrono work. With these you can record cold velocity, hot barrel velocity and a “Final Velocity”. Over in the lower left quadrant, in the left-most column, are three dot targets for zeroing and recording group size with load data. Finally, four more black/white targets can be used for a scope box test (aka “shooting the square”). With a box test, you move from target to target, clicking in sequence to each corner of the square in sequence, eventually returning to your original aim point. If your scope tracks correctly, the last box test shot should end up right on top of the first shot.
Record the Entire Load Development Process on One Target
For those used to shooting at conventional bulleyes or benchrest targets, this target may seem confusing, but it can really help organize and simplify the process of load development. We like the idea of having a single, durable target that performs double-duty — serving for load development as well as scope checking. And we like the fact that the target is pretty strong — the maker says: “The target is Tear-Resistant and Water-Proof”. We’d expect a maker based in the Pacific NW to design a target that can handle wet weather.
Previous version of target shown. Current version has some minor enhancements.
How to Order
So how much does all this target technology cost? A pack of three 23.5″ x 30″ targets costs $27.00, a five-target pack is $40.00, a seven-target pack is $49.00, while a ten-target pack runs $55.00. These targets ship FREE in a durable cardboard tube. To order these targets, visit the Box To Box Precision Online Store.


 Made by the same smart folks that created Wipe-Out™, and Carb-Out™, NO-LEAD Brushless Lead Remover™ really works. Honest. If you are an active rimfire shooter, or if you shoot cast lead-alloy bullets in centerfire rifles and pistols, you should try this product. We now use NO-LEAD in our rimfire benchrest rifles, and in some centerfire guns that receive a steady diet of soft-alloy cast bullets (90%+ lead). (With rimfire guns, you don’t need to use NO-LEAD very often — maybe every 300-400 rounds unless you have a real fouler of a barrel.)
 Where to Buy NO-LEAD Lead Remover








 There’s a simple, inexpensive “miracle device” that can cut your groups in half. If you’re not using this device, you’re giving away accuracy. The “miracle device” to which we refer is a simple wind indicator aka “windflag”. Using windflags may actually improve your accuracy on target much more than weighing charges to the kernel, or spending your life savings on the “latest and greatest” hardware.



 Dasher Loading Tips
 I use a carbide ball on the expander rod of the full length sizing die. I use a .266″ TiN-coated bushing and the ball just kisses the inside walls of the sized neck. I get very consistent neck tension this way and have had no issue with split necks.


