|
|
December 21st, 2008
 The NRA Blog recently ran a story on Silhouette shooting by NRA Silhouette Program Coordinator Jonathan Leighton. Here are selections from Leighton’s story: The NRA Blog recently ran a story on Silhouette shooting by NRA Silhouette Program Coordinator Jonathan Leighton. Here are selections from Leighton’s story:
NRA Silhouette Shooting
The loud crack from the bullet exiting the muzzle followed by an even louder ‘clang’ as you watch your target fly off the railing is really a true addiction for most Silhouette shooters. There is nothing better than shooting a game where you actually get to see your target react to the bullet. In my opinion, this is truly what makes this game so much fun.

 Metallic Silhouette — A Mexican Import Metallic Silhouette — A Mexican Import
Silhouette shooting came to this country from Mexico in the 1960s. It is speculated that sport had its origins in shooting contests between Pancho Villa’s men around 1914. After the Mexican Revolution the sport spread quickly throughout Mexico. ‘Siluetas Metalicas’ uses steel silhouettes shaped like game animals. Chickens up front followed by rows of pigs, turkeys, and furthest away, rams. Being that ‘Siluetas Metalicas’ was originally a Mexican sport, it is common to hear the targets referred to by their Spanish names Gallina (chicken), Javelina (pig), Guajalote (turkey) and Borrego (ram). Depending on the discipline one is shooting, these animals are set at different distances from the firing line, but always in the same order.
 Before Steel There Was… Barbeque Before Steel There Was… Barbeque
In the very beginnings of the sport, live farm animals were used as targets, and afterwards, the shooters would have a barbeque with all the livestock and/or game that was shot during the match. The first Silhouette match that used steel targets instead of livestock was conducted in 1948 in Mexico City, Mexico by Don Gongalo Qguilar. [Some matches hosted by wealthy Mexicans included high-ranking politicians and military leaders]. As the sport spread and gained popularity during the 1950s, shooters from the Southwestern USA started crossing the Mexican border to compete. Silhouette shooting came into the US in 1968 at the Tucson Rifle Club in Arizona. The rules have stayed pretty much the same since the sport has been shot in the US. NRA officially recognized Silhouette as a shooting discipline in 1972, and conducted its first NRA Silhouette Nationals in November of 1972.
Now There Are Multiple Disciplines
The actual sport of Silhouette is broken into several different disciplines. High Power Rifle, Smallbore Rifle, Cowboy Lever Action Rifle, Black Powder Cartridge Rifle, Air Rifle, Air Pistol, and Hunter’s Pistol are the basic disciplines. Cowboy Lever Action is broken into three subcategories to include Smallbore Cowboy Rifle, Pistol Cartridge Cowboy Lever Action, and regular Cowboy Lever Action. Black Powder Cartridge Rifle also has a ‘Scope’ class, and Hunter’s Pistol is broken into four sub-categories.
Where to Shoot Silhouette
NRA-Sanctioned matches are found at gun clubs nation-wide. There are also many State, Regional, and National matches across the country as well. You can find match listings on the Shooting Sports USA website or contact the NRA Silhouette Department at (703) 267-1465. For more info, visit SteelChickens.com, the #1 website dedicated to Silhouette shooting sports.
December 21st, 2008
Tony Boyer, all-time benchrest Hall of Fame points leader, has had a spectacular year, racking up many major wins. Of course, most of that success is due to his shooting skills, but Tony also benefitted from his superb Bartlein gain-twist barrels, and a new bore-cleaning product, CARB-OUT™ from SharpShoot-R™ Precision Products of Kansas. Boyer has been using CARB-OUT for the past year, and Tony enjoyed one of his best seasons ever. The use of CARB-OUT has helped Tony to remove carbon from his match barrels, reducing the need for abrasives. CARB-OUT, we’ve found, can also reduce the amount of brushing you need to do.
 Our friend Boyd Allen tested CARB-OUT on a rifle that had stubborn carbon fouling. Boyd had previously applied conventional solvents which did a good job of removing copper and conventional powder fouling. However, when examining the barrel with a borescope, Boyd saw heavy “burned-in” deposits of carbon. In this situation, Boyd observed, scrubbing with an abrasive such as Iosso or JB would normally be required. But Boyd had received a sample of CARB-OUT and Boyd decided to give it a try: “After working with a nylon brush and patches, getting all that I could out, I was able to see heavy carbon next to the lands, extending forward. This I removed by wetting the bore with the nylon brush, letting it soak for 20 minutes, and brushing with a bronze brush. I did this twice. Previously I would have expected to have done a lot of strokes with an abrasive to get the same result, since this was a worst case situation. Being able to to remove hard carbon without the use of abrasives is a ‘great leap forward’ to steal a phrase”. Our friend Boyd Allen tested CARB-OUT on a rifle that had stubborn carbon fouling. Boyd had previously applied conventional solvents which did a good job of removing copper and conventional powder fouling. However, when examining the barrel with a borescope, Boyd saw heavy “burned-in” deposits of carbon. In this situation, Boyd observed, scrubbing with an abrasive such as Iosso or JB would normally be required. But Boyd had received a sample of CARB-OUT and Boyd decided to give it a try: “After working with a nylon brush and patches, getting all that I could out, I was able to see heavy carbon next to the lands, extending forward. This I removed by wetting the bore with the nylon brush, letting it soak for 20 minutes, and brushing with a bronze brush. I did this twice. Previously I would have expected to have done a lot of strokes with an abrasive to get the same result, since this was a worst case situation. Being able to to remove hard carbon without the use of abrasives is a ‘great leap forward’ to steal a phrase”.
Using this regimen, Boyd was able to remove the stubborn carbon. “CARB-OUT really works”, Boyd told us. “This was that baked-on black stuff that normal solvents won’t touch. After a good soak, the CARB-OUT on a wet [bronze] brush knocked it out.” Boyd observed, “Others may differ, but after using this stuff, I think abrasives may be a thing of the past.” Boyd observed: “If Boyer, who has been at the top of the BR heap for years, believes in the stuff… that’s significant.”
While Boyd used CARB-OUT with a bronze brush, Terry Paul says the product is designed to work well without brushing. For the typical type of carbon fouling seen in barrels, Terry says: “You simply put it on a patch or a mop and swab it thru the barrel. CARB-OUT also leaves behind a protective coating that prevents future carbon adherance. This coating is less than 100th of a micron in thickness, so it will not affect first shot accuracy.” For more info, visit SharpShootR.com, or call (785) 883-4444.
December 20th, 2008
 Minnesotan Stan Ware is an extremely knowledgeable gunsmith, known for his precise machine work and attention to detail. When you have work done by Stan, you know he will “sweat the details” to ensure that everything is assembled to the correct, precise tolerances. Stan is also a successful benchrest competitor, shooting in score matches, and Hunter Benchrest matches using his innovative short-neck Wolf Pup wildcat. Minnesotan Stan Ware is an extremely knowledgeable gunsmith, known for his precise machine work and attention to detail. When you have work done by Stan, you know he will “sweat the details” to ensure that everything is assembled to the correct, precise tolerances. Stan is also a successful benchrest competitor, shooting in score matches, and Hunter Benchrest matches using his innovative short-neck Wolf Pup wildcat.
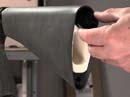
Stan recently received a Remington 40X receiver from a customer on the West Coast. Supposedly, the action had been “trued” by a California gunsmith (who shall remain nameless), who also fitted (using the term loosely) a PT&G replacement bolt. To be brutally honest, the California gunsmith butchered the job, and Stan Ware was called in to “save the day.”
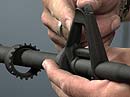
Stan looked over the 40X action carefully and was able to determine flaws in the truing work and serious problems with the way the replacement bolt was fitted and the bolt handle attached. Faulty work by the California smith resulted in a myriad of problems — the bolt timing was off, the bolt was headspacing on the handle (not the lugs), the bolt was not camming correctly, the lugs were lapped improperly and they were not bearing correctly inside the action. All in all, this action needed major surgery. In the videos below, Stan explains how he diagnosed the problems, and he illustrates the work he did to restore the 40X to a safe, functioning condition.
Moral of the story? When you have action work to do, go to a respected smith like Stan Ware (SGR Custom Rifles), rather than some local “gun plumber” who may mess up the action big-time, leaving it downright dangerous. Watch the videos below, and you’ll be amazed at the problems that Stan had to correct.
Part 1 — Diagnosing the Problems
Stan explains: “We recently received this action to be fixed. Because the bolt is such a good example of what the things you want to avoid, I put together this video. It’s a great example of what happens when the bolt is out of time or not in the correct position.”

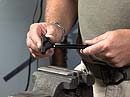
Part 2 — Fixing the Lugs
According to Stan, “We encountered some more problems after machining the bolt handle off and installing the new Kiff bolt. We found that the lugs were lapped at a angle and that we were loosing cam as we rotated the bolt. So, we decided to go back in and re-cut the integral lugs and true the bolt lugs.”

Part 3 — Final Bolt Installation
Stan notes: “Here we show you what was done to correct the bolt that was not installed correctly. The Kiff bolt (Pacific Tool & Gauge) is a good system and laid out well. I would recommend it to anyone that wants to accurize his 700 Action.”

December 20th, 2008
 John Loh is widely respected for the ultra-high-quality front rests he creates for JJ Industries. These rests exhibit some of the finest machining you’ll find anywhere. John has recently turned his attention to a new product — stainless supports for windflags. John Loh is widely respected for the ultra-high-quality front rests he creates for JJ Industries. These rests exhibit some of the finest machining you’ll find anywhere. John has recently turned his attention to a new product — stainless supports for windflags.
These are not the typical collapsing tripod stands. Rather, they are designed with a strong pointed tip that you drive into the ground. The Loh windflag supports have telescoping segments of stainless rod, with locking collars. This allows you to easily adjust the height of your wind flags, while the telescoping design permits compact storage. You can easily fit three supports under the foam in a hard rifle case (between the foam and case wall) and still have room for your rifle. Built of aircraft-grade stainless steel with TIG-welded joints, these wind-flag supports are extremely rigid and sturdy, despite being relatively compact and easy to store.
John Loh recently introduced his stainless windflag stanchions at Benchrest matches out west. Used by Gary Sinclair, the stands have proven very popular and John sold out his first production run. But he has tooled up to make more, priced at $50.00 each. Contact JJ Industries, (562) 602-5553, info [at] jj-industries.com, for more information or to order. Note, these supports will work well on most terrain, but for some ranges that have very hard or rocky soil, a conventional tripod stand may work better.


December 19th, 2008
We recently had a discussion with the barrel-makers at Bartlein Barrels. They confirmed that they have seen many, many more barrels harmed by crown damage caused by improper cleaning than by anything else. If you use a bronze brush, Bartlein recommends that you remove the brush after it passes through the muzzle. This is because the bristles take a set (pointing to the breech) during the out-stroke. In other words the bristles angle back as you push towards the muzzle from the breech. If you drag the brush backwards at the muzzle, you force these bristles to reverse direction abruptly right as they cross the delicate crown. In time, that can damage the crown. John Krieger of Krieger Barrels also advises his customers not to pull a bronze brush backwards across the crown.

Response to Skeptics
Whenever we’ve published similar advice, given by guys who are producing some of the most accurate barrels in the world, some readers get extremely angry. They say, “You’re crazy! I’ve was pullin’ triggers when you were still in diapers. I’ve got Hall of Fame points and I say there’s no way a phosphor bronze brush can ever do anything to steel. You’re full of it.” Well, these guys are entitled to their opinion. But here’s our response. Number one, we’re just telling you what the barrel-makers are telling US. Don’t kill the messenger. Number two, many of the guys who say bronze brushes can’t affect the crown are the same guys who feel they need to recrown their barrels every 400-500 rounds (Do we see a connection?). Third, if you don’t think a softer material can affect steel, look at the steel ferrules of a well-used fishing rod — there the steel is worn away by plastic. (With time, water will wear away granite.) Lastly, this Editor can tell you I’ve seen the damage myself, first-hand, using a magnifying glass on much-brushed benchrest barrels. Right at the muzzle, the top edge of the lands had sharp, jagged edges that looked like little shark’s teeth, or the edge of a serrated knife. By contrast, a new barrel will have a nice, smooth straight edge along the top of the lands at the muzzle.

Be Careful with Jags
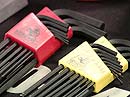
Bartlein’s experts also told us to be careful about the jags you use. Dewey-style jags in particular can cause problems. These have a long shaft with multiple rings with diamond-pattern “teeth”. The teeth are designed to grip a patch. The problem is that the lower rings may be exposed below the patch fabric, so the teeth can grind directly on the rifling and/or crown. Bartlein says Dewey-style metal jags can damage a crown very quickly if any of the toothed rings are exposed, metal-on-metal. Tim North of Broughton barrels also advises against using the Dewey-style jags with toothed rings. Interestingly, Dewey uses the same type of diamond-shaped teeth on the bottom of its “Crocogator” primer pocket tool, so you know those knurled teeth can scrape.
December 18th, 2008
 The Tooley offset stock has been around since mid-2007, but custom gun-builders may not know it’s available. This radical rig employs an offset design to counter the torque associated with large-caliber benchrest guns. Dave Tooley tells us, “the wide, flat fore-end and offset design really tames the big 30s.” The stock is 4″ wide along the fore-end with the barreled action offset 1.5″ from center. From the trigger guard rearward the stock is pretty much the same as a Tooley MBR, with a bottom flat and slight drop from grip to buttplate. In American walnut laminate or maple laminate the stock weighs 3 lbs., 12 oz., the same as a fiberglass Tooley MBR from McMillan. There is also a lighter “Butternut” wood version that weighs 2 lbs., 12 ounces. So making weight in Light Gun Class should not be an issue. The Tooley offset stock has been around since mid-2007, but custom gun-builders may not know it’s available. This radical rig employs an offset design to counter the torque associated with large-caliber benchrest guns. Dave Tooley tells us, “the wide, flat fore-end and offset design really tames the big 30s.” The stock is 4″ wide along the fore-end with the barreled action offset 1.5″ from center. From the trigger guard rearward the stock is pretty much the same as a Tooley MBR, with a bottom flat and slight drop from grip to buttplate. In American walnut laminate or maple laminate the stock weighs 3 lbs., 12 oz., the same as a fiberglass Tooley MBR from McMillan. There is also a lighter “Butternut” wood version that weighs 2 lbs., 12 ounces. So making weight in Light Gun Class should not be an issue.
The stock is legal for NBRSA and IBS 600- and 1000-yard benchrest competition. Dave has shipped many offset stocks to Australia, where they are very popular for the big calibers used in “Fly Shoots” and long-range competitions. For clubs (or disciplines) that may limit fore-end width to 3″, Dave notes that you can simply saw 1″ off the left side (looking from the breech foreward), to make the stock 3″ wide and legal. Dave tells us “the stock still works really well at 3″, it just doesn’t cancel as much torque as it does in a 4″ configuration.” Tests have shown that the 4″-wide stock will effectively soak up 45 inch-pounds of torque, enough to cancel the twisting effect of a 30-caliber rifle shooting 240-grainers at 3100 fps. Dave tells us: “With the offset stock, in competition, you can shoot a 30-caliber the same way you shoot a 6.5-284.” Scott Fletcher, who shot the prototype version with a 338 Lapua Improved, reports the stock “works fantastic. It’s like night and day with a heavy recoiling caliber. It makes a 30-caliber feel like a 6.5. And with a 6.5-284, you can easily shoot the gun free recoil.”
The Tooley offset stock, un-inletted but ready to finish, costs about $350 in walnut or “butternut” laminate. In maple, the un-inletted price starts at $400 and goes up for highly figured wood. Dave notes: “there is no conventional barrel channel so inletting is very easy.” For roughly $800.00 Dave will deliver the stock fully inletted and pillar-bedded for your action, complete with recoil pad. Dave currently has about a half-dozen offset stocks in inventory. Once they sell out, Dave can normally deliver walnut laminates in 2-3 weeks plus shipping time. Upgraded wood stocks will take 3-4 weeks plus shipping time. For more info, email Tooleyrifles[at]carolina.rr.com or call Dave at (704) 864-7525.


December 18th, 2008
 We’re pleased that Creedmoor Sports (among other vendors), has started carrying the Howard Leight, noise-cancelling “Impact Sport” ear-muffs. This is a good product, that works well, yet costs hundreds of dollars less that many other electronic muffs on the market. The compact, folding design makes storage convenient. Forum member Danny Reever reports: “Off the firing line, while others are shooting, you can easily carry on a conversation while the electronics cancel out the gunfire. Amplification is crisp and clear even at the highest setting. On the firing line, the muffs are comfortable and the slim profile of the muffs does not interfere with cheek weld.” We’re pleased that Creedmoor Sports (among other vendors), has started carrying the Howard Leight, noise-cancelling “Impact Sport” ear-muffs. This is a good product, that works well, yet costs hundreds of dollars less that many other electronic muffs on the market. The compact, folding design makes storage convenient. Forum member Danny Reever reports: “Off the firing line, while others are shooting, you can easily carry on a conversation while the electronics cancel out the gunfire. Amplification is crisp and clear even at the highest setting. On the firing line, the muffs are comfortable and the slim profile of the muffs does not interfere with cheek weld.”
The Howard Leight Muffs’ 350-hour battery life is excellent and we like the auto shut-off feature, and external audio plug (if you want to listen to music). There is a single switch for both on/off and volume with an automatic 4-hour shutoff to help to extend battery life. The external battery compartment holds two AAA batteries, which are included.
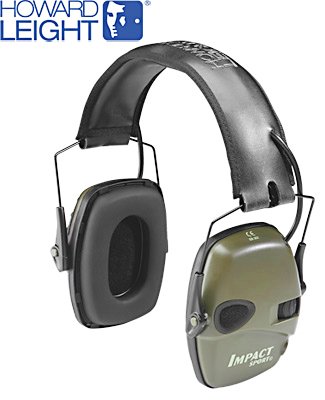
Creedmoor currently sells the Howard Leight Impact Sport model shown above, for $69.99. The Impact Sport muffs have a Noise Reduction Rating (NRR) of 22. You can increase the effective NRR by using foam plugs under the muffs.
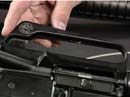
December 18th, 2008
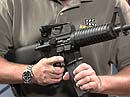
 Brownells, responding to customer requests, has created a DVD version of their “How To Build An AR-15″ instructional videos (#080-000-587 – $29.95). Whether you’re building a complete gun, or just installing a new safety, flash hider or stock, this DVD will make the job easier. The DVD is designed for those who don’t can’t access the web video series on Brownells.com, or folks who want to see the videos in high resolution, or use a portable DVD player to follow the step-by-step directions right in their workshop. It provides all the info one needs to build an AR-15 from scratch. (However, we recommend that novices start with small jobs first–such as fitting a trigger–before moving on to tasks such as barrel-fitting.) Brownells, responding to customer requests, has created a DVD version of their “How To Build An AR-15″ instructional videos (#080-000-587 – $29.95). Whether you’re building a complete gun, or just installing a new safety, flash hider or stock, this DVD will make the job easier. The DVD is designed for those who don’t can’t access the web video series on Brownells.com, or folks who want to see the videos in high resolution, or use a portable DVD player to follow the step-by-step directions right in their workshop. It provides all the info one needs to build an AR-15 from scratch. (However, we recommend that novices start with small jobs first–such as fitting a trigger–before moving on to tasks such as barrel-fitting.)
The DVD was produced professionally in Brownell’s in-house studio. It is organized into more than 50 chapters so you can access the specific content you need without excessive searching. Plus, you can pause the DVD while you perform each step.
PDF instructions are included on the DVD. (Load the disc into your computer’s DVD drive and print out the illustrated instruction sheet.) Plus, there are checklists to help you make sure you’ve ordered every piece you will need.
The DVD can be purchased for $29.95 from brownells.com. You can also order by phone at 800-741-0015, mention code #PEN. FYI, the videos can still be accessed, FREE, through the website howtobuildanar15.com, or you can click on the links in the tables below.
December 17th, 2008

One click is all it takes to enjoy the Daily Bulletin in a wider, easier-to-read format, with less scrolling. Just click ANY of the links shown below to access our WIDER Daily Bulletin page. Pictures will appear better and the navigation tools won’t block text.

We’ve offered the dedicated Bulletin page for months, plus all these link buttons, but for some reason, many of our readers still only view the Daily Bulletin in the small “preview” window on our home page. (We’re working on making the home page wider, but that requires some major changes.) Recently we added a 6″-wide red button above this preview window saying “CLICK HERE for Daily Bulletin.” That link takes you to www.accurateshooter.com/bulletin.html, our dedicated Bulletin page. You may want to bookmark that page.
Anyway guys, if you currently read the Bulletin only on the home page, that’s like watching a 12″ TV in your kitchen when you’ve got a 50″ Plasma a step away in the living room.
December 17th, 2008
Greg Tannel, owner/operator of Gre-Tan Rifles and GTR Tooling, is a renowned gunsmith and one of the most respected machinists in the business. He invented, and now builds, many of the advanced tools used by other gunsmiths, such as the GTR high pressure pump for chamber flushing systems.

CLICK HERE for Gre-Tan Gunsmithing DVD Order Page. Call (970) 878-5421 for more info.
Greg has created a series of high-quality DVD videos sharing his knowledge of advanced gunsmithing topics. These DVDs range in length from 50 minutes (Tailstock Alignment) to a full 4 hours for the 2-disc Action Blueprinting DVD. All the videos are available from Greg in modern DVD format that can be played through either your television set or your home computer. Here are the gunsmithing DVDs currently offered:
• Action Blueprinting: 2 DVDs / 4 Hrs. $58.00 delivered.
Greg notes: “No other video ever made comes close to this Hi-tech, in-depth look at what is involved to blueprint an action. This video is not candy-coated. It reveals the inherent gross misconceptions of action truing with facts and dial indicators. All machining is single point, including the recutting of the threads. This includes an in-depth instruction section on setup of the threading tool bit and how to pickup the internal thread in an action for recutting for professional truing of threads.”
• Bolt Sleeving Video: 2 DVDs / 2 Hrs. 30 mins. $55.00 delivered.
This video starts by showing bolt lug deflection off of the receiver lug. This will open your eyes. Next the use of the action bolt bore reamer/mandrel is shown and demonstrated on an action that is being blueprinted. Then the nitty gritty of sleeving a bolt body is presented. All setups for machining are shown from the start to finish on the bolt.
• Tailstock Alignment For Reaming: 1 DVD / 50 mins. $41.00 delivered.
This video shows how to dial in the tailstock and explains why the turning of a shaft for alignment may be fighting and ruining all your chamber reaming efforts.To achieve repeatability when moving the tailstock for depth of cut, like head space readings, the tailstock has to come back into axial alignment when slide back up the barrel for resuming the reaming operations.
• Sako Extractor Install: 1 DVD / 1 Hr. 59 mins. $25.00 delivered.
This video covers installation of all styles of Sako extractors. It also covers set up and machining of the bolt for the SAKO extractors.
• G.T.R. High Pressure Pump: 1 DVD / 2 Hrs. $31.00 delivered.
Whether you purchased a flushing system from G.T.R. or built your own. You will want this full information video, which will save you time & money. All important matters concerning chamber flushing are covered in detail.
|